...
The Website tab contains the Landing page that can be set for Members when they connect to PayCloud. Initially this is typically set to display Statements. Oftentimes, however, Clubs accepting online payments may choose to change this to Make a Payment.

Club Logo
The logo appearing on the Statements may be changed here. Click to upload.
...
The Website tab contains the Landing page that can be set for Members when they connect to PayCloud. Initially this is typically set to display Statements. Oftentimes, however, Clubs accepting online payments may choose to change this to Make a Payment.
Club Settings - Payments
...
Please Note: Password must be longer than six digits, needs one uppercase character, and one numeric character.
Reports
Payment History
This report contains the payments made by Members using the PayCloud system. The report can easily be filtered (using the predefined filters) and/or customized (using the date range feature) to quickly display the data desired. Easily view payments from Today, the Past Week, Past Month. Also, for Clubs with Autopay enabled, easily view the payments based on status Successful or Unsuccessful.
...
Users can also delete Batches that have not yet run, in PayCloud, as seen below.


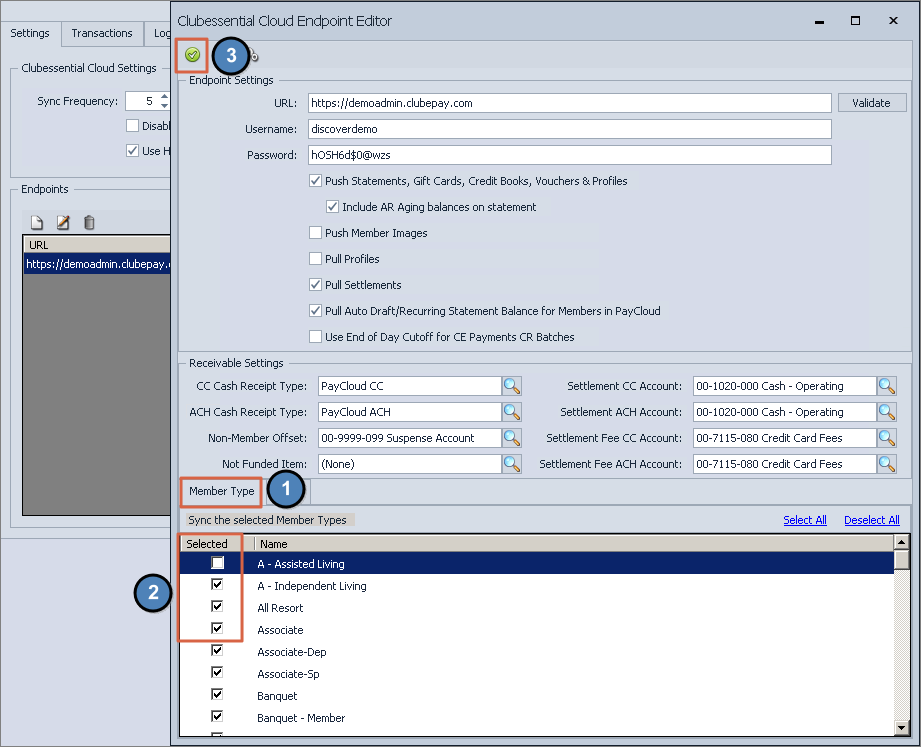
Adding New Member Types to the Sync
- Click the Green Check Mark to accept the changes.
4. Save the System Settings using the Save or Save and Close buttons.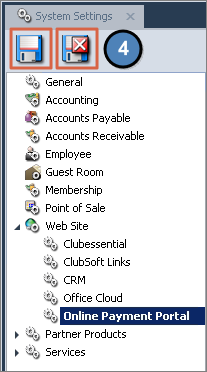
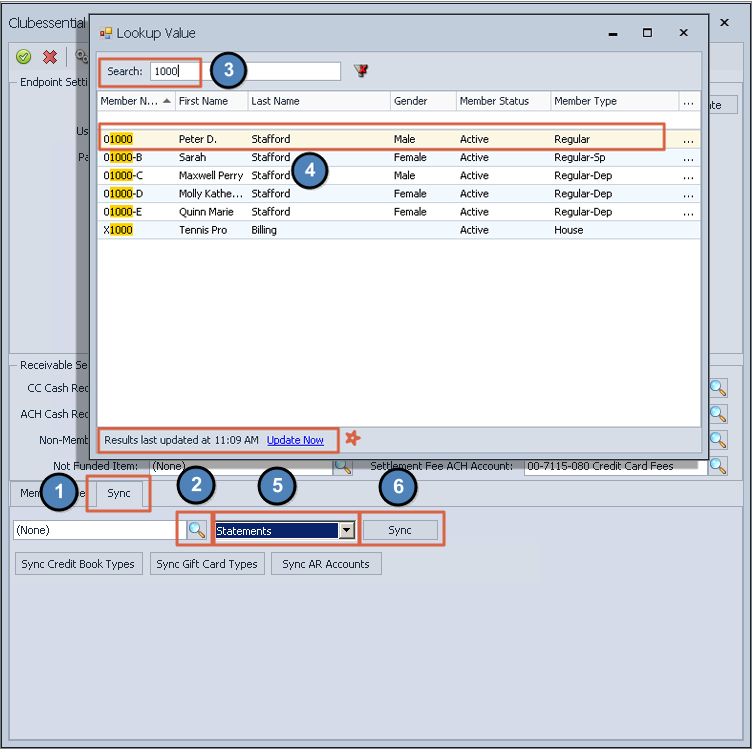
- Navigate back to the Clubessential Cloud Endpoint Editor and click on the Sync Tab.
- Use the Magnifying glass to open the Member Lookup Window.
- Use the Search field to find the member.
- Double Click the member in the Grid.
- From the drop down, select which item to sync (Statements, Credit Books, Gift Cards, and Vouchers).
- Click Sync.
- A confirmation window will appear, "The sync has completed successfully. Check the Log for details." Click OK to close and return to the editor.

Member Cannot Access PayCloud as They Are "Restricted"
There are three places in CMA that can cause a Restricted status in PayCloud. They are the Web Settings in the member's profile, the Rules tab under their Member type settings, and the Rules tab under their Member Status Definition settings.
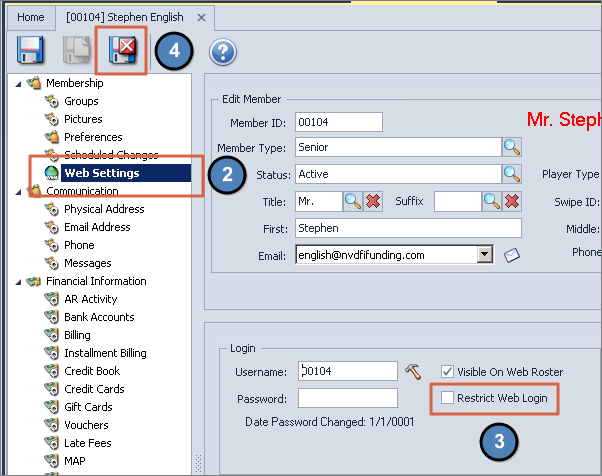
Web Settings in Member's Profile
- Go to the Manage Member's Grid and edit the member in question.
- Expand Membership on the left hand side and click Web Settings.
- Review the Restrict Web Login checkbox to confirm this is unchecked.
- Click Save and Close.
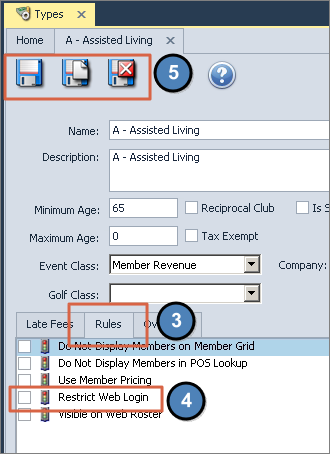
Member Type Rules
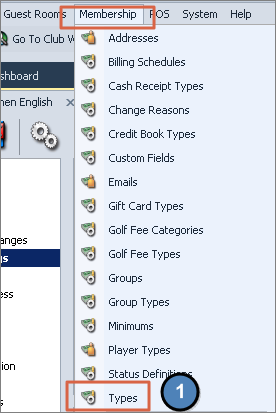
- Navigate the Membership drop down from the top menu bar and click Types.
- Open the Member Type connected to the Member in question.
- Click on the Rules Tab.
- Review the Restrict Web Login checkbox to confirm this is unchecked.
- Click Save.
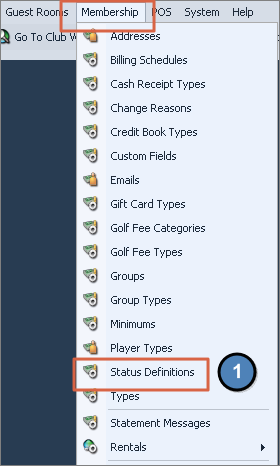
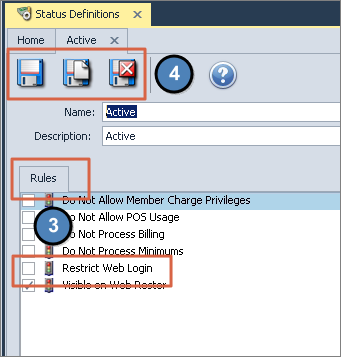
Member Status Definition Rules
- Navigate to the Membership drop down from the top menu bar and click Status Definitions.
- Open the Status connected to the Member in question.
- Click on the Rules tab and review the Restrict Web Login checkbox to confirm this is unchecked.
- Click Save.
...