...
Navigate to the Endpoint Editor by clicking on the System drop down across the top row of setting options. Then choose the System Settings.
...
Please Note: If you do not see System Settings in this drop down, reach out to your club admin to enable those rights. Find out more in the Security Rights Manual.
...
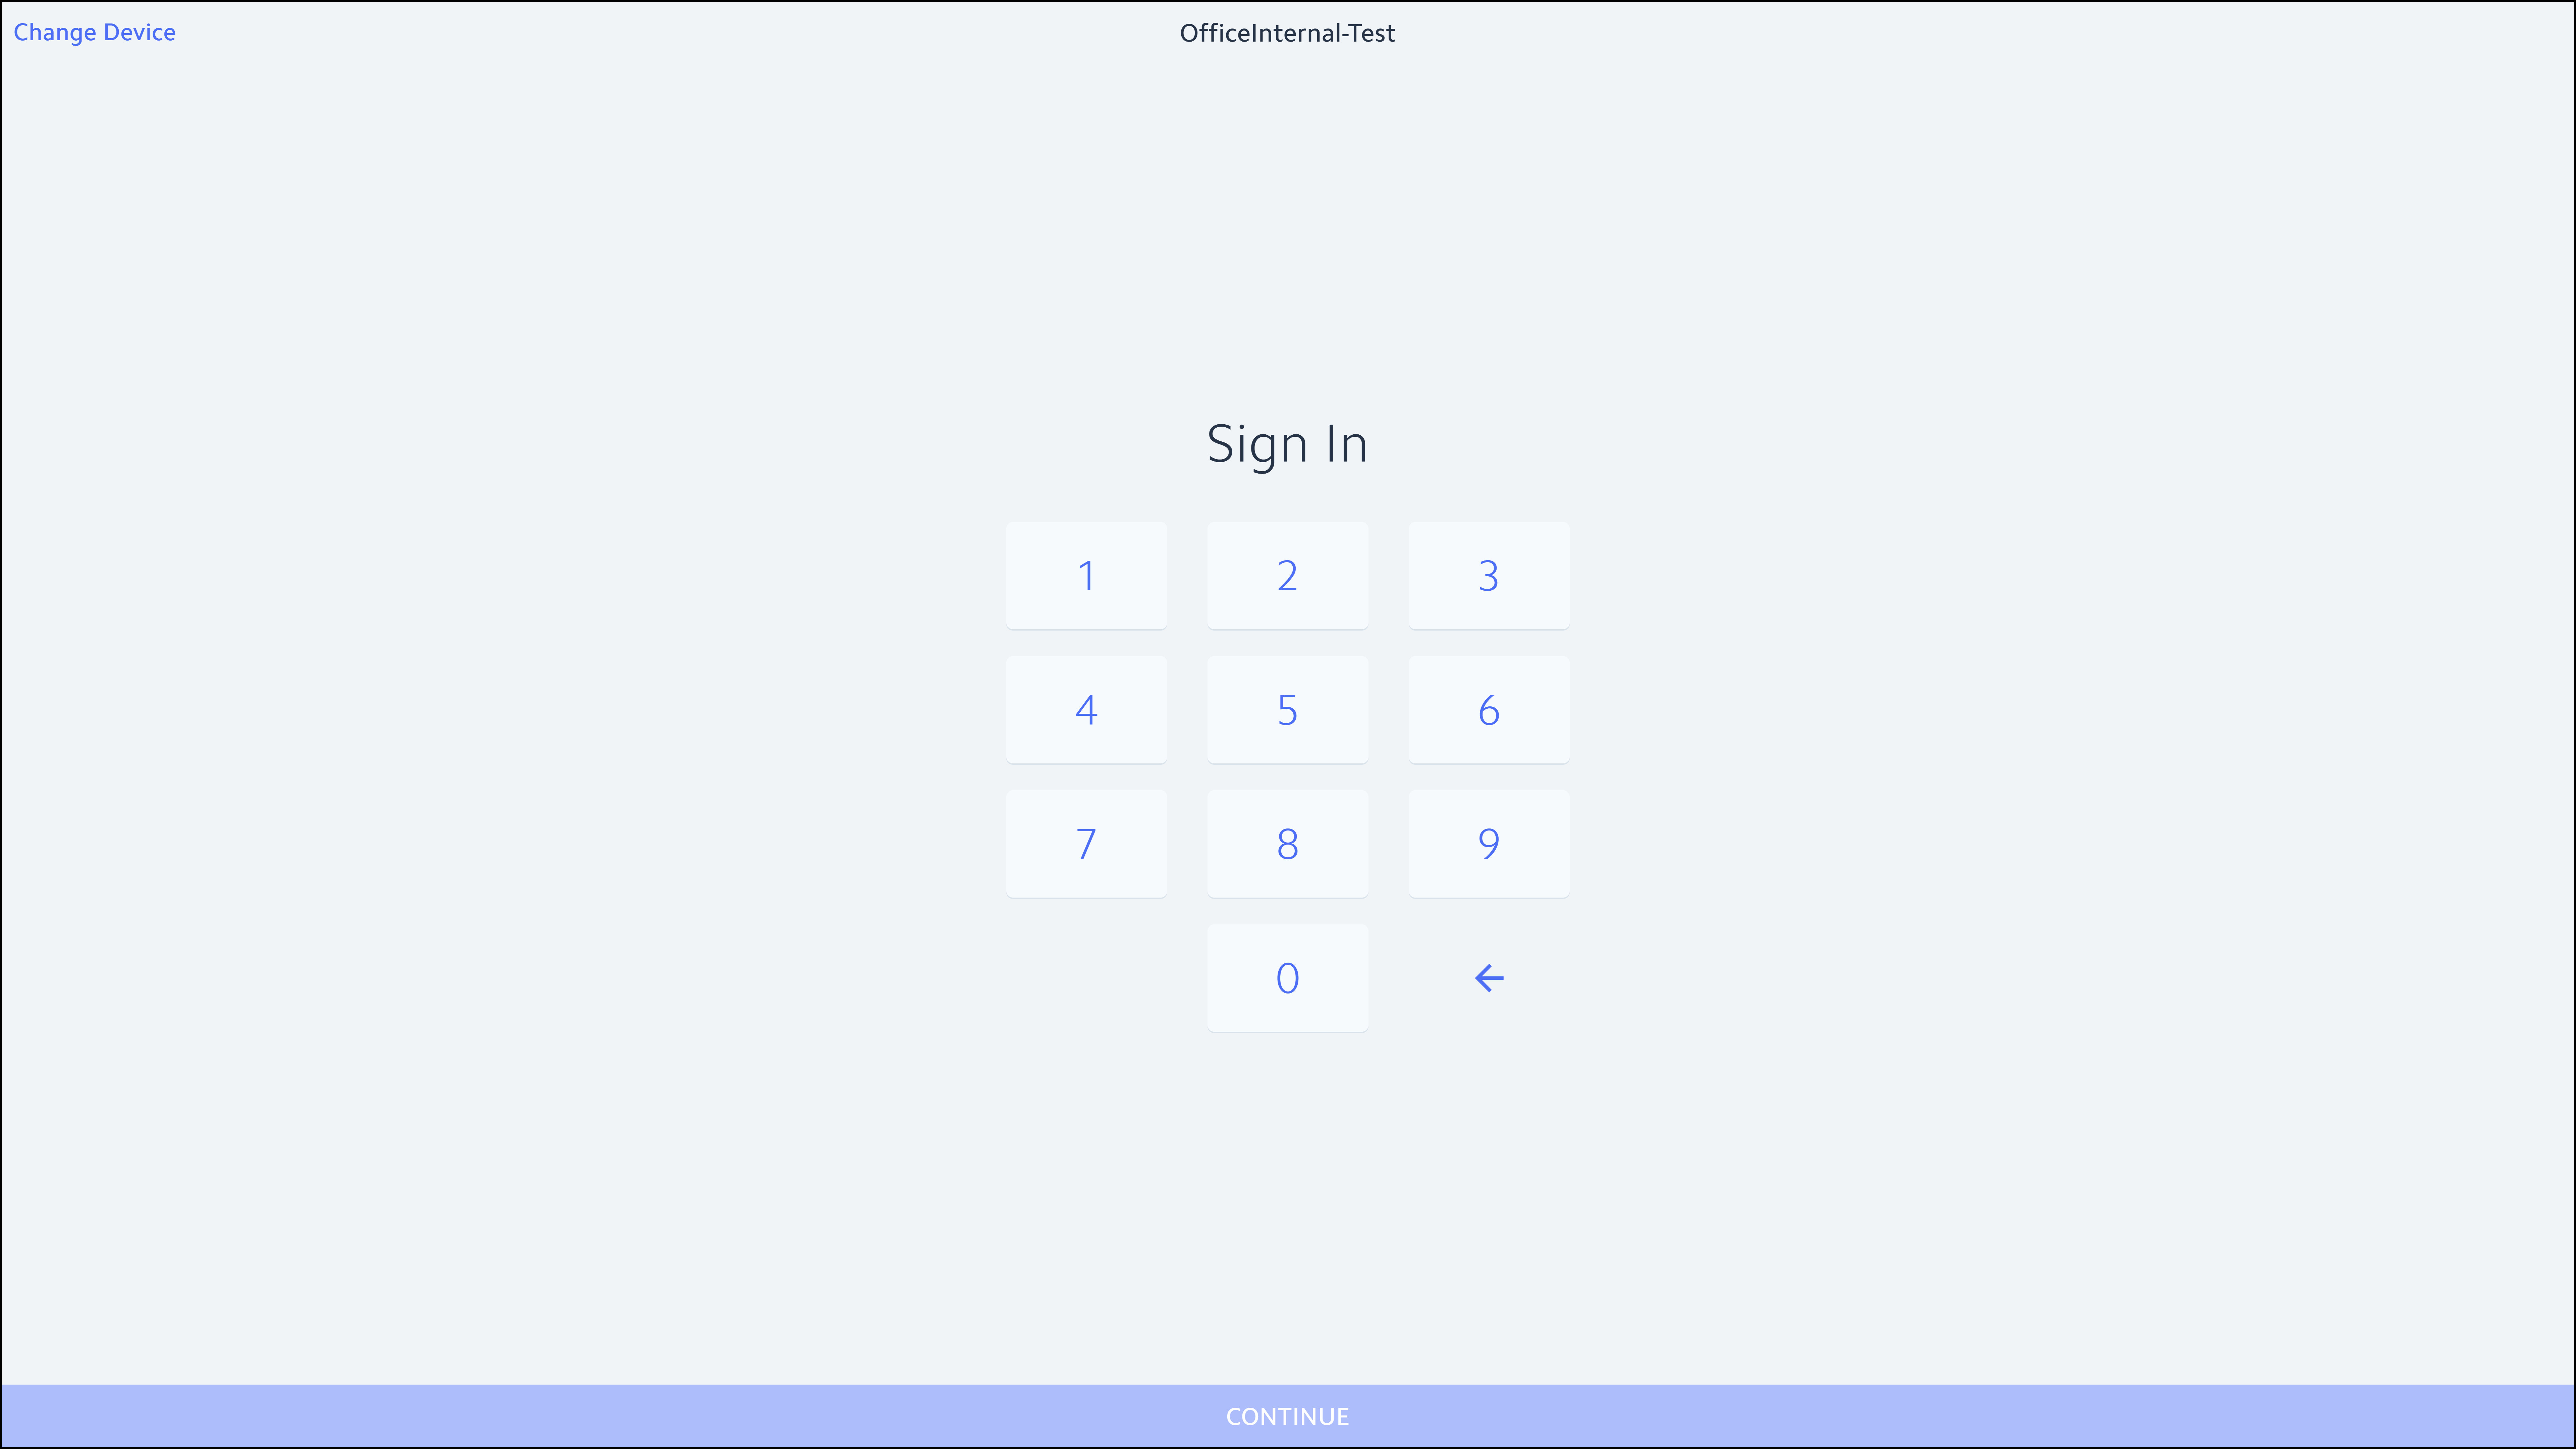
Click on the POS Icon on the mobile device or access the Mobile POS Application via browser with the following link: http://pos.clubessential.com.
On the Sign In screen, enter the POS Pin Code and select Continue.
Next, select the applicable Job Code.
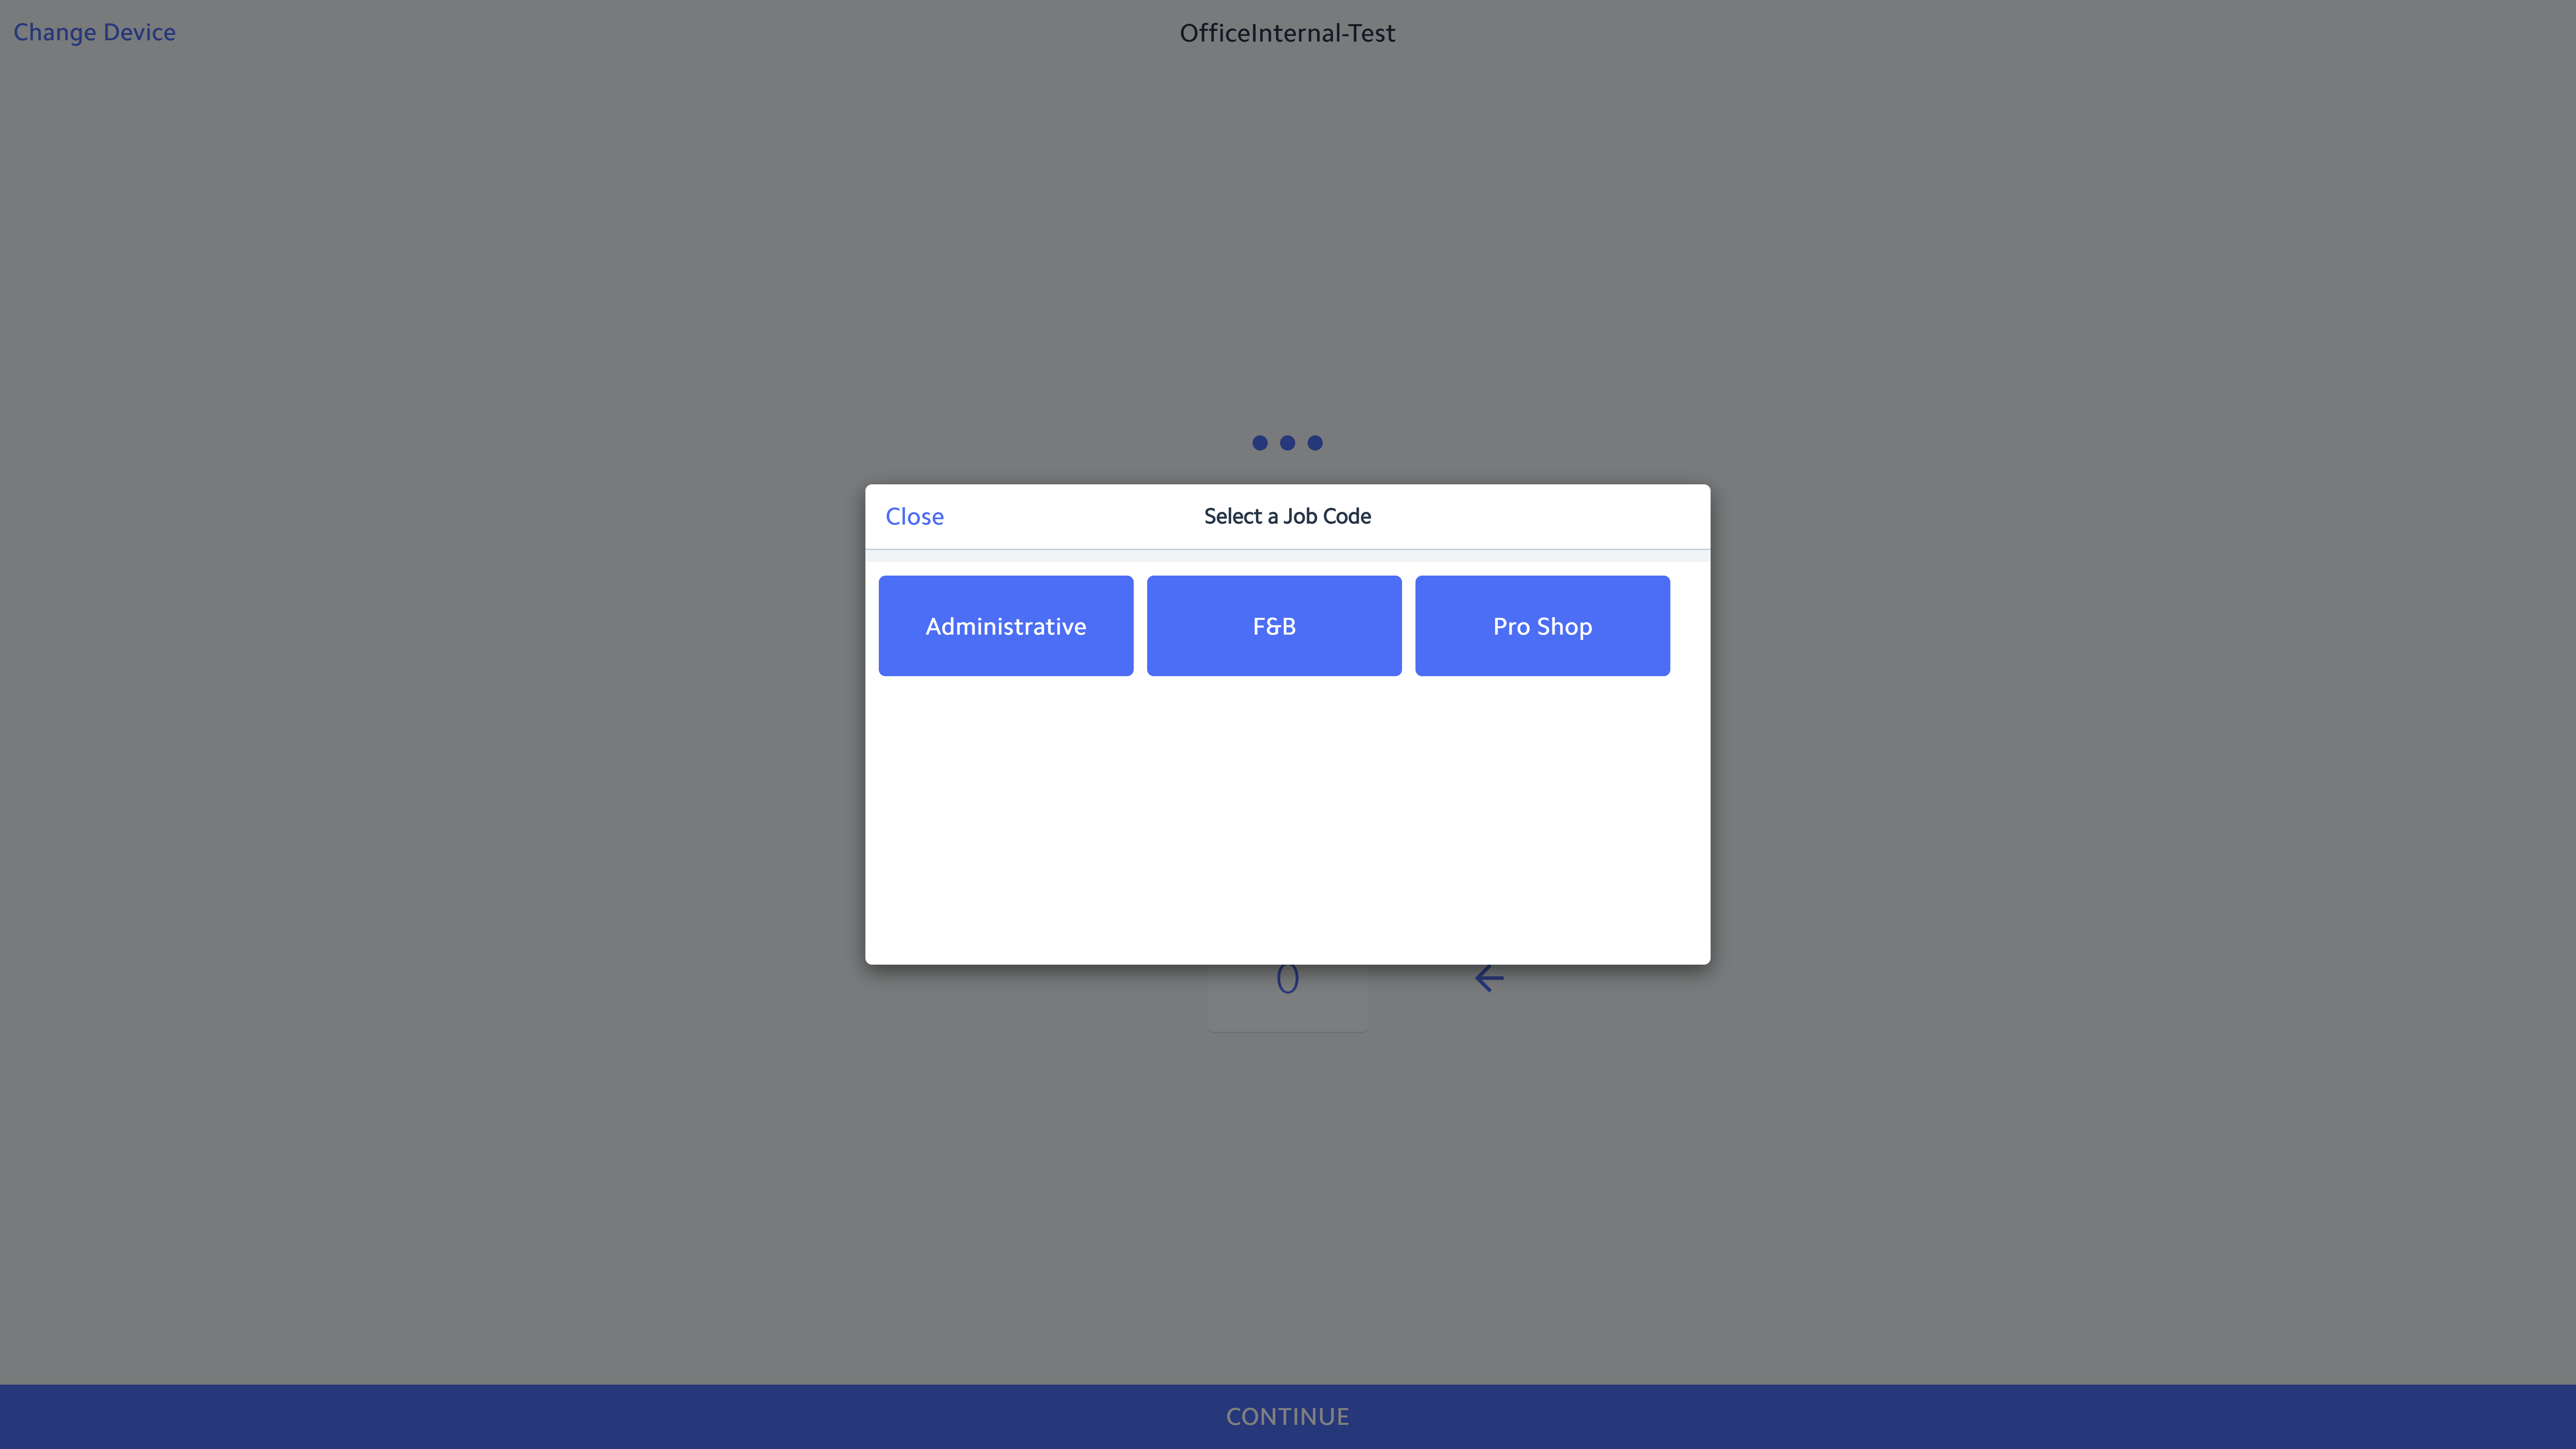
Please Note: If the user only has only one Job Code assigned to their Employee Profile, the system will display: You have successfully logged in.
...
The above options will clock the user out but NOT end their shift - meaning, the employee can clock back in and continue working on the same shift.
When clocking back in after a break, it is important to remember to clock in under the SAME Job Code that started the Shift. Otherwise the system could apply incorrect pay rates to the shift. For example, if the shift began under the Food & Beverage Management Job Code and when clocking back in, select the Food & Beverage Job Code to report timekeeping properly.
End of Shift Processes
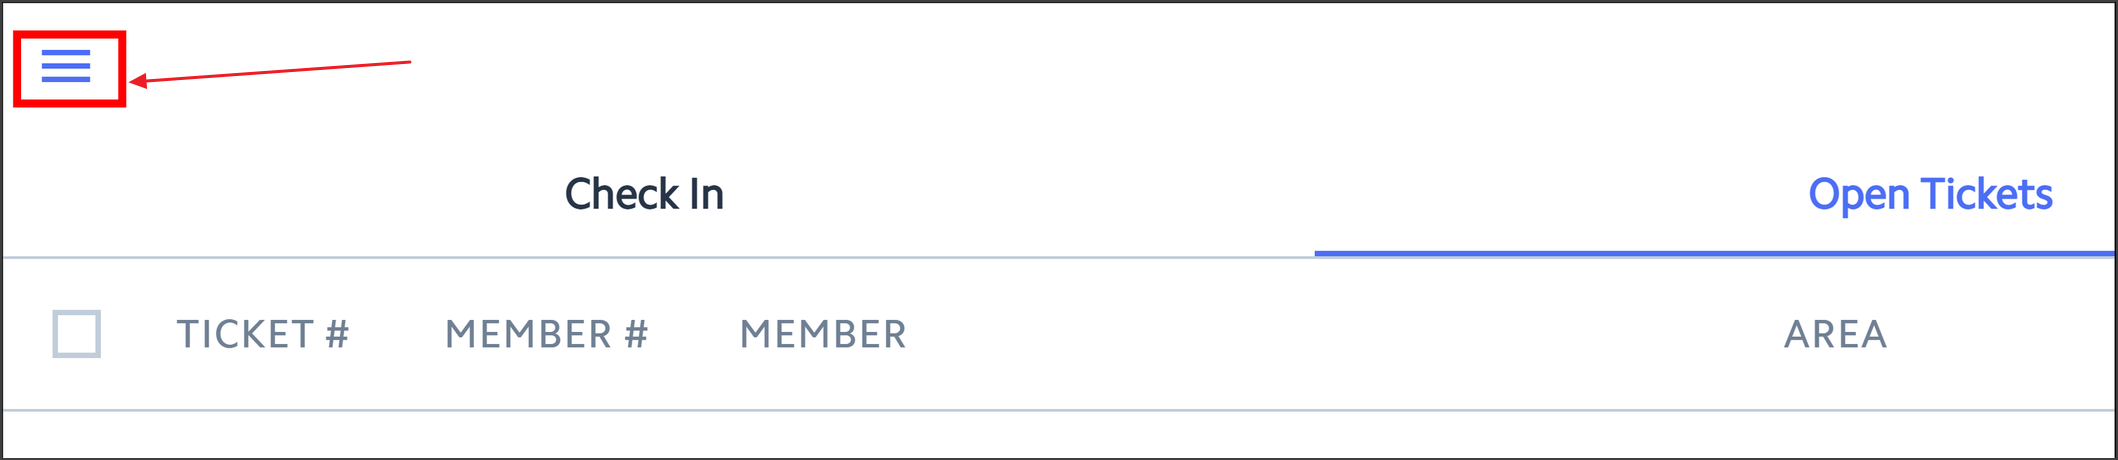
Before an employee Ends their Shift, the Open Tickets screen must be blank, reflecting that the employee has no open tickets. An employee must close all tickets before Ending the Shift.
...
The window will then return to the Open Tickets screen and a success message will populate. This ensures there are no open tickets under the employee trying to clock out or end shift.
...
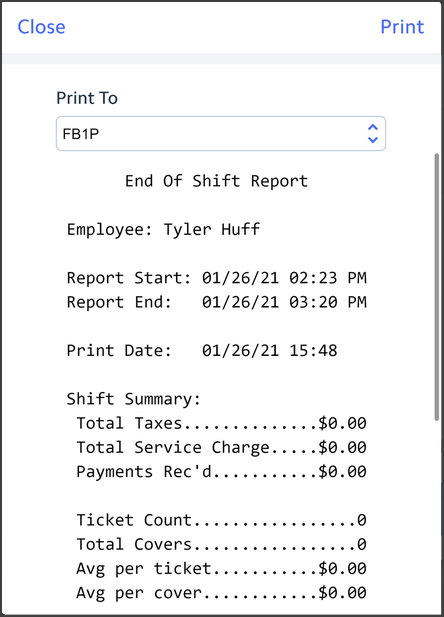
End of Shift Report
Once the Open Tickets display is blank, an End of Shift Report (EOS) can be printed. This report is usually run before the Shift is ended, and will display all Sales and Transactions completed during the employee’s “Shift” regardless of how many times they clocked in and out during their that time. This report can be printed as many times as needed. In addition, all past End of Shift Reports are saved for the user to access and print at any time.
...
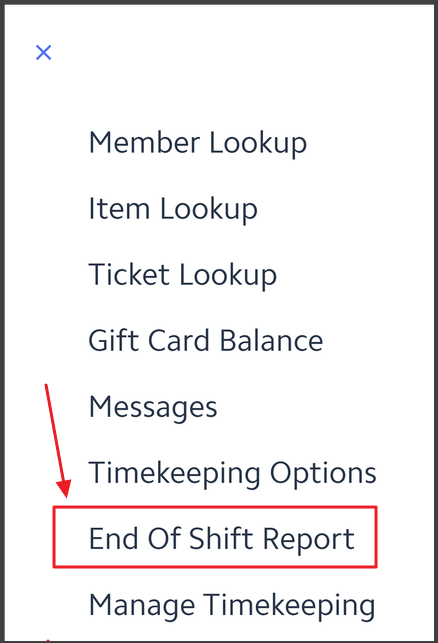
Click the flyout menu button in the top left corner of the main window.

Select End of Shift Report from the menu.

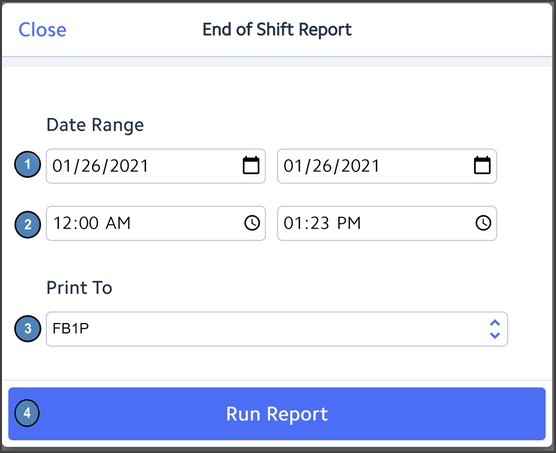
Select a Start and End Date as well as a Start and End Time. Then select the printer under Print To and click Run Report.

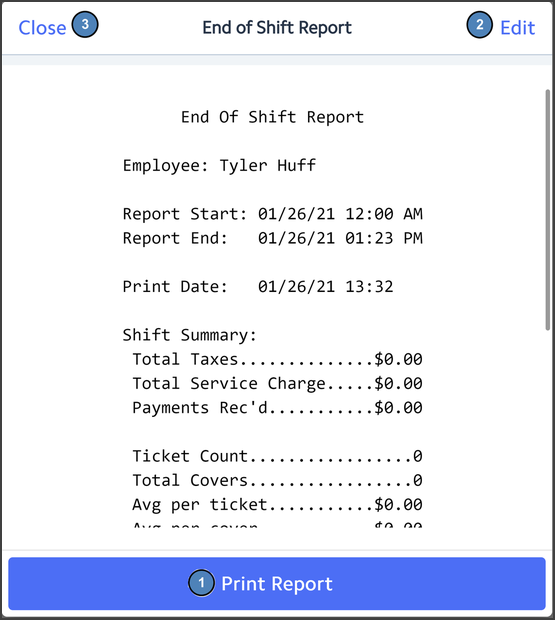
The Print Preview window will display the report. Select Print Report to continue printing. Click Edit to go back to the previous settings window. Click Close to exit the EOS report entirely.

Ending the Shift
The Office System requires all tickets to be closed and an End of Shift completed. This is the preferred method to ending a shift. Different operations have different end of shift expectations before an employee can leave; follow the policies and procedures as advised by the Club.
Please Note: An employee cannot end their shift without clocking out as well.
...
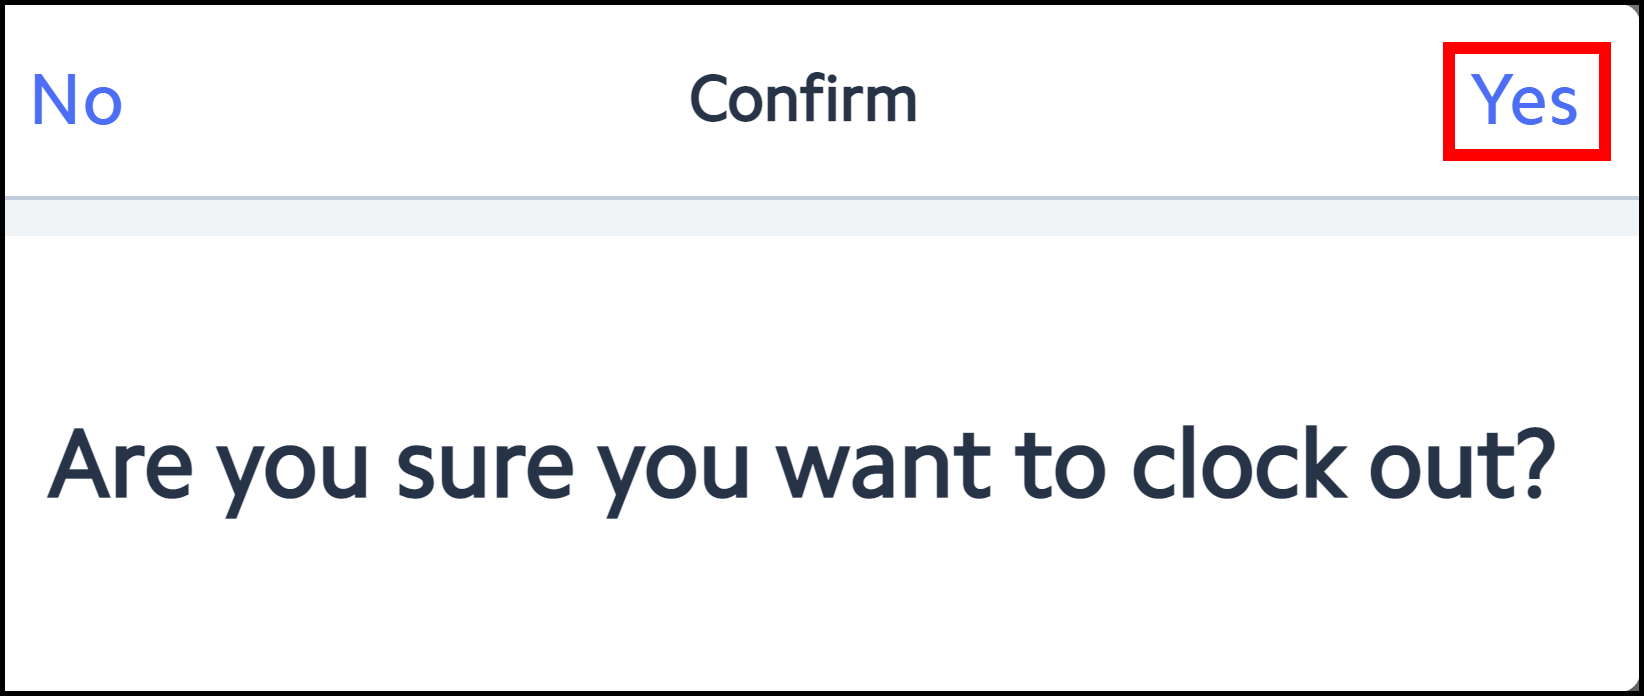
Click Clock Out at the bottom of the main POS screen.


The confirmation window will prompt, “Would you like to Clock Out?” Click Yes.

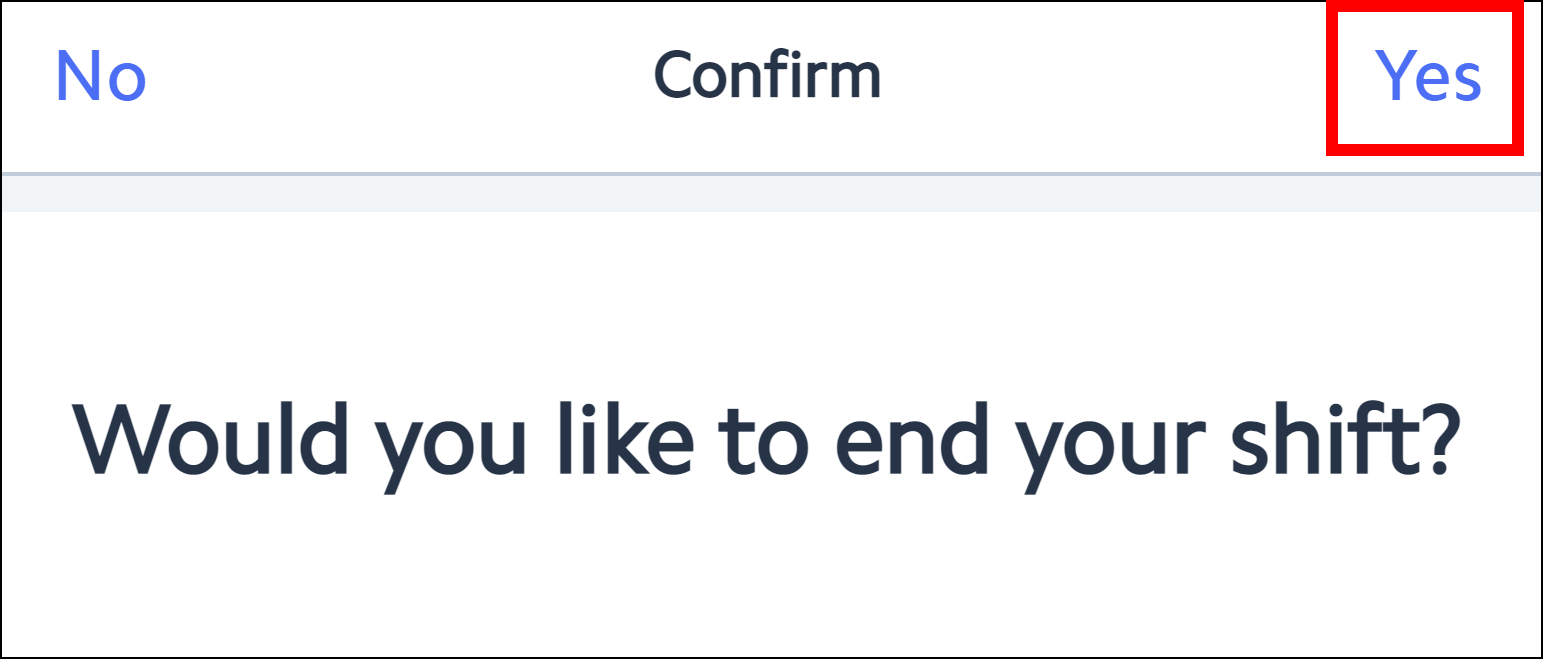
.The next confirmation window will prompt, “Would you like to end your shift.” Click Yes.

The End of Shift Summary window will display the following options for the Employee: Print Timesheets, Print EOS Report, Enter Tip Amount, and Close if no further actions are needed.

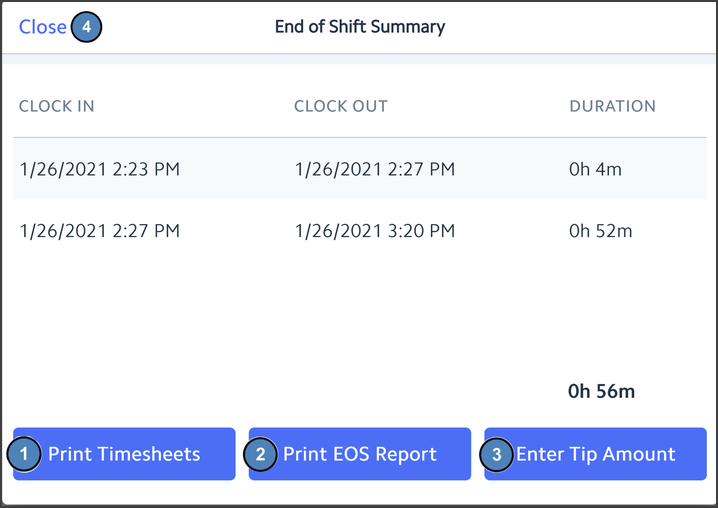
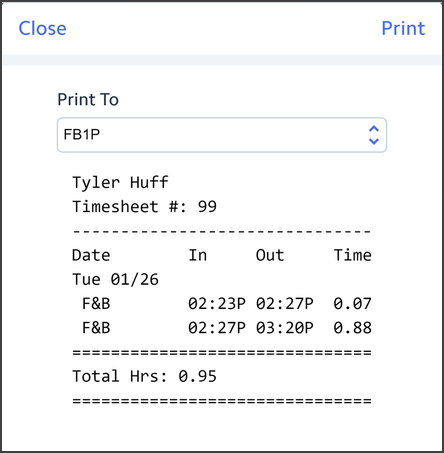
Print Timesheets
...
- When selected, the system will provide a report on total hours worked during the shift per Job Code. Select Print to continue printing the report.
...
Print EOS Report -
...
Enter Tip Amount -
This is the same as mentioned above when using the flyout menu.
...
Enter Tip Amount
...
If you report cash tips for tax purposes, select this option and a prompt will display for the user to enter their cash tips. Click OK when finished. The tip amount will then display on the main Options screen.
Change Job Code
If you mistakenly logged into the wrong Job Code, Open the Flyout menu and select Timekeeping Options.
...
Once in the Timekeeping Options window select Change Job Code.
...