...
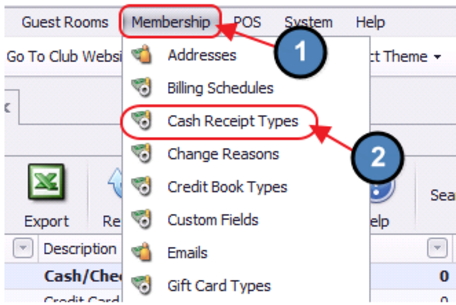
To access Cash Receipt Types, select
- Select Membership across the top toolbar
...
- Choose Cash Receipt Types.
Double-click on the Bank ACH Cash Receipt Type.
...
To effectively receive an ACH payment from a Member, the Member’s profile must first contain the appropriate banking information. Within
- Within the Membership Module, Manage Members section
...
- Select a Member
...
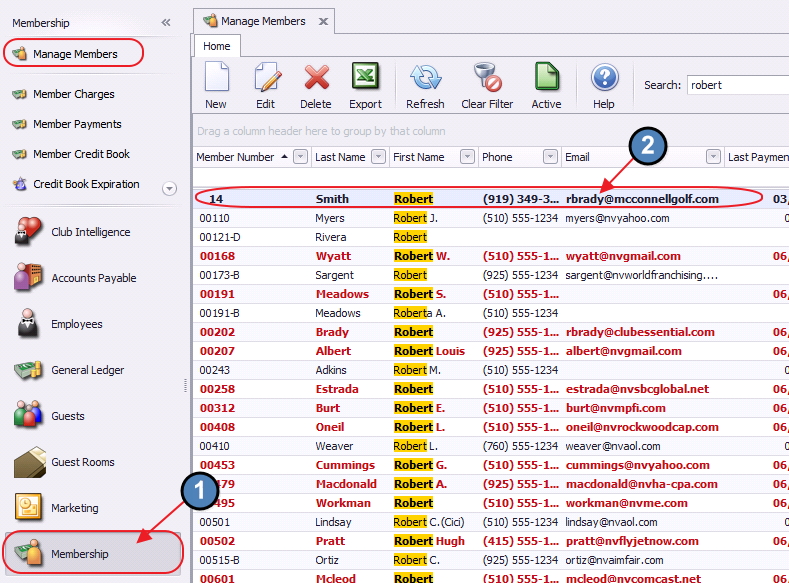
- navigate to the Bank Accounts tab within the Financial Information section of the Member’s profile.
...
- Click New to add an account
...
- Complete the tab for the Member’s account they wish to use for ACH payment purposes
...
- Click Save and Close.
...
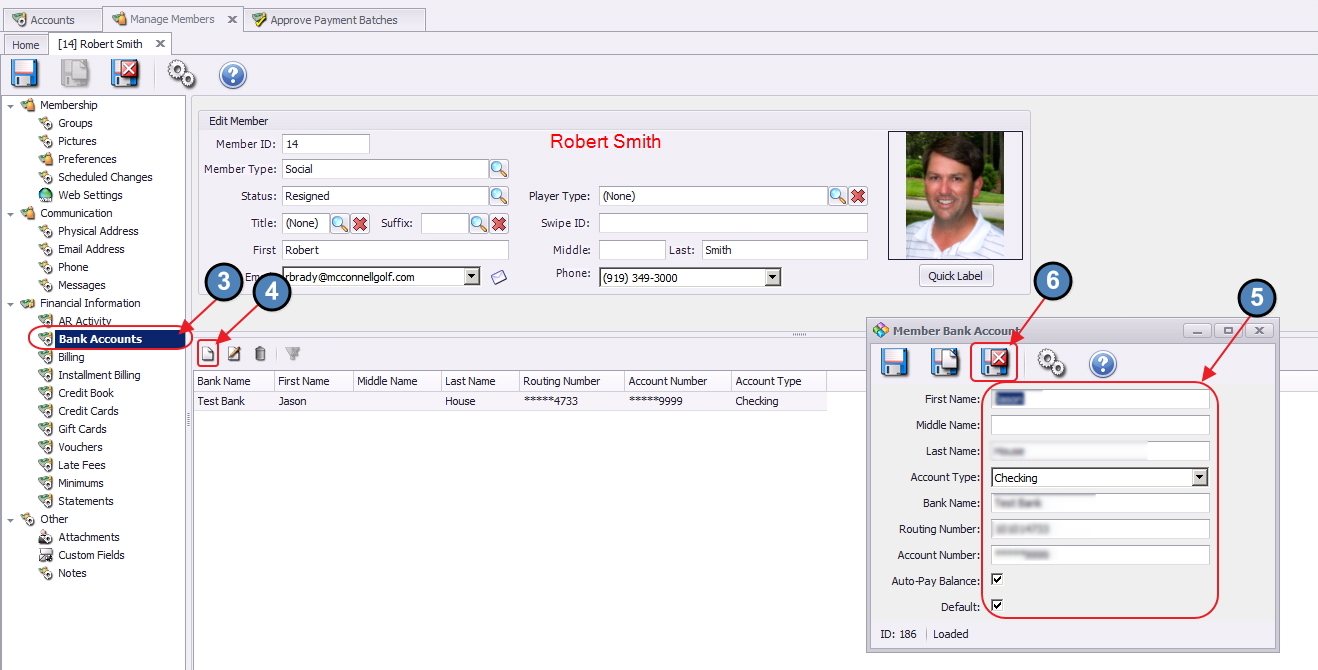
The Member must have banking information set up to make an ACH payment.
...
In addition to having a Member’s banking information, the Club’s Cash Account that will be receiving the payments from the Members must also be set up properly.
- Within the General Ledger top menu
...
- Select Accounts
- Double-click on the appropriate cash account that will be receiving the ACH payment.
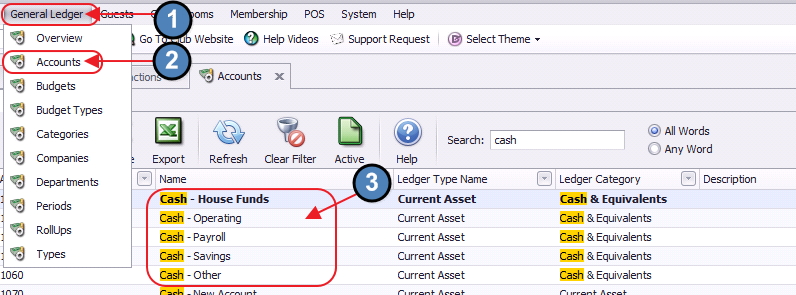
- Navigate to the Banking tab
...
- Populate the Bank Name
...
- Populate Routing Number fields.
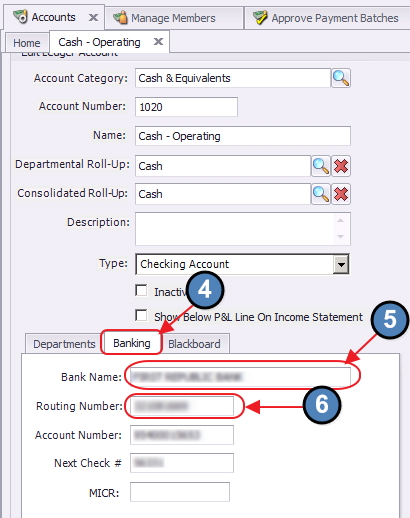
These fields must be populated to issue the proper ACH file.
...
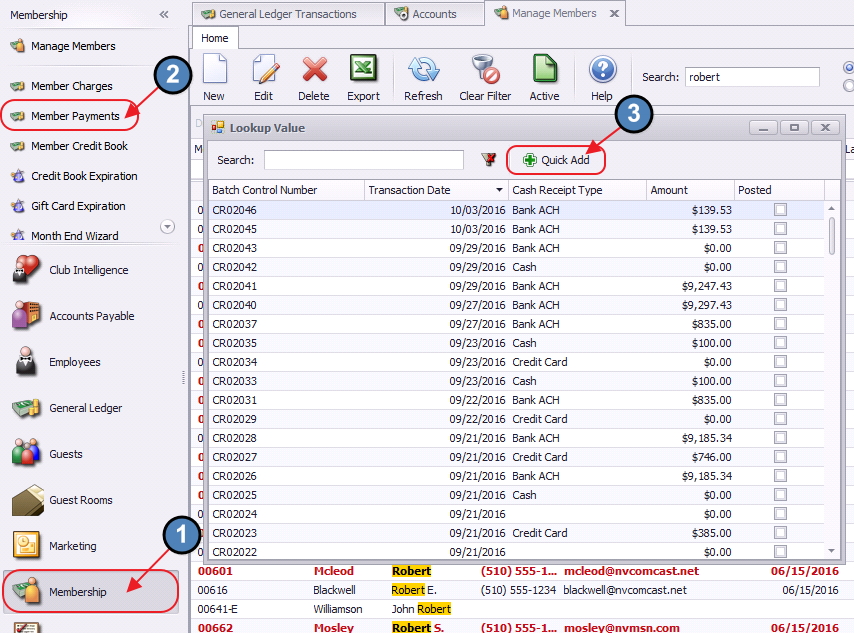
Once the proper Member(s) and Club account have been set up properly in the system, proceed to the Payment Wizard to generate the appropriate NACHA file for the bank. Navigate
- Navigate to Membership
...
- Member Payments
...
- Quick Add to initiate a ACH payment batch.
Complete the Payment Wizard as normal, with the following highlighted exceptions.
4. EnsureEnsure Bank ACH is chosen , and
5. Export NACHA File has been selected. Once Export NACHA File has been selected, the NACHA Settings box will open. Contact
6. Contact your bank to receive the proper information to populate the NACHA settings fields. These will be unique to your bank.
Please Note: If you bank requests a Balanced file click the Create Balanced File checkbox within these settings.
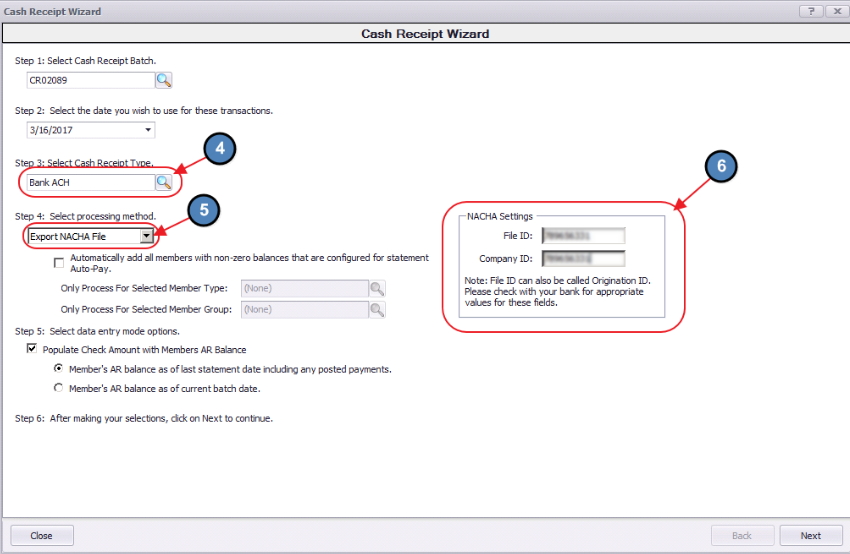
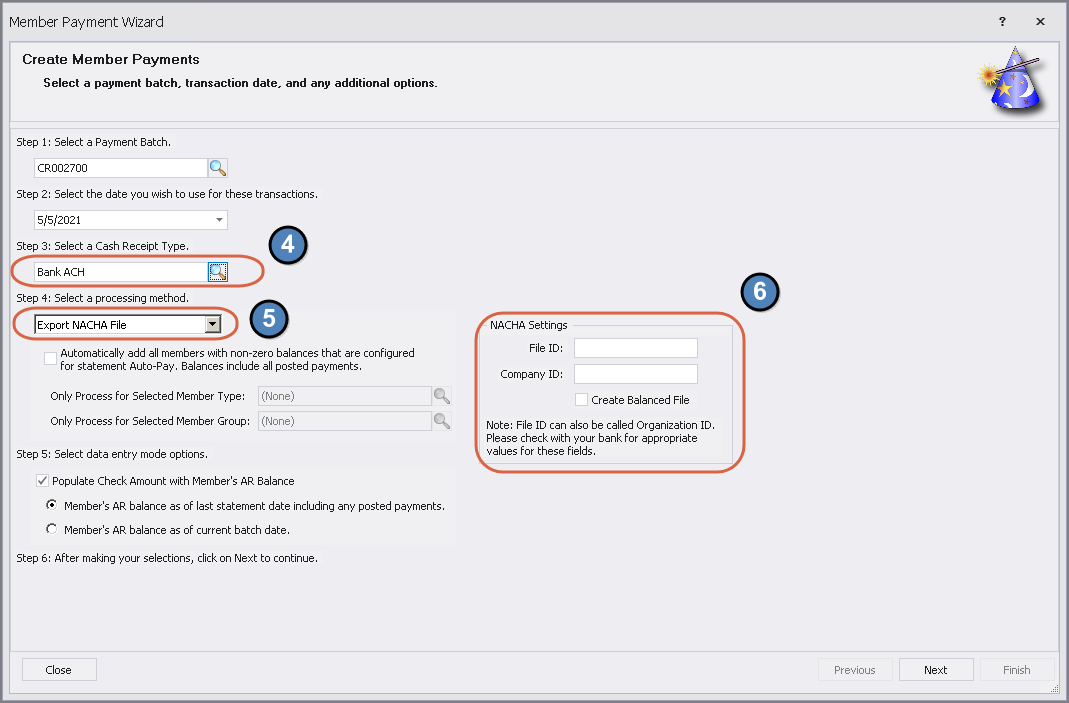
If NACHA Settings are not populated, error message will appear, and you will not be allowed to proceed.
...
Once populated, proceed to next screen. When populating information in this screen, ensure to select the Member’s account that is to be utilized for ACH payments (previously set up in Member’s profile) in the Payment field . Once (7).
8. Once complete, click Save NACHA File.
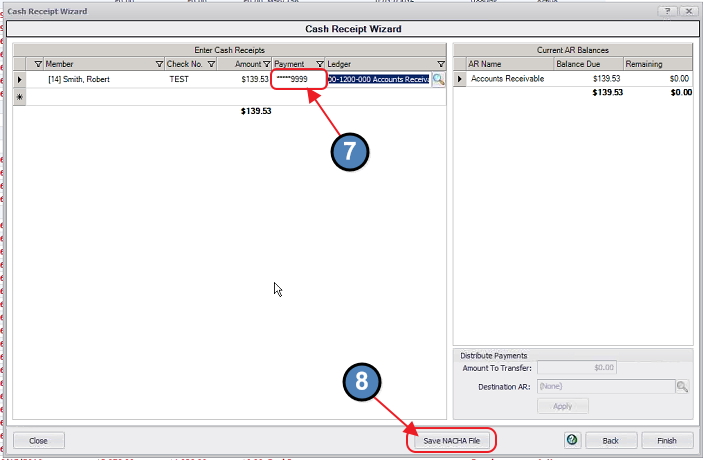
9. Name the NACHA file (end name with .txt) and save
10. Save file to location of your choice.
...