Versions Compared
Key
- This line was added.
- This line was removed.
- Formatting was changed.
| Table of Contents | ||||||||||
|---|---|---|---|---|---|---|---|---|---|---|
|
Table of Contents
| Table of Contents | ||||||
|---|---|---|---|---|---|---|
|
Overview
The Manage Timekeeping Module allows users, with the proper permissions, to edit an Employee’s existing Timesheet, create a new Timesheet, and delete a Timesheet. Timekeeping can be managed in both the POS and the Back Office System
...
Use Case
...
.
...
|
|---|
Manage Timekeeping in the POS
In this section, we will review the proper procedures to follow when Managing Timekeeping in the POS.
...
Only users with the proper permissions will have these options available at the POS.
Required Permissions
Employees Module
Manage Timekeeping
Employee Group
Accessing the Tool
To access the Timekeeping tool in the
...
CPOS,
...
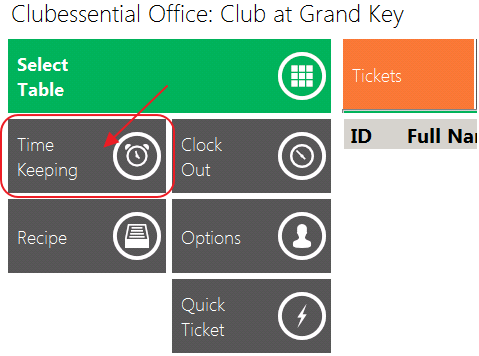
Log in to the POS as normal and select Timekeeping.
...
...
The Manage Timekeeping Module will launch.
 Image Removed
Editing an Existing Timesheet
To edit an existing Timesheet
...
,
...
Use the Date field to select the applicable Date in which the Timesheet occurred.
...
...
Select the applicable Employee from the Grid.
...
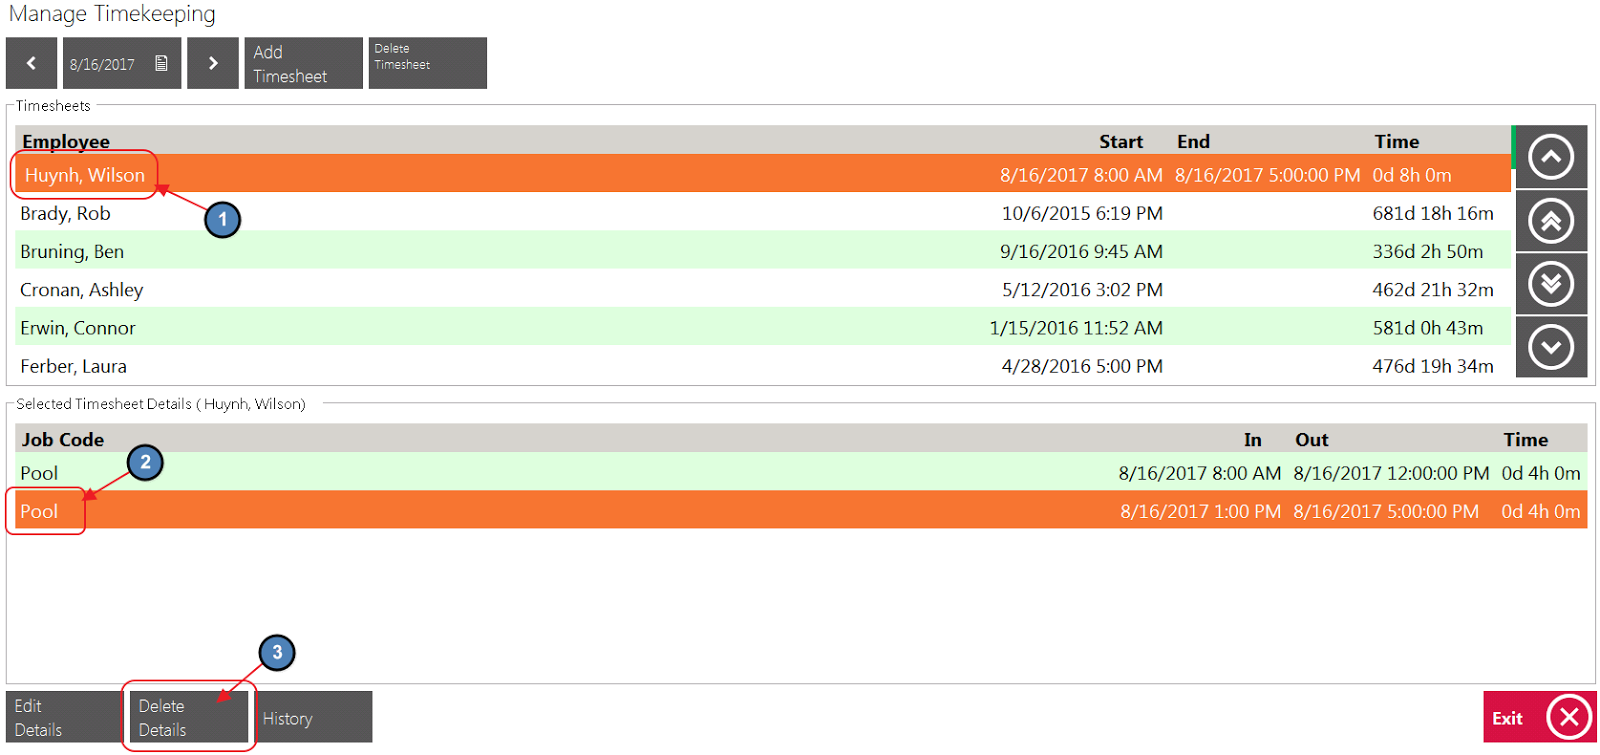
The top section of the Grid displays Shift totals (In Hours Worked) for the Employee, while the bottom section displays the Employee’s Timesheets that make up the total of the Shift (For example, the Employee could have two Timesheets for one Shift if the Employee clocked out for Lunch).
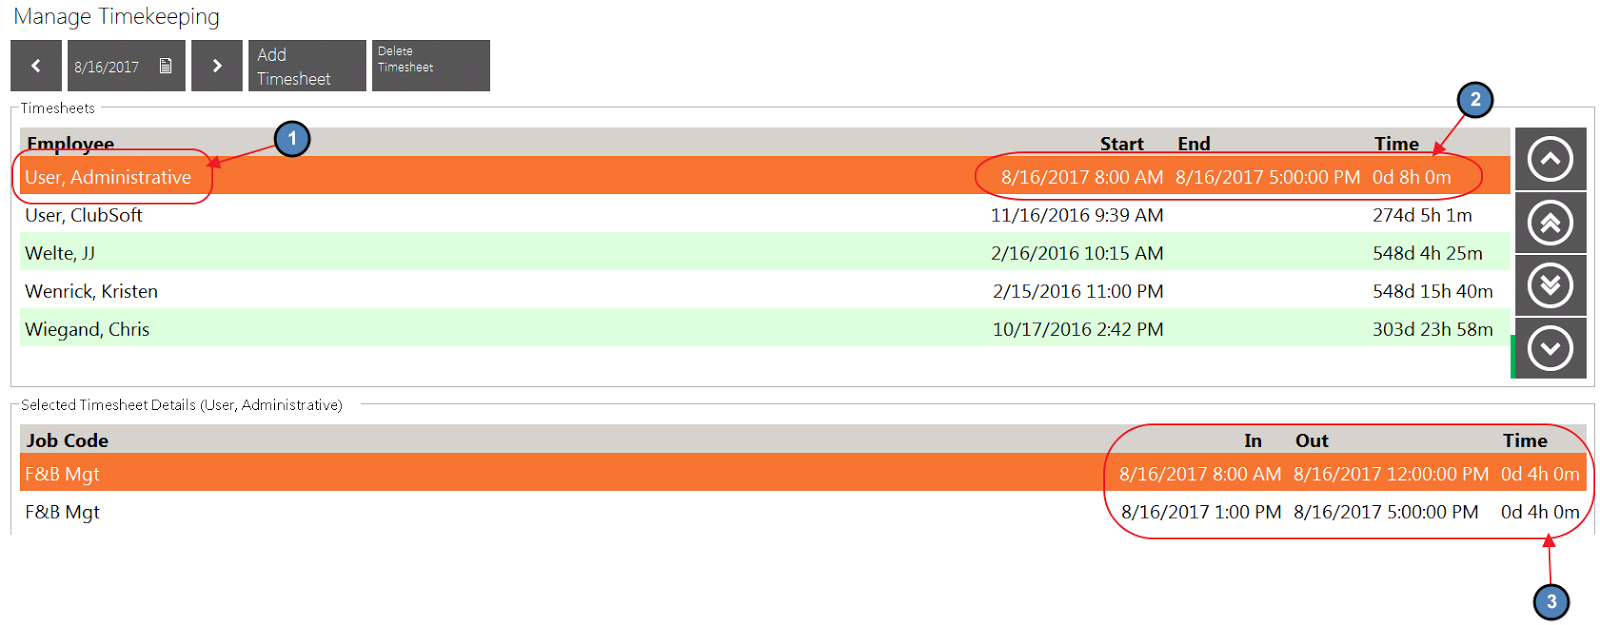 Image Removed
...
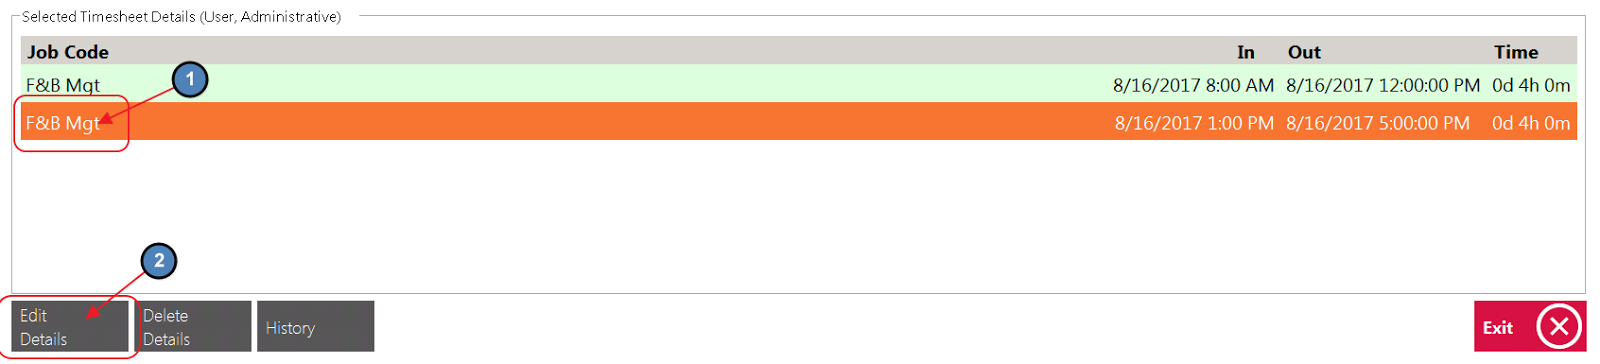
Be sure to select the correct Timesheet from the bottom grid labeled Job Code (If there is more than one), and select Edit Details.
 Image Removed
...
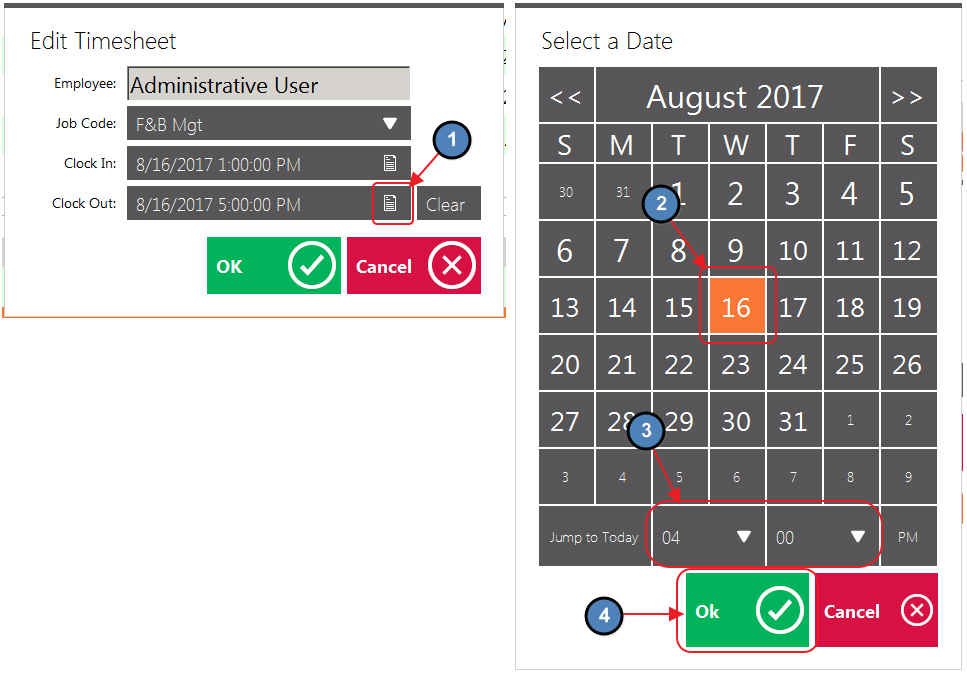
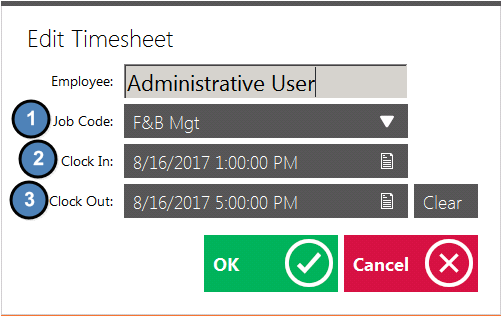
Review available options below:
...
...
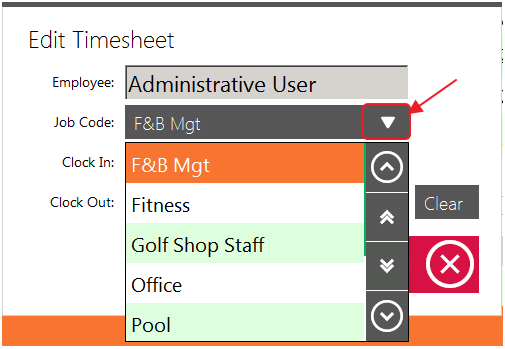
- The Job Code assigned to a particular Timesheet can edited by selecting the drop-down arrow. The Lookup Value will display all Job Codes assigned to the Employee.
...
...
- The Clock In Date/Time of a particular Timesheet can be edited here. Select the Lookup Value for a more user friendly interface.
...
...
- The Clock Out Date/ Time of a particular Timesheet can be edited here. Select the Lookup Value for a more user friendly interface.
...
...
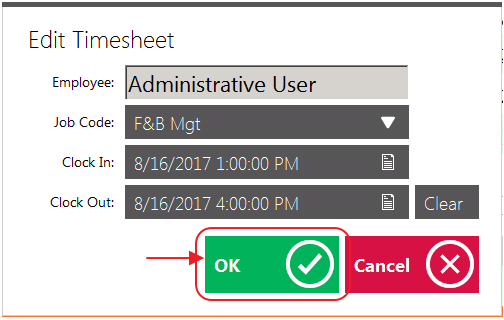
Select OK once edits are complete.
 Image Removed
...
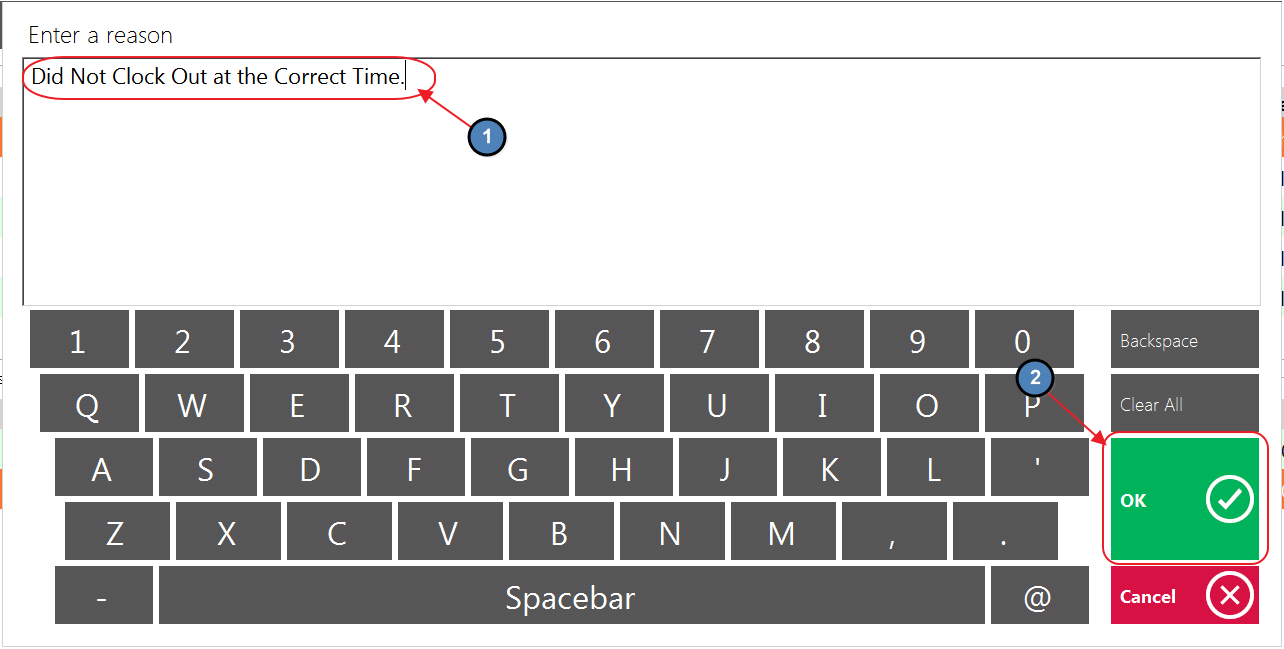
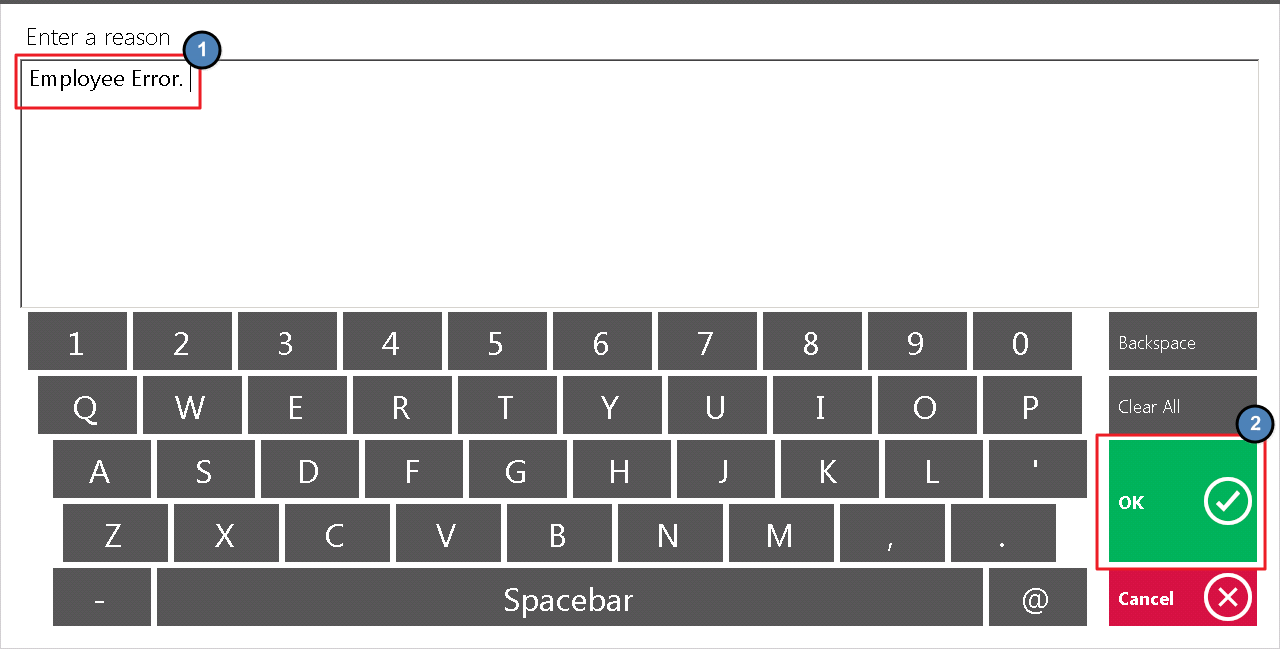
Lastly, Enter a Reason for editing the Timesheet.
...
Creating a New Timesheet
To create a new Timesheet
...
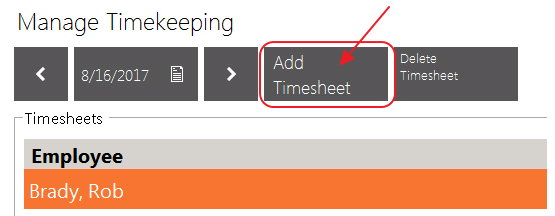
1) Select Add Timesheet,
 Image Removed
...
,
Select Add Timesheet.
Populate the appropriate information for each of the following:
Employee
Job Code
Clock In
Clock Out
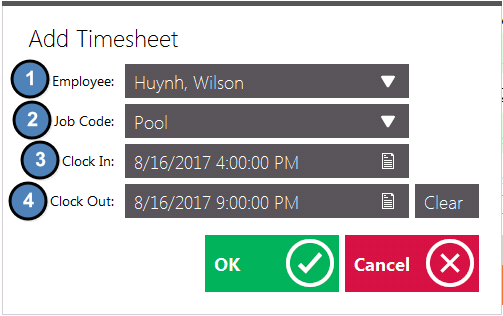
...
Click OK when finished.
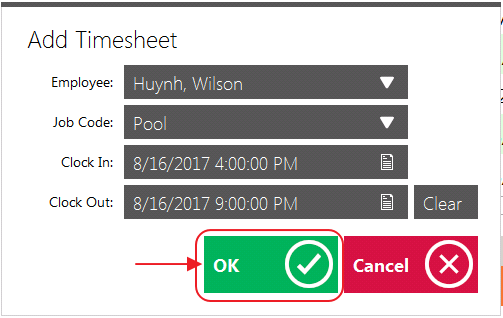
...
Delete a Timesheet
There are two options when deleting a Timesheet in the POS. In this section, we will review each option.
...
Any Timesheet associated with completed transactions cannot be deleted until all tickets associated with the Timesheet are transferred to another Employee. Please review our System Tool Manual for more information on Reopening, and Transferring Tickets.
Option 1 -
...
Select the applicable Employee from the Grid and chooseDelete Timesheet. This will delete each Timesheet (if there are multiples) associated with the Employee’s Shift.
...
...
Next Enter a Reason for Deleting the Timesheet.
 Image Removed
...
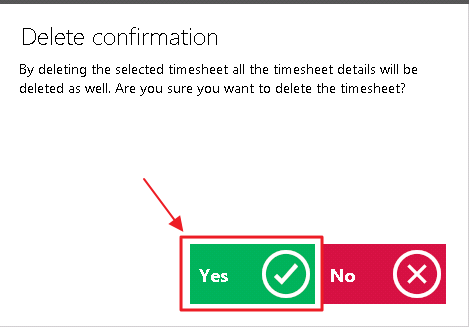
Finally, confirm the Timesheet deletion. This will delete each Timesheet (If there are multiples) associated with the Employee’s Shift.
...
Option 2
...
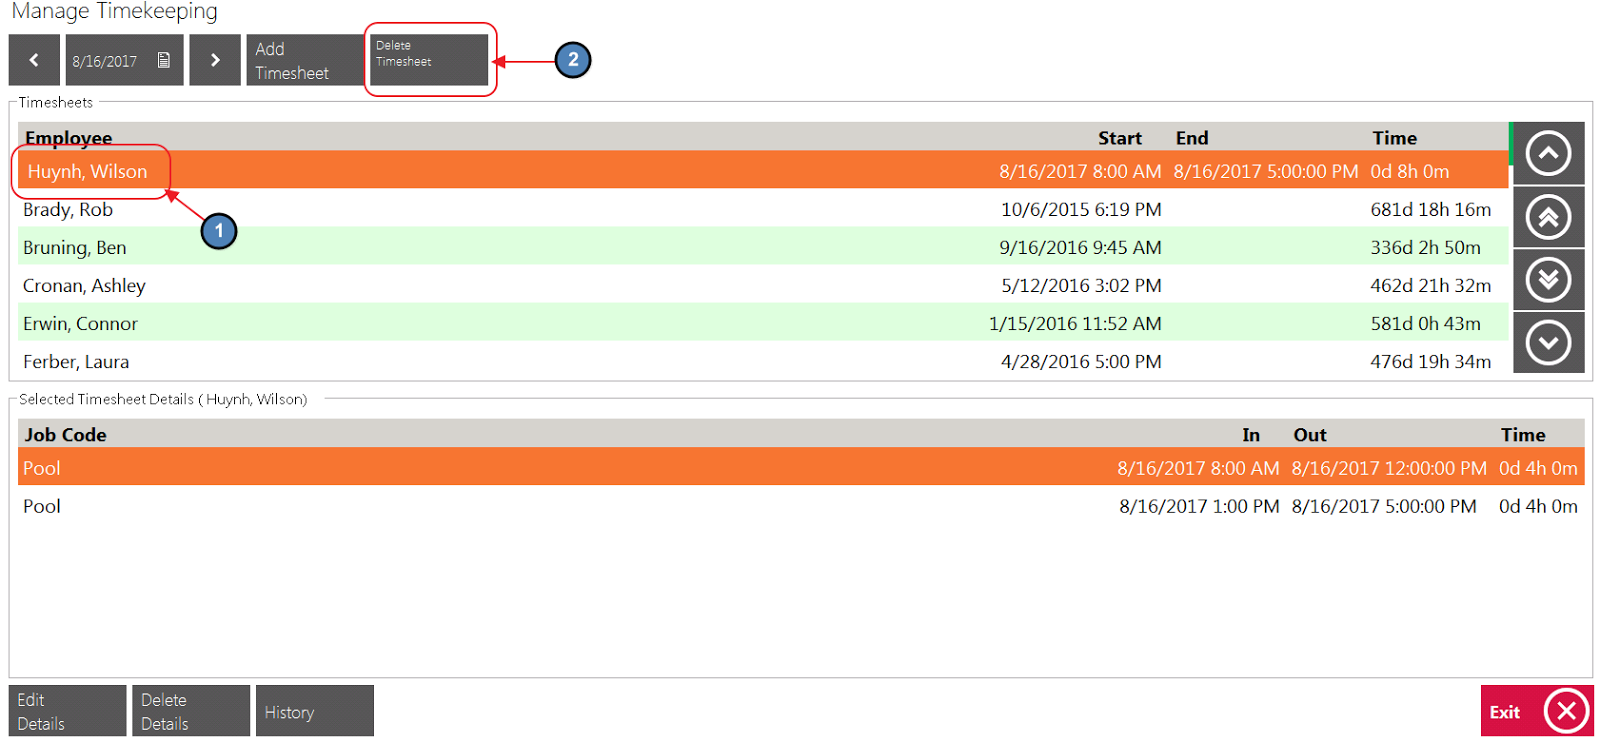
- If only one Timesheet for a particular Shift needs to be deleted,
...
Select the applicable Employee from the top section of the Grid
...
. Then the appropriate Timesheet on the bottom section of the Grid, and then choose Delete Details.
...
If there is only one Timesheet associated with the Shift, either option can be used.
...
 Image Removed
...
...
Next Enter a Reason for Deleting the Timesheet.
...
...
Finally, confirm the Timesheet deletion.

...
Manage Timekeeping in Back Office
In this section, we will review the proper procedures to follow when Managing Timekeeping from the Back Office System.
Accessing the Tool
To access the Manage Timekeeping tool
...
,
...
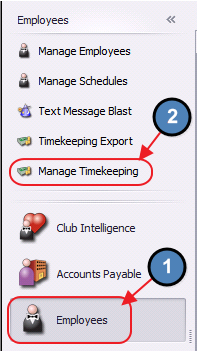
Select Employees from the left user menu
...
.
ChooseManage Timekeeping.
...
...
The Manage Timekeeping Grid will launch.
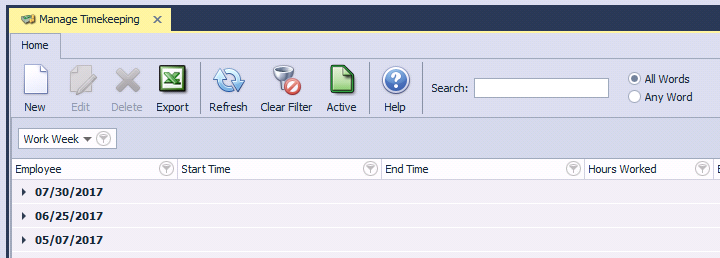
 Image Removed
Editing an Existing Timesheet
The Manage Timekeeping Grid is defaulted to Group Timesheets by Work Week. Users can expand the Work Week to view the individual Timesheets for the week.
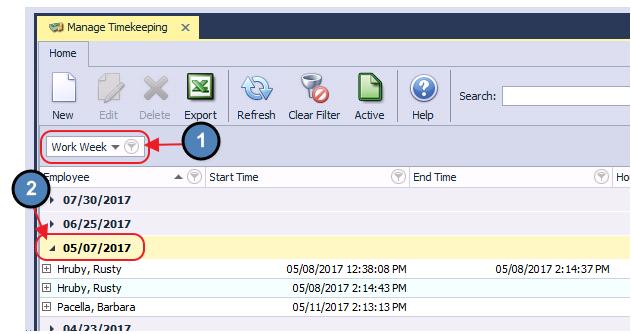
...
To edit an existing Timesheet
...
,
...
Expand the applicable Work Week and double-click the Timesheet that needs editing.
...
...
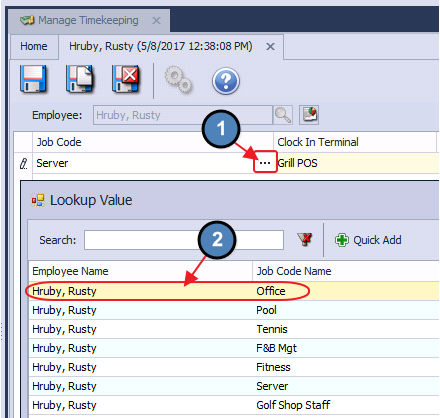
Please review each available option below:
 Image Removed
...
- The Job Code assigned to a particular Timesheet can be edited under the Job Code column. The Lookup Value will display all Job Codes assigned to the Employee.
...
...
- The Terminal in which the Employee clocked in can be edited under this column.
...
...
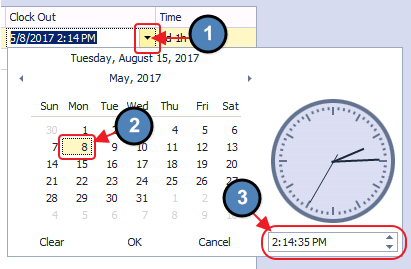
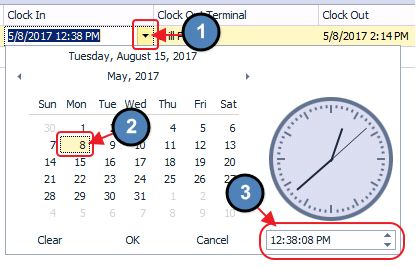
- The Clock In Date/Time of a particular Timesheet can be edited under this column. Select the Drop Down arrow for a more user friendly interface, or type in the appropriate Clock In Date/Time.
...
...
- The Terminal in which the Employee Clocked Out can be edited under this column.
...
...
- The Clock Out Date/Time of a particular Timesheet can be edited under this column. Select the
...
Drop Down for a more user friendly interface, or type in the appropriate Clock Out Date/Time.
...
...
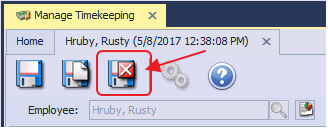
Select Save & Close.
...
Creating a New Timesheet
To create a new Timesheet
...
,
...
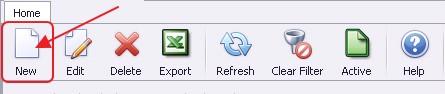
Select the New icon on the toolbar.
...
...
The Timesheet setup screen will launch.
...
...
Select the Employee for which the Timesheet is being entered.
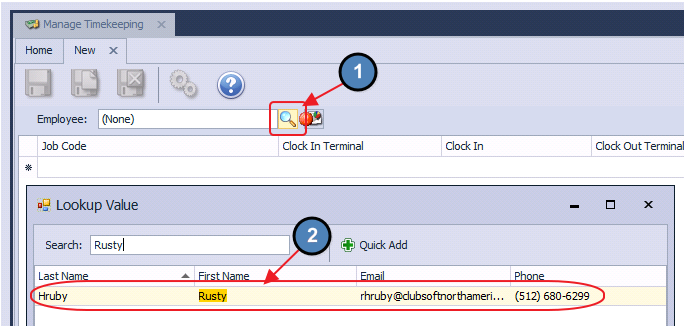 Image Removed
...
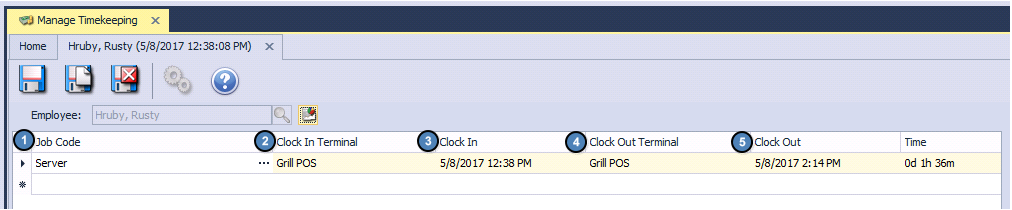
Populate the appropriate information for each of the columns below:
Job Code
Clock In Terminal
Clock In
Clock Out Terminal
Clock Out
Image Removed
...
Select Save & Close.
...
...
Delete a Timesheet
To delete a Timesheet,
...
Select the applicable Timesheet from the Grid and choose Delete on the toolbar.
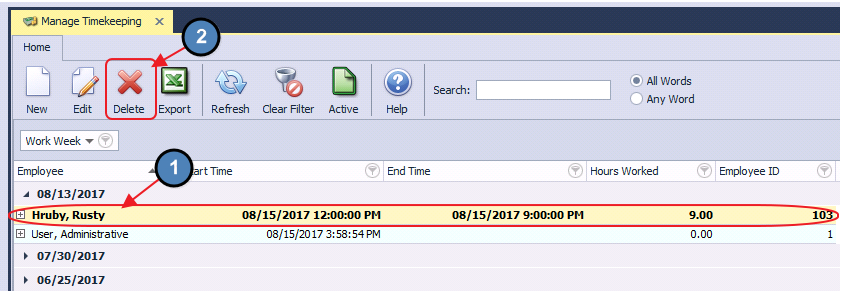
...
Any Timesheet associated with completed transactions cannot be deleted until all tickets associated with the Timesheet are transferred to another Employee. Please review our System Tool Manual for more information on Reopening, and Transferring Tickets.
...
Select, Yes on the Confirmation Prompt.
...
Best Practices
...
FAQs
...
If having to continually make significant edits to timesheets, review Clock In/Clock Out procedures with Employees to ensure they understand the process.
...
FAQs
The system will not allow me to delete an employee's Timesheet. What can I do?
...
Any Timesheet associated with completed transactions cannot be deleted until all tickets associated with the Timesheet are transferred to another Employee. Please review our System Tool Manual for more information on Reopening, and Transferring Tickets.
Downloadable Guide
...
 Image Added