| Table of Contents | ||||||||
|---|---|---|---|---|---|---|---|---|
|
Overview
The Office system allows the user to enter non-member payments if applicable. This feature can only be utilized for Cash Receipt Payments (including checks); no other form of payment can be entered as a non- member paymentCMA application has been updated to include two new grid views available to users with the appropriate roles. These grids allow a user to manage, at a bulk level, the notification types (Statement, etc) linked to physical mailing addresses and email addresses. Use Case A Club wants to view all members who have Statement notifications linked to a physical or email address. The Club would also like to export a list of addresses or emails that are not configured for any notification types so additional research can be performed, and information can be gathered. |
Content
|
|---|
Accessing the Tool
To enter a Non-Member Payment,
Select Membership from the user menu, and then choose Member Payments.
Select, Quick Add.
The Cash Receipt Wizard will launch.
Enter Non-Member Cash Receipt
Enter the appropriate information for a typical Cash Receipt Payment into each step of the Cash Receipt Wizard. For a refresher, refer to the Member Payments reference guide for more information.
Click, Next when complete.
Payment Entry Screen
The payment entry for a Non-Member Payment is similar to entering a typical Cash Receipt Payment.
To enter a Non-Member payment,
1) Select the Lookup and choose Non-Member Cash Receipt.
2) Enter the Check Date. The system will default to the date the payment was entered.
3) Enter the Check Number of the check received. Cannot be left blank.
4) Enter the Amount of the check.
5) Select the lookup and choose the appropriate Ledger.
(Repeat as necessary to enter all appropriate payments into batch.)
6) When appropriate payments have been entered, click Finish.
8) Verify the GL posting is correct and select Post Batch.
Payment(s) will post to G/L.
Editing Posted Payments
All Payment Batches can be unposted unless they are flagged within a bank rec, in which case the system will not let the user unpost the batch. Follow same procedure for editing Member Payments as outlined in the Member Payments guide.
Best Practices
- Enter Non-Member payments timely, and correct any errors in posting prior to marking amount as reconciled.
FAQs
Q. I accidentally entered the wrong amount for a Non-Member cash payment, how do I fix this?
A. Unpost the batch using the Approve Payment Batches function. Then, re-open batch (through the Wizard) to correct payment amount. Re-post when finished. Refer to Member Payments guide for details.
Downloadable Guide
...
Addresses
For bulk maintenance of Physical Addresses,
1) Select Membership across the top toolbar and select Addresses.
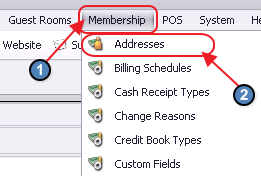
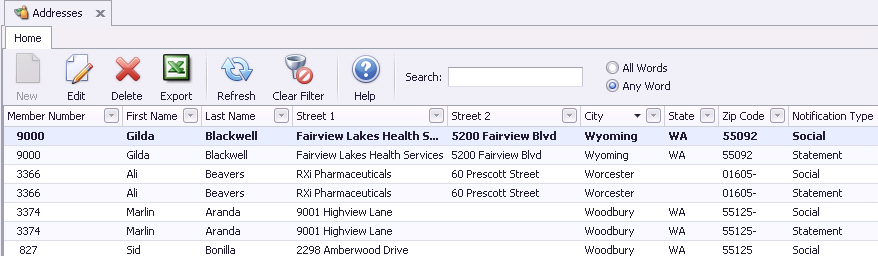
2) The Addresses Grid will launch.
Emails
For bulk maintenance of Email Addresses,
1) Select Membership across the top toolbar and select Emails.
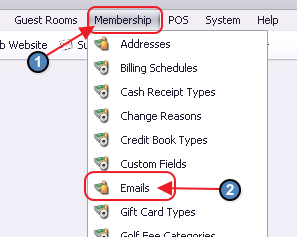
2) The Emails Grid will launch.

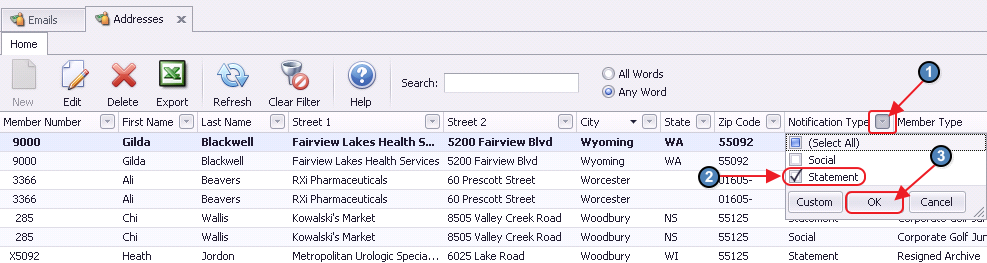
Filtering
The Addresses and Emails Grids can be filtered in the same manner as any other Grid. For example, if a user would like a list of all members who have Statement notifications linked to an Email Address, the Emails Grid can be easily filtered to reflect this information. Please see instructions below.
1) Filter the Notification Type column to only show the Statement Notification Type. Click OK.
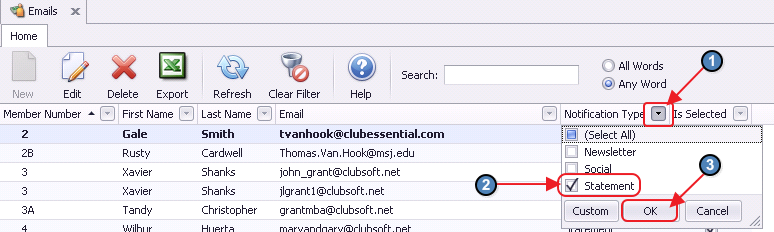
2) Filter the Is Selected column for Checked.
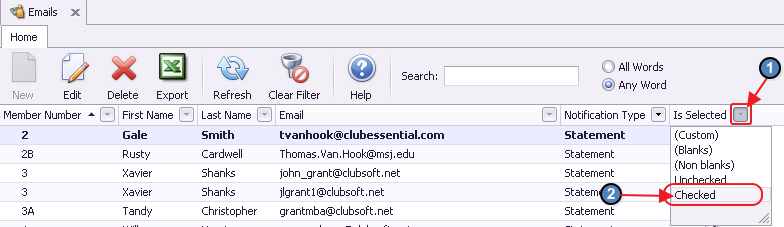
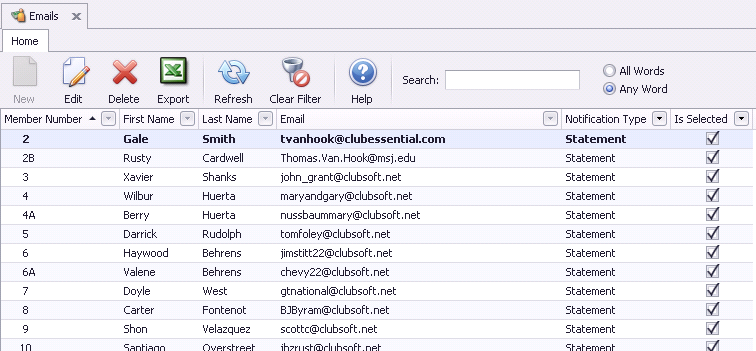
3) The Grid now reflects all members in the system who have Statement notifications linked to an Email Address.
Export to Excel
The Addresses and Emails Grids can also be easily exported to Excel for further data manipulation.
To do so, filter the grid to the preferred view, and select Export on the toolbar.
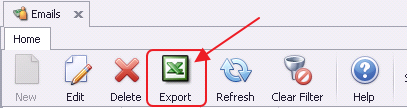
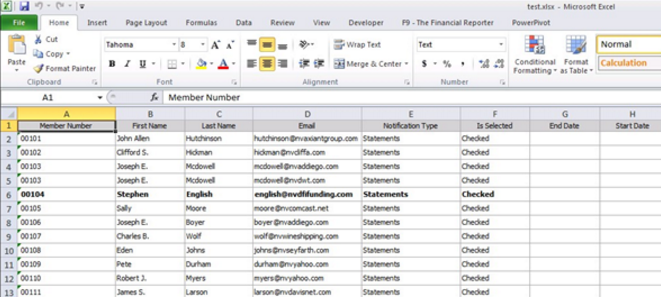
The current grid view will be exported to Excel.
Multi Edit
Just like any other Grid, the Addresses and Emails Grids can be edited in bulk via the Multi Edit function.
For example, let’s assume a group of members, who are currently configured to receive a printed statement, would now like to receive their statement via email. In previous versions, the user would have to navigate to each member’s individual profile and edit their notification types. With the addition of the Addresses and Emails Grids, the notification types for these members can be easily edited in one place. Please see instructions below.
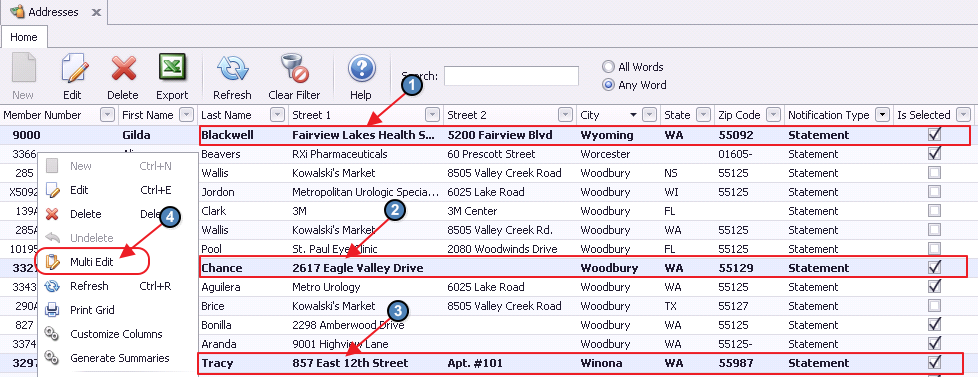
1) On the Addresses Grid, filter the grid to only show the Statement Notification Type.
2) Hold CTRL to select multiple members from the grid. Right click and select Multi Edit.
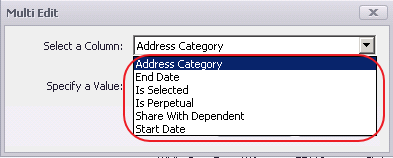
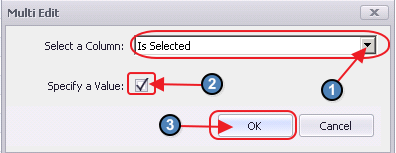
3) Choose the Is Selected column by utilizing the drop-down arrow. To un-select these members from the Statement Notification type, leave the Specify a Value field unchecked.
Then, click OK to continue.
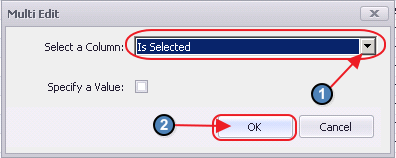
(Note: Other bulk edits (in addition to Is Selected) can be performed as well.)
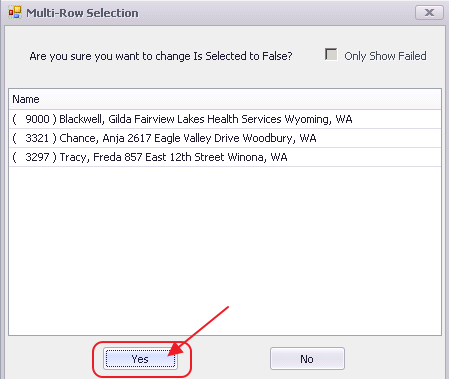
4) Confirm the change to affect the selected records by clicking Yes.
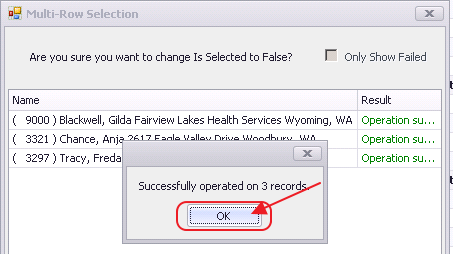
5) Success message will return. Click OK.
6) Lastly, click Close to continue.

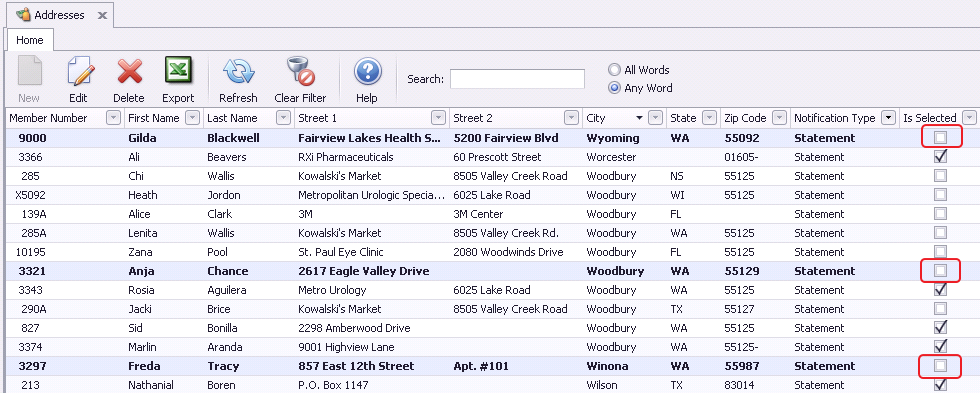
Now that these members are no longer configured to receive a printed statement (shown below), they will have to be configured to receive a statement by email.
Other than step 3, please repeat the same steps as above on the Emails Grid to configure these members for an emailed statement.
On step 3, check the Specify a Value field within the Is Selected column to designate that the selected email addresses are selected for Statement Notification.
Best Practices
-
Utilize the Multi Edit function to save time and make edits to multiple records at the same time.
Apply filters to help identify/review/clean up data in the database (quickly identify blank records, records within certain ranges, etc).
FAQs
Q. When I click Export, will it export all records, or the view I have selected based on filters I have applied?
A. The exported grid will contain all columns and rows of the currently displayed grid. If filters are impacting the view, only the returned results based on applied filters will be exported. To export all records, click Clear Filters in the toolbar to eliminate any filters impacting the current view.
Downloadable Guide
Bulk Maintenance Notification Types - Guide