...
Image Explorer Interface
The Image Explorer is a repository for all images used on the website. It is simply a holding place to organize imagery, and allows for images to be edited.
Organizing Images
It is important to organize images, so the images are easy to find. Organizing folders is extremely important when working within Photo Albums, as Photo Albums pull images from an entire folder, or multiple folders. There is never a reason to delete images from the website, as there is no limit to the amount of images stored.
Folders are typically named after year, event, topic, dimension, or Photo Album title.
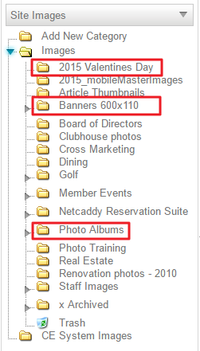
To add a New Folder, click the Add New Category folder at the top of the folder structure.
...
It is best to keep the Image Explorer as organized as possible so images can easily be found. By creating multiple folders named by year, event title, or image size it can be easy to find where images are located at a glance.
Create an Archive folder in the Image Explorer and move imagery here when not in use. Since there is no limit to the amount of imagery in the Image Explorer, move unwanted images here. If images are deleted from the Image Explorer, they then must be re-uploaded in order to use them on the website. Deleting an image in use will create a black box on the website where the image was located.
Resizing and cropping images ensures that imagery to sized to the proper dimensions for the site design. It is not recommended to resize imagery on the page as this could cause the image to become pixelated.
- Name imagery something descriptive of the image so images are easy to locate within the folders.
Downloadable Guide