...
|
|---|
...
Member Bank Accounts
To effectively receive an ACH payment from a Member, the Member’s profile must first contain the appropriate banking information. Within the Membership Module, Manage Members section, select a Member, and then navigate to the Bank Accounts tab within the Financial Information section of the Member’s profile. Click New to add an account, complete the tab for the Member’s account they wish to use for ACH payment purposes, and click OK.
...
Select Membership from the user menu, and then choose Member Payments.
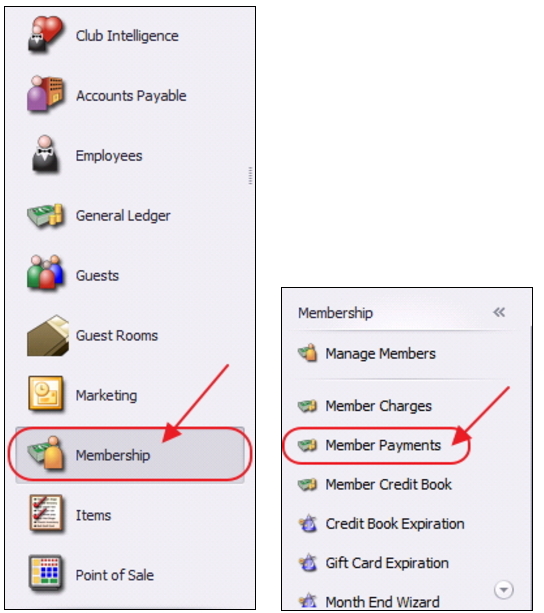
Select, Quick Add.
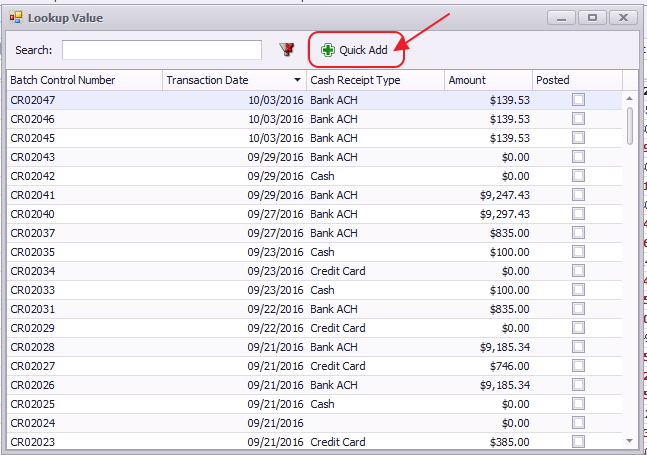
The Cash Receipt Wizard will launch.
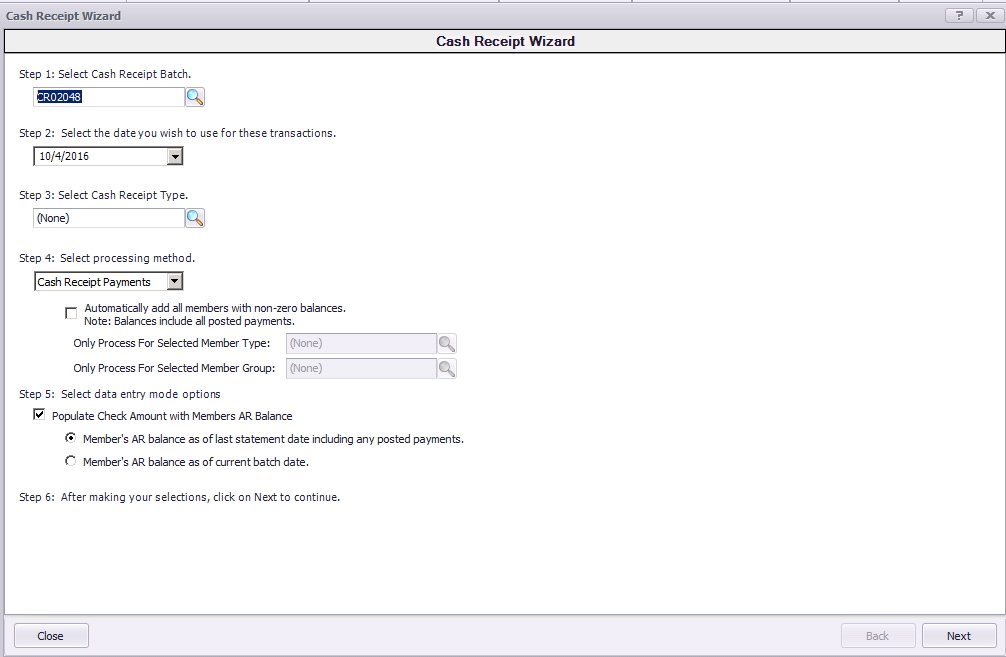
Cash Receipt Wizard
The Cash Receipt Wizard is designed to help simplify the payment entry process. Please see instructions below.
Cash Receipt Wizard - Screen 1 (Payment Specifications Screen)
To enter a new payment, please follow the below steps in sequential order.
Step 1 - Select the Cash Receipt Batch. When creating a new batch, the system will default to the next available batch number.


Step 4 - Select the ACH Payments Processing Method. This option should be selected when utilizing ETS, or Open Edge for ACH processing.
Automatically add all members with non- zero balances that are configured for Auto- Pay - If checked, when the user clicks Next, all members who are configured for Bank Account auto payment (Bank ACH) will populate on the next screen. If this box is checked, the user has the ability to narrow the payment batch down to a certain Member Type or Member Group.

Step 5 - This step is Null for ACH payments, move to Step 6.
Step 6 - Click, Next.

Cash Receipt Wizard - Screen 2 (Payment Entry Screen)
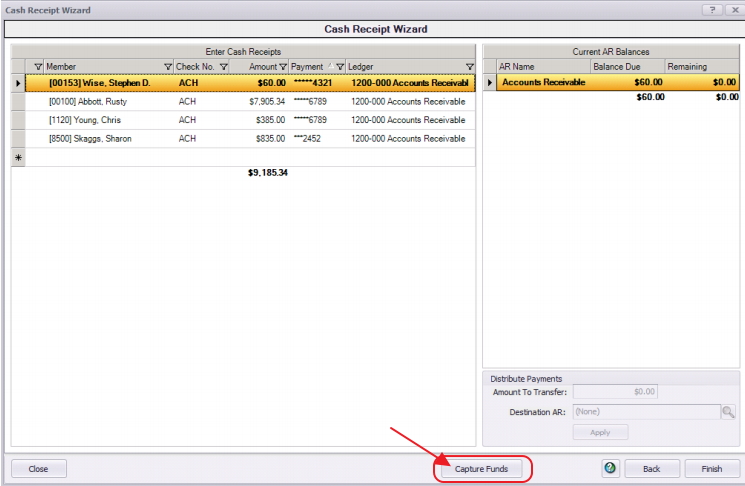
The following Payment Entry screen will appear next based on selections made in Screen 1 of the Wizard. The Payment Entry screen is used to specify the member, payment amount, and the AR account.
If Automatically add all members with non- zero balances that are configured for Auto- Pay was checked in Step 4 of the previous screen, the payment entry screen will list all members in the system who are configured for Bank ACH payment.
The Member(s) will pre-populate, Check number will say ACH for reporting purposes, the payment amount will be equal to the AR balance due of the member, the payment field will populate the bank account on the member’s profile, and the Ledger field will contain the Primary AR Account linked in System Settings.
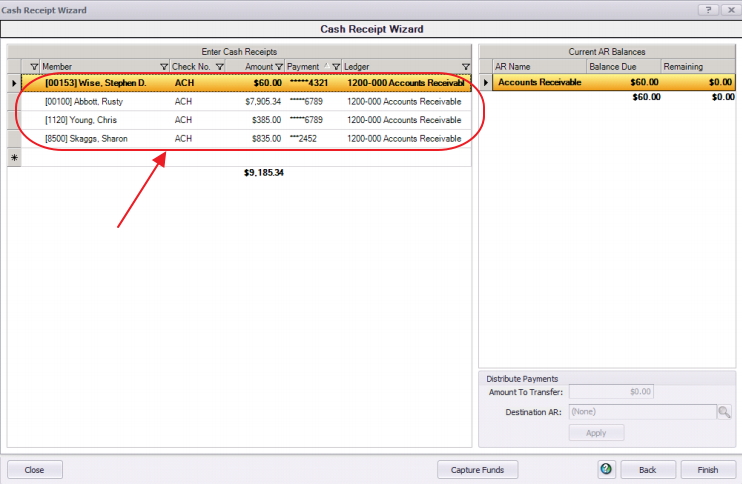
Please verify that all payments in this screen are correct before moving to the next step.
Capture Funds
Once all payments have been verified, the funds for the payments must be captured from the member’s bank account. To capture these funds, select Capture Funds at the bottom of the payment entry screen.
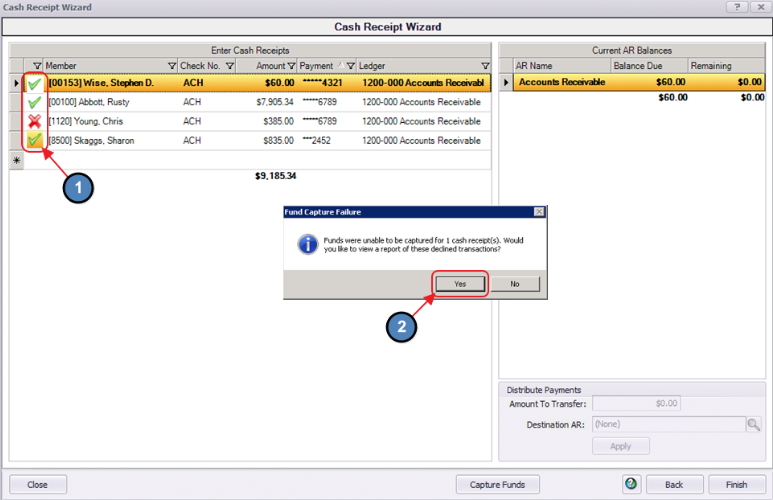
Funds that have been captured successfully will have a gray checkmark to the left of the Member’s name. Funds that have not been captured successfully will have a red X to the left of the Member’s name. Funds that have not been captured successfully will have a red X to the left of the Member’s name. This indicates there was an issue with banking information or available funds.
A message will pop up if there are declined transactions; choose Yes if you want a report of declined payments.
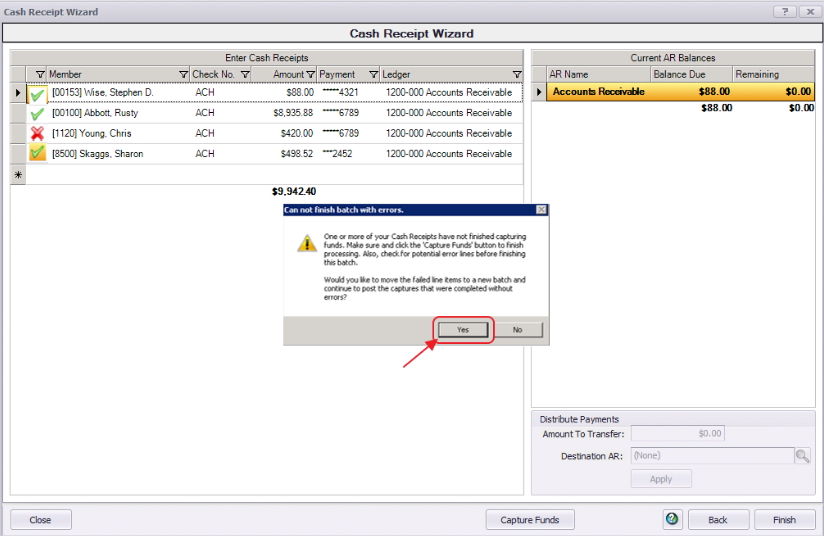
Another message will appear asking if the user wants to move the declined members to a separate batch so they can post the successfully captured transactions.
Select Yes and the system will split the payment transactions to separate batches. All successfully captured transactions will be in one batch and all transactions with errors will be moved to a separate batch.
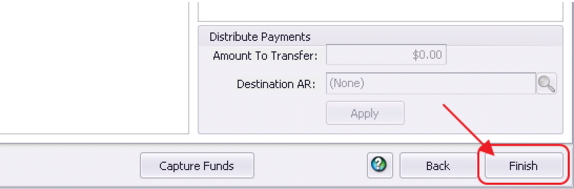
Click Finish.
Batch Exit and Re-Entry Note: To exit batch prior to batch completion, click Close at any time. Batch will automatically be saved, and can be re-opened by selecting Member Payments and choosing the appropriate batch from the lookup list.
Print Deposit Slip
Once Finish has been selected, system prompt “Would you like to print a deposit slip?” will appear.
...
Click No to proceed directly to generating the Payment Batch.
Post the Payment
Payment batch will appear for batch review. Verify the GL posting is correct and select Post Batch.
...
Payments will post to Member accounts as noted in this Member’s Profile.

Reprocessing Failed Captures
...