...
First type the text that will be the link.
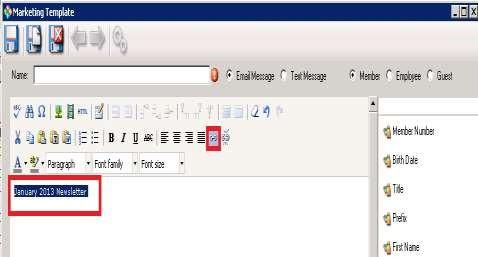
Please Note: Until the text is in the editor and highlighted, the hyperlink icon will remain greyed out.Type text such as “January 2013 Newsletter” in the body of the editor and click the hyperlink icon.
3. Click the browse button in the Insert/Edit Link menu.


4. Click the Browse button to locate the file on your computer.
5. As File Name: Option to name the file something other than the original file name.
6. Click Upload.

7. Once complete, click the “x” to close the upload box and return to the file manager.
8. Select file by placing a checkmark by the file name in the preview, and click insert.
...

9. Insert/Edit box will appear. The Link URL will be populated with the file.
10. Then set the Target to either open in a new window or the same window.
11. Enter the Title of the document.
12. Click Insert. The text is now a hyperlink to the document.

Third Row of Icons

Select Text Color
...
This is one option to upload and attach documents into the email template. Using this feature will display the attachment file name exactly as the filename is when uploaded. If you wish to customize the attachment file name, use the hyperlink function instead. Clicking the Attachment button will display all attachments currently uploaded, then click the attachment name to insert into document.

...
To upload a new attachment:
Click the New button the top right corner, then browse your computer for the file you wish to upload.
Select a category by clicking the looking glass.
Enter a Description of the file (optional).
Set Web Visibility Settings. ‘Anonymous’ will allow the member to open the attachment without logging into the website.
Save and Close
Please Note: Download File allows you to download the file onto a disk and the Document Quick View allows you to preview the document.
...
...

Once the new file is uploaded, it will appear in the list of attachments. Click the file name to insert into the editor as seen below.

Member
This plugin allows you to customize the member’s personal information such as their name, web login information, member number and birthdate. It works similar to a mail merge feature pulling information from the database into the document. Click the member information you wish to include. Example below.

...
Custom Fields
This plug-in pulls in data from ‘custom fields’ in the database.

Member Financial
Use this plugin to include data such as food minimums, current balance due, and past due amounts.

...
System
Use this plugin to include system information such as the club name, phone number and email address.

...
Web Custom Page
If you use the Clubsoft web product, you can use this plugin to link to a custom webpage.
...
If you use the Clubsoft web product, you can link to modules of the website using the various options.

...
Best Practices
Click the Refresh icon to refresh the images in the Image Manager.
Access the File Manager (where you upload files/documents) by clicking on the File Manager icon.
View Mode allows you to toggle between thumbnail view, which displays a preview of the image, and list view, which shows the file name only.
Under Categories, when the Images icon is selected, it will display all images in the Image Manger, Favorites will display only images tagged as Favorites, History will show recent history and Folders will display all created folders in the image manager.
...