...
| Table of Contents | ||||||||
|---|---|---|---|---|---|---|---|---|
|
Overview
As an administrative CRM User, you have access to almost all of the editable settings within your CRM. This includes creating new fields, adjusting the fields visible in a given View/Layout, and editing the values within an existing picklist field, among many other permissions. Use Case(s) Sometimes you may need to adjust the values stored within a picklist field, such as if you add a new lead source. |
Video
For this functionality, we are able to configure the CRM to communicate with Office to the point where “Closed - Won” prospects in CRM can appear in Office in the New Member Wizard, via a new button labelled "Load From CRM". When you press this button in Office from the Add New Member window, a list of all your Closed - Won prospects in CRM will appear for you to choose from. You can then click on a name in the grid and click OK to go through the new member creation process, with some of their essential data already filled in based on the existing CRM data. The fields that are able to be brought over are currently:
At this time we aren't able to adjust the fields that come over, as the settings to write the data to new records in Office are hard coded in. Any additional information you would want to add to a Member record would be able to be added manually, as normal. |
Content
|
|---|
Editing an Existing Field
Your CRM should already include many different fields, containing a variety of different types of data. However, often you may need to edit the list of values available to choose from in a Picklist field, or rename an existing field by changing its label.
Adding a new Field
To begin, you’ll need to first decide what Object your field exists in - that is, what is it that this field helps to describe? The most commonly used Object in CRM is the Contacts Object. All fields in the Contacts Object should be used to directly describe a person, whether they are a Member, Prospective Member, Guest, or other.
In this example, the field we are adjusting is “Beverage Preference”, which will allow us to choose which beverage this Member prefers when they dine. This field would most accurately describe a Contact, so we will find this new field in the Contacts Object.
To edit the field, you’ll first need to access the Admin Dashboard. To do this, first start at your CRM home screen, then hover the mouse over your name in the top right corner, and click the Setup option.
To edit your field from here, you’ll first need to open your Contacts Object for editing. From the left-hand sidebar, click on Options to expand the list and display all of the Objects present in your CRM. Contacts should almost always be the first Object listed. Click Contacts to expand the list further, and then click Fields to view the list of existing Fields for the Contacts Object.
To edit your chosen field, find its name from the list of fields displayed on this screen, and click the Edit button next to it.

From here, you should see the list of Field Properties for this field. At the top of the list is the field’s label, or how it will display when shown in a View or a Layout. Since the field that we selected (Beverage Preference) is a Picklist field, you will also see a list of available options, as well as a field to enter in new options.
To add new options to the list, click inside the text box next to the blue button titled Add Option and type the name of the option that you would like to add.
Once complete, click the Add Option button, and your option will appear in the box above. Repeat this process as needed until all the necessary options have been added.
You can reorder the list by clicking on an option, and then using the Up or Down Arrow buttons to the right of the options box to move that option up or down in the list.
You can remove options by clicking on the option to remove, and clicking on the “X” icon just under the Up/Down Arrows.
There are two more Field settings available before the Save button. Choose whether to sort the options in the order they appear in the listing you just created (default), or to sort all the options alphabetically, regardless of how they were entered.
Finally, choose whether this field should be required. If the field is marked as required, any record that is created or edited in this Object will not save until a value is entered for this field.
It is recommended to only use this for fields that would appear to all types of records within this Object (in our example, the Contacts Object). Therefore, making the Member Number field required would not be recommended, as all Prospects, Guests, Realtors, etc. do not have a Member Number, and you would not be able to save a new Prospect (or similar) record until a Member Number was entered. However, the Primary Email Field may be good to set as required, if you are certain that you will be able to fill this in for each contact that you enter.
...
CRM “Closed - Won” Prospects to Office “New Member Wizard” API Documentation
In CRM, close out a prospect by changing their Opportunity Status from “Open” to “Closed - Won”.

In Office, navigate to the Members screen and click the ‘New’ button to bring up the New Member Wizard. On this popup, a new button will be available, labelled “Load From CRM”.
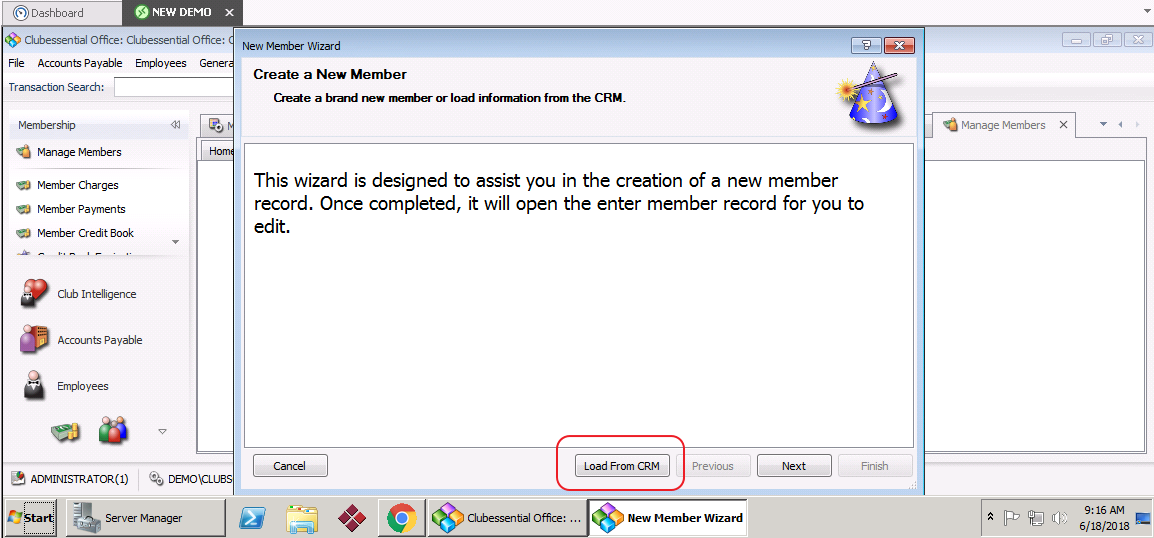
Click this new button, and a list of all your Closed - Won prospects from CRM will appear. Select the name from this list that you’d like to create as a new Member, and click OK to begin the process of creating this Member.

Follow this process as you normally would, and fill in any remaining data for the new Member. Once you save the new Member, the system will write this data back to the existing CRM record, eliminating the need for you to merge the closed prospect and new member records in CRM.
Downloadable Guide
CRM Editing Fields Guide"Closed - Won" Prospects to Office "New Member Wizard" API Documentation