...
Users will log in to the POS and select System tools on the bottom left corner of the main POS screen.

Select the Utilities tab.
.png?version=1&modificationDate=1565009602509&cacheVersion=1&api=v2&width=624)
Select Credit Card.
.png?version=1&modificationDate=1565009601266&cacheVersion=1&api=v2&width=650)
Then Navigate to the CE Payments Device Lookup. For POS Devices that will only be using a single reader, use the Lookup feature to find the corresponding Reader for the Device.
.png?version=1&modificationDate=1565009602093&cacheVersion=1&api=v2&width=450)
Once the device is selected, click Save Configuration and select Yes to the confirmation prompt.
.png?version=1&modificationDate=1565009600811&cacheVersion=1&api=v2&width=650)
Please Note: Once a reader is selected, this will be the only reader that can be used on the device in which you just set up.
...
Users will log in to the POS and select System tools on the bottom left corner of the main POS screen.
.png?version=1&modificationDate=1565009965407&cacheVersion=1&api=v2&width=319)
Select the Utilities tab.
Select Credit Card.
.png?version=1&modificationDate=1565009602282&cacheVersion=1&api=v2&width=575)
For POS Devices that will work as a Roaming Tablet, select Prompt for CE Payments Device.
.png?version=1&modificationDate=1565009601073&cacheVersion=1&api=v2&width=430)
Click Save Configuration and select Yes to the confirmation prompt.
.png?version=1&modificationDate=1565009601894&cacheVersion=1&api=v2&width=675)
When enabled, this setting will prompt the user to select a credit card reader when settling a ticket.
...
Double click the POS Application to launch the Point of Sale.
.png?version=1&modificationDate=1565009600608&cacheVersion=1&api=v2&width=82)
Select the applicable POS Device. (Eg. Gov Bar POS)
.png?version=1&modificationDate=1565009600384&cacheVersion=1&api=v2&width=234)
Enter your POS Pin Code (Consult Club Admin if you do not know your code).
.png?version=1&modificationDate=1565009600175&cacheVersion=1&api=v2&width=228)
Depending on the nature of the POS Station, choose Select Table/New Transaction to start a new ticket.
.png?version=1&modificationDate=1565009599944&cacheVersion=1&api=v2&width=624)
If the POS is an F&B Environment choose any table. If Retail, skip this step.
.png?version=1&modificationDate=1565009599699&cacheVersion=1&api=v2&width=600)
Choose Guest to start a guest ticket.
.png?version=1&modificationDate=1565009599490&cacheVersion=1&api=v2&width=900)
Add any random item the ticket.
.png?version=1&modificationDate=1565009599215&cacheVersion=1&api=v2&width=700)
In the POS ordering screen, select Close Ticket.
.png?version=1&modificationDate=1565009598976&cacheVersion=1&api=v2&width=384)
Select the Credit Card Settlement Type.
.png?version=1&modificationDate=1565009598722&cacheVersion=1&api=v2&width=500)
Select OK (or Print and Done).
.png?version=1&modificationDate=1565009598513&cacheVersion=1&api=v2&width=500)
If this is a Set Device configured to work with only one reader, you will move straight to inserting the Card. If this is a Roaming Tablet, select the Reader that is closest to you and then insert the card.
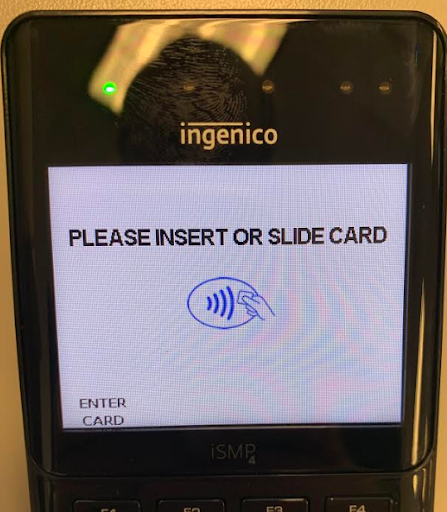
Insert the Card.
.png?version=1&modificationDate=1565009598313&cacheVersion=1&api=v2&width=218)
Additional Gratuity Prompt
...
After the card is processed the ticket is sent back to the main Open Tickets Tab highlighted in yellow.
.png?version=1&modificationDate=1565009598103&cacheVersion=1&api=v2&width=670)
Select the ticket in yellow and the Gratuity Prompt will populate.
.png?version=1&modificationDate=1565009597887&cacheVersion=1&api=v2&width=300)
Enter the additional Gratuity amount (the user can either use the percentages or manually key in the amount).
...
Click OK to complete the transaction.
.png?version=1&modificationDate=1565009597687&cacheVersion=1&api=v2&width=350)
Starting a Tab
Charge Tab is used to store the Credit Card on the ticket at the time the ticket is open as opposed to using the card at the end when closing. Mainly used by clubs who allow non-member visits; this allows them to capture the Credit Card information before the sale.
Select Charge Tab, and then Insert the card.
Please Note: If this is a Set Device configured to work with only one reader, you will move straight to inserting the card. If this is a Roaming Tablet, select the Reader that is closest to you and then insert the card.
.png?version=1&modificationDate=1565009597493&cacheVersion=1&api=v2&width=700)
Proceed to enter the order as normal. When finished, select Close Ticket.
Select the Tab Button (located on the keypad under the Exempt button). The Credit Card information is stored on the ticket so you do not need to insert the card again. Click OK to complete the transaction.
.png?version=1&modificationDate=1565009967674&cacheVersion=1&api=v2&width=250)
Select OK (or Print and Done).
.png?version=1&modificationDate=1565009598513&cacheVersion=1&api=v2&width=420)
Please Note: If you have not inserted the card the Tab button will not appear.
...
Select System Tools on the bottom left corner of the main POS screen.
Navigate to the Closed Tickets tab.
.png?version=1&modificationDate=1565009965949&cacheVersion=1&api=v2&width=624)
Highlight the ticket and select Delete. The user will be prompted, Are you sure you want to delete ticket #XXXXX? Click Yes. This will communicate back to CE Payments and Refund the Ticket.
.png?version=1&modificationDate=1565009603545&cacheVersion=1&api=v2&width=600)
Reopen a Credit Card Ticket
...
Select System Tools on the bottom left corner of the main POS screen.
.png?version=1&modificationDate=1565009604017&cacheVersion=1&api=v2&width=319)
Navigate to the Closed Tickets tab.
Highlight the ticket and select Re-Open. The user will be warned that all Payments made on this ticket will be erased. Click Yes.
Navigate back to the main POS screen, select the reopened ticket, and make the necessary corrections. When finished, select Close Ticket.
.png?version=1&modificationDate=1565009967119&cacheVersion=1&api=v2&width=384)
On the settlement screen, select the Tab button (located on the keypad under the Exempt button). The Credit Card information is stored on the ticket so the user does not need the Credit Card to reclose the ticket. Click OK to reclose the ticket.
.png?version=1&modificationDate=1565009967674&cacheVersion=1&api=v2&width=240)