...
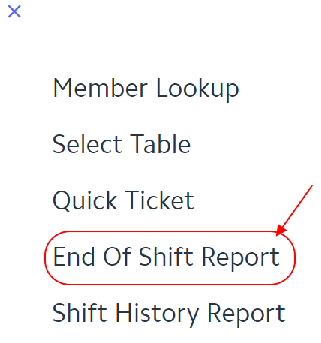
The Fly Out Menu provides users the ability to access additional functionality of the Mobile POS. This includes a Member Lookup (To Access additional information about the Member), End Of Shift Report, Gift Card Balance, and an Item Lookup. Each option is explained below.


Member Lookup
Please follow the instructions below to access additional information about a Member.
- Select Member Lookup from the Fly Out Menu.

2. The Member Grid will populate. Search for and select the applicable Member.

3. Additional information displayed includes Member Name, Member Number, Member Type, Birthdate, Minimum Activity (View Minimum), and Member Groups.
.png?version=1&modificationDate=1566244368503&cacheVersion=1&api=v2&width=350)
4. Select the toggle on the top right to navigate to additional information about any of the Member’s Dependents.

Select Table
Performs the same functionality as Select Table on the Open Tickets Tab.
...
- Select End of Shift Report from the Fly Out Menu.
2. The System will default to Current Day for both the Start and End Dates. This is done because we are assuming the user is running the report for the Current Day, at the End of their Shift. Use the Date Dropdown to run an End of Shift Report from a different day.
Note: Please be sure the Start and End Dates are set to the Same Day. This will tell the System to only pull Sales for the Date selected. To run the report over multiple days, select the applicable date range.
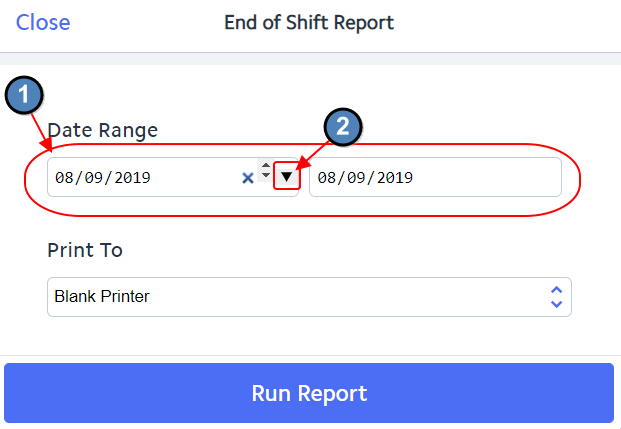
3. Select the Receipt Printer to where the report should be printed. Then choose Run Report.
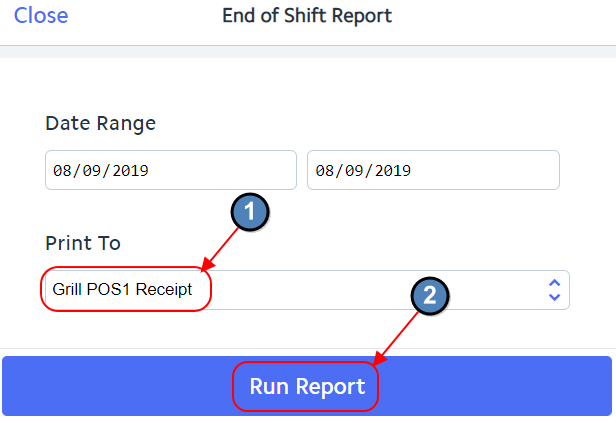
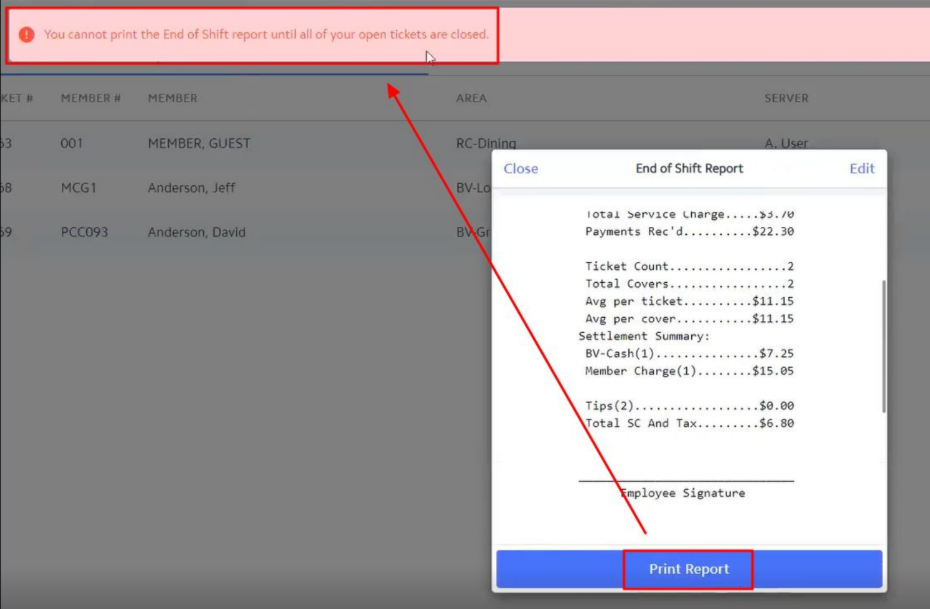
4. A Print Preview will populate. Select Print Report to physically print the End of Shift Report; or select Edit to navigate to the previous step.
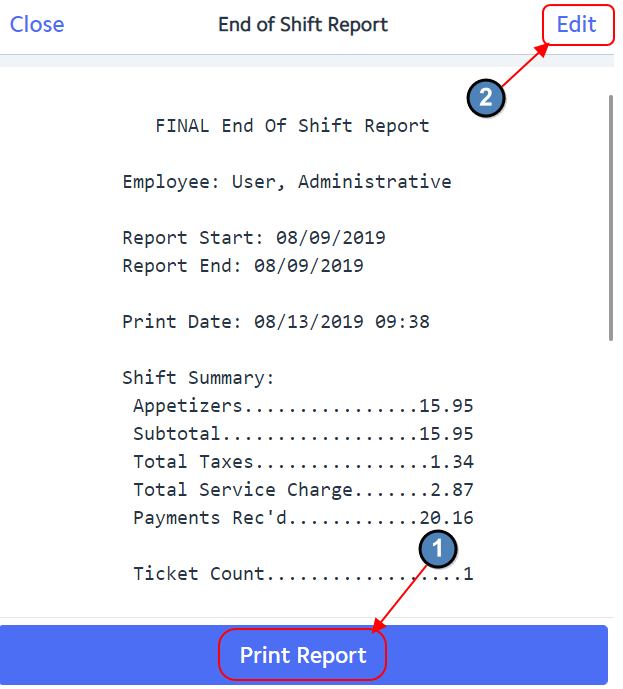
Note: If the user has any Tickets when Print Report is selected, they will receive an error message. Please be sure to Close or Transfer any Open Tickets before running the End of Shift Report.
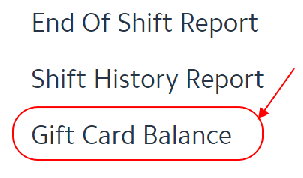
Gift Card Balance
The Gift Card Balance option allows the user to lookup the Balance of a Gift Card, as well as Reassign a Gift Card. Please follow the instructions below for each option.
- Select Gift Card Balance from the Flyout Menu.
2. A grid will populate displaying all Gift Cards in the System. Fields displayed on the grid include Assigned To, Gift Card Number, Issued Amount, and Remaining Balance. Use the Search option to lookup the applicable Gift Card. Touch or click the applicable Gift Card to view additional Details.

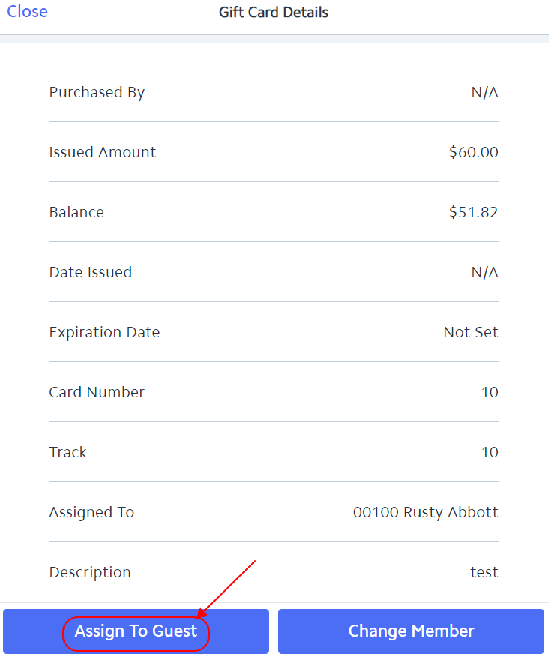
3. Additional Details include Purchased By, Issued Amount, Balance, Date Issued, Expiration Date, Card Number, Track Number, Assigned to, and Description.
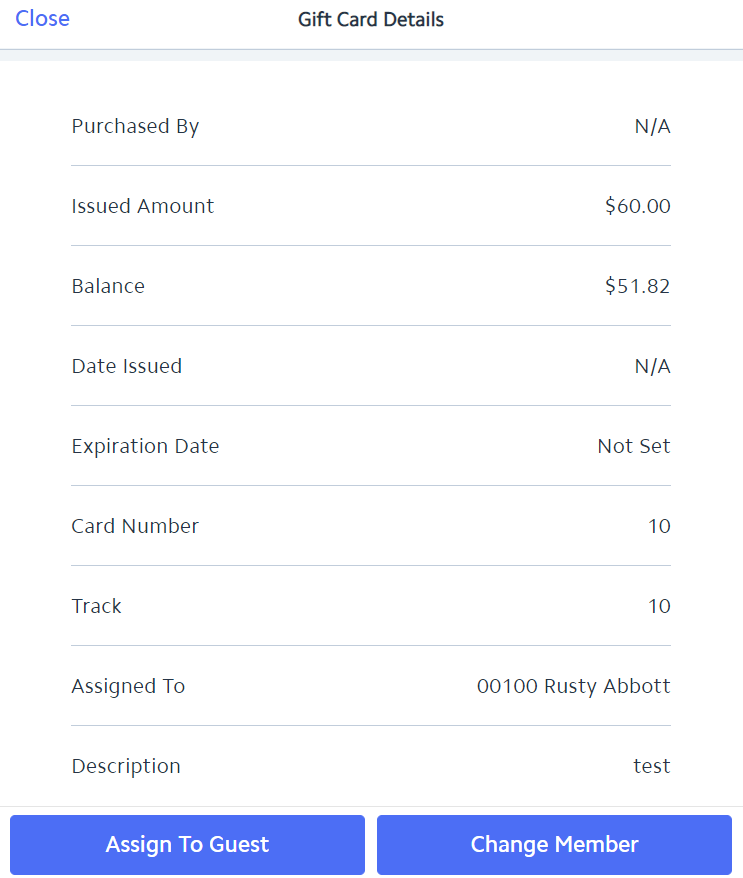
Reassign Gift Card
Please follow instructions below to Reassign a Gift Card to a Guest or a Member.
Guest
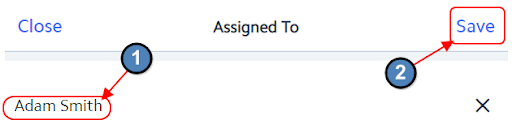
- Select Assign to Guest.
2. The System will prompt the user to enter the Guest’s Name. Click Save when finished.
Member
- Select Change Member.

2. A Member Grid will populate. Search for and select the applicable Member.

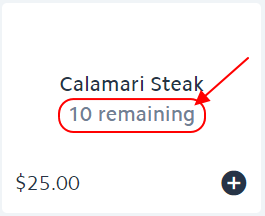
Item Lookup
In the event an Item has a limited Quantity, users have the ability to turn on, as well as update the Countdown for the Item directly in the Mobile POS. Please follow instructions below.
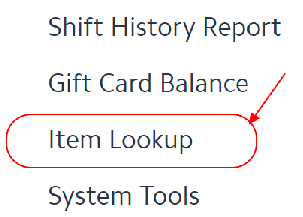
- Select Item Lookup from the Flyout Menu.
2. An Item Grid will populate. Search for and Select the applicable Item.

3. Select Yes to Turn the Countdown On (Or No to Turn the Countdown Off). Enter the applicable Quantity. Select Save when finished.

4. The Countdown will then be added to the Item Lookup Grid, and also be included on the actual POS Button for the Item.