...
Name - Enter the Name of the Area.
Description - Enter an optional Description of the Area.
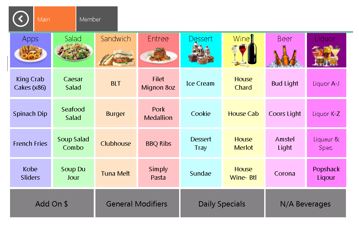
Screen Group - Select the Screen Group/ Menu to be displayed at POS for the Area.
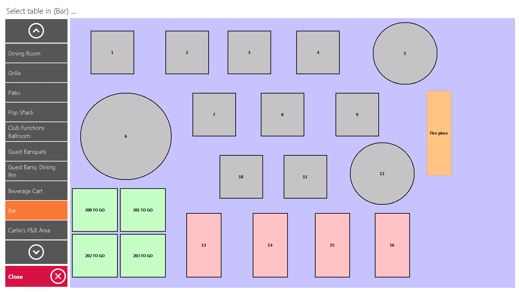
Active Layout - Select the Area Layout to be displayed at the POS for the Area (Select a Table Phase).
Tab Payment - Set this field to the F&B Credit Card Charge Settlement Type. This allows the user to hold a guest’s credit card information on the Tab key in POS.
POS Type - For F&B Areas set this field to FnB.
Department - Select the Department to be associate with this Area (Required).
Area Category - Select the Area Category to be associated with this Area (Required).
Manager - Select the Manager of this Area using the lookup (Optional).
Display Order - Select the Display Order this Area should appear in the Select a Table phase at POS.
Note: For the Display Order to work correctly, each F&B Area must have a sequential Display Order. Otherwise, the Display Order will be alphabetized.
Schedule Overrides - This allows the user to override the Screen Group (Menu) that shows in the POS, during a certain time frame for this Area.
For instance, assume the club has a breakfast buffet on Sunday from 8:00am- 12:00pm and they only want the Buffet Screen Group to show during this time frame.
1 & 2 ) Enter the Start and End Time of the Schedule Override.3) Select the Screen Group to show during this time frame.4) Select Save.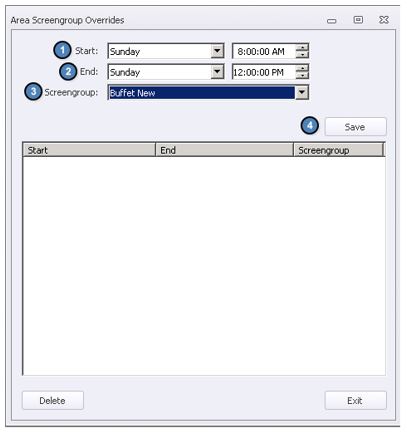
POS Options
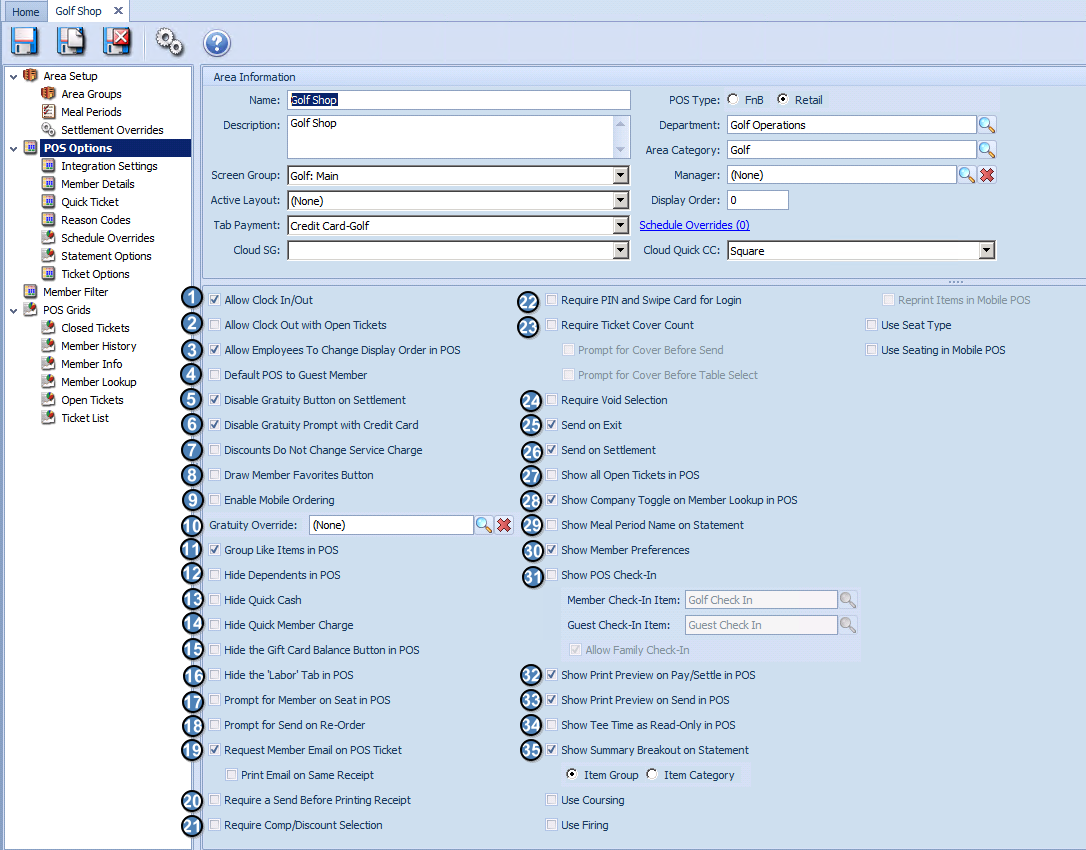
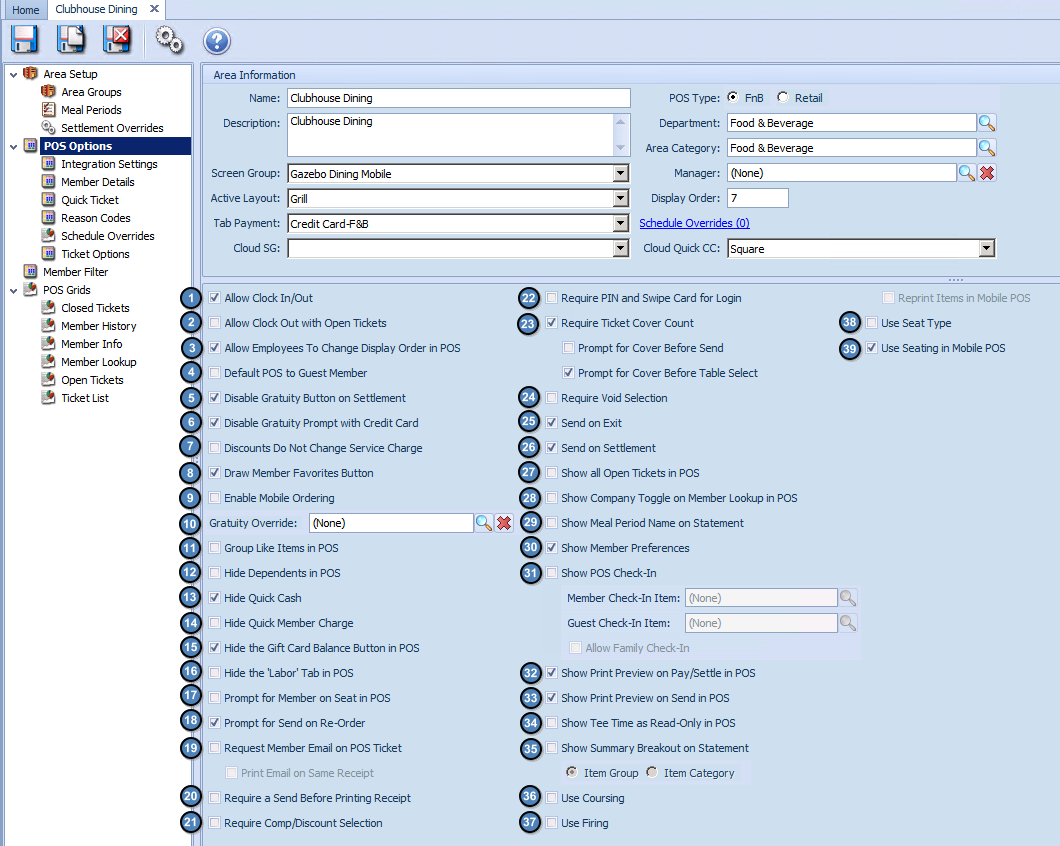
- Allow Clock In/Out - Check if employees will be clocking in/out in this Area. When checked, a clock-out button will appear on the POS.
...
15. Hide the gift card balance button in POS - This will remove the ‘Gift Card Balance’ button in the POS.

16. Hide the ‘Labor’ Tab in POS - If checked, the user will not be able to see the Labor Tab in this Area.
17. Prompt for Member on seat in POS - When using a pivot system and entering an order by seat, the system will prompt for the member on each seat.
...
Please Note: If breaking out by Item Category, navigate to the Statement Options Tab and hit Select All. Any category not checked on this tab with show as ‘Other’ on statements. 
 a
a
36. Use Coursing - If
...
checked, users will be able to categorize items ordered into courses.
37. Use Firing - If checked,
...
users will be able
...
to send different courses to the kitchen separately.
ca. Reprint Items in Mobile POS - If checked, items will print upon sending to the kitchen.
38. Use Seat Type - If checked,
...
users are presented with the option to label Items as being Female or Child as a courtesy to the Member.
...
39. Use Seating in Mobile POS - If checked, this setting will prompt Users to select the appropriate seat in the Mobile POS for the Item being added.
Reason Codes
Standard Messages can be created to help quicken the order entry process at the POS. These messages can either be Special Instructions or Void reasons.
...