| Table of Contents | ||||||||
|---|---|---|---|---|---|---|---|---|
|
Overview
The Employee module allows a Club to manage an Employee’s contact information, job codes, security, areas, and other fields pertinent to the Employee. Within the module, new employees can be added by replicating an existing role at the club, or by adding a new position at the Club. Additionally, employee access and status can be controlled within this module. Use Case A new Manager of Food and Beverage started at the Club today. Management will add the new employee to the database, and will model the employee after the former F&B Manager. Care will be taken to ensure the former F&B Manager (who resigned), can no longer access the database. |
Content
|
|---|
Accessing the Tools
Employee Management tools are located within the Manage Employees section in the Employee Module. To access:
...
First, Middle (Optional), and Last Name
Email and Phone: Once added (on the Communications tab), data will be visible on this tab, and if more than one option is added, the “default” values may be specified.
Salaried Employee designation - If checked, the employee will have no clock in/ out options at the POS.
Photo - If desired, a photo of the Employee may be added. Click Select Photo and browse to the correct file to add.


The bottom section of the tab contains System log-in information and will be covered in the System section of this document.
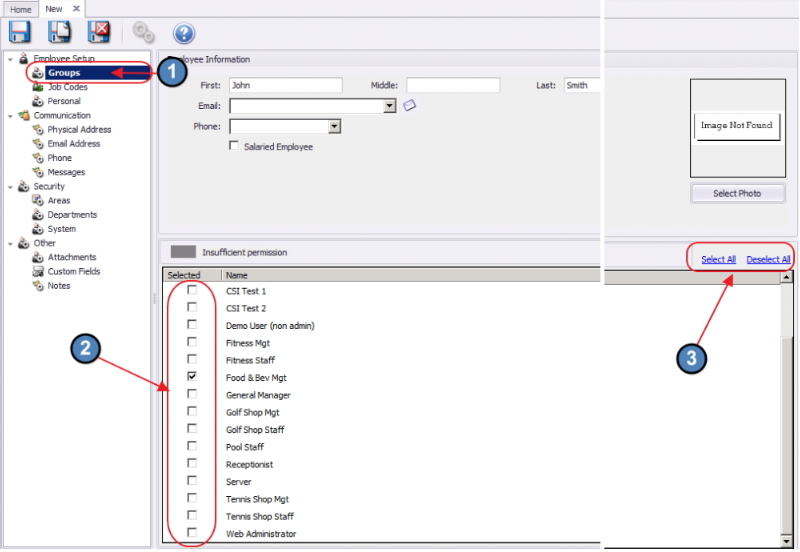
Groups
Select the applicable Employee Groups on this tab. Employee Groups are designed as a shortcut (and best practice) to assign Security, Area, and Departmental rights all at once, rather than on an individual basis. Please see our Employee Groups Manual for more information on their setup. Note the Select All and Deselect All buttons on the right to assist with assignment and unassignment.

Job Codes
Job Codes are used to track hours worked within the timekeeping system. Select the Employee’s applicable Job Codes on this tab. Please see the Job Codes manual for more information on their setup.
...
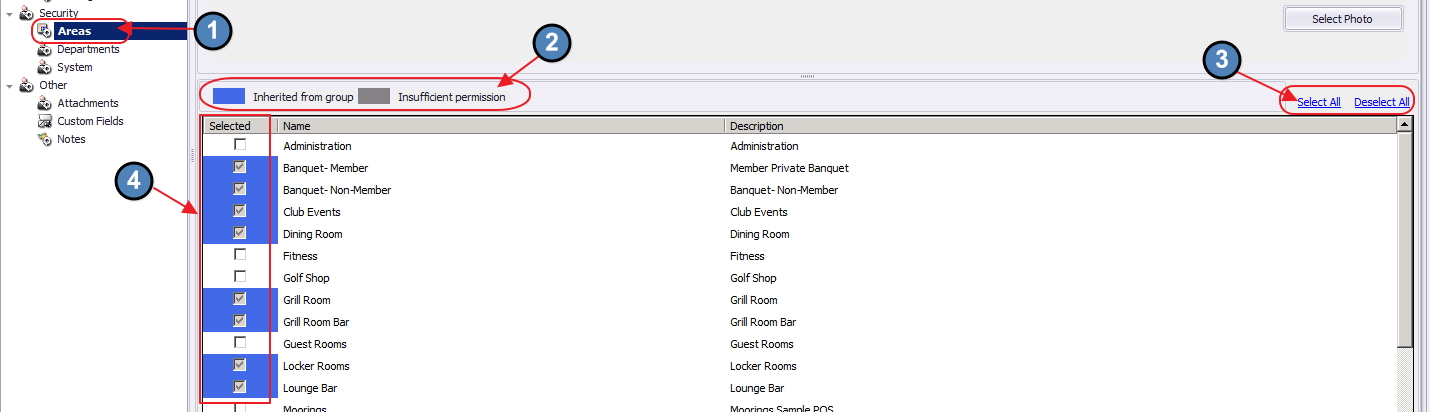
While not recommended, individual permissions may be applied if necessary by selecting the required areas. The Select All, and Deselect All buttons are available to assist with quick assignment and unassignment.
Departments
Employees must have rights to at least one department. The Departments Tab is used for security purposes. More specifically, the Departments tab can be used to hide certain aspects of the system from employees.
...
While not recommended, individual permissions may be applied if necessary by selecting the required Departments. Note that the Select All, and Deselect All buttons are also available to use for quick assignment and unassignment.
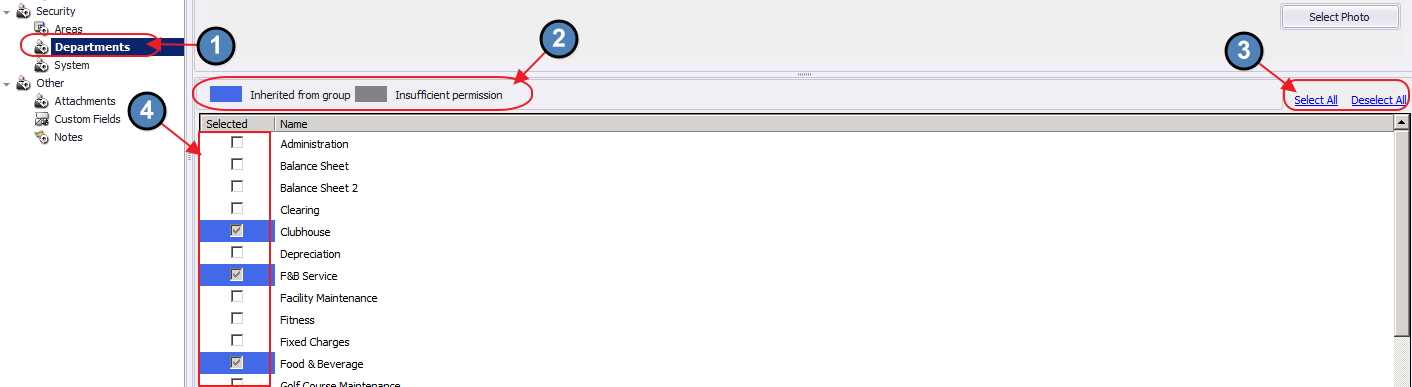
Note: For timekeeping purposes, an employee must have rights to the departments linked within the areas they will be working. For instance, if a server will be working in the Dining Room area, and the Dining Room area is linked to the Food & Beverage department, the server will need to have rights to the Food & Beverage department for timekeeping to report properly. If the employee does not have the correct departmental rights, they will not show on the Employee Hours report.
...
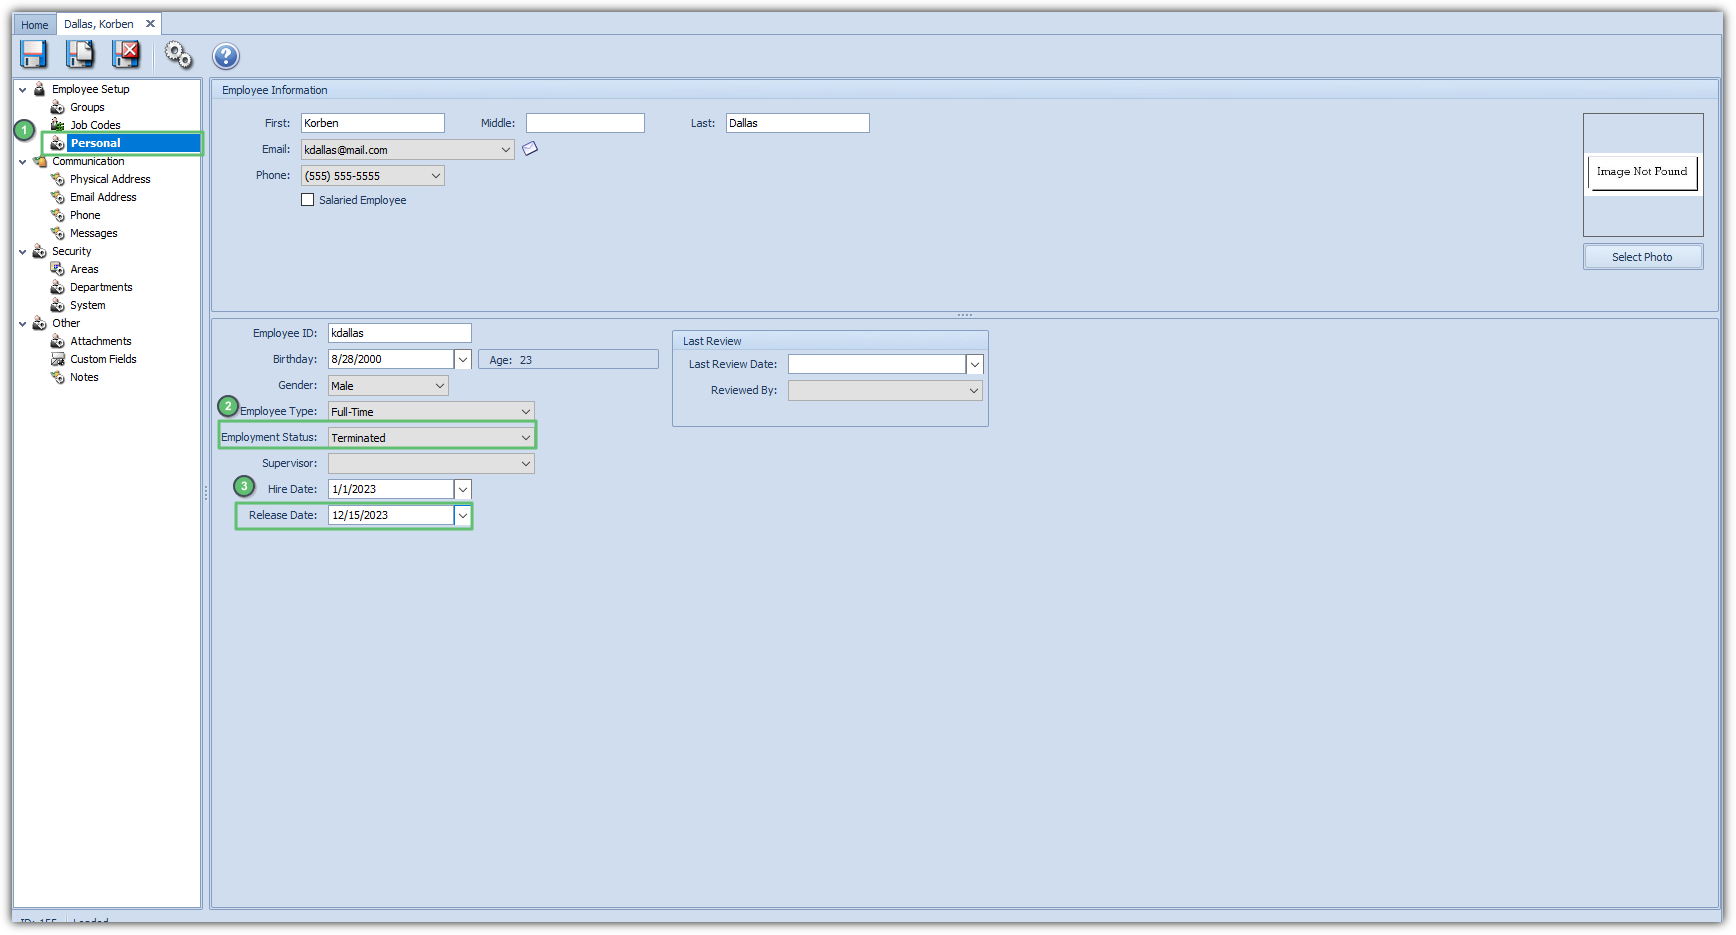
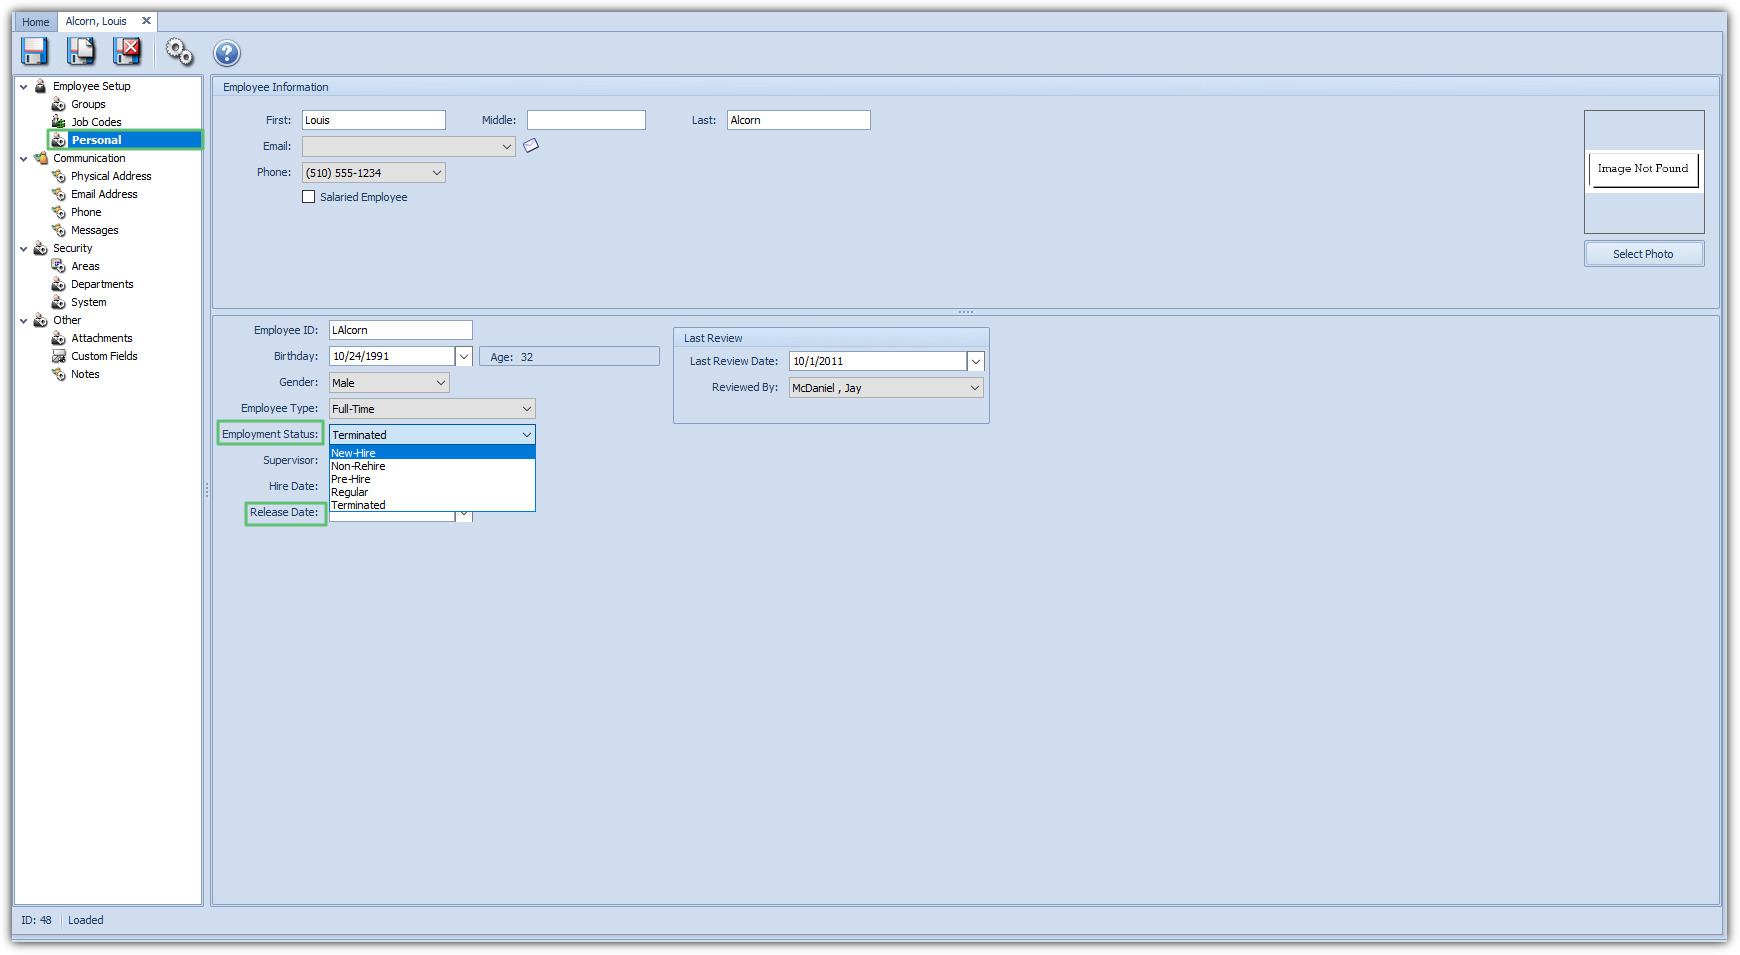
Set Employee Status to Terminated.
Set the Release Date to the date of termination.
...
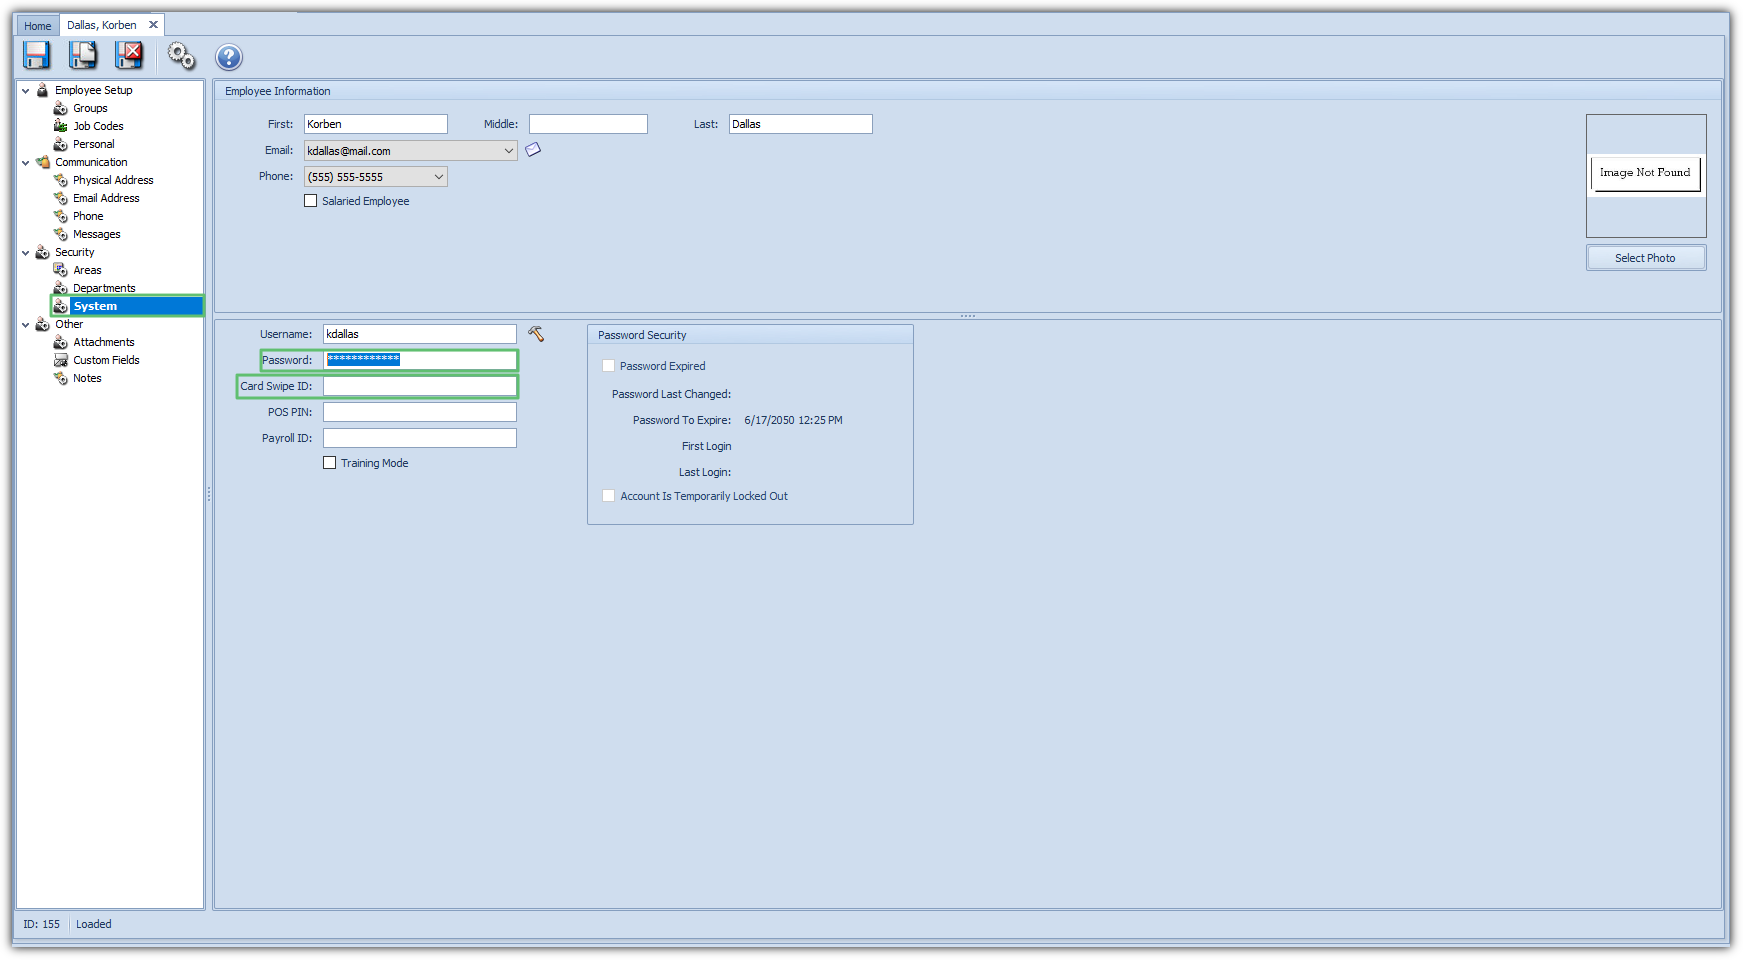
3) Navigate to the System tab, then:
Remove Card Swipe ID to prevent the terminated employee from logging into the POS any longer.
Change Password to prevent employee from accessing CMA any longer and remove their email address. This will stop the employee from resetting their password. (This can be updated to any bogus password).
...
When finished, click Save and Close to save the settings to the Employee Profile.
...
Determining Which Employees Have Been Terminated
...
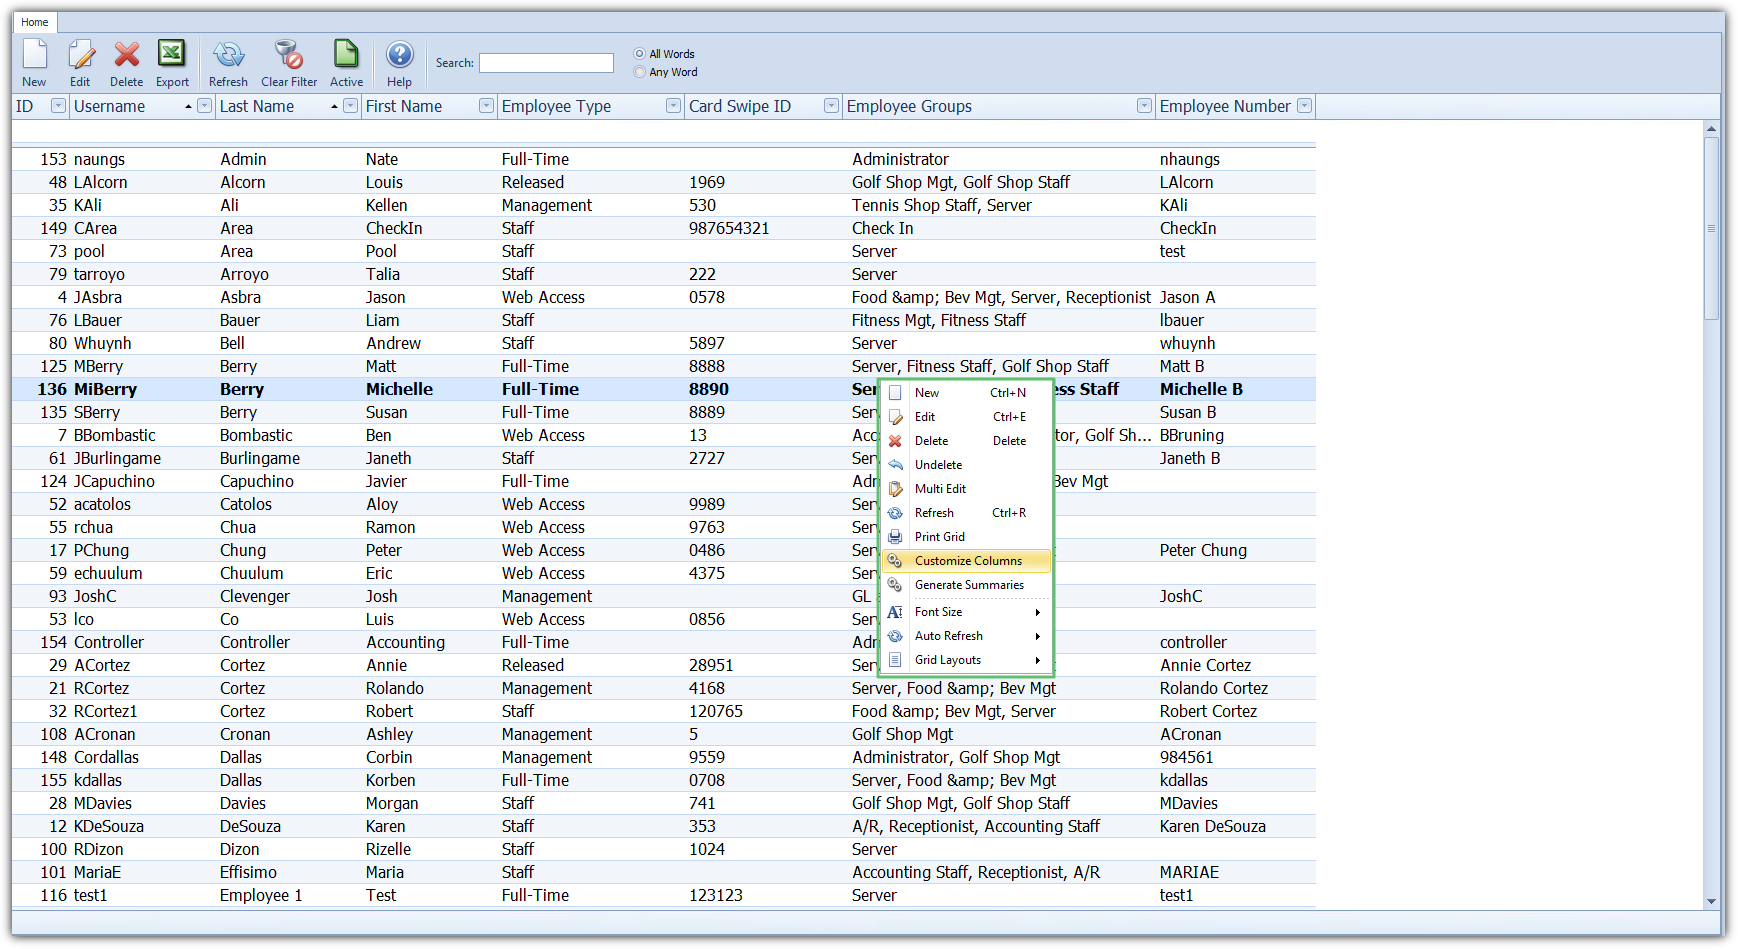
Right-click anywhere on the Grid and choose Customize Columns.
...
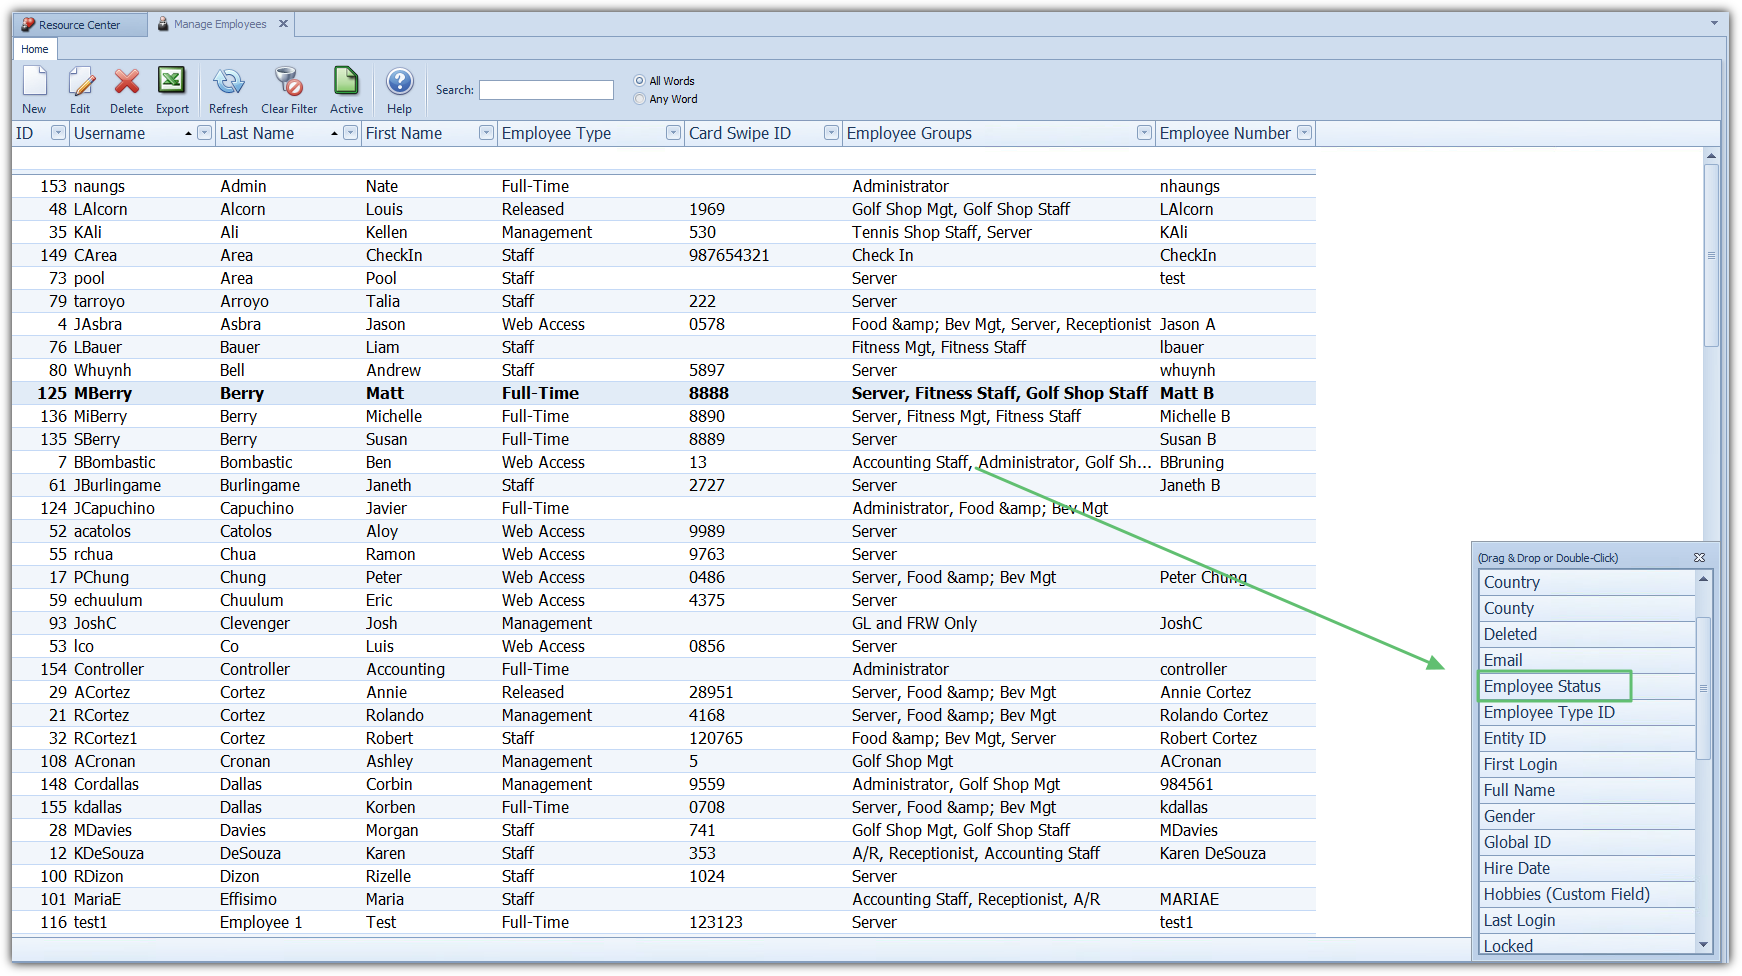
Double-click or drag and drop the Employee Status column to add it to the Grid.
...
Rehiring a Former Employee
...
Change the Employee Status to New Hire or any other status that applies.
Highlight the Release Date and select delete on your keyboard. This will delete out the old Release date.
...
3) Navigate to the System tab, then:
Provide the re-hire with a Card Swipe ID. This will provide them with access to the POS.
Update their Password to reinstate their access to CMA.
...

4) When finished, click Save and Close to save the settings to the Employee Profile.
...