Versions Compared
Key
- This line was added.
- This line was removed.
- Formatting was changed.
...
Content
|
|---|
Table of Contents
| Table of Contents | ||||||
|---|---|---|---|---|---|---|
|
Overview
Custom Fields are designed as a club specific solution to gathering additional information on particular instances of the Office system. Specifically, Custom Fields can be created to gather additional information on Members, Employees, and Vendors. The Office system has the capability to create various types of Custom Fields including Choice, Date, Number, Text, Yes/No, and Group.
Use Case
The Club would like to track the age of their Members when they joined the club.
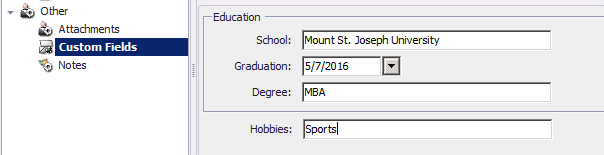
The Club would like to track the Education of a club’s employees.
The Club would like to track the brand of woods a Vendor sells.
Required Permissions
Membership
Add/Edit/Delete Custom Fields
Accessing the Tool
Please see instructions below to access Custom Fields within each available module.
Membership
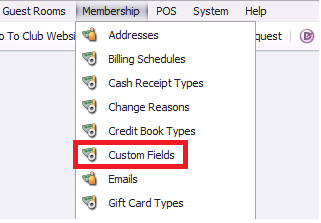
To access Custom Fields specific to Members:
Select Membership across the top toolbar
...
.
...
Choose Custom Fields.
Employees
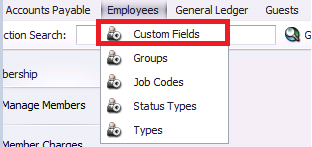
To access Custom Fields specific to Employees:
Select Employees across the top toolbar
...
.
Choose Custom Fields.

...
.
Choose Custom Fields.
...
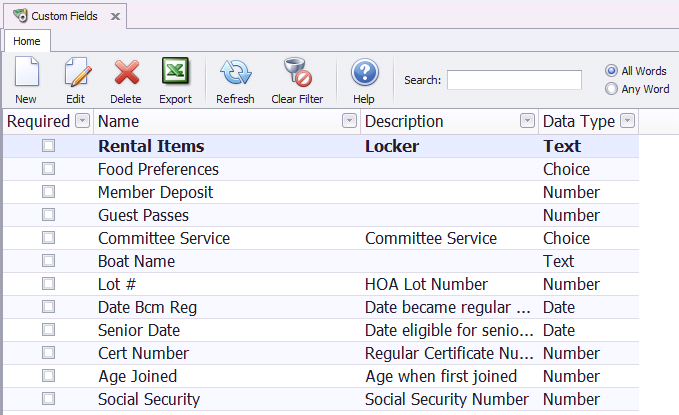
Custom Fields Grid
A Custom Fields Grid will launch, specific to the selected module, when either of these options are selected. These Grids can be filtered, and exported to excel in the same manner as any Grid within the Office system.

...
Custom Fields Categories
Please Note: Selecting a Custom Fields Category is required during the setup of a Custom Field.
This allows the user to classify their Custom Fields for easy reporting.
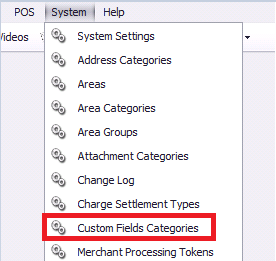
To create a Custom Fields Category:
...
Navigate to System across the top toolbar and select Custom Fields Categories.
...
...
Then, perform either of the following to launch the Custom Fields Categories setup screen:
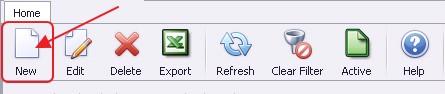
Click the New icon on the toolbar.

...
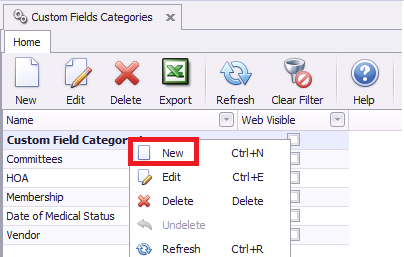
Right Click anywhere on the Custom Fields Categories Grid and select New.
...
...
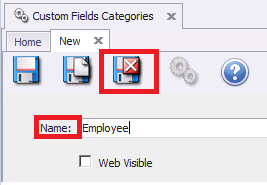
Give the new Custom Fields Category a name and Save & Close. Web Visibility is only applicable to clients still using CSWeb.

...
Create a New Custom Field
To create a new Custom Field:
...
Navigate to the corresponding Custom
...
Fields Grid, specific to the module the user is entering the new Custom Field.
...
Then, perform either of the following to launch the Custom Fields setup screen:
Click the New icon on the toolbar.
...
Right Click anywhere on the Custom Fields Grid and select New.
...
...
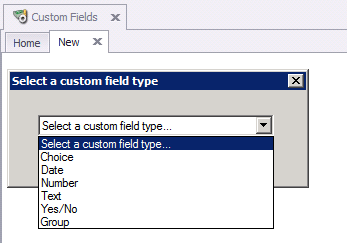
The Custom Fields setup screen will launch. Select the Type of Custom Field that is being entered.

Custom Fields Types
Please see below instructions on each Type of Custom Field.
Choice
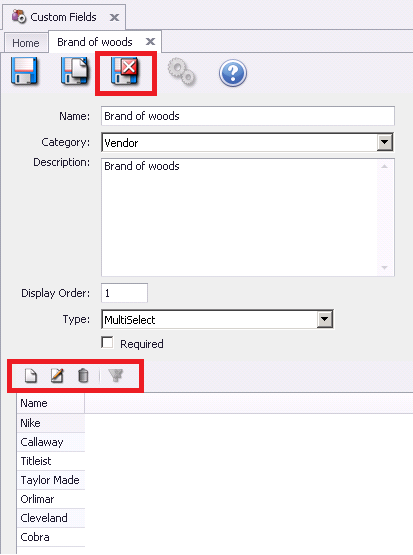
A Choice Custom Field creates a selection option within the specific instance of the Office system the Custom Field is created.
Name - label that will display for the Custom Field.
Category - select the Custom
...
Fields Category.
Description - additional information about the Custom Field.
Display Order - used to put the Custom Field in order on the Custom Field screen within the specific module the Custom Field was created.
Type - used to determine if the field will accept more than one selection.
MultiSelect- more than one can be selected. When selecting multiple instances, please be sure to hold CTRL on the keyboard.
SingleSelect- only one can be selected.
...
Required - will make the Custom Field a required field when entering a new member.
Add Selections - the selection options are added and edited using the New, Edit and Delete icons at the bottom of the screen.
Be sure to Save & Close the Custom Field when complete.

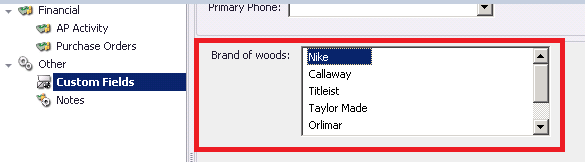
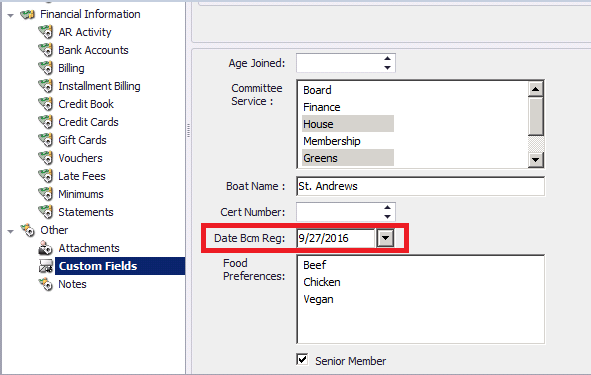
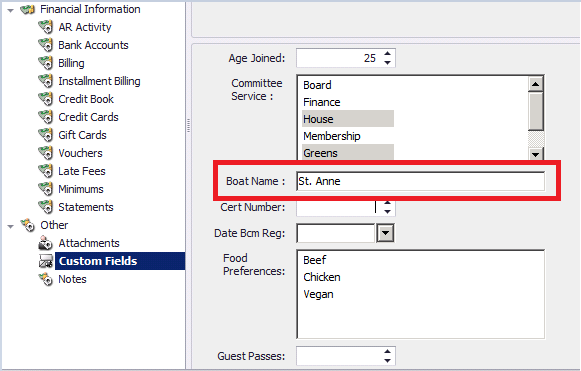
The new Custom Field will display on the Custom Field Tab within the specific module the Custom Field was created.

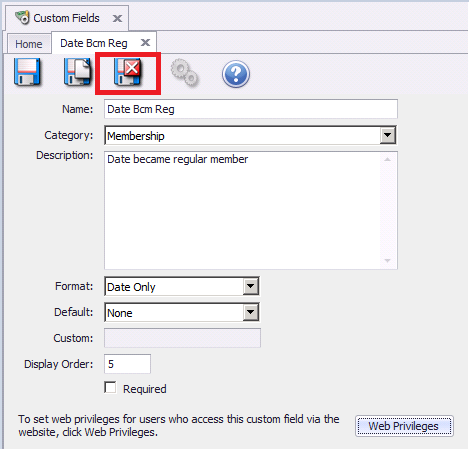
Date
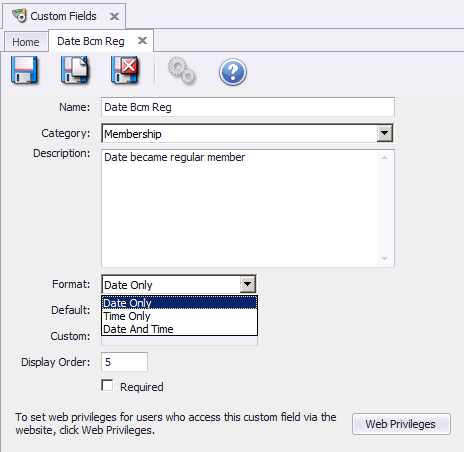
Date Custom Fields are used to store additional information in a date format.
Name - label that will display for the Custom Field.
Category - select the Custom Fields Category.
Description - additional information about the Custom Field.
Format - used to set the specific format for the Custom Field.
Date Only - will only accept date entry
Time Only - will only accept time entry
Date and Time - will accept date and time entry

...
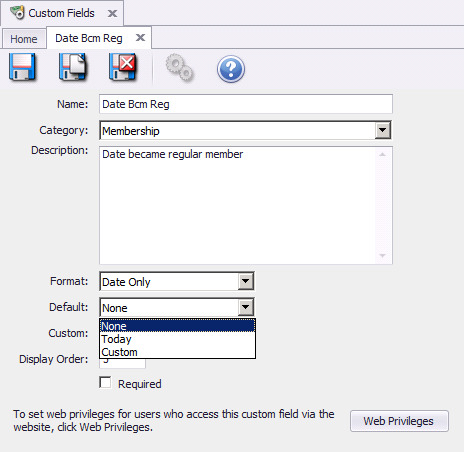
- used to auto fill the Custom Field, but can be overwritten.

...
Today - new vendor will default to creation day for this field.
...
Custom - will default with entry in Custom field below.
Custom - When default is set to Custom, set the custom date to be entered. Date format is month, day, year (XX/XX/XXXX).
Display Order - used to put Custom Fields in order on the Custom Field screen within the specific module the Custom Field was created.
Required - makes the Custom Field a required field when entering a new member.
Web Privileges - Only applicable if client still uses CSWeb.
Be sure to Save & Close the Custom Field when complete.
...
The new Custom Field will display on the Custom Field Tab within the specific module the Custom Field was created.
...
Number
Number Custom Fields are used to store additional numeric data.
Name - label that will display for the Custom Field.
Category - select the Custom Fields Category.
Description - additional information about the Custom Field.
Display Order - used to put Custom Fields in order on the Custom Field screen within the specific module the Custom Field was created.
Max - maximum value, example: entry of 150 means that the field will only accept an entry of 150 or lower
Min - minimum value, example: entry of 1 means that the field will only accept an entry of 1 or higher
Decimals - number of decimal places that can be entered for the numeric value. Must be between 0 and 10.
Default - used to auto fill the Custom Field, but can be overwritten.
Required - will make the Custom Field a required field when entering a new member.
Web Privileges - Only applicable if client still uses CSWeb.
Be sure
...
to Save &
...
Close the Custom Field when complete.
...
The new Custom Field will display on the Custom Field Tab within the specific module the Custom Field was created.

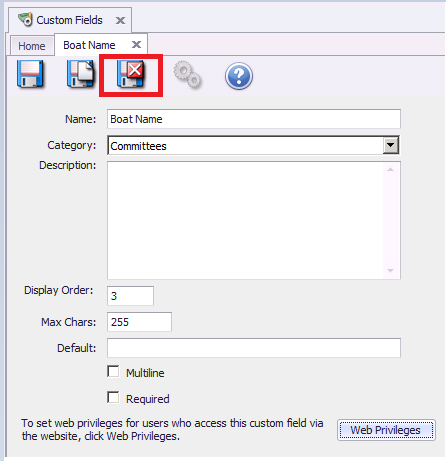
Text
Text Custom Fields are used to store additional information in simple text format.
Name - label that will display for the Custom Field.
Category - select the Custom Fields Category.
Description - additional information about the Custom Field.
Display Order - used to put Custom Fields in order on the Custom Field screen within the specific module the Custom Field was created.
MaxChars - limits the number of characters that can be used in the Custom Field
Default - used to auto fill the Custom Field, but can be overwritten.
Multiline - used to allow multiple lines for entry.
Required - will make the Custom Field a required field when entering a new member.
Web Privileges - Only applicable if client still uses CSWeb.
Be sure to Save & Close the Custom Field when complete.

The new Custom Field will display on the Custom Field Tab within the specific module the Custom Field was created.

Yes/No
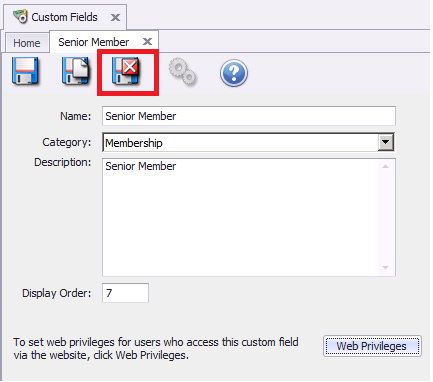
Used for storing Yes or No information. Creates a checkbox for the user to check for yes or leave unchecked for no.
Name - label that will display for the Custom Field.
Category - select the Custom Fields Category.
Description - additional information about the Custom Field.
Display Order - used to put Custom Fields in order on the Custom Field screen within the specific module the Custom Field was created.
Default - used to auto fill the Custom Field, but can be overwritten.
Web Privileges - Only applicable if client still uses CSWeb.
Be sure to Save & Close the Custom Field when complete.
...
The new Custom Field will display on the Custom Field Tab within the specific module the Custom Field was created.
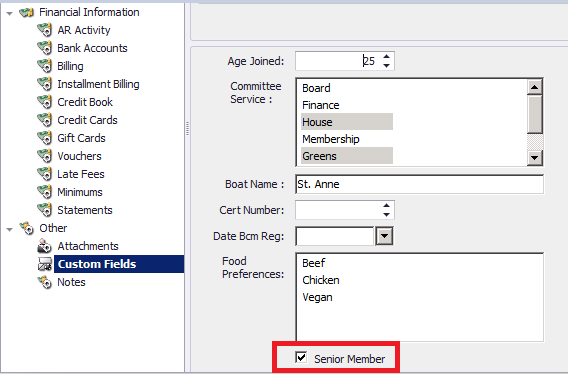

...
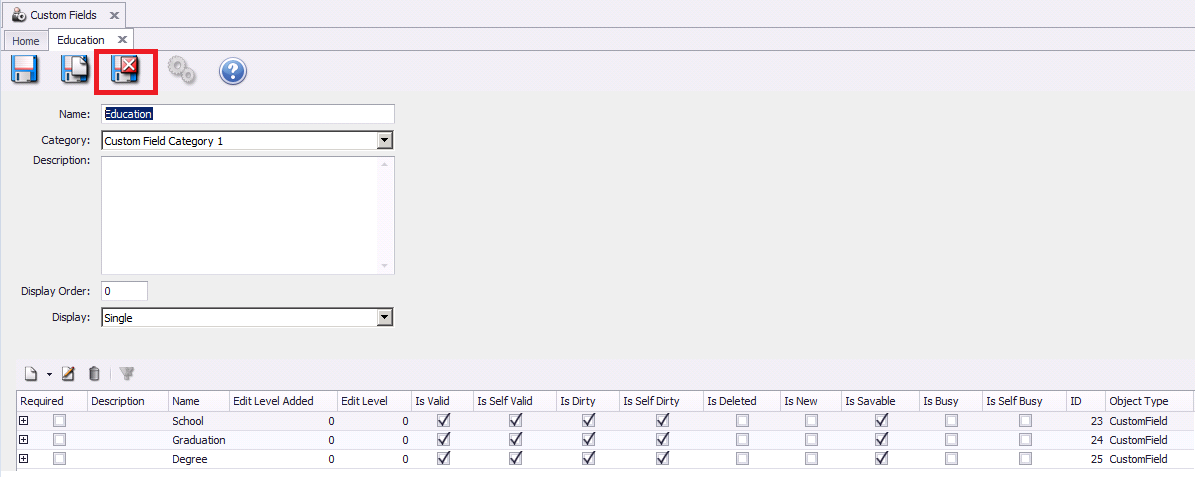
This Type is used to group several types of Custom Fields into one section within the specific module the Custom Field is entered.
Name - label that will display for the Custom Field.
Category - select the Custom Fields Category.
Description - additional information about the Custom Field.
Display Order - used to put Custom Fields in order on the Custom Field screen within the specific module the Custom Field was created.
Group Type - used to determine if only one group can be added per instance or if more than one group can be added
Single - only one group of these Custom Fields will be in the specific module the Custom Field is entered.
Multiple - initially one group will display in the specific module the Custom Field is entered, but an Add button will be available to add as many as needed to keep all of the information for that particular instance.
Required - will make the Custom Field a required field when entering a new member.
Add Selections - the selection options are added and edited using the New, Edit and Delete icons at the bottom of the screen.
To add a new selection:
Click New with the Down Arrow
Select the Custom Field Type
Fill in the entry screen based on the information provided on the different types above.
Save and Close
...
Web Privileges -
...
Only applicable if client still uses CSWeb.
Be sure to Save & Close the Custom Field when complete.
...
The new Custom Field will display on the Custom Field Tab within the specific module the Custom Field was created.

Custom Fields Reporting
Reporting on Custom Fields is most efficient when using Grids. Once a Custom Field is created, the Custom Field becomes an available column option within the specific module the
...
Custom Field is created.
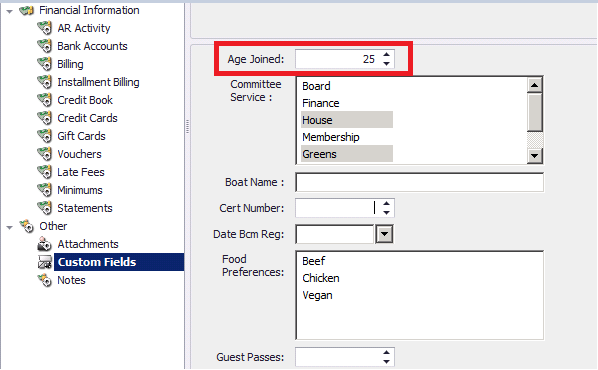
For example, assume a club created a Membership Custom Field titled,
...
Age Joined. The primary goal of this Custom Field is to track the age of their members when they joined the club.
To create a report displaying this information:
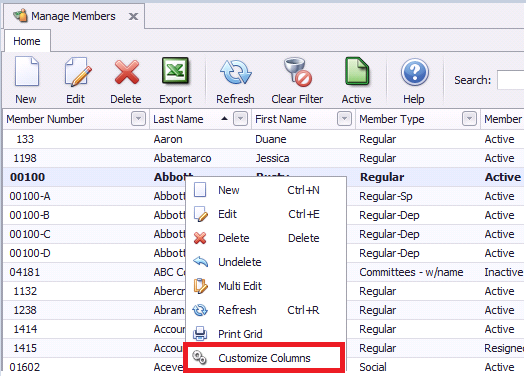
Navigate to the Mange Members Grid.
Right click on the grid and select Customize Columns.

...
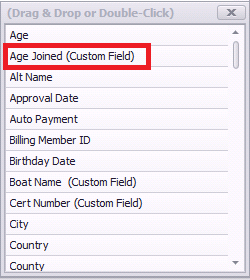
The newly added Custom Field is now an available column option. Double click or drag and drop the column.
...
...
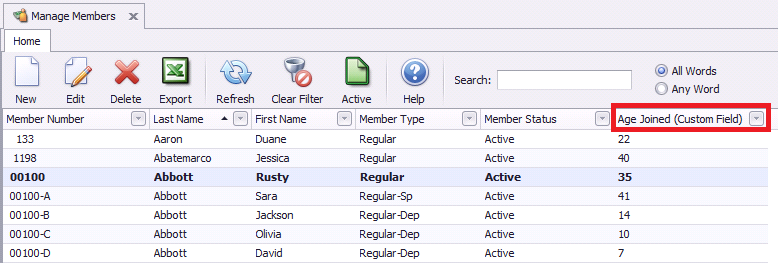
The column is now on the grid and can be filtered and exported to Excel the same as any other column.
...
Best Practices
Make sure to always save and close when finished editing the custom field.
It is required to select a Custom Fields Category during the setup of a Custom Field.
FAQs
...
 Image Added