Versions Compared
Key
- This line was added.
- This line was removed.
- Formatting was changed.
| Table of Contents | ||||||||||
|---|---|---|---|---|---|---|---|---|---|---|
|
Overview
...
Content
|
|---|
Navigation
Table of Contents
| Table of Contents | ||||||
|---|---|---|---|---|---|---|
|
Overview
Employee Groups are designed as a shortcut (and best practice) to assign Security, Area, and Departmental rights all at once, rather than on an individual basis. Settings and security are assigned to the Group, and then Employees are added to the Group, to help with consistency of application as well as increased efficiency in Employee maintenance.
Use Case
Next month, a Club will be opening a Spa due to Membership demand. There will be specialized employees working within the Spa, and therefore a new Employee Group called Spa, will need to be established. Security will be assigned to the Group, and all Spa Specialists will become Employees of the Spa Group to ensure security and settings are applied consistently and efficiently.
Required Permissions
Employees Module
...
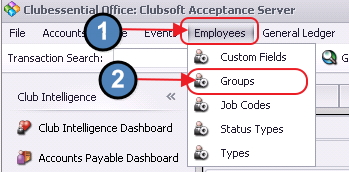 Image Removed
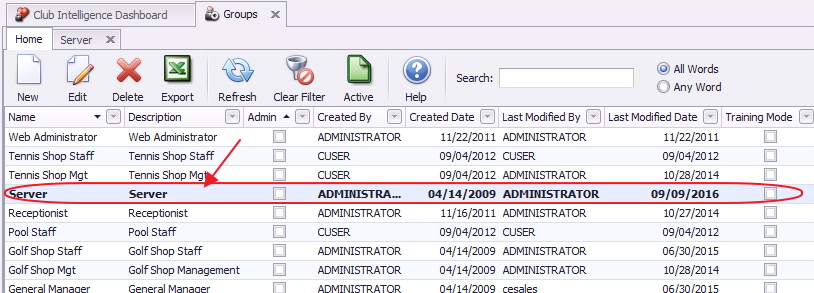
The Employee Groups Grid will launch.
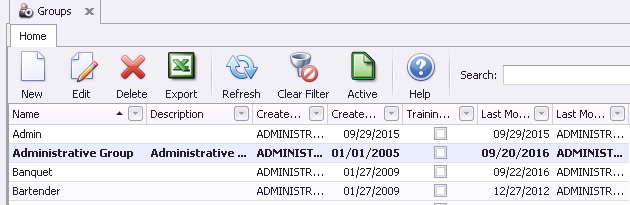 Image Removed
The primary functions associated with managing Employee Groups are embedded in the tabs of the Group setup, which can be accessed by double-clicking on an existing Group, or clicking the New button.
 Image Removed
Group Setup - Tab
...
Overview
In this section, we will review the various tabs within an Employee Group.
General Information
...
Enter the Name and Description (optional) of the Employee Group.
...
Display Recipe Button at POS Terminal - If checked, the employees within the group will be able to view Recipes in the POS system.
...
Administrative Group - If checked, employees within this group will have access to all Roles/Security rights.
...
Training Mode - If checked, any POS charges completed by an employee within the group, will be put into a test charge batch. The system will not allow this batch to be posted to prevent skewed financials.
...
...
Areas
The Areas Tab contains which areas the Employee can access in the POS, as well as the reporting module.
...
For Employee Groups to see specific items within the Items module, they will need rights to the Areas linked to the corresponding Item Categories. This is most often used to prevent F&B employees from seeing Retail items and vice versa.
Groups will have access to Areas designated in the Selected column. Also note, the Select All, and Deselect All buttons are available to assist with quick assignment and unassignment. For example, if the Group should have access to all areas, click Select All to quickly assign access to all areas.
...
...
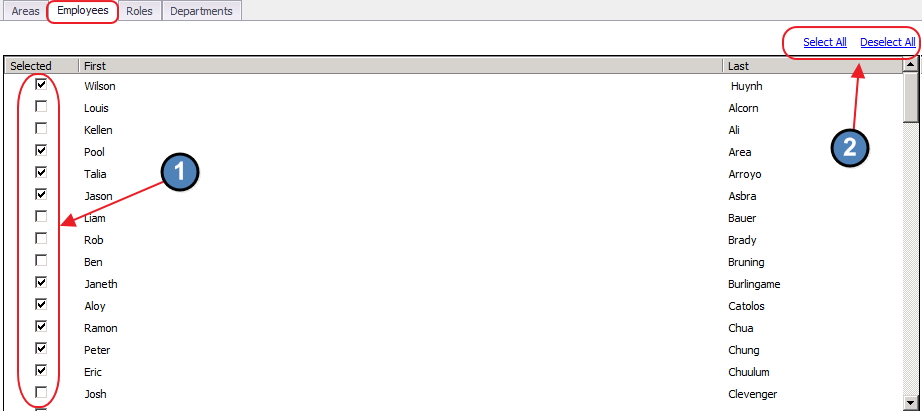
Employees
The Employees tab displays the employees within a particular group.
...
Although it is recommended to add/remove employees within the individual employee profile, this can also be done here by simply checking or unchecking the flag within the Selected column. Also note, the Select All, and Deselect All buttons are available to assist with quick assignment and
...
un-assignment.
Roles/Security
...
Rights
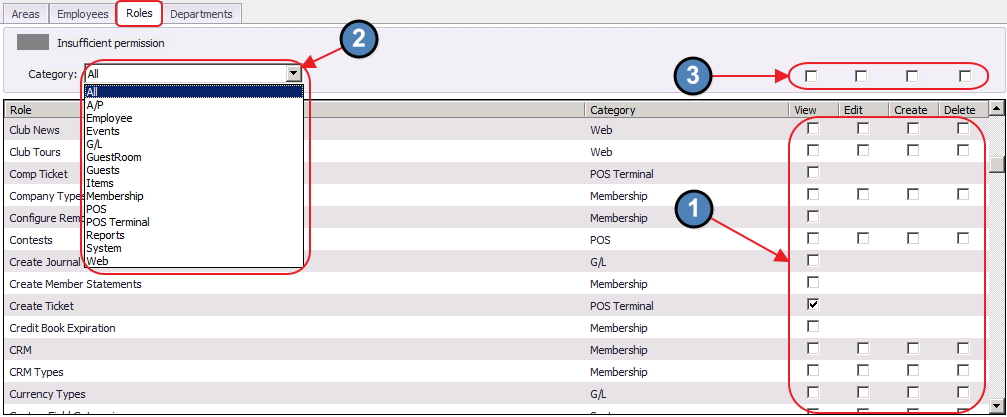
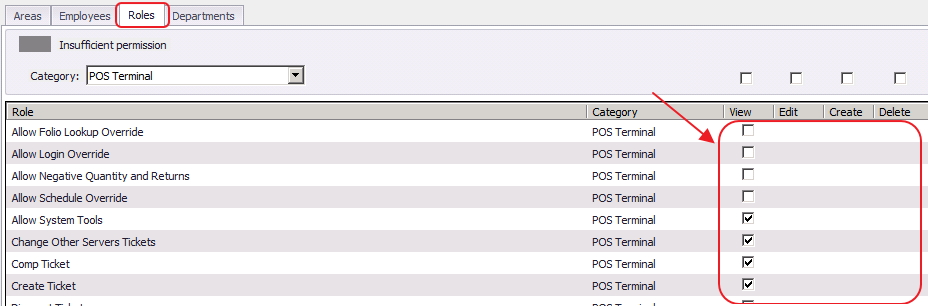
The Roles tab contains the security matrix (roles and modules) as assignable to the Employee.
...
...
manual here. Security can be assigned by placing a check in the grid. Additionally, security Categories can be filtered for ease of reference or review. Also note check boxes above the grid can be utilized for easy assignment (check), or un-assignment (uncheck) of entire column.
...
Most security rights, will have four permission levels with a corresponding check box. Check all permission levels that apply for each security feature. The permission levels include:
View- User will have a view only mode of the security feature.
Edit- User will be able to edit existing instances of the security feature.
Create- User will be able to create new instances of the security feature.
...
Delete- User will be able to delete existing instances of the security feature.
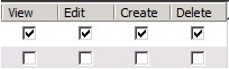 Image Removed
Note: If there is not a check-box for the Edit, Create, or Delete permission levels, simply check the View permission level, and the employee will have full access to the security feature.
...
...
Departments
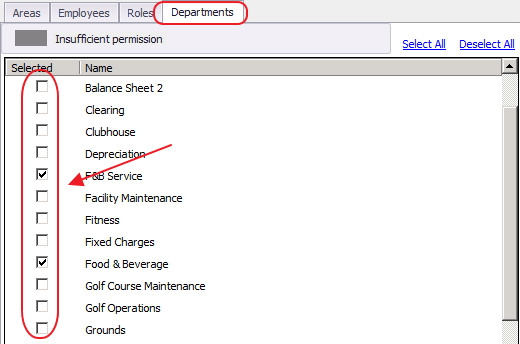
Groups must have rights to at least one department. The Departments tab is used for department security purposes. More specifically, the Departments tab can be used to hide certain aspects of the system from the Group (and respective employees of the Group). Please see examples below:
Supervisors - In the Employees module, supervisors will only be able to see employees in departments to which they have been granted access.
GL Accounts - To see certain GL accounts, employees must have rights to the department(s) flagged within the GL account.
Vendors - To see certain vendors, employees must have rights to the department(s) flagged within the vendor profile.
Companies - With the new multi-company capabilities, to see anything associated with a specific company, the Group will need rights to a department that is linked to that company.
Members/Member
...
Types - With the new multi-company capabilities, Member Types are linked to a specific company. To see any Members or Member Types associated with a specific company, the employee must have rights to a department linked to that company.
Apply departmental permissions by checking the appropriate boxes in the Selected column. Note that the Select All, and Deselect All buttons are also available to use for quick assignment and
...
un-assignment. For example, if Employee should have access to all Departments, choose Select All to quickly assign.
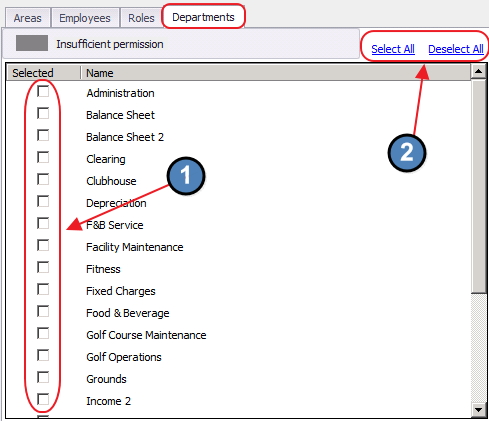 Image Removed
For timekeeping purposes, employees must have rights to the departments linked within the areas they will be working. For instance, if the Servers will be working in the Dining Room area, and the Dining Room area is linked to the Food & Beverage department, the Servers must have rights to the Food & Beverage department, for timekeeping to report properly. If the employees do not have the correct departmental rights, they will not show on the Employee Hours report.
Most Commonly Used Actions - Group
...
Mgmt
Create New Employee Group for an Existing
...
Position
If a new Employee Group will perform similar functions as an already existing Employee Group, best practice is to copy the existing Employee Group’s setup.
...
For instance, let’s assume a club is adding a new position titled Lead Server, and this position will have a few additional Security rights in addition to their typical Server roles. Best practice is to copy the setup of the already existing Server Employee Group, and then add the additional security rights to the new group. Not only will this save a great deal of time, but will also ensure that no information is lost in translation from the existing Server security rights.
To copy an existing Group,
...
Navigate to the Employee Groups Grid and double-click on the Group to copy from, to load the existing Group setup screen.
 Image Removed
...
Select the Save & New icon.
...
...
The user will be prompted to select the relevant fields to copy. Be sure to uncheck
...
Employees to avoid adding unnecessary employees to the group. Then, click OK. Applicable fields include:
Areas
Roles
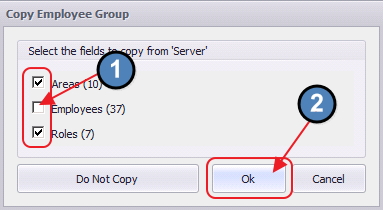 Image Removed
...
Enter all General Information. Please see the General Information section of this document for further instructions.
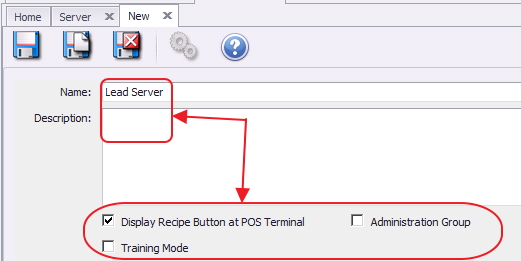 Image Removed
...
Verify that all information was successfully copied to the Areas and Roles tabs.
...
...
Edit Security rights on the Roles tab as necessary to account for increase/decrease in rights.
...
...
Navigate to the Departments tab and add the necessary departments. Please see the Departments section of this document for further instructions.
...
 Image Removed
...
...
Lastly, click Save & Close to complete the setup of the new Employee Group.
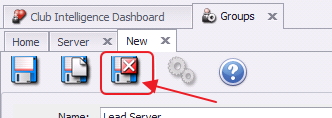 Image Removed
 Create New Employee Group for a New
...
Position
If
...
an Employee Group needs to be created for a completely new position, please follow the below instructions:
...
Navigate to the Employee Groups Grid, then perform either of the following to launch the Employee Group setup screen:
...
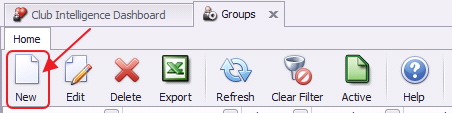
Click the New icon on the toolbar.
...
...
Right-click anywhere on the Employee Groups Grid and select New.
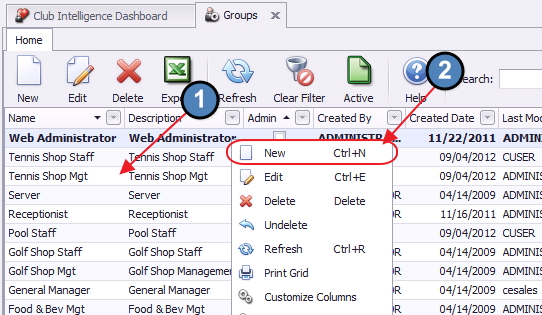 Image Removed
...
The Employee Group setup screen will launch.
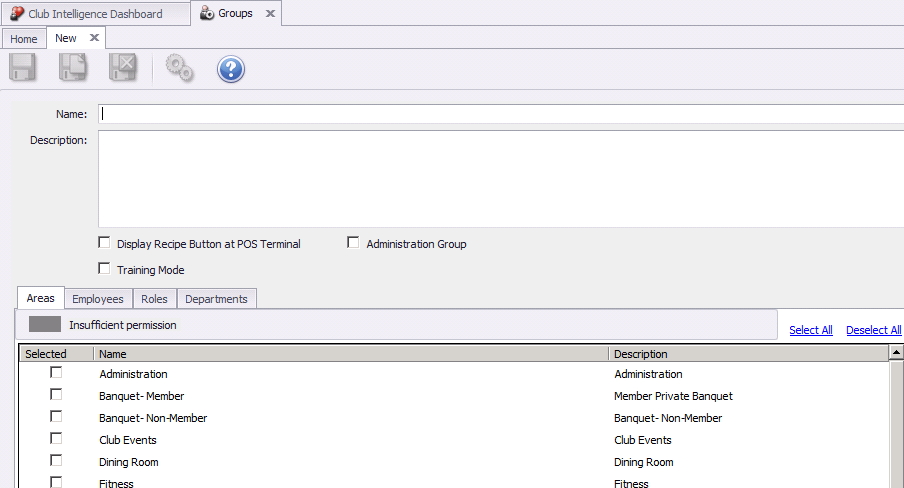 Image Removed
...
Complete the General Information, and then navigate to each of the below tabs and enter all relevant information. It is recommended to enter information on these tabs in sequential order. Please see the Tab Overview section of this document for further instructions on each tab.
...
General Information
Areas
Employees
Roles
...
Departments
Lastly, click Save & Close to complete the setup of the new Employee Group.
Best Practices
...
Set security at a Group level (rather than at an Individual Employee level) to increase consistency of security application and efficiency of assignment.
To set up a new Group based on a similar existing group, make a copy of an existing group by opening the existing group and utilizing the Save as New function. Then, edit as necessary.
FAQs
...
What is the best way to set up a new Employee with a new position?
...
First, set up a new Employee Group to house the new employee.
...
Assign settings/permissions to the new Employee Group, and then assign the Employee to the Employee Group, either in the Employee Profile (preferred), or on the Employee tab in the Employee Groups set up.
Downloadable Guide
...
 Image Added