Versions Compared

Key

  • This line was added.
  • This line was removed.
  • Formatting was changed.

...

Table of Contents

Table of Contents

...

minLevel1

...

maxLevel

...

7

...

Overview

The first step in managing an event is to create the actual event to be managed.  This guide will walk you through creating or booking the original event.

Use Case(s)

Mr. and Mrs. Rogers would like to host their wedding at the Club next July 15.  To ensure the event gets on the calendar, and can be managed, the Banquets Manager books the event.


Content

Table of Contents
maxLevel4
minLevel2
excludeBanquets - Booking a New Event


FAQs


Q: How do I move an event to a different date or time?

A: When in the calendar view, you can drag and drop the event to the new day. When in the event, you can click on Move Event and follow the provided steps.


Best Practices

  1. Add your contacts in Office and let them sync over to Banquets.

  2. Make sure the owner for the contact says GATEWAY_AGENT, if it doesn’t the information won’t come into Office.

Downloadable Guide

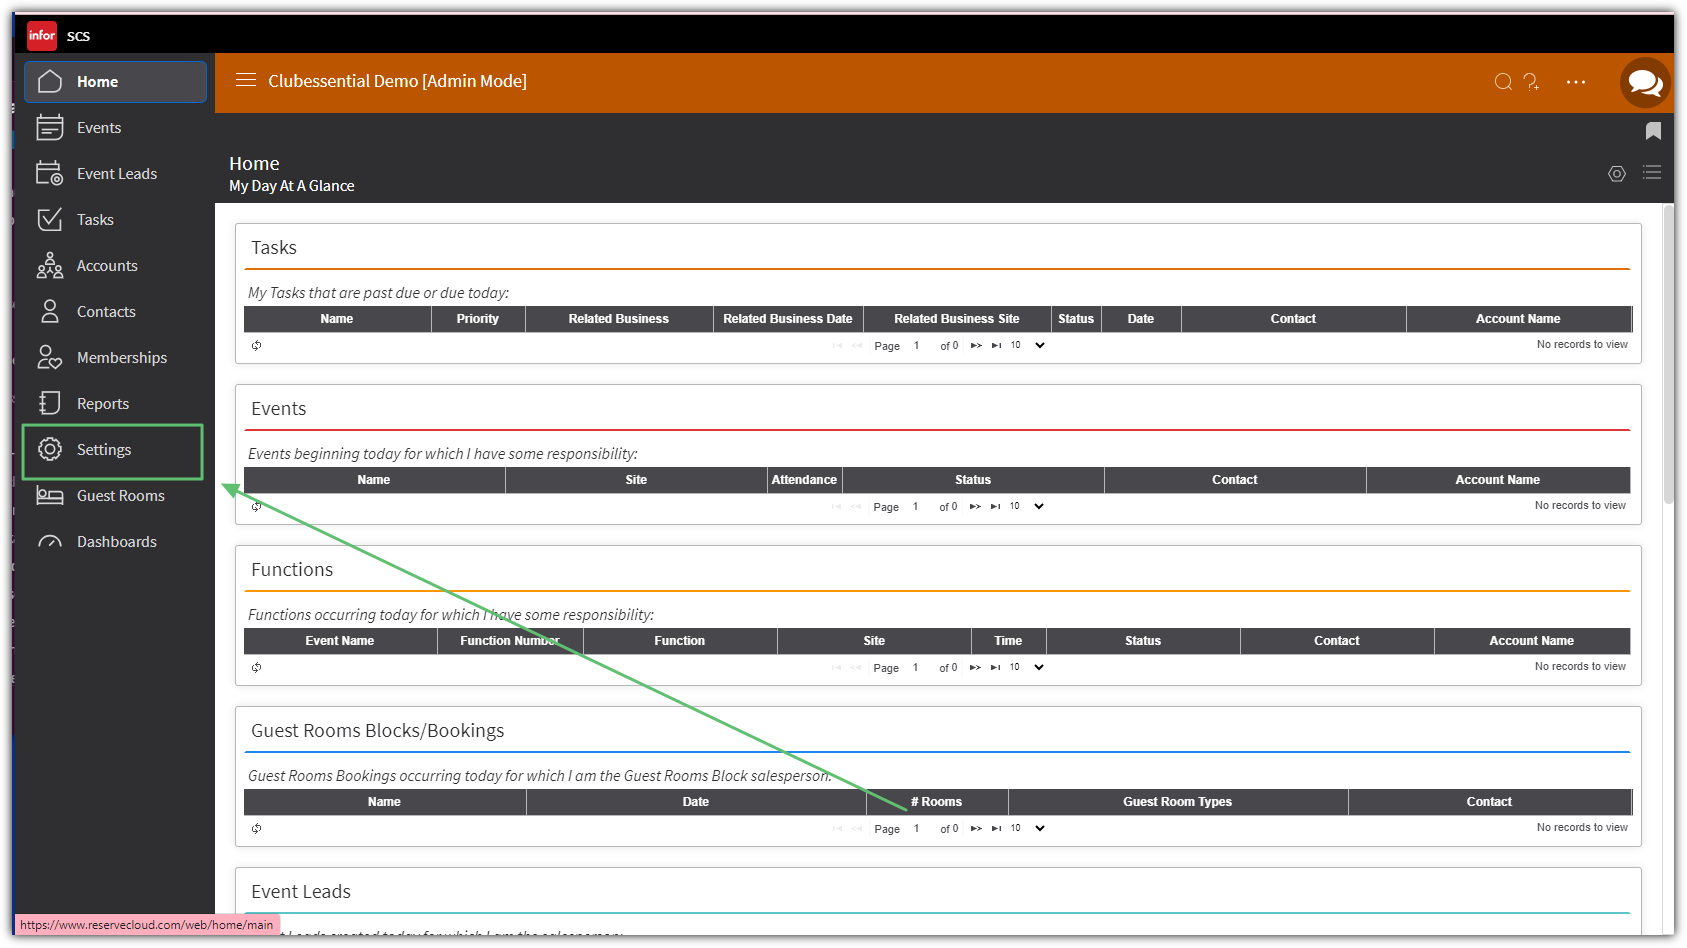
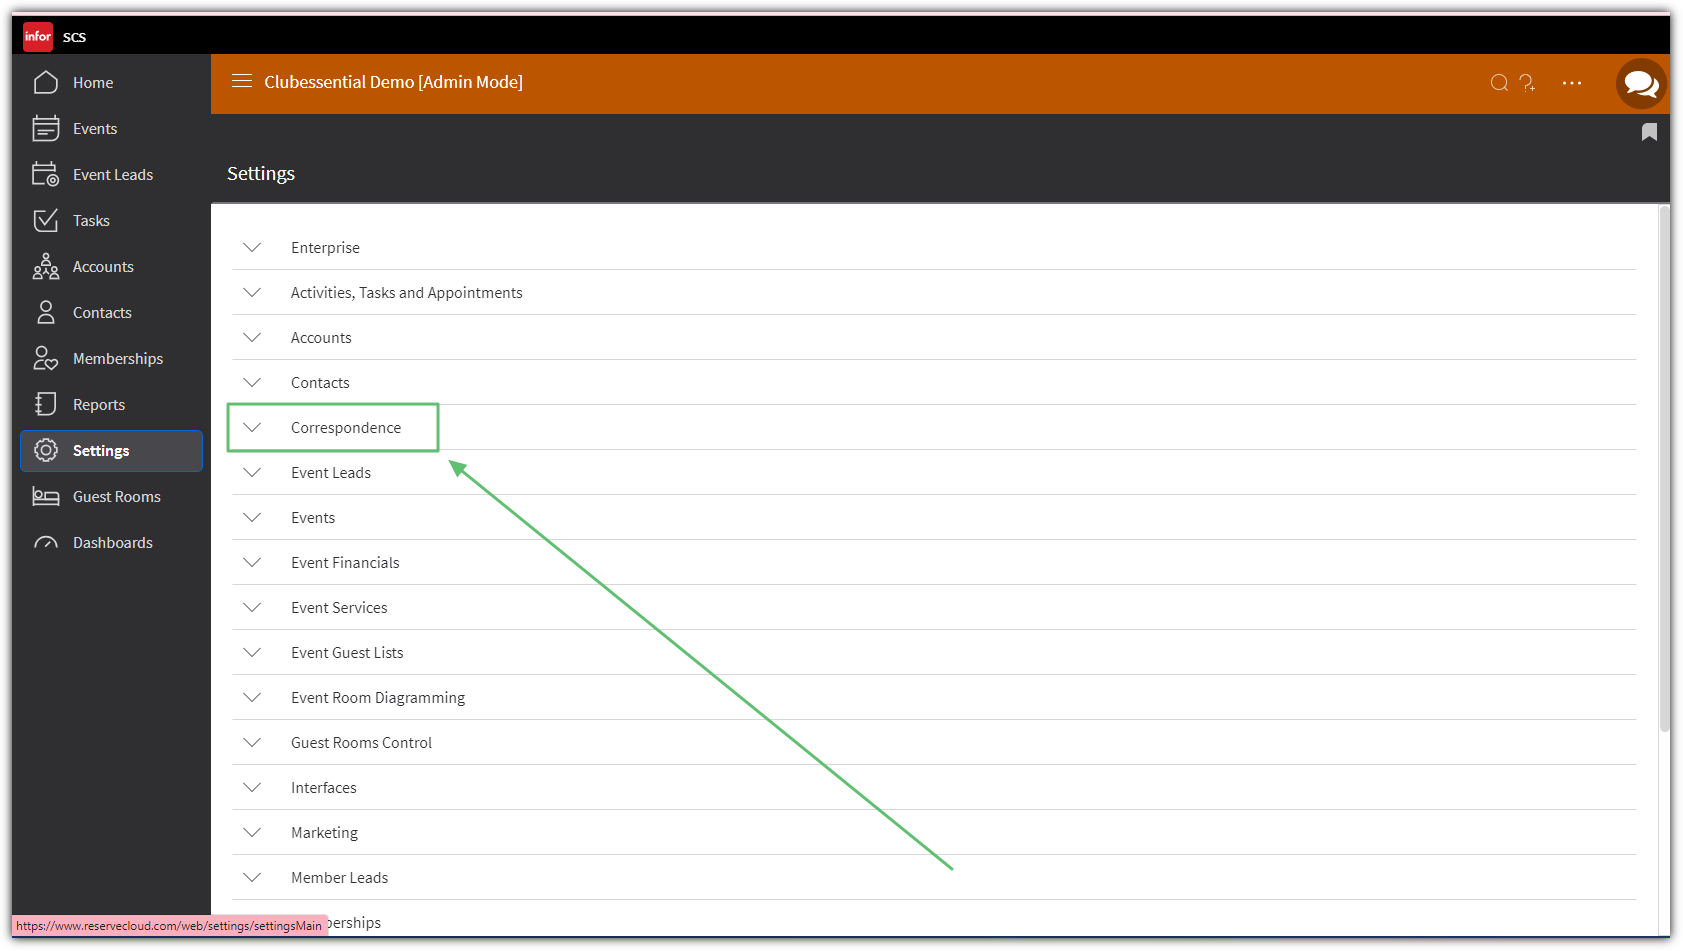
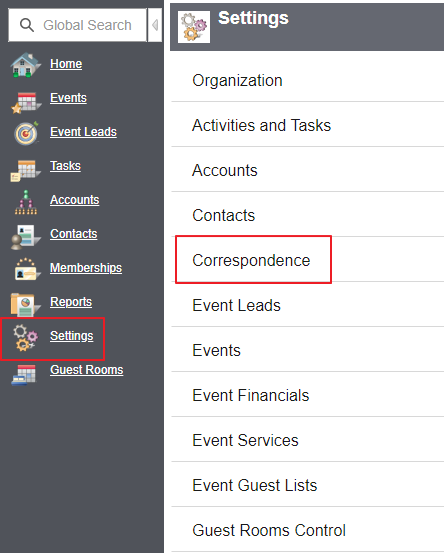
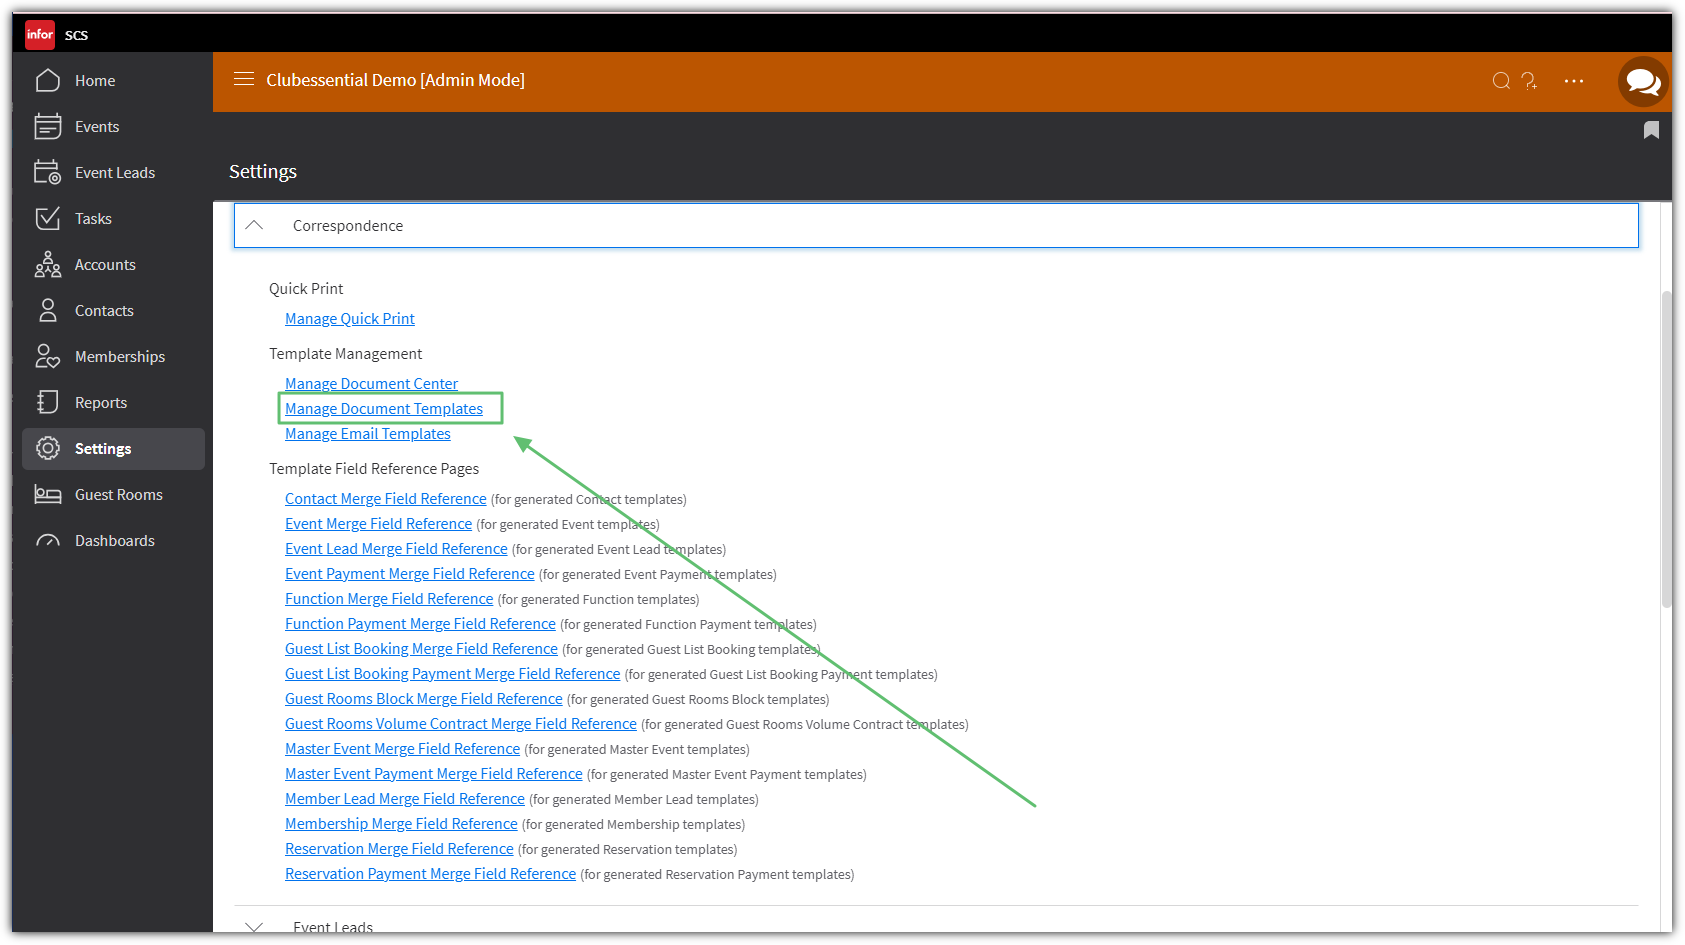
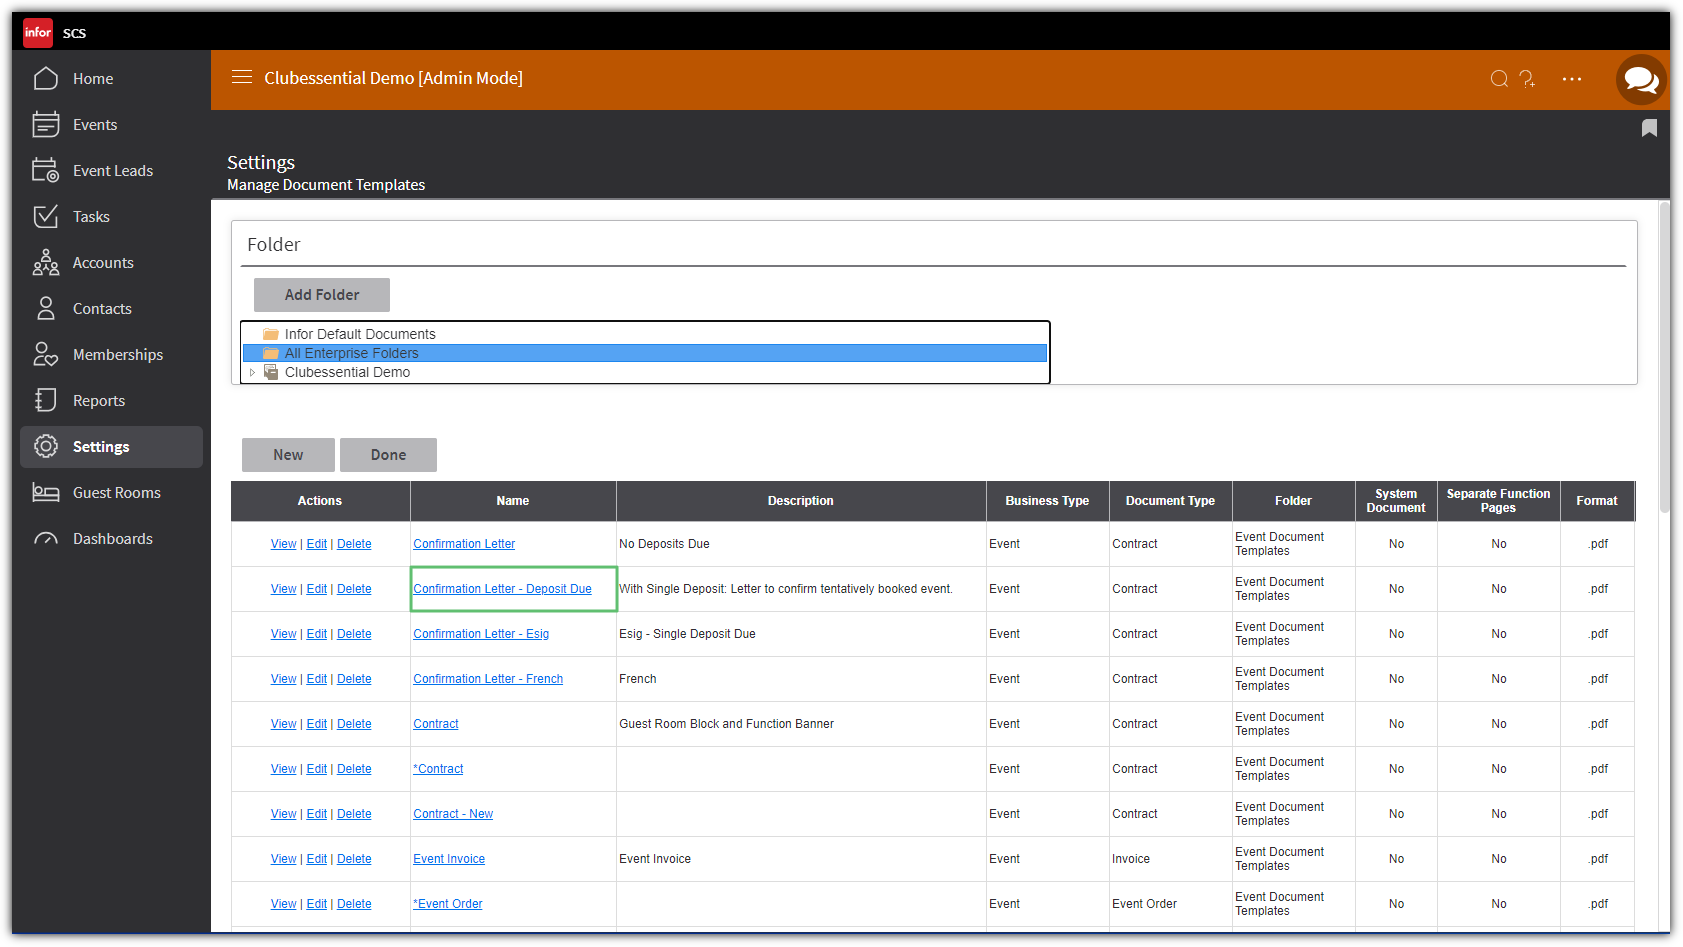
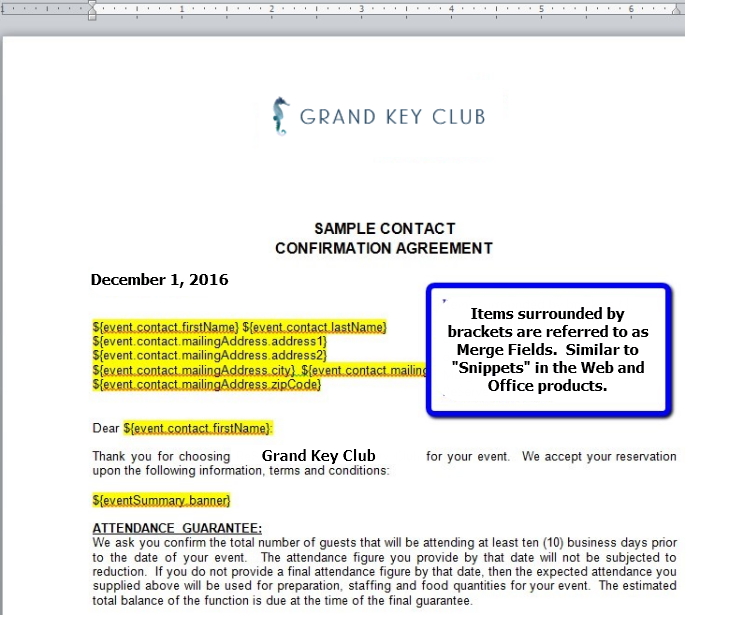
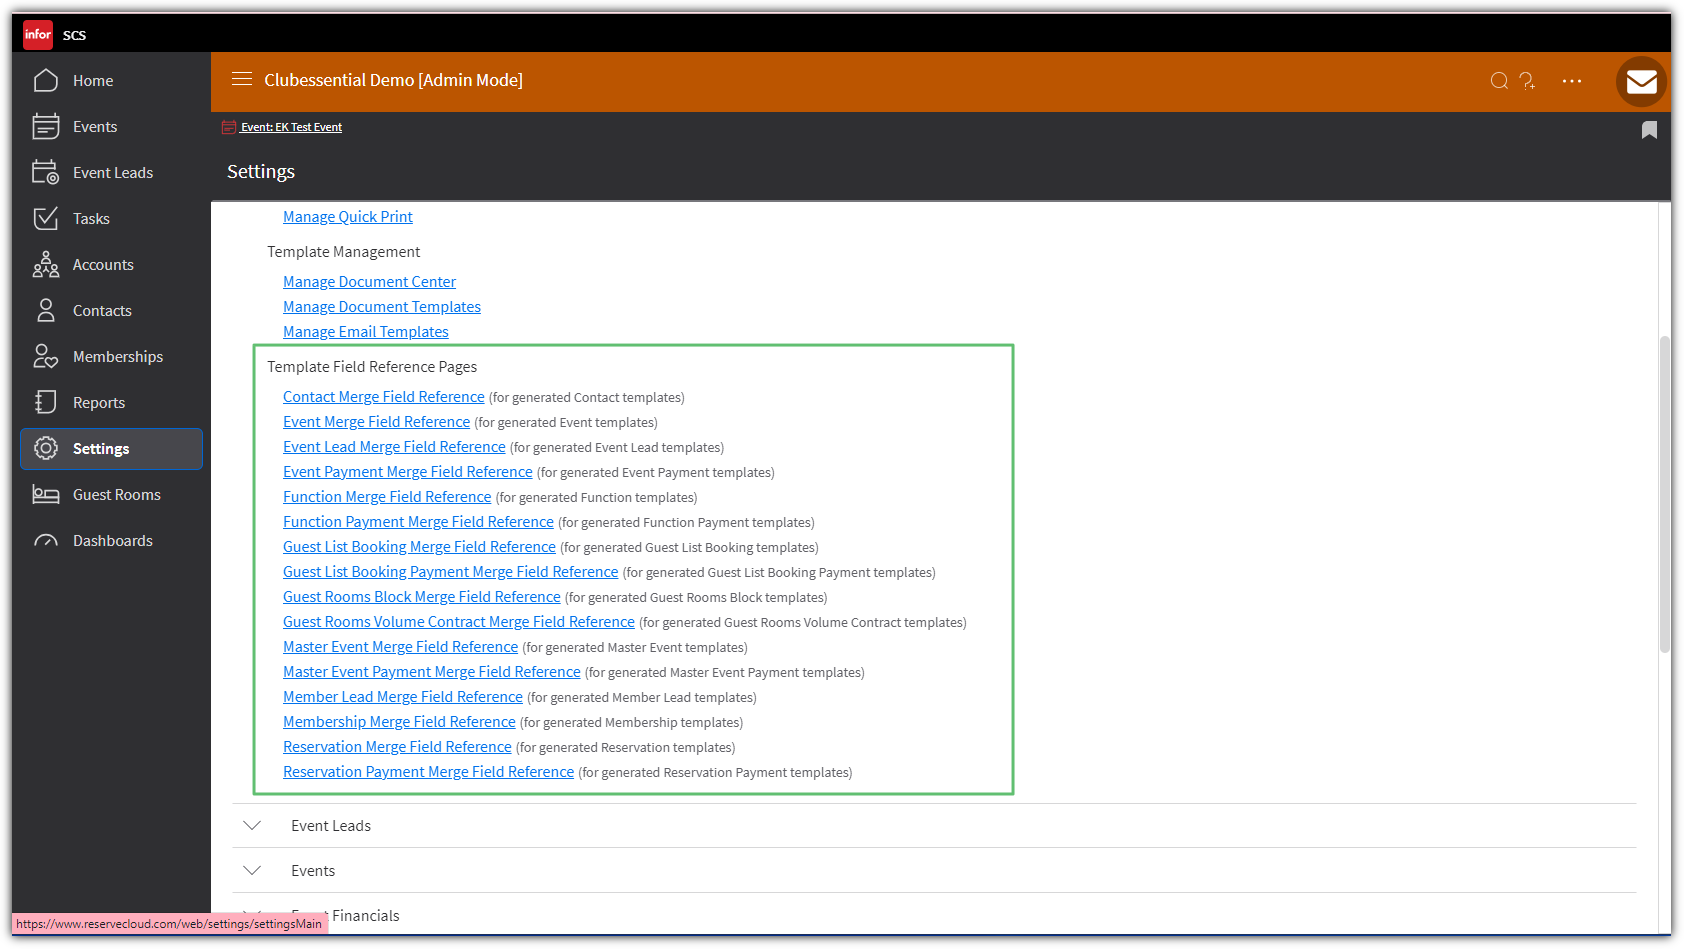
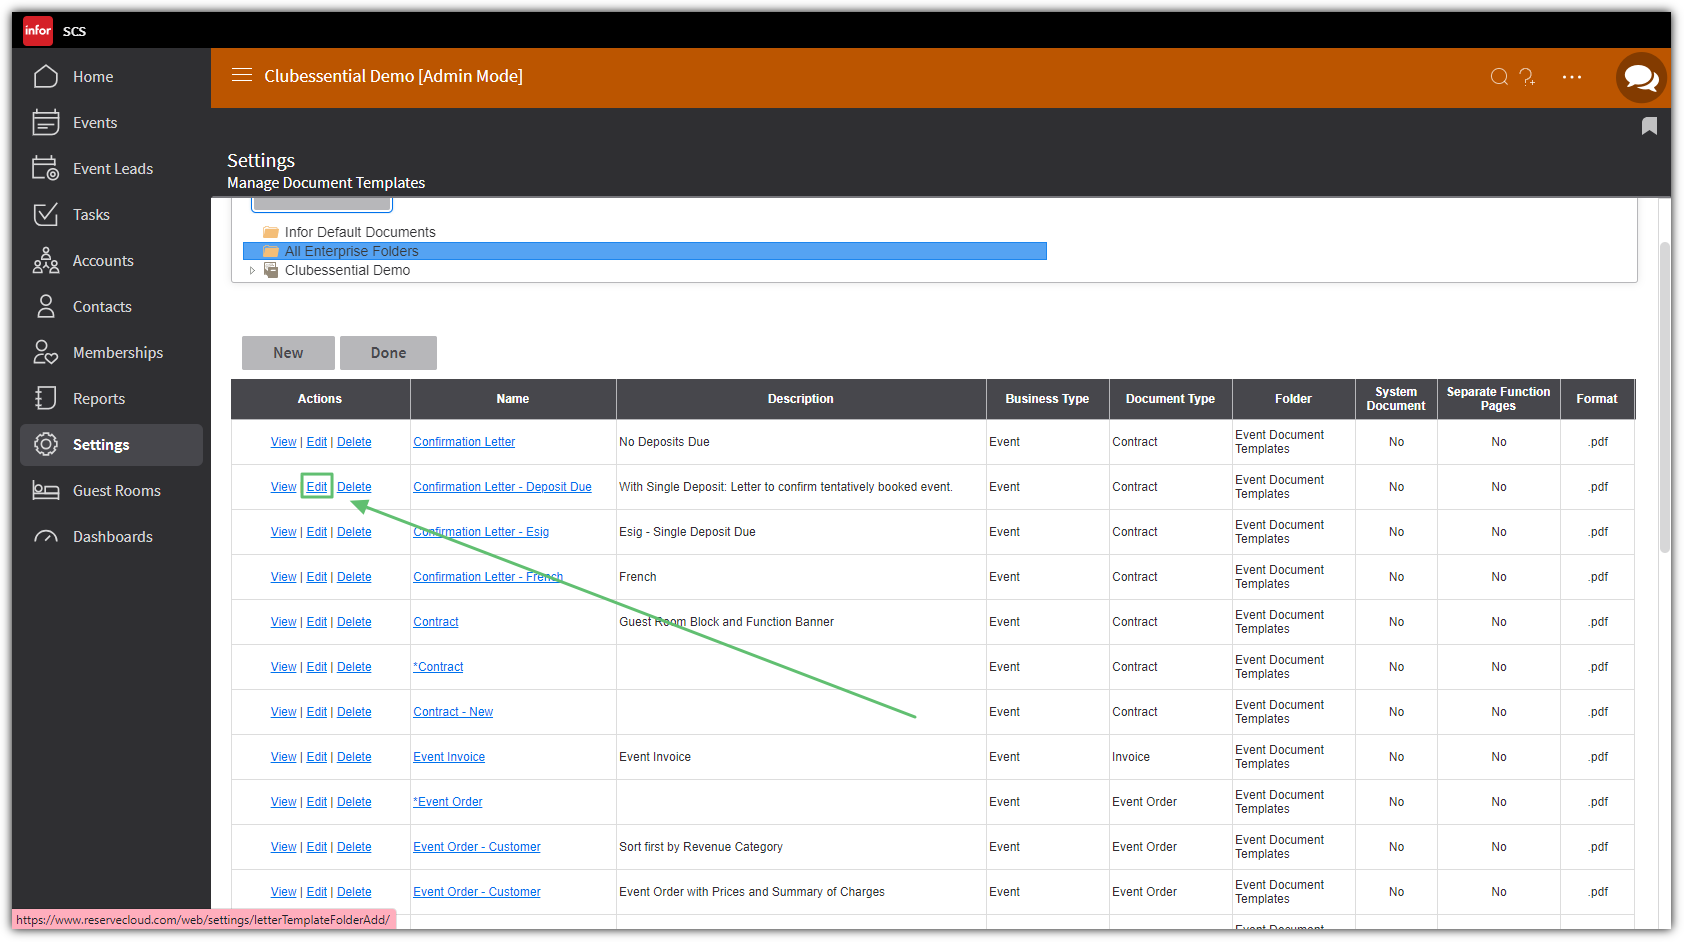
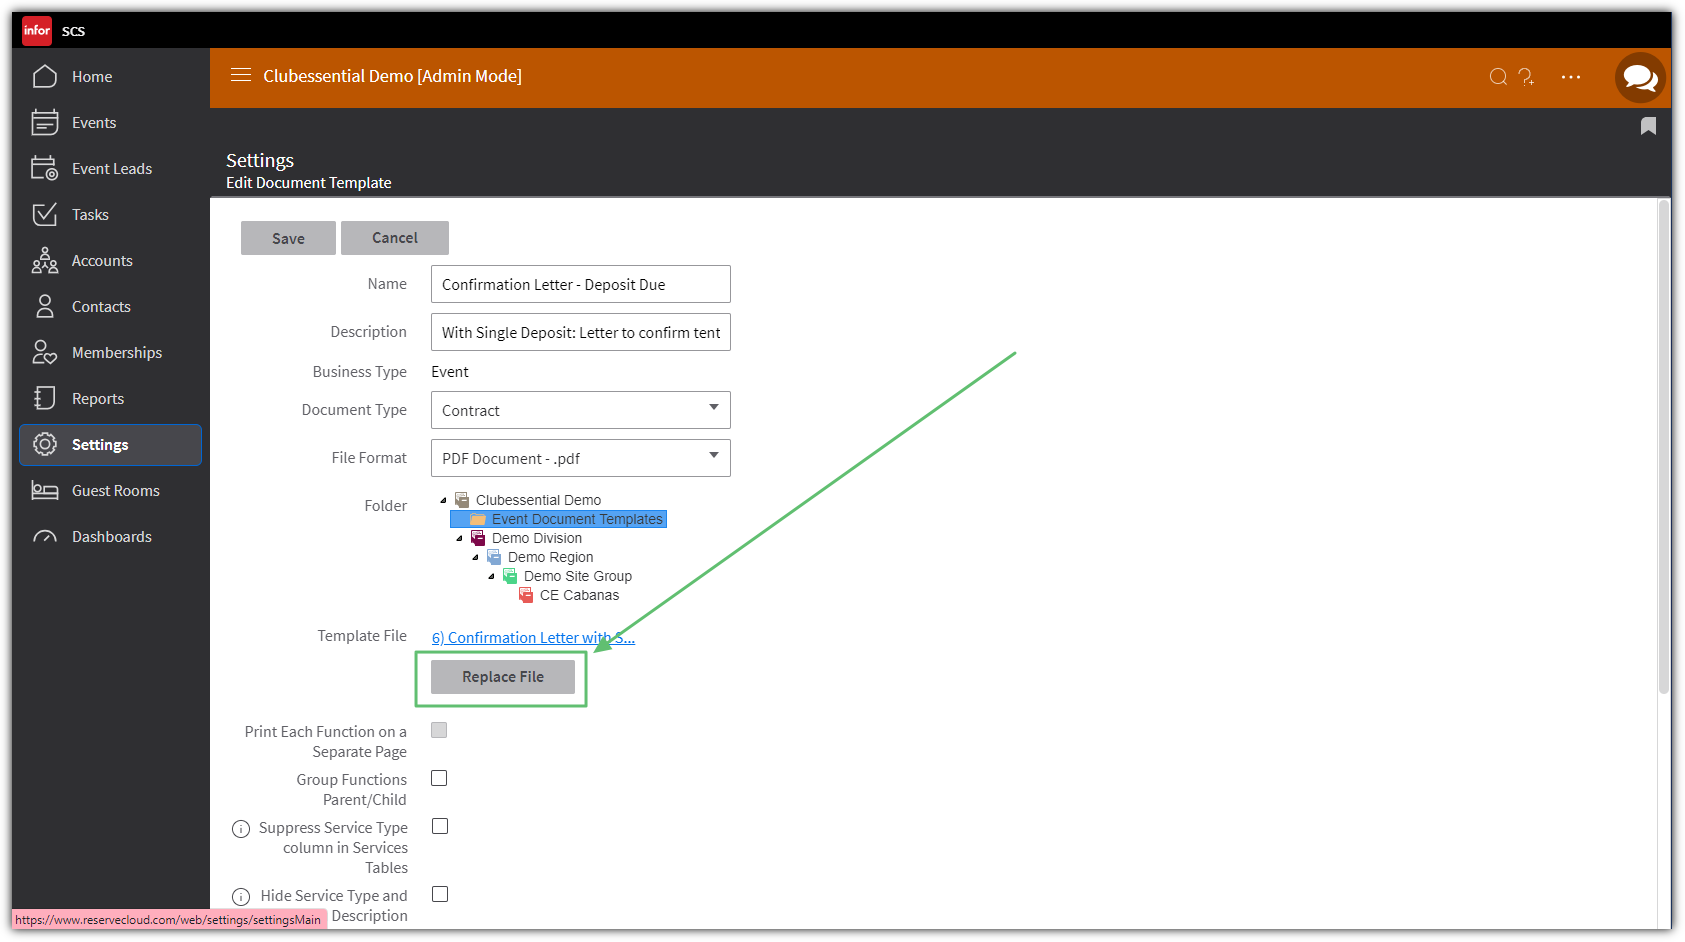
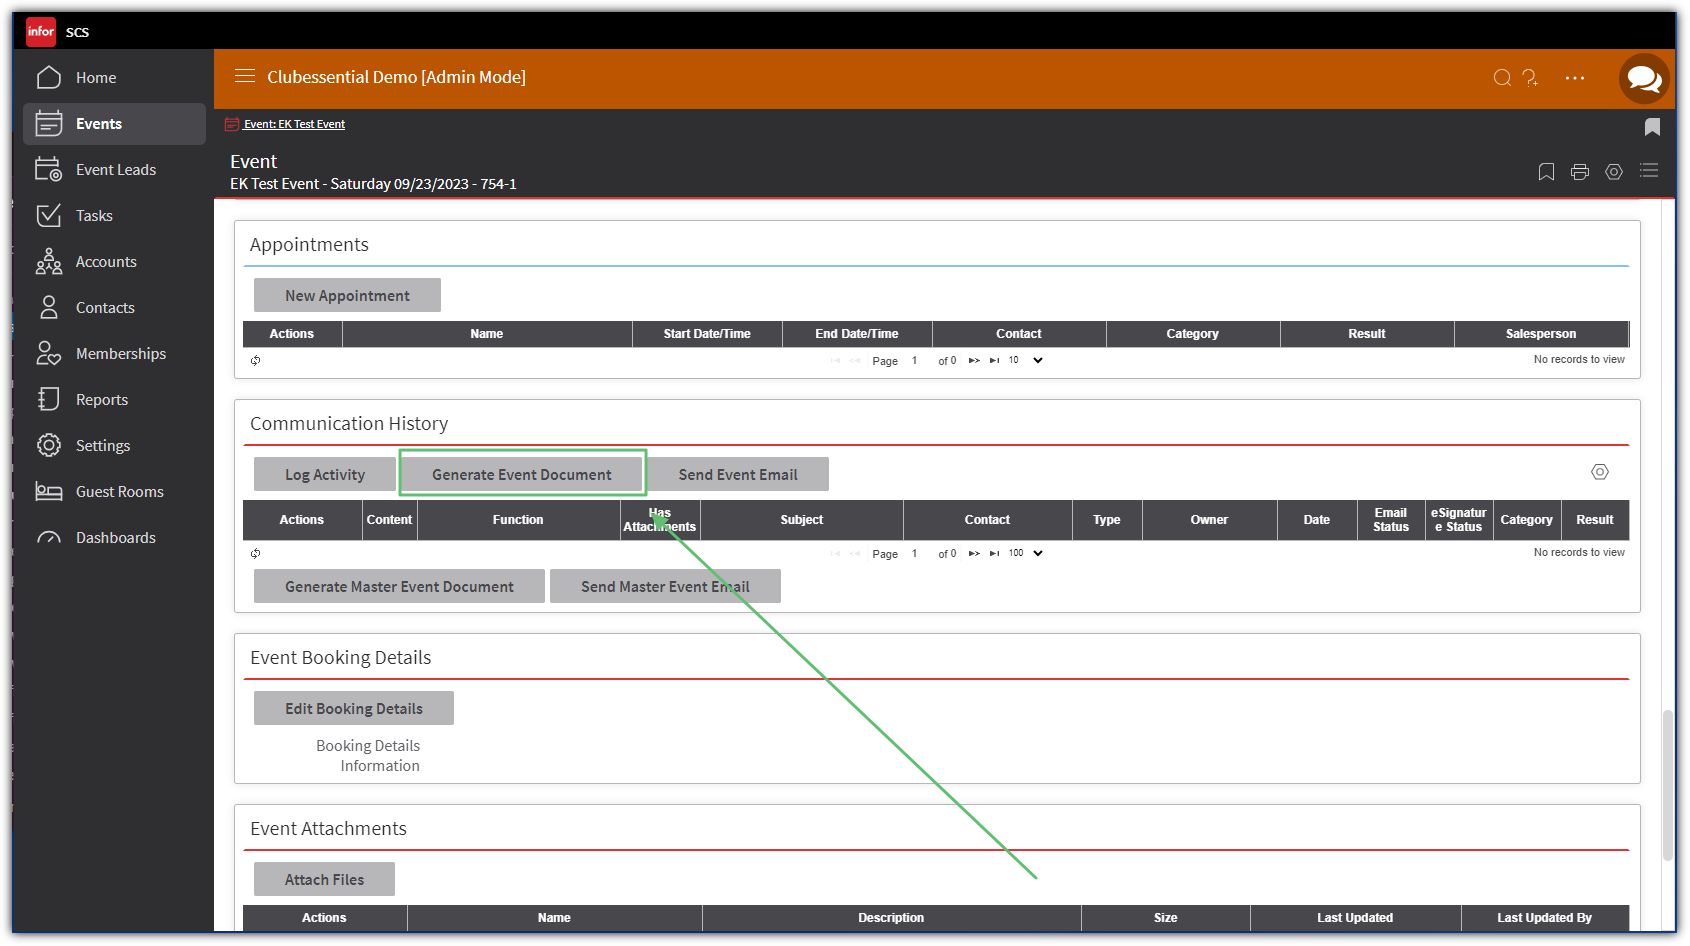
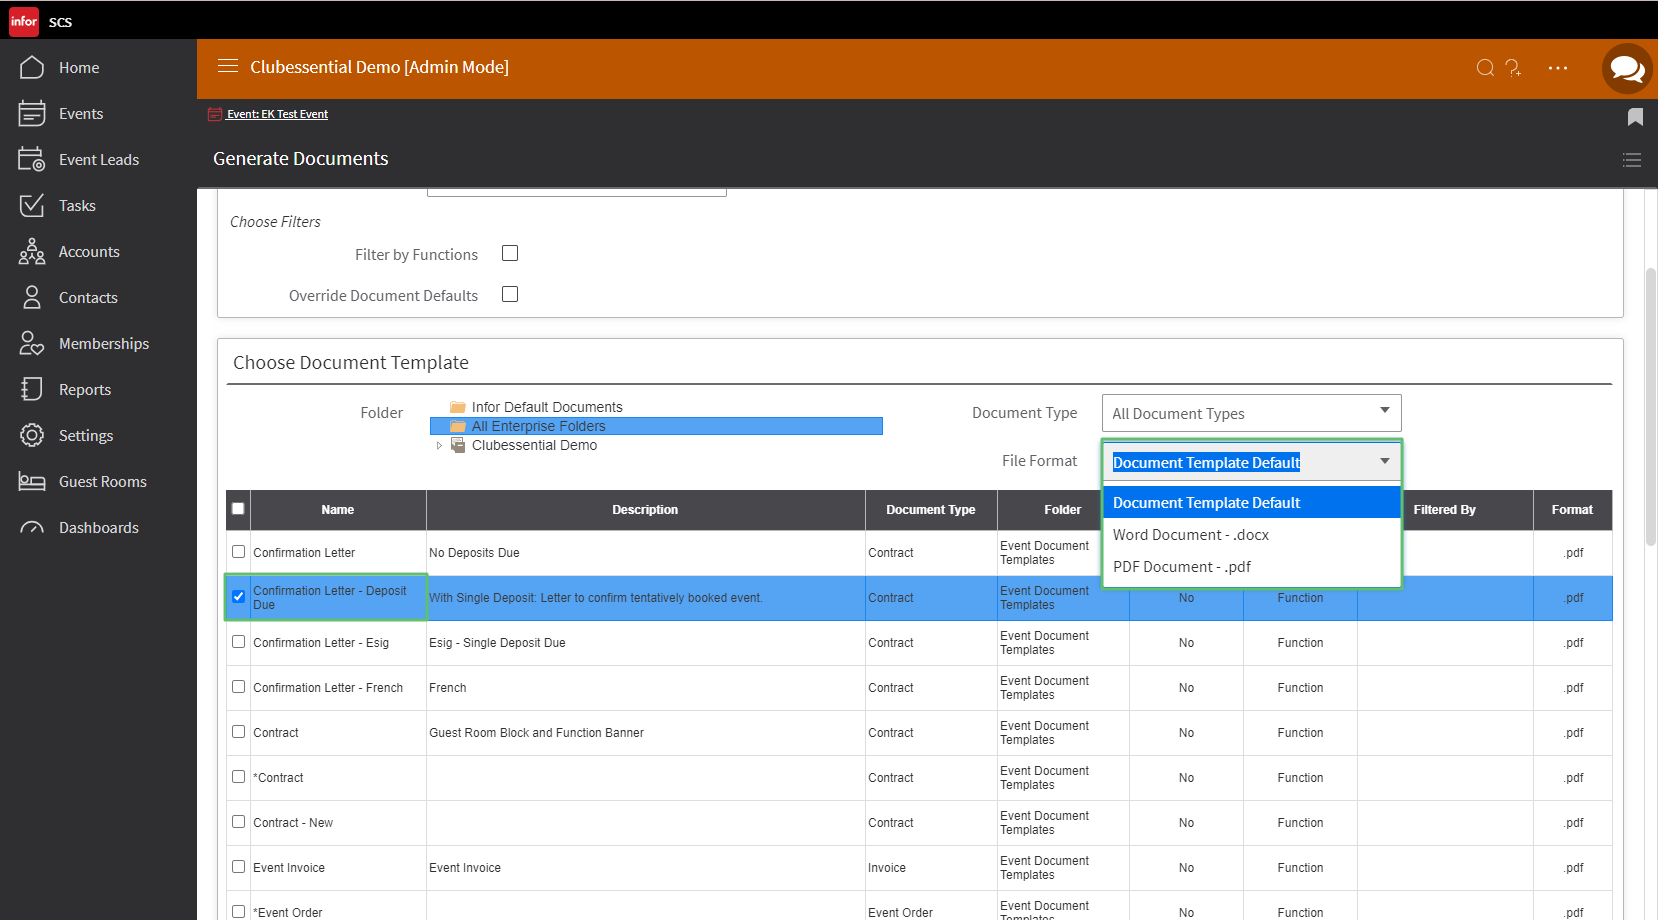
Banquets - Edit Existing Documents

Back to Getting Started

excludeTable of Contents

Accessing the Tool

  1. Navigate to Settings,

  2. ClickCorrespondence.

  3. Select Manage Document Templates.

  4. Click on the View linkto the left of the document you wish to edit.

  5. The document is then downloaded as a Word Document. Verbiage that is located within the document can now be edited.  The document correspondence may contain ‘merge fields’, which are indicated by dollar signs and brackets ${ }.  Merge Fields are used to display specific information that may be unique to the event, contact, etc.

Editing Templates

  1. To edit the hardcoded information, simply type before, over, or after the existing verbiage. 

  2. To add or edit a merge field in the document, navigate in Settings > Correspondence, where various merge field reference pages can be found. Select the type of reference page needed, find the merge field desired, and copy/paste (Ctrl C/Ctrl V) the field value into the document.

  3. When you have finished editing the document, navigate back to Settings > Correspondence > Manage Document Templates. Click theEdit link next to the same document you originally viewed.

  4. You can now edit the name, add a description and change the folder that the document lives in if desired. Click theReplace File button to browse your computer for the file you finished editing. When you have finished replacing the document, click Save.

Testing the Edited Document Template

  1. After replacing the document template with the version you edited, you can test the template by generating it from any event.

  2. Start by navigating to the Event Details Page of any event and scrolling down to the Communication History area. ClickGenerate Event Document.

  3. Choose a Document format (PDF or Word) and then select the document you wish to generate. Click theGenerate Documentsbutton.

  4. If you find that there are still further edits you would like to make, start the process over again from the beginning and make any additional changes as necessary. Retest the document after each replacement.

Image Added