...
Table of Contents
| Table of Contents |
|---|
...
|
...
|
...
Editing Sidebar Content Areas
Sidebar Content Areas typically reside within the side panel of content pages on the website. These marketing areas can be global or page specific. For general Cross Marketing, edit the global sidebar content area. For targeted marketing, edit the page specific sidebar content area.
Global Sidebar Example: An end of year club celebration which would appeal to the majority of members should be placed in the global sidebar content area so this information is available no matter what page the member travels to.
Page Specific Sidebar Example: If you have a Golf Tournament coming up, it will be best to place this marketing information on Golf pages to attract Golf Members.
Navigate to the page in which you wish to add the Cross Marketing Information, and open the Click to Edit in the Sidebar Area.
This will open the Axis Editor, which is the same editor used throughout the website. From here, you can add imagery, text, and hyperlinks. Save once complete.
Editing the Global Sidebar will show on all pages of the website, while editing the Page Specific Sidebar will only show on that specific page.
Editing Online Member Statements
If your website is utilizing Online Member Statements, you may use this as another area to Cross Market. Some members may only use the website for statements and payments, making this another highly trafficked area on the website.
Access the Online Member Statement portal where it is located in the main navigation.
Once the Statement window is open, hover over Admin and select Edit Statement Layout.
Again, hover over Admin, and choose Edit Statement Header or Edit Statement Footer.
This will open the Axis Editor, which is the same editor throughout the website. You can add text, imagery, and hyperlinks as desired. Save once finished.
The Cross Marketing material will then show in the Statement Window.
FAQs
Q: I want to cross market to specific members, but not all members. Where is the best place to cross market?
A: If you’re trying to target certain members, you can try to cross marketing in a specific email campaign using target marketing. Set up appropriate groups that include the proper members. You may also want to place cross marketing pieces in page specific sidebars to market on pages that the type of member you’re trying reach would access frequently (ex: market a Golf Tournament on the page specific sidebars on Golf Pages only).
...
|
...
Overview
Cross Marketing on your Clubessential website is promoting certain events, topics, or content in an area where a member would not expect to see this information. Cross Marketing can easily be added to: Custom Event Notifications, Directory Disclaimer, Dynamic Sidebar Content Areas, and Online Member Statements. Use Case(s) Cross Marketing is best used to promote upcoming events, or new features and pages on the website. By using Cross Marketing, we can ensure that users will see the information, especially if placed in high traffic areas. Furthermore, we can use cross marketing platforms as directional marketing to specific users based on interests, and/or past event attendance. |
Video
This video provides an overview of how to use the Axis tool functionality to Cross Market.
Note: Sections of the video have been referenced below with corresponding times in the video for ease of access
| Total Video (Length) | 6:55 | |||
|---|---|---|---|---|
| Cross Marketing Overview | 0:18 | Editing Directory Disclaimer | 3:32 | |
| About Event Notifications | 1:23 | Editing Sidebar Content | 4:02 | |
| Accessing Event Notifications | 1:55 | Editing Online Member Statements | 4:57 | |
| Editing Event Notifications | 2:05 |
Content
|
|---|
Using Cross Marketing
Your Clubessential website has several areas that were specifically built for cross marketing. Those areas include: Custom Event Notifications, Directory Disclaimer, Dynamic Sidebar Content Areas, and Online Member Statements. Detailed instructions below review these areas and how to edit these sections.
Custom Event Notifications
Directory Disclaimer
Sidebar Marketing
Statement Window
Cross Marketing in Event Notifications
Each time a member registers for an event, a confirmation email is sent to that member. The confirmation email presents a key opportunity to make an impression using Cross Marketing. Event Notifications can be edited globally for all confirmation emails, or individually per event notification. For larger events, it is best to place the Cross Marketing piece in the Global Notifications so all members receive the communication. For targeted marketing based on past events, groups, or type of member; it is best to edit the Event Notification individually.
Editing Global Notifications
Only Admins are able to access Site Notifications. Hover over Admin in the left hand corner of the screen, click on Site Notifications.
Click on the Edit box next to Edit Default Notifications.
Click Registration Received to edit Global Registration Received Notifications.
Edit Default Event Notifications by opening the Click to Edit.
This will open the Axis Editor, with the Default Notifications. Delete the default and type your own, or Add additional content to the Default Notification.
This editor works just like the Axis Editor used throughout the website. You may add plain text, imagery, and hyperlinks.
It is recommended to use Snippets to personalize messages.
Snippet Examples:
##MEMNAME## : this will add the member’s name to the notification
##EVENTTITLE##: this will add the event title name to the notification
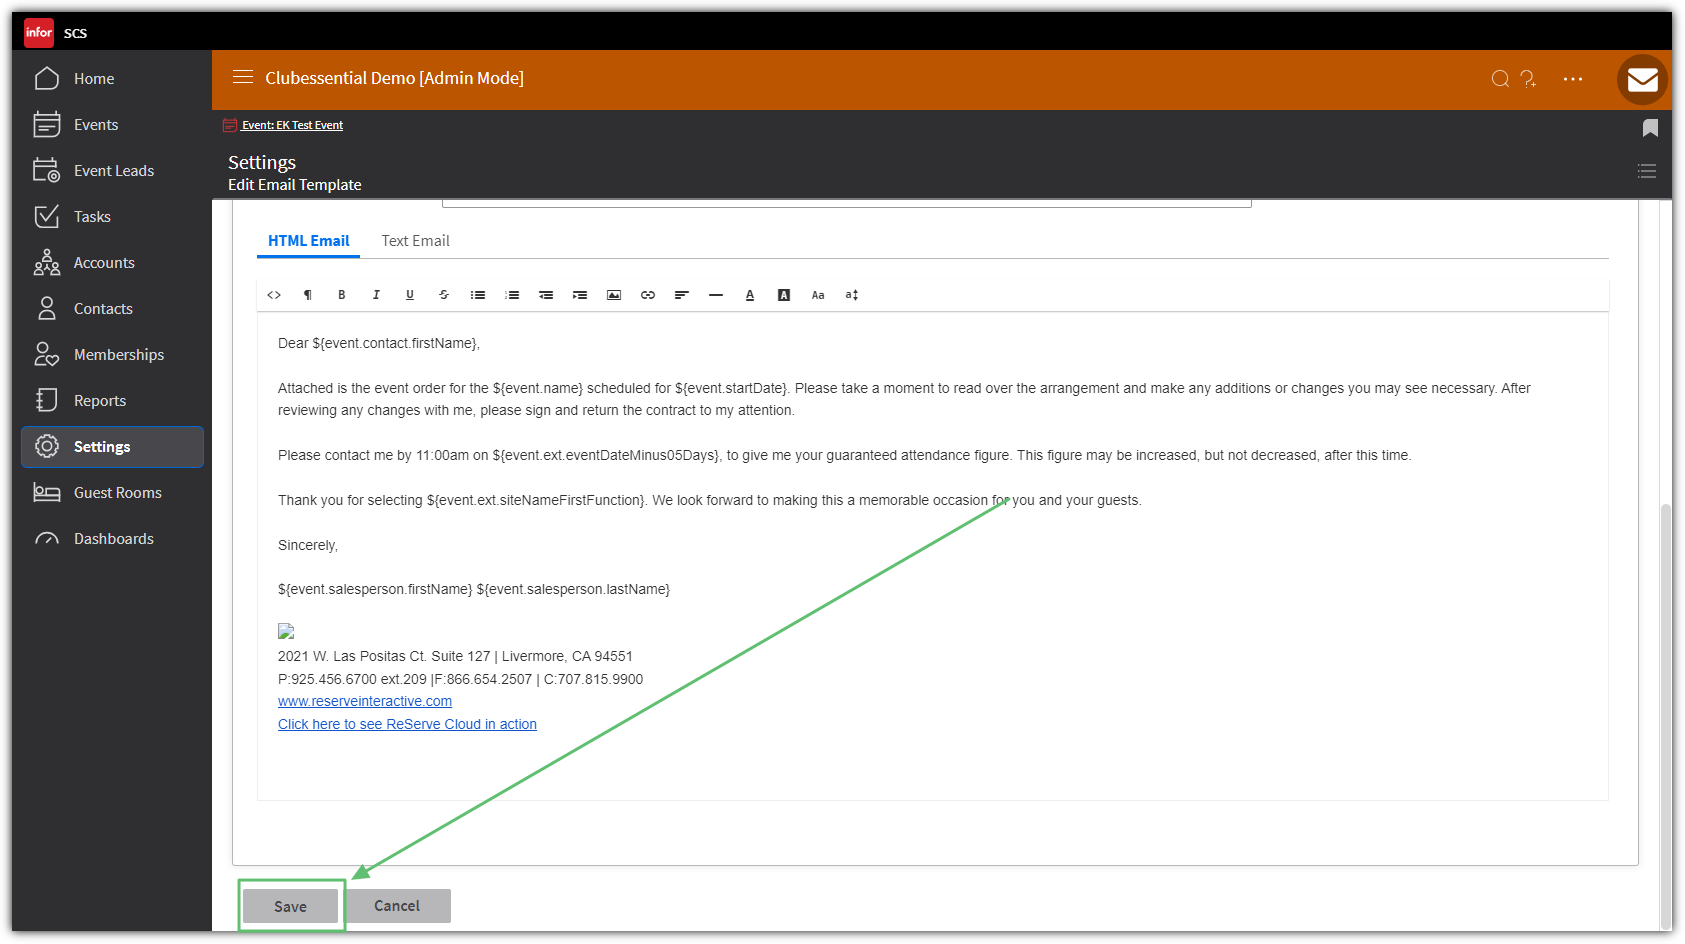
Click Save once you’ve added your desired content.
Click Update Notification for the custom notification to update.
Editing the Directory Disclaimer
The Directory is a highly trafficked area of the website. Members may use the Directory to access other member or staff information. Members are also likely to visit their own profile often to update information. The Directory offers prime real estate for Cross Marketing general events to members.
If you’re an Admin, hover over the Admin tab and click on Directory / Roster.
If you’re an Editor, hover over the Admin link in the main navigation and click Main Tools > Directory.
Once the Axis Editor is open, add text, imagery, and hyperlinks as desired. This works just like the Axis Editor used throughout the website. Click Save once complete.
The Cross Marketing material will then show above the Member List in the Directory.
|
...
Best Practices
When utilizing Cross Marketing, it is best to try to be as directional as possible. Decide if the material you are Cross Marketing is best suited for all members, or specific types of members. Knowing to whom you are marketing should then help you decide whether to place this in global areas, or specific areas of the website.
Many of the Cross Marketing areas have limited space, so remember to size images appropriately and keep information short. Cross Marketing is most efficient when the message is short and enticing. It is also best to link to either the event or page you’re trying to Cross Market so members can access the full information easily.
Keeping your Cross Marketing areas up to date helps keep the information informative and useful. Once an event is over, be sure to update the Cross Marketing section so old information is not being marketed.
- Looking to enhance how, where, and when to market? Check out information on Site Statistics to lean on analytics to determine the best places on the website to market, along with the best day of the week and time of day. Information on Site Statistics is located here.
Downloadable Guide
Axis - Cross Marketing - Guide
