Table of Contents
| Table of Contents |
|---|
...
|
...
|
...
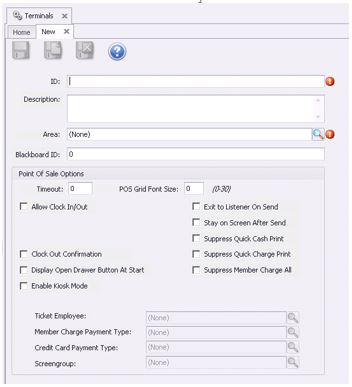
POS Workstation Devices are what the user selects when logging into the POS.
...
|
...
Overview
|
...
...
Use Case
Due to the significant volume of transactions occurring in the Club’s newly expanded Dining Room, Management decided to add another Workstation Device to ensure Dining Servers had adequate opportunities to enter orders and ring out tickets. The Workstation Device was linked to the existing Terminal connected to the Dining Room Area, however, had a separate receipt printer attached to it for ease of processing transactions.
Content
|
|---|
Hosted Server
POS Receipt Printers for Hosted clients need to be installed on the club’s Hosted server. Installing and sharing these printers is Clubessential’s responsibility, however, to install printers correctly, the club’s Local IT Service will need to provide the Make, Model, IP Address, and desired Share Name of the printer.
Clubessential will install the printer on the club’s Hosted server, configure within the Clubessential Office System, and assign the printer to the correct POS Workstation Device. Once this is complete, Clubessential will contact the club to test the printer.
Onsite Server
The local IT Service for clients with an Onsite server are responsible for setting up and sharing printers. In addition, configuring the printer in the Office system can be done by the club’s Local IT, however Office Support can be contacted if help is needed. The below instructions are designed to assist with these processes.
Installing Receipt Printer on Workstation
Again, installing printers on workstations is the responsibility of the club’s Local IT Service.
Below are a few tips when installing printers.
1) If using IP printers connected to the club’s network instead of USB, installing the printer on your print server is best practice. (Most printers will work using the Generic/Text Only driver)
2) Please install the printer according to the manufacturer’s instructions.
3) The POS application uses Windows printing so if Windows cannot print a test page to the printer, POS will not be able to print either.
Sharing the Printer
Printers cannot be shared unless they are installed locally on the machine. Ensure that installation of the printer is complete before attempting to share the printer. The user will likely need to be logged in as administrator or have administrative rights to change sharing properties on the computer/ Workstation.
To share a Windows printer, follow these instructions:
1. Click Start >Control Panel>Devices and Printers.
2. Right click on the receipt printer that was installed and then click on Printer Properties.
3. Click on the Sharing tab at the top.
4. Check the box that reads Share this Printer.
Leave the box checked for Render print jobs on client computers.
5. Enter a Share Name — if this is a receipt printer, best practice is to use the same name as the POS station with an “R” at the end to signify a receipt printer. Please be sure to make a note of the Share Name used; it will be needed later.
For Example: if the workstation is named POS2 the printer would be POS2R.
Alternatively, when setting up a prep printer, using something like Cold, Hot, Expeditor, etc. is a typical practice.
6. Click OK to save the new changes.

Printing a Test Page
To complete printer set up, a clean Print Test Page is required.
To Print a Windows Test Page,
1. Click Start>Control Panel> Devices & Printers.
2. Locate the printer that was just installed > right-click and select Properties.
3. On the General tab, click the Print Test Page button. This should send a test page to the printer.
4. Verify the test page printed. If it printed, continue on to Step 5. If it did not print do not continue. Try rebooting your machine; if that doesn’t work un-install and then reinstall the printer drivers. If you are still having problems, contact your local IT Service or the printer manufacturer. Clubessential POS will not print if the windows test page does not print.
5. Be sure to hold on to the Test Page that was printed as it lists the Computer Name and Share Name. This information will be needed to setup the printer in Clubessential Office.

Setup Printer in Clubessential Office
The club’s local IT can continue the setup of the printer in Clubessential Office using these instructions. If you require help at this point Clubessential Support is available to assist. Make sure to have the print out from the Print Test Page.
To setup a printer in Clubessential Office,
...

...
...

...
...
...
...

...
...
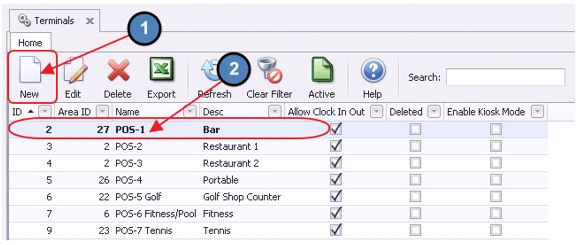
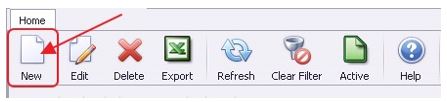
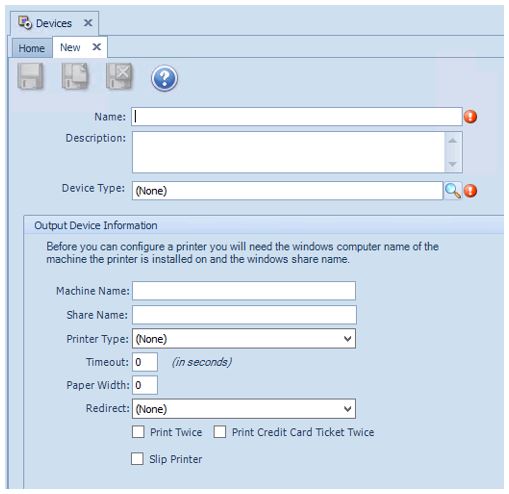
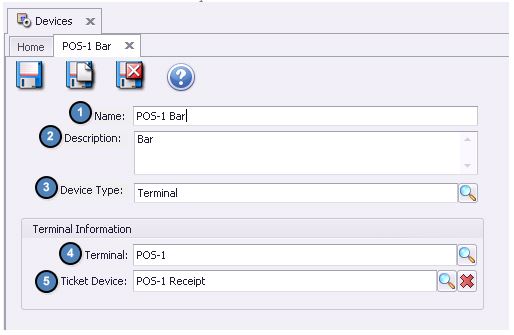
5) Name- Give the Device a Name and a Description (Optional).
6) Device Type- Click the Lookup icon and select Printer(this will open additional printer fields).
7) Machine Name- This is the Computer Name found on the Print Test Page.
8) Share Name- This is the Share Name of the printer, also listed on the Print Test Page. This field is case sensitive. Please be sure to enter the Share Name EXACTLY as it shows on the Test Page.
9) Printer Type- Click the down arrow and select the printer type. Clubessential only supports the printers listed.
10) Timeout- The amount of time, in seconds, to wait before checking the status of a print job. If a print job does not print, an error message will be shown in the POS screen. If you are unsure of this field, leave at “0.”
11) Paper Width- The maximum number of horizontal characters that can fit on a ticket. If you are unsure of this field, leave at “0.”
12) Redirect- This is only used if the printer breaks or a different printer needs to be used. Click the down arrow to see available printers to reroute the print jobs. DO NOT set a redirect printer unless you want all print jobs to go to a different printer.
13) Print Twice- If selected, this printer will print all jobs twice.
14) Print Credit Card Ticket Twice- If selected, all Credit Card tickets will print twice.
15) Slip Printer- Select ONLY if your club uses a slip (flatbed) printer for tickets.

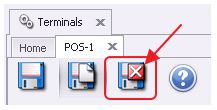
16) Lastly, click Save & Close to complete the setup of the new POS Device.
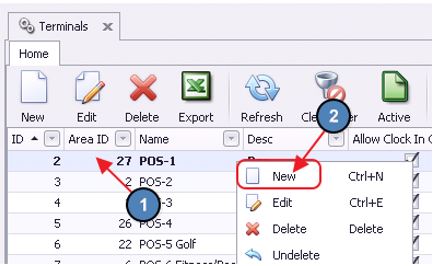
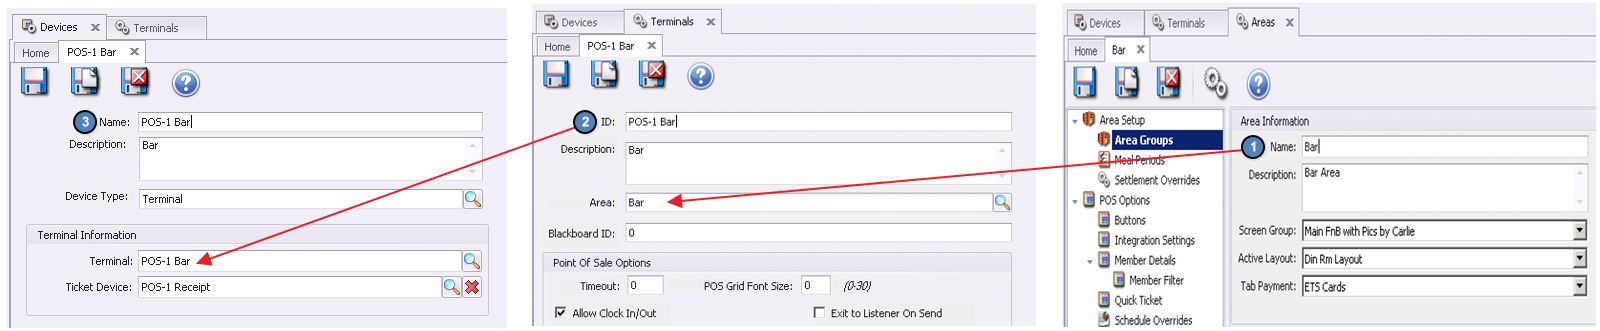
Assigning Printer to a POS Workstation Device
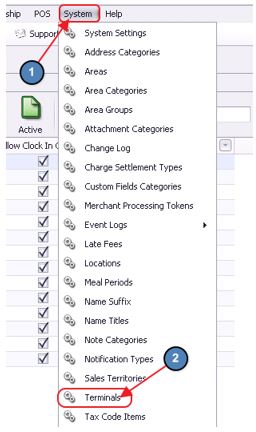
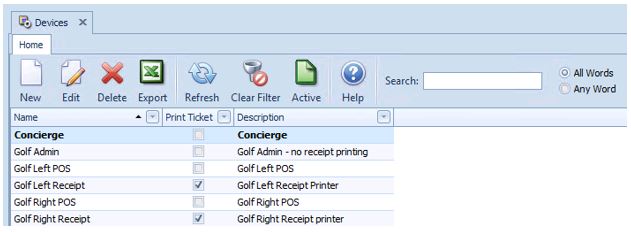
1) Navigate to POS across the top toolbar and select Devices.
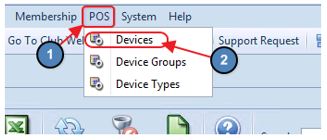
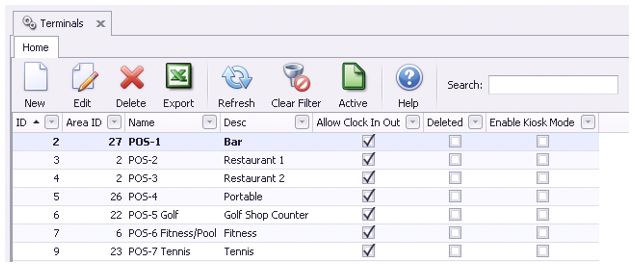
2) The POS Devices Grid will launch.

3) Double click on the applicable Workstation Device to launch the Device setup screen.
4) Select the Ticket Device Lookup and choose the applicable Receipt Printer from the Lookup.

...
...
...
For more information on POS Work Station Devices, please see our POS Terminal/ Workstation Device Setup manual.
Common Printer Troubleshooting
1) Before calling support, power cycle your printer and if it is a USB Printer, restart the computer, and then attempt printing again.
2) Verify that the printers Share Name matches what is in Clubessential Office within Devices. Usually if you are able to print a Windows Test Print but nothing from Clubessential, it is related to an incorrect Share Name.
3) If you receive an error stating that you do not have an associated printer for that terminal when attempting to print a receipt, please navigate to the Assigning Printer to a POS Workstation Device of this document.
4) Check to make sure that you are not out of paper.
5) On Epson printers, you are able to run a test print from the printer by turning it off, holding down the feed button, then powering back on and releasing the feed button when printing begins. Power cycle the printer again after doing this. This will help make sure there isn’t an equipment problem.
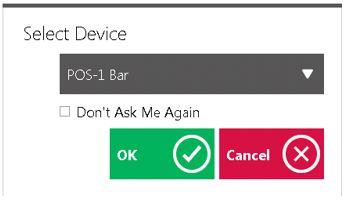
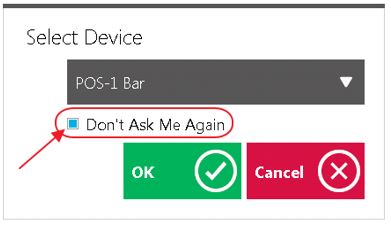
6) When a particular POS computer is printing to the wrong printer, typically the POS is defaulted to login to the wrong Workstation Device. Please verify that the POS is logging into the correct Workstation by referring to the top right corner of the POS screen; this will list the Workstation Device the POS is currently logged into.
Please see our POS Terminal/ Workstation Device Setup manual for more information on Workstation Devices.
Downloadable Guide
POS Receipt Printer Setup - Guide
...
