...
Table of Contents
| Table of Contents | ||||||
|---|---|---|---|---|---|---|
|
| Widget Connector | ||||||
|---|---|---|---|---|---|---|
|
...
...
There are 2 scheduling tools:
...
Create New Course Schedule
...
Use Cases:
Daily 8am start time every 10 mins allowing all members to book except SOCIAL members.
Tues Ladies Day consisting of 8-9:50am Women Only, 10am-5pm Member Booking.
Course Closed used every Monday except Holidays, and the Tuesdays following the Monday Holidays.
7am open time with intervals alternating 8 & 9 mins and a 15 min gap every 90 mins.Weekend double tees during season.
Video
Content
|
|---|
Key Terms
The following are the key terms and settings within a schedule:
Template - what rules should be in place? For example, “Member Booking” is used to name the particular club rules established during the installation process such as no social members permitted to book. See the Templates - Booking Rules section for more details.
Start Time and End Time - when is the 1st and the last tee time? For example, starting at 7:30am and going until 6pm.
Intervals - tee times run every 10 minutes, for example.
Start Tees - do players start on the 1st tee only or is this a crossover or reverse/backwards shotgun?
Custom Styling - is there a font or background color used to make the tee times stand out on the sheet such as for Women Only times?
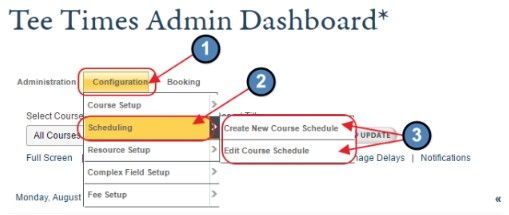
Accessing the Tools
...
...
...
...
...
...

...
...
...
...

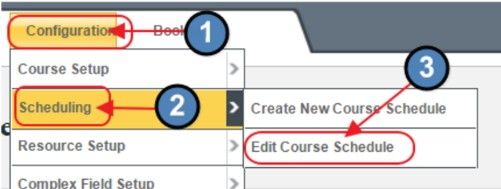
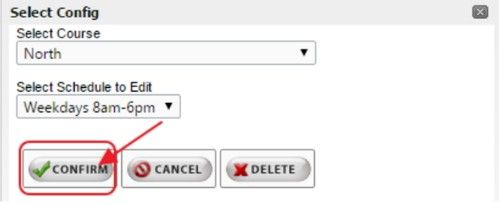
To edit an existing schedule:

...
...

...
...
...
...
...
...
...

...

...
...

...
...
...

...
...
...
...
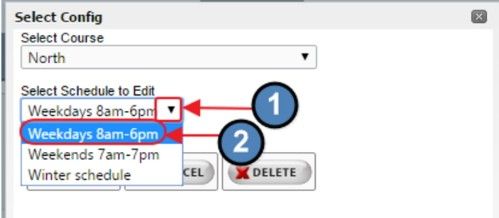
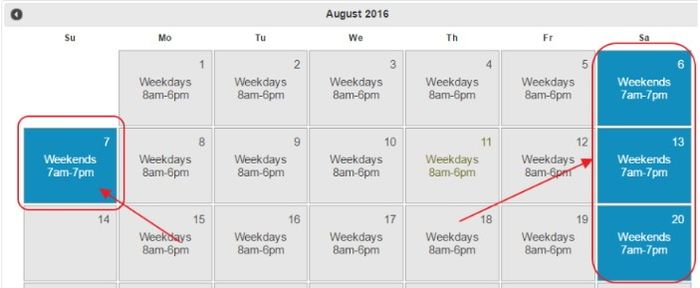
Selected schedule, “Weekdays 8am-6pm,” will apply to the date clicked.

...
...

...

Newly selected schedule is now active for editing.

Templates - The Booking Rules
Templates are a key component to schedule creation. Because a vast majority of clubs do not need to edit or manage the setting within templates, only the basics of templates will be covered in this guide.
Examples of Standard Templates

Templates tell the tee sheet what rules to use. The standard templates are as follows:
Admin Only or Pro Shop Only: Members are not allowed to book. Staff can book but must override the rule conflict message.
Admin Only (Hidden from Members): Members are not able to see these start times. The times only appear on the staff tee sheet. Staff can book but must override the rule conflict message.
Admin Only (Hidden from All): These times are removed from the tee sheet. This is not used for schedules, instead meant for blocks or events.
Member Booking: This is the most commonly used template for schedules. Members are allowed to book based on the rules established during the installation of the tee sheet.
Club-Specific or Custom Templates
The possibilities for templates are endless! With the Clubessential rules engine we can build just about any logical rule.

Most common are rules based on the membership type but rules can also look at criteria such as gender, relationship (primary, spouse, child/dependent), day of week, month of year.
Front Nine & Back Nine
This section allows for editing the applied templates and start times for the Front and Back Nine.
Click, “Edit” to open the “Edit Time Range Properties” screen.


Or, select a new Template from the Available Templates drop-down, and click, “Add” to apply a new template for a schedule.

More information regarding the “Edit Time Range Properties” screen can be found in the Create New Course Schedule section of this document.
Once Edits are made, click, “Save Schedule,” to save changes, or click, “Cancel Changes,” to Abandon changes.

Delete Course Schedule
To delete a Course Schedule (created in error, or that is no longer relevant), click on the “Edit Course Schedule” option.

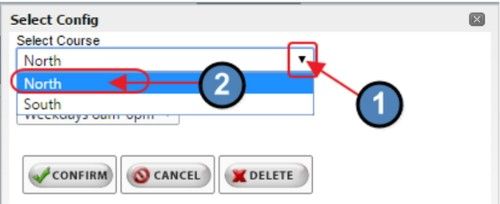
Select Course, Schedule, and click, “Delete.”

Create New Course Schedule
If a course schedule is frequently used, it is more effective to create a new schedule than to use blocks, add starts, or events to adjust the tee times on a daily basis.
To create a new schedule:
- Click Create New Course Schedule to begin.

2. Enter the Schedule Name. This can be changed later.

3. If more than one course exists, select the appropriate course using the Course drop-down menu.

4. Click the blue “Save Schedule” button (bottom-right of the screen).

A blank schedule is created and is available for adding starts.
5. Scroll down and select a template to apply to the schedule in the “Available Templates” area.

6. Click the “Add” button in the Front Nine & Back Nine section.

The “Add Time Range” window will load.

7. Often it is best to remove the “Display Name” text so that this does not show on the tee sheet. For something like Women Only though it may make sense to leave the Display Name and it will appear on each tee time in the time range.

8. Enter the “Start time”. Click the Clock icon to launch the Time Picker window. Click on desired time to populate “Start Time.” You can also type in whatever start time you need, for example, 8:03 am.

9. Enter the “End time”.

10. For most schedules, it is appropriate to click the “Create Time Range” button at the bottom-right. (Note: Additional options will be discussed following the completion of the basic schedule.)

11. Confirm the new start times/effective date.

12. Repeat as necessary to fill in all start times for the schedule.
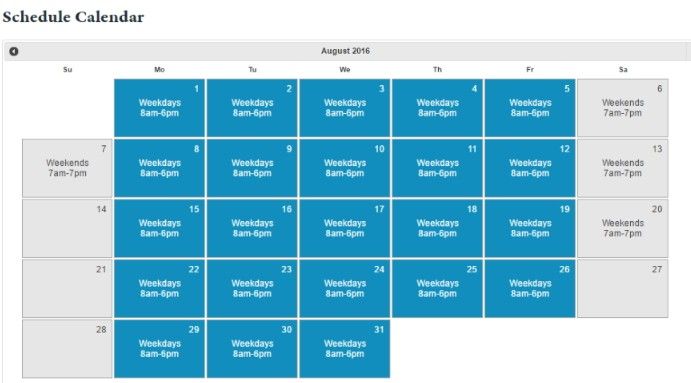
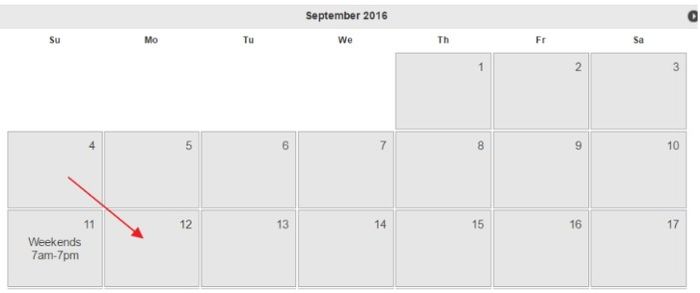
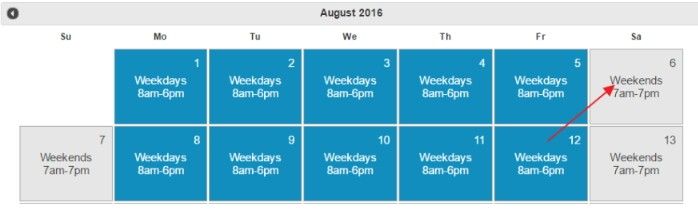
13. Finally, use the Schedule Calendar to apply the schedule. Click in the blank area of the date(s) to apply the schedule.

14. Schedule will populate. Click “Save Schedule” to continue.

15. Confirmation will appear. Click, “OK” to continue.

As previously mentioned, additional settings in the “Add/Edit Time Range” window exist to offer additional customization options.
- The Effective Date may be left blank for most cases. The system automatically fills this out when checking to make sure the changes to a schedule do not impact tee times already booked.

- Interval (Minutes) refers to how often the players tee off, ie. every 10 mins
- Alternate Interval (Minutes) typically matches the Interval but may be used to swap between 8 & 9 minute intervals for example.
- Hold Interval refers to the time a member has to complete the tee time. This is typically set at 6 minutes.

- Start Tees are the bookable tees. Note: if creating a crossover schedule it’s generally important to select a crossover template, instead of a single tee template and then checking the 10th tee.

- Custom Styling options can be utilized to customize the background and text color/style of the Schedule Display on the Tee Sheet.

Once additional settings are made in the “Add/Edit Time Range” windows, click Create Time Range, Confirm Effective Date, proceed to Calendar assignment, and save schedule as previously documented.
FAQs
...
...
...
Q. How do I create new templates?
A. Templates can be created at any time by contacting the Reservations Support Team. While the controls can be accessed from the pro shop side, the tools currently require advanced knowledge to fully understand or make changes.
Q. How do I change or see the rules within the templates?
A. The tee time rules, or templates, are originally created during the installation of your tee times and undergo an extensive review process to ensure they are correct.
Many clubs come to Clubessential from programs that require the pro shop to heavily manage their own settings with check boxes for membership types or drop downs for times allowed to play. This has 2 main downsides:
1) A simple check box or time drop down for rules is limiting. For example, junior rules are rarely simple enough to use a check box, even combined with time of day or day of week. General club rules are often more complex too, such as golf members can book a social member as long as they pay the guest fee, or rules varying based on month or year, or primary vs spouse.
2) Rules controlled by check boxes can be overly involved to maintain. When this system was originally designed clubs asked us for a more flexible rules engine that could cover many conditions. By using templates it takes only a couple clicks to apply the same rules to many days or events, instead of having to select many boxes for each day or event.
We do plan to make the templates and rules more transparent and manageable on the club side but there has not been a large demand for this yet. Changes are simple to do with the unlimited support offered by the Reservations Support Team.
Best Practices
Plan to review and reapply schedules annually or before each season.
Schedules can only be changed for days without tee times. Blocks, Add Starts, or Special Events can be used to adjust days that already have tee times.
Impersonate User is the quickest way to check a specific membership type or rule such as when Non-resident members may book.
- Contact the Reservations Support Team at 512.609.7984 or res@clubessential.com for any questions or assistance with booking rules within the templates.
Downloadable Guide
Tee Times - Schedules - Booking Rules and Start Times
...
