| Table of Contents | ||||||||||
|---|---|---|---|---|---|---|---|---|---|---|
|
Overview
The Office System allows for payments to be processed at the POS through third party vendors, specifically ETS Transvault. Its necessary for the POS to communicate with the ETS Transvault software to process credit card transactions. The Terminal Value allows sync with the Payment Processing software, and the value itself is typically determined by the Payment Processor. Use Case(s) |
Please Note: If Club is NOT hosted, the process outlined below will need to be completed for each individual POS. |
Content
|
|---|
...
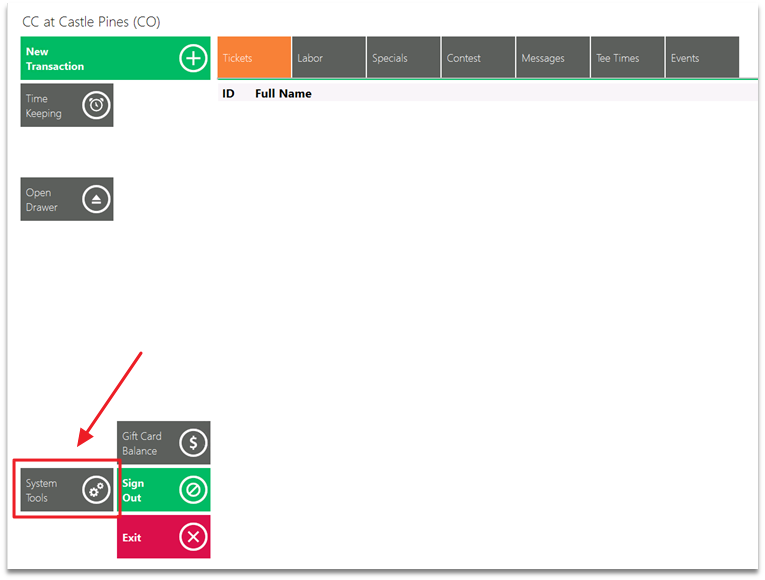
Accessing the Tool
To access POS Utilities,
1) Launch the POS system.
2) Select System Tools at the bottom left.
Creating a New Message
To create a new Message,
Navigate to the POS Messages Grid and perform either of the following to launch the POS Message setup screen:
a. Click the New icon on the toolbar.
b. Right-click anywhere on the POS Messages Grid and select New.
The POS Messages setup screen will launch.
General Information
Complete Information as shown/listed below.
1) Subject - Enter the Subject of the POS Message.
2) Body - Enter the Body of the POS Message.
3) Expiration - If the message has an expiration date, enter it here.
4) Urgent - If checked, Urgent will display on the message in POS.
5) Delivery - If checked, a Delivered button will populate on the message in POS. If selected, the message will not show again when the member is selected, or an employee signs in to the POS.
6) Conditional - If checked, additional options will populate to specify the conditions of the message.
7) Enable Area Filters - If checked, an additional tab will populate called Areas. If the message should only show in certain areas, please specify the applicable Areas on this tab.
8) Form - Only applicable when Conditional is checked. Leave this set to Close Ticket.
9) Condition - Only applicable when Conditional is checked. Leave this set to Cover Count Greater Than.
Member Specific Messages
A member specific message will show when the member is assigned a ticket at the POS. To specify the member(s) to receive the message:
Navigate to the Members tab and select the applicable members. Use the Select All or Un-Select All features in the right-hand corner, if applicable.
Again, when the member is assigned a ticket at the POS, the message will appear.
Employee Specific Messages
An employee specific message will show when the employee signs in to the POS. To specify employee(s) receive the message:
Navigate to the Employees tab and select the applicable employees. Use the Select All or Un-Select All features in the right-hand corner, if applicable.
Again, when the employee signs into the POS, the message will appear.
Conditional Messages
The Office system allows the user to create a Conditional Message that will populate on the Close Ticket screen in POS, when a ticket exceeds a specific Cover Count.
To create a Conditional Message, follow instructions shown/listed below.
1) Enter the Subject and Body of the message as normal.
2) Select Conditional.
3) Enter an Expiration date if applicable.
4) Form - Leave this set to Close Ticket.
5) Condition - Leave this set to Cover Count Greater Than.
6) Value - Specify the Cover Count that needs to be exceeded for the message to appear.
Now, when a ticket at the POS has a Cover Count of 8 or more, a message will appear when the server selects Close Ticket.
Delivery Messages
Delivery Messages can be used to alert staff to provide a one-time message to a specific member.
To set up a Delivery Message, follow instructions shown/listed below.
1) Enter the Subject and Body of the message as normal.
2) Select Delivery.
3) Enter an Expiration date if applicable.
4) Select the member(s) that will trigger the message on the Members Tab.
Again, when the member is assigned a ticket at the POS, the message will appear. However, for a Delivery Message, there will be an additional option called Delivered. Select this field when the message has been delivered to the member. After delivered is selected, the message will no longer appear when the member is assigned a ticket at the POS.
This is mostly used to prevent the member from receiving repeated messages.
Best Practices
Oftentimes, it is a good idea to establish a general format for writing messages to increase your Staff’s ability to easily understand communicated messages. For instance, if a Member has a food allergy, use, “Attn: Dining - Food Allergy” to preface the message. Or for All Employee messages, include that it is an all employee message by starting the message with “Attn: All Staff” and then append the nature of the message prior to adding details - ie., Attn: All Staff - Monthly Meeting”. Using specific formats to highlight the audience as well as the topic can train staff to quickly and consistently interpret your Club’s messages.
Keep tabs on your messages to ensure they are reaching the appropriate parties. To identify whether or not a message has been viewed or delivered, open the message in CMA and review the columns next to the assigned Employees or Members.
FAQs
Q: Can I assign a message based on Membership Groups, rather than individual Members?
A: While POS messaging is a very useful way to deliver messages to Members, Member Groups do not integrate with POS Messaging. Utilize other methods of communication to reach targeted groups of Members such as blast emails, notifications, or text messages.
Q: If more than one message is assigned to an Employee/Member, will both messages display?
A: Yes, messages will display one at a time, until all assigned messages have been shown and acknowledged.
Downloadable Guide
...
3) Select Utilities from the top menu.

Setting Terminal Value
To set the Terminal Value:
Within the Utilities Menu, Navigate to the Credit Card sub-menu.
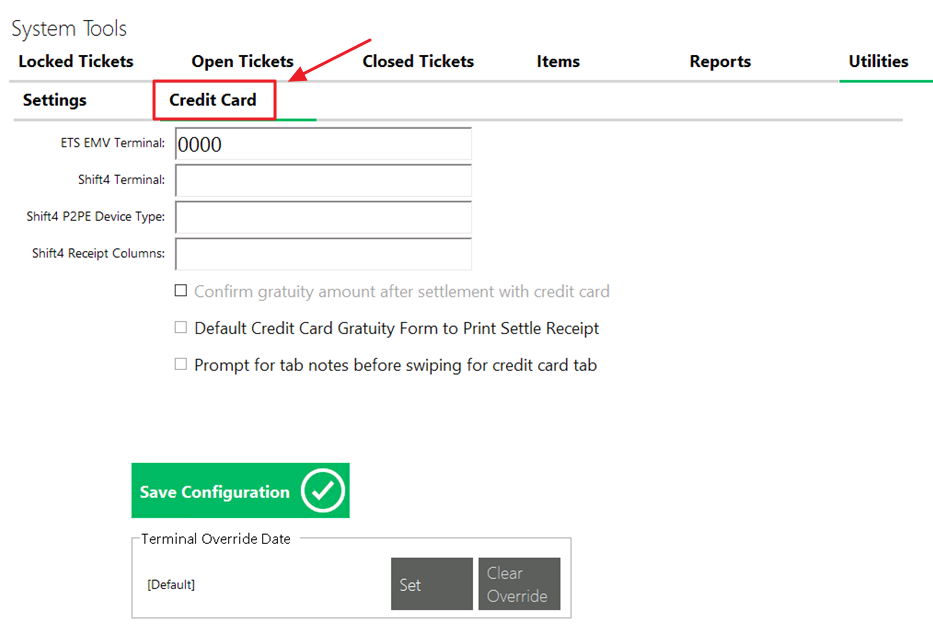
Set the ETS EMV Terminal to 0000.
Please Note: If the ETS Card reader is an LS5300 using a USB connection, the Terminal Value needs to be set to 5300, not 0000.
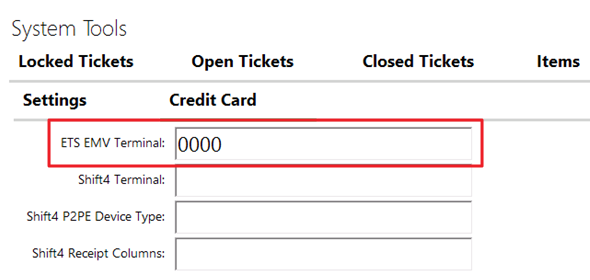
Please Note: If there is other information entered into this menu, it should be deleted. Make sure the ETS Value is set at 0000 and everything else blank.
Save Configuration.
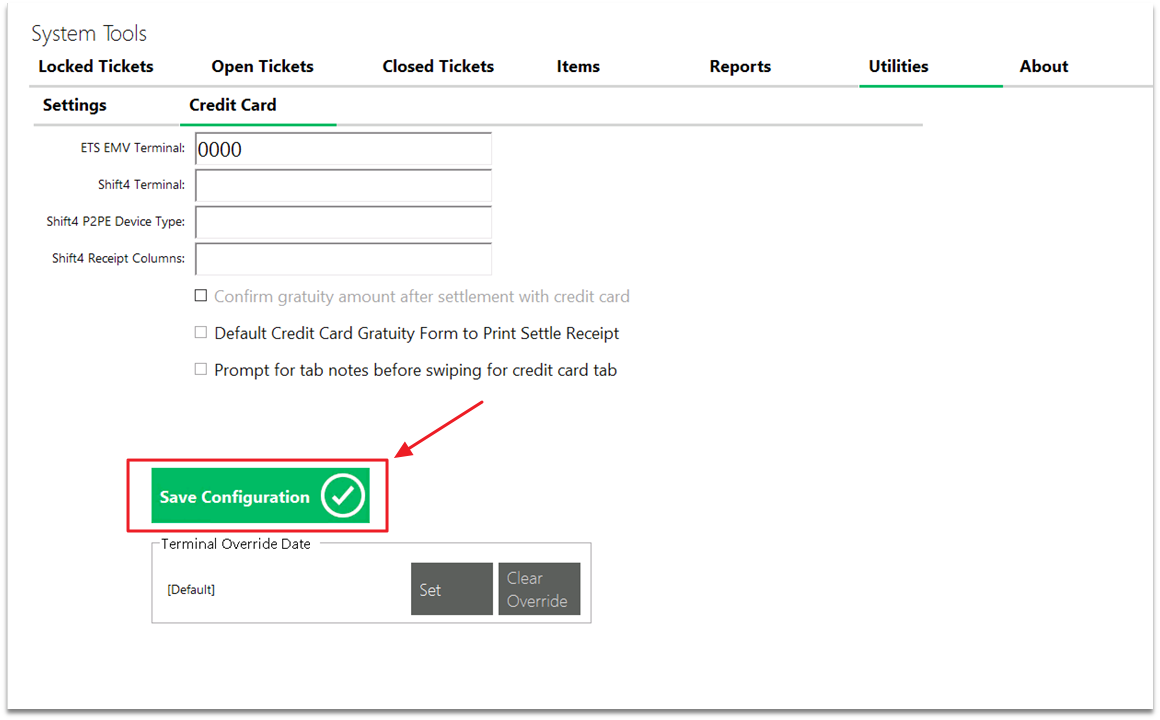
Please Note: This process will set up the ETS Terminal. If, after completing these steps, there are issues, a newer version of ETS Transvault needs to be installed. Please contact your CE Support Team for assistance in updating your version of ETS.