Versions Compared
Key
- This line was added.
- This line was removed.
- Formatting was changed.
...
Table of Contents
| Table of Contents |
|---|
...
|
...
|
...
|
...
|
Overview
Job Codes are the primary mechanism used to track hours worked and pay rates within
...
the Office timekeeping system.
...
Use Case
A new hourly employee started today in the Golf Shop. To ensure the employee can clock-in and out, and his hours and pay are tracked properly through the timekeeping system, it is essential to assign the Employee to the proper Job Code, and populate his hourly rate appropriately.
Content
|
|---|
...
In addition, Job Codes must be assigned to any Employee who will be clocking in/out at the POS.
Required Permissions
Employees Module
Add/Edit/Delete Job Codes
Accessing the Tool
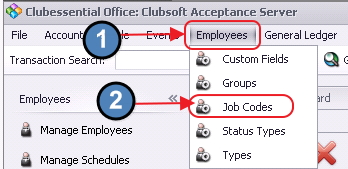
To access Job Codes, select Employees across the top toolbar, and choose Job Codes.
...
The Job
...
Codes Grid will launch.
...
The primary functions associated with managing Job Codes are embedded in the Job Code setup screen, which can be accessed by double-clicking on an existing Job Code (to edit an existing code), or clicking the New button (to create a new code).
Create New Job Codes
To create a new Job Code, navigate to the Job Codes Grid, then perform either of the following to launch the Job Code setup screen:
...
Click the New icon on the toolbar.
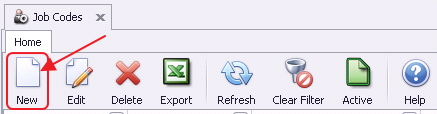 Image Removed
...
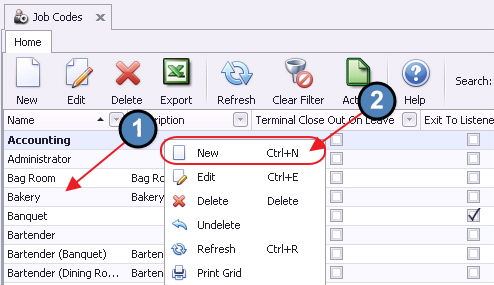
Or, right-click anywhere on the Job Codes Grid and select New.
...
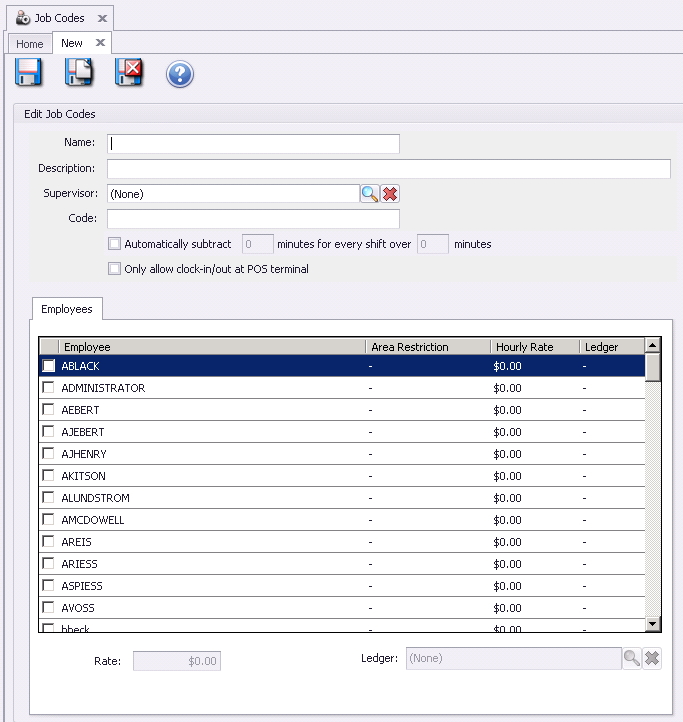
The Job Code setup screen will launch.
...
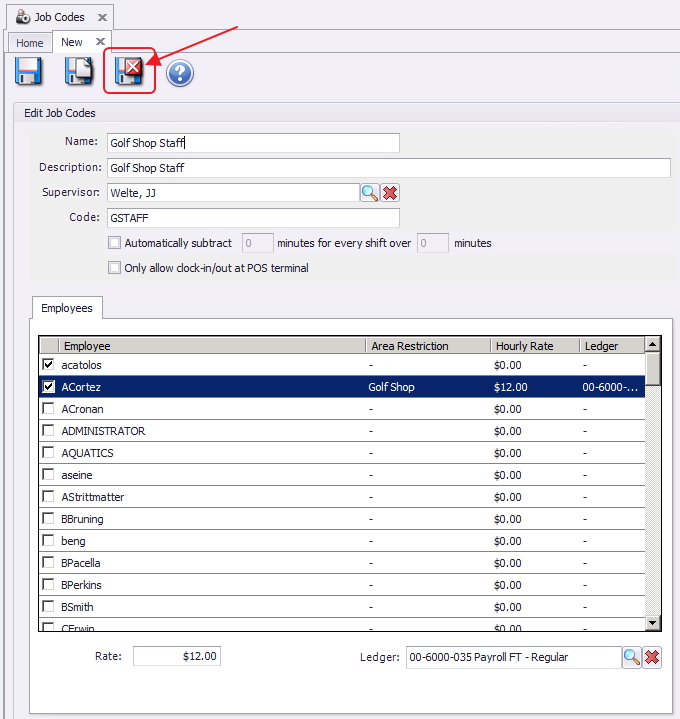
Begin setup by populating the General Information at the top of the screen.
General Information
...
Enter a Name and Description (optional) for the Job Code.
...
Supervisor - Enter the supervisor of the employees within the Job Code (optional). Note the lookup feature is available to assist with populating this field.
...
Code - Enter a unique value for the Job Code. This will be the code used if Payroll is exported to a third party vendor.
...
Automatically Subtract - Only used when our Scheduling Module is utilized. If an employee works longer than a certain allotted time, checking this box will subtract a specific amount of time (in minutes) from their timesheet. For instance, this could be used to automatically deduct a lunch break from an employee’s timesheet.
...
Only Allow Clock in/Out at POS Terminal - If checked, employees within the Job Code will only be able to clock in and out at the POS; all other POS functions will be restricted.
...
Once General Information is populated, proceed to the Employees tab at the bottom portion of the setup screen.
Employees
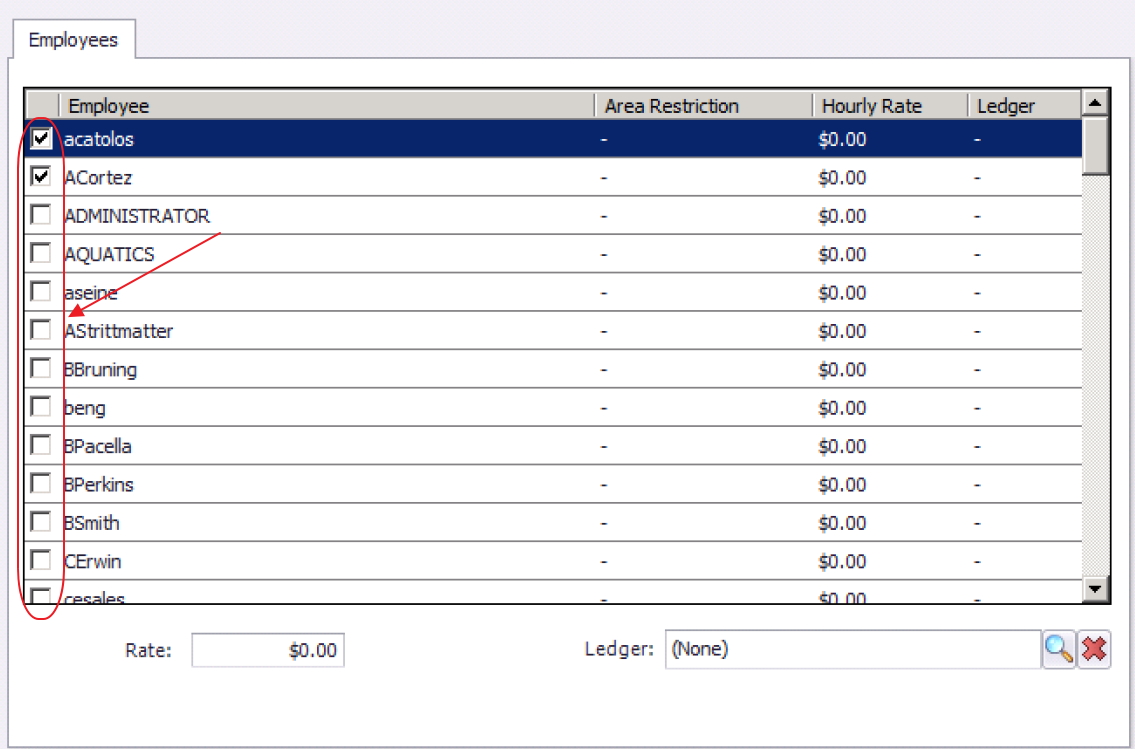
The Employees tab displays a list view of all employees with the Job Code.
Although it is recommended to add/remove employees to/from the Job Code within the individual employee profile, this can also be done here by simply checking or unchecking the flag next to the Employee’s Username.
...
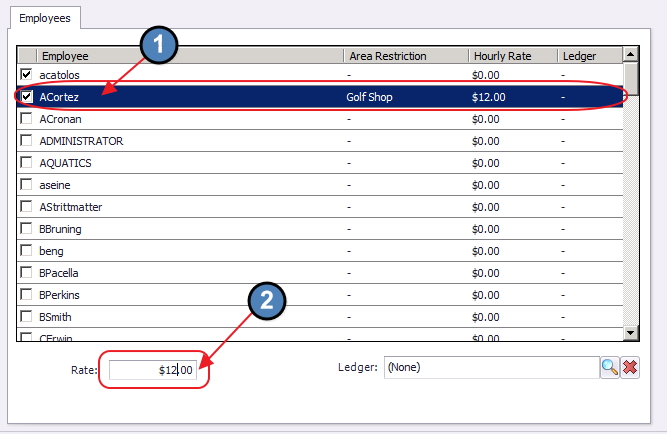
Rate
To add an hourly Rate to an employee, click to select the employee in question (will be highlighted in blue when selected), and in the Rate field, type the appropriate dollar amount.
...
Ledger
To add an Expense Payroll Ledger to an employee, click the ledger lookup and select the appropriate ledger. The Expense Payroll Ledger is simply for reporting purposes, it will not produce any type of Journal Entry.
...
Save and Close
Lastly, click Save & Close to complete the setup of the new Job Code.
Apply/ Remove Job Codes within Employee Profile
As previously mentioned, it is recommended to add/remove employees to/from the Job Code within the individual employee profile.
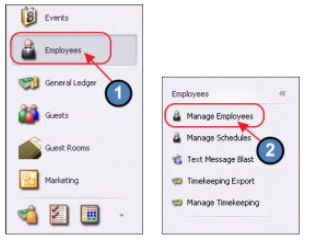
To do so,
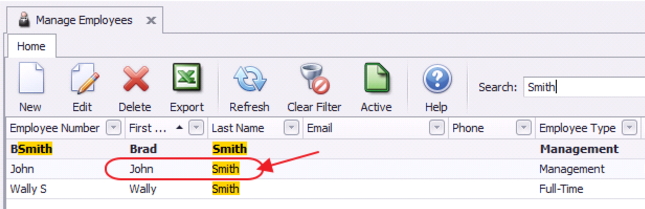
Navigate to the Employee Module on the left user menu and select Manage Employees.
The Manage Employees grid will launch. Double click the applicable Employee to add/remove the Job Code.
Select the Job Codes tab on the left pane. Next, Select the Employee’s applicable Job Codes.
Although it is best practice to add the Rate and Expense Payroll Ledger at the Job Code
...
level, they can be added on an individual basis here.
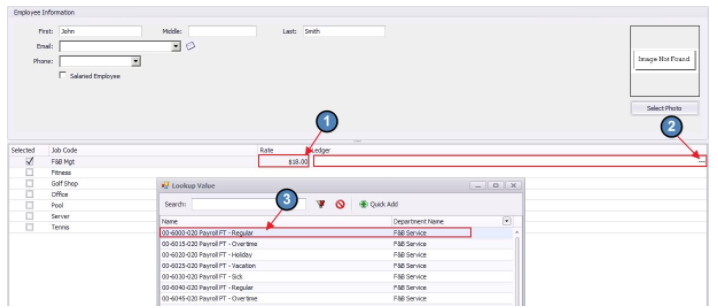
To add a Rate, Click to select the Rate field and type the appropriate dollar amount. This rate will be on an hourly basis.
To add an Expense Payroll Ledger, click the ledger lookup button (three dots) and select the appropriate ledger. The Expense Payroll Ledger is simply for reporting purposes, it will not produce any type of Journal Entry.
Best Practices
...
While the functionality exists to automatically subtract minutes worked from an employee’s shift (for lunch, etc), ensure you are familiar with your State’s labor laws prior to determining whether it is appropriate for your Club’s use.
Assign Hourly Rate and Ledger Expense accounts within the Job Code setup screen (rather than the Employee Profile screen), to improve comparability and visibility across employees within the same Job Code.
FAQs
...
How can I ensure employees can clock-in/out at the POS, but not access any other POS features?
...
Check the Only Allow Clock in/Out at POS Terminal option in the Job Code. When checked, all functionality except clocking in and out is restricted for Employees assigned to the Job Code.
Downloadable Guide
...
 Image Added