...
...
...
...
...
...
...
...
...
Table of Contents
| Table of Contents | ||||||
|---|---|---|---|---|---|---|
|
...
Use Case(s)
A Club may wish to allow their Members to register for Dining Reservations utilizing the on-line Reservations system. Additionally, the Club may also utilize the Clubessential Office Product, with Food and Beverage POS fully implemented in their Dining facilities. In addition to allowing the Members to make reservations online, the Club is interested in assisting Members who call-in or walk-up with making a Dining Reservation. Daily, the Club would also like the Food and Beverage areas of their Club to have integrated visibility and editing capabilities to the Dining Reservations, be able to easily convert the reservations into POS dining tickets; assign tables and servers to the Reservations, add items to the Tickets, and ultimately charge their Members. The Unified Suite provides the Club with the ability to meet their goals.
Video
This video contains highlights from a training Webinar given on the Dining Unification process.
Note: Sections of the video have been referenced below with corresponding times in the video for ease of access
| Total Video (Length) | 9:23 | |||
|---|---|---|---|---|
| Website - Member Makes a Reservation | 0:51 | POS - Create Ticket from Reservation (Assign Table and Server) | 5:36 | |
| POS - Dining Room Manager Perspective | 2:40 | POS - Dining Room Review/Ticket Audit Preview | 6:25 | |
| POS - Dining Tab Overview | 3:15 | POS - Dining Room Server Perspective | 7:16 | |
| POS - Show Admin Dashboard (Make Real Time Reservations) | 4:35 | POS - Convert Open Ticket to Member Charge | 7:46 |
Content
|
|---|
Reservations/Dining
Make a Reservation (as a Member)
Once a Member makes a Reservation on-line using the Clubessential Dining Reservations product, the Reservation fully integrates into the Food and Beverage POS application.
For example a member could make a reservation on the website as follows:
Navigate to Book a Table

Select Reservation Date/Dining Room/Time
Select the Date, scroll to the desired Dining Room (if more than one exist), and select specific time slot by clicking on the Booking block.

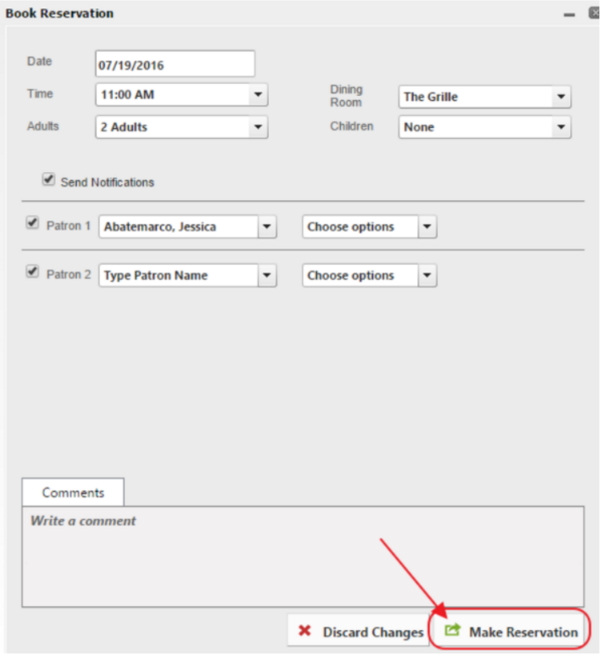
Complete Registration Booking Form
Once a time is selected, the Reservation form will appear. Complete the form, and click “Make Reservation.”

Confirmation screen of reservation being received will appear.

Once a Member makes a Reservation online using the Clubessential Dining Reservations product, the Reservation fully integrates into the Food and Beverage POS application.
Point of Sale (POS)
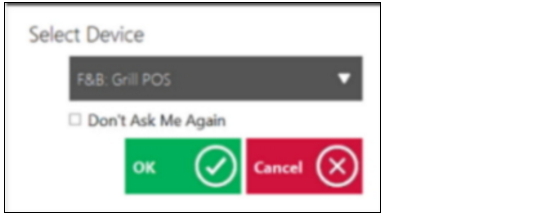
To view the existing Dining Reservations, log in to the Food and Beverage POS Terminal associated with the Dining area.

Dining Tab (as a Dining Manager)
Once logged in, navigate to the “Dining,” tab.

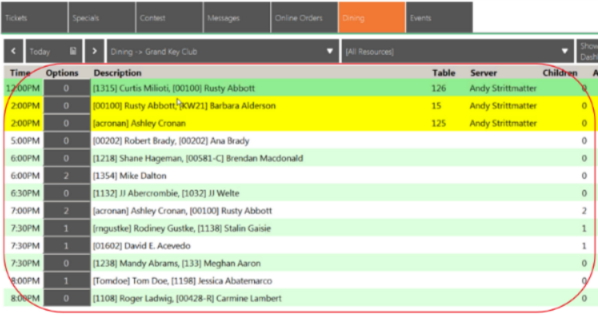
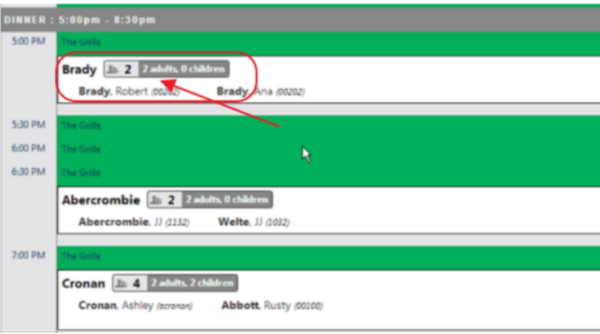
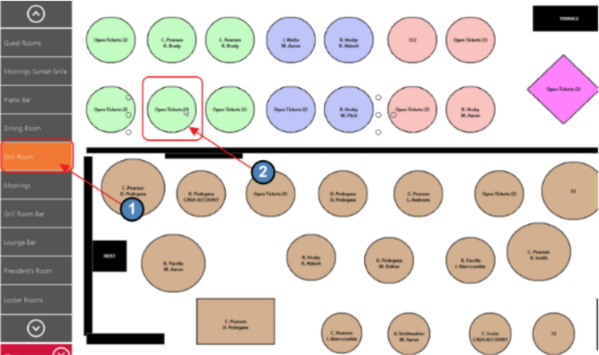
Main Grid
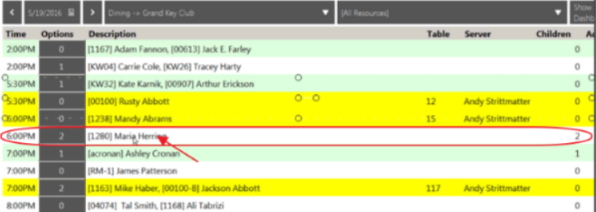
All Dining reservations for Today (default date) will appear on this tab.

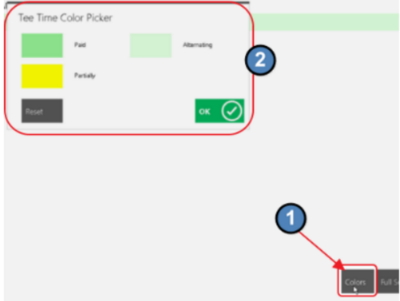
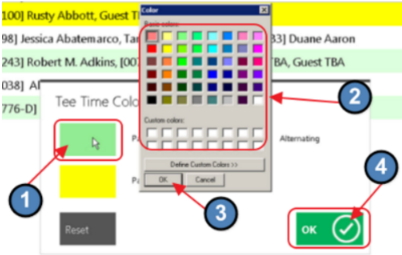
Colors Displaying on Main Grid
...
...
Default colors are as follows:
...
...
...
...
...
...
Club Display
This filter contains the Club(s) available in the POS. In the event more than one Club exists in the system, selection of a particular Club will be available here.

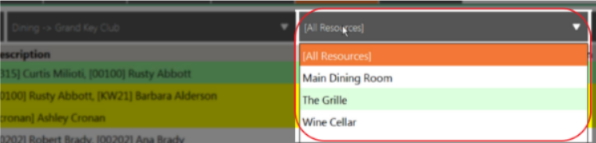
Dining Rooms Display
The filter (below) contains the Dining Rooms. Most Clubs have more than one Dining Room, and as a Dining Room Manager, it is common to utilize the “All Resources” option within the drop-down to display all dinings reservations in the Club.

Show Admin Dashboard
Click on the “Show Admin Dashboard” button in the upper right-hand corner of the screen to make/edit reservations directly from the POS.

Once clicked, the Admin Webview functionality launches.
...
...

...

...
...

...
...

...

...
...
...
...
Click “Hide Admin Dashboard” to return to main Dining Reservations grid.

...
...

...
...

...
...
...

...
...
Review Dining Room Status
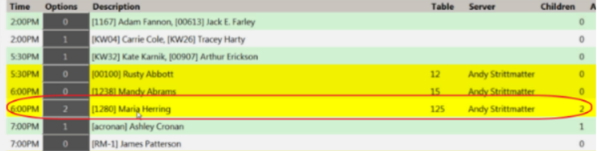
To review the status of the open Dining Room tickets, click on an open (Yellow) ticket to launch the “Ticket Audit Preview,” screen.
The food ordered can be viewed, and therefore an estimate of when the table may be available could be obtained.
In the example below, entree salads were just ordered, so it is likely the table will not be finishing up in the very near future.

Dining Tab (As a Server)
The Dining tab and associated reservations are also viewable to the Servers.

Convert Open Ticket to Member Charge
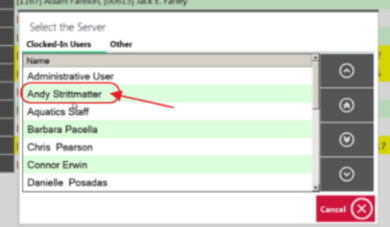
Once ticket has been assigned to a Server, the Server can access the Ticket on the Tickets tab. Server will click ticket to open.

Once open, items can be added utilizing normal POS functionality.

When complete, ticket can be closed based on Member/Guest payment preference.

Review Dining Tab (Reservations)
Servers also have access to the Dining Tab, and can review upcoming reservations.

Best Practices
...
FAQs
...
...
...
...
...
...
...
...
...
...
...
...
...
...
Downloadable Guide
...
