Versions Compared

Key

  • This line was added.
  • This line was removed.
  • Formatting was changed.

Table of Contents
maxLevel1
outlinetrue
stylenone
classtoc

Content

...

Table of Contents
maxLevel3
minLevel2
excludeUnification - Events


Registering for Activities

...

Table of Contents

Table of Contents
minLevel1
maxLevel7
excludeTable of Contents

Use Case(s)

Clubs want to allow Members to register for club activities (i.e. reserve a court time, book a tennis lesson, register for a fitness class, book time with a personal trainer, reserve time at the pool) utilizing the Club's on-line Courts/Lessons/Activities Reservation system and have those reservations fully integrate with the Club's back Office/CMA and POS products so that Club Administration, Management and Staff have full visibility into all activity reservations via the POS system and have the ability to fully manage those reservations via the POS (changes, additions and deletions) as needed. In addition, Clubs need the ability to convert those reservations to POS tickets that can be charged to the Member. 

Notes:

  • Activity Reservations refer to reservations made for any activities outside of: Golf, Dining and Events. Examples include: Tennis Courts, Squash Courts, Tennis Lessons, Personal Training, Fitness Classes, Pool Time, Swim Lessons, etc. 
  • Clubessential Implementation/Support involvement is needed to enable the Activities Integration for your Club. Various settings both within Website and Office/CMA need to be invoked to complete the integration.    

Activity Registration

Register for Activities As a Member 

  1. Navigate to the area of your Club Website set-up specifically for booking the activity you want to participate in, or reserving the court/fitness room/spot you want to secure

...

...

  1. Select the Activityyou want to book. 

Image Removed 

...

  1. Complete the reservation for the Activity.

Image Removed

Register for Activities as a Club Admin  

  1. Navigate to the Admin Dashboard for the activity that needs to be booked.

Image Removed  Image Removed  Image Removed

  1. Select the Activityto be booked.  

...

  1. Complete the reservation for the Activity. 

Image Removed 

Activity Reservations in Mobile POS

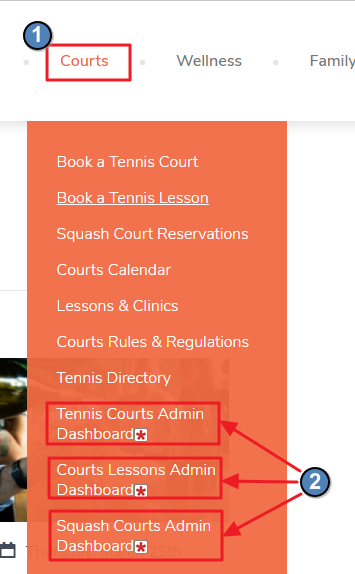
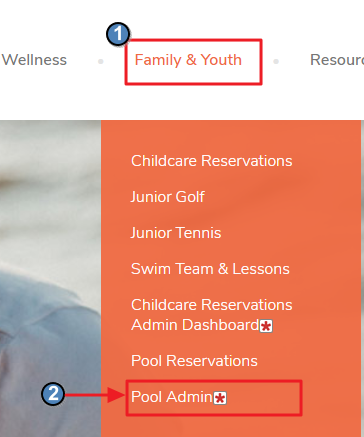
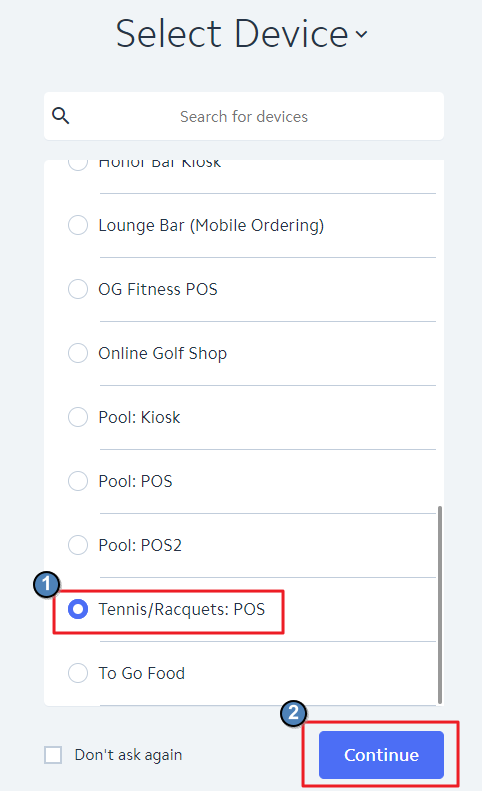
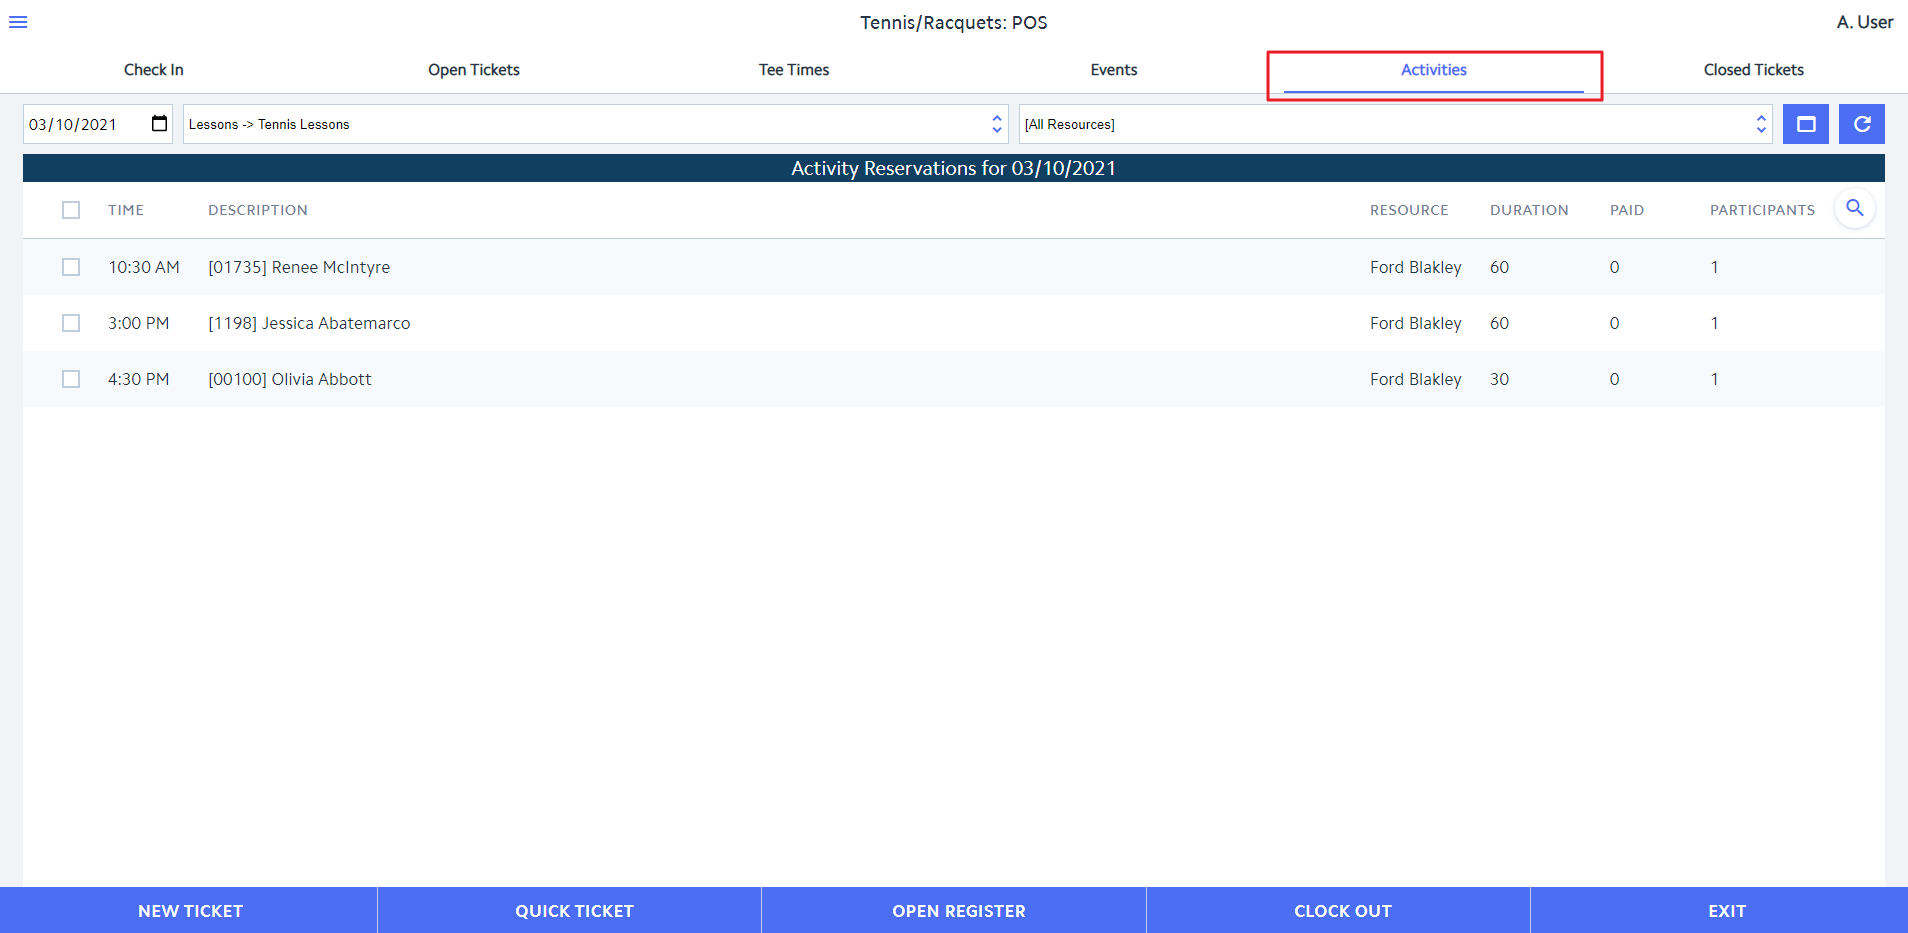
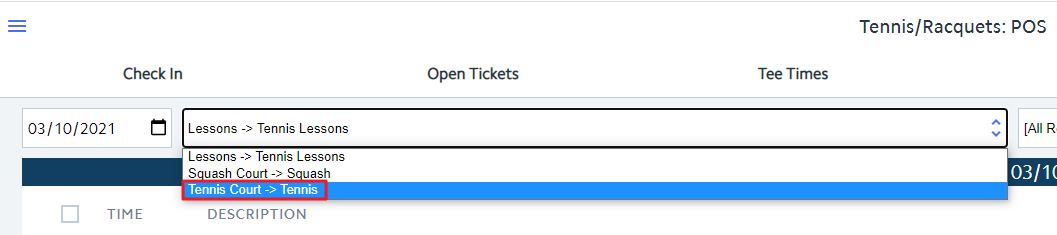
Navigating to Activity Reservations

...

  1. Login to Mobile POS

...

  1. and select the device associated with the area of the

...

  1. activity

...

Image Removed

...

  1. .

  2. Navigate to the Activitiestab.

Image Removed

  1. The date will default to today's date. To select a date other than today, click on the Calendar icon.

Image Removed

  1. Select the appropriate Resource or Activity Reservation option from the dropdown list

...

  1. .

...

Image Removed

  1. All reservations for the Date and Activity Reservation option will be displayed. Groups of members/guests who share one reservation will appear on the same line

...

  1. .  

Image Removed

Convert Reservations to Member Charges

...

  1. Click on the desired reservation or click the check mark next to the desired registration and select Create Ticket.

Image Removed

  1. Select who is paying for the ticket. (Only Members will be listed as options.) 

  2. Select who is being paid for. (Both Members and Guests will be listed as options.)

...

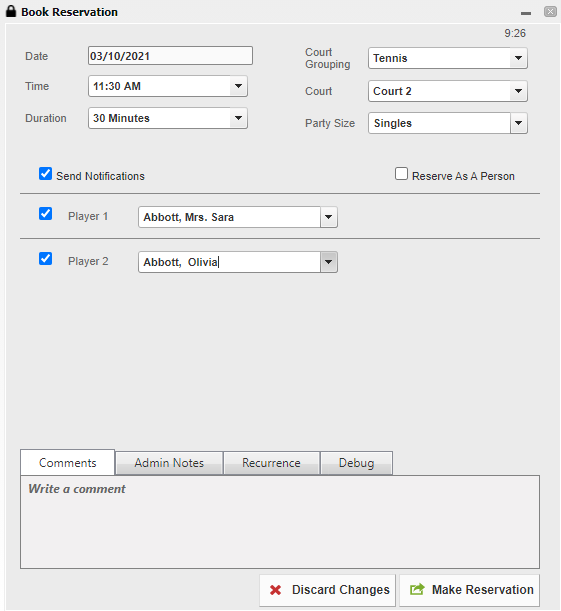
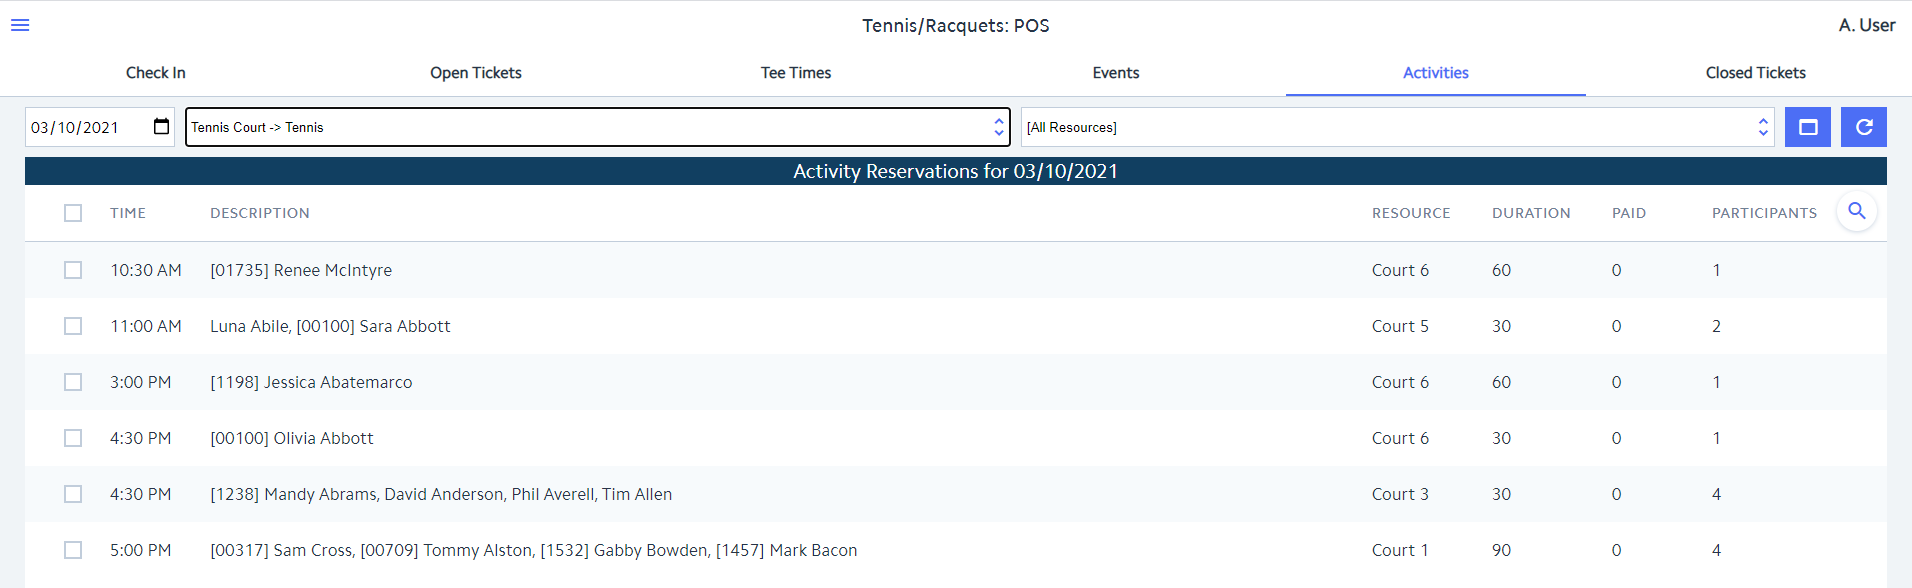
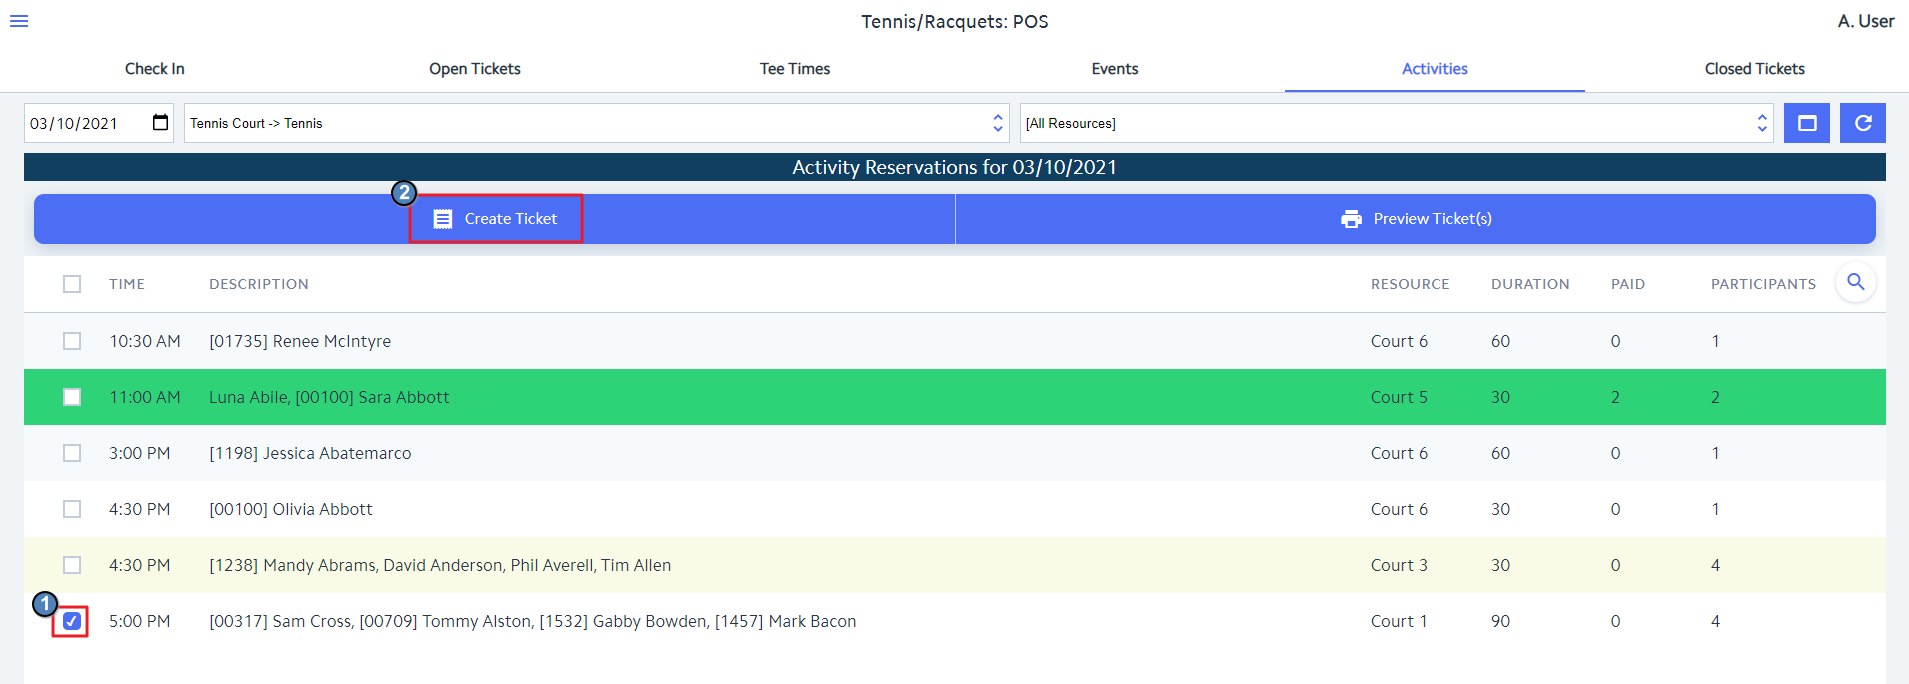
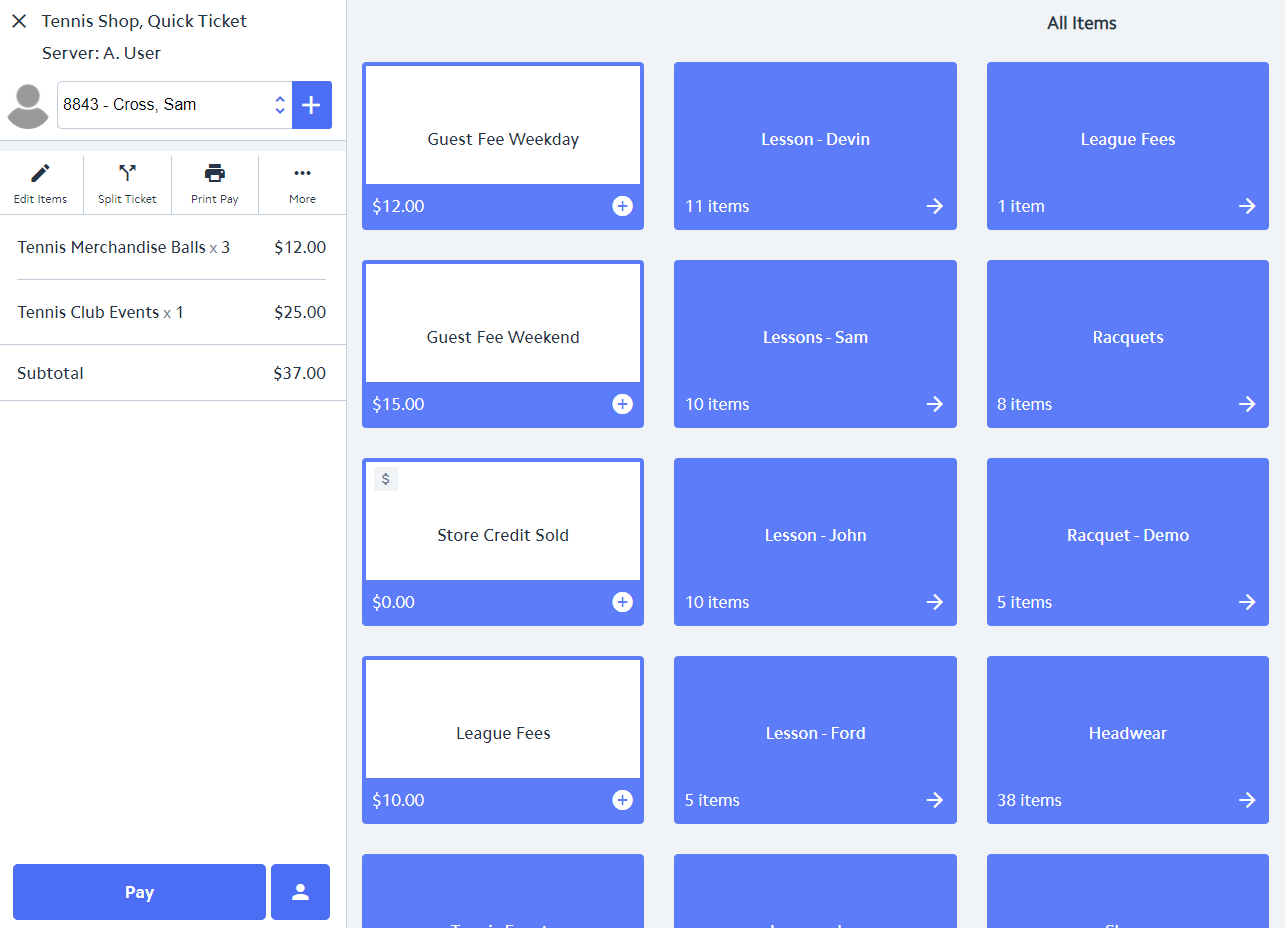
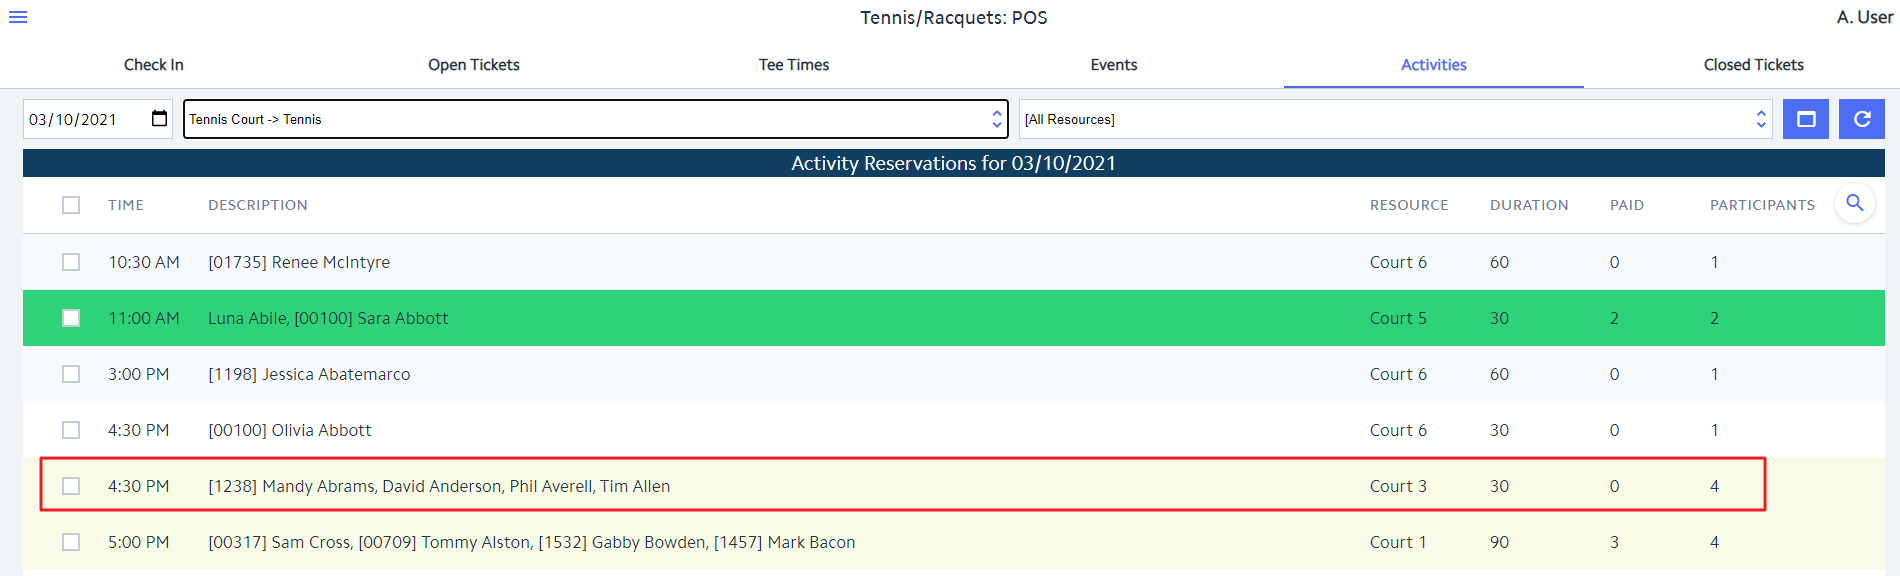
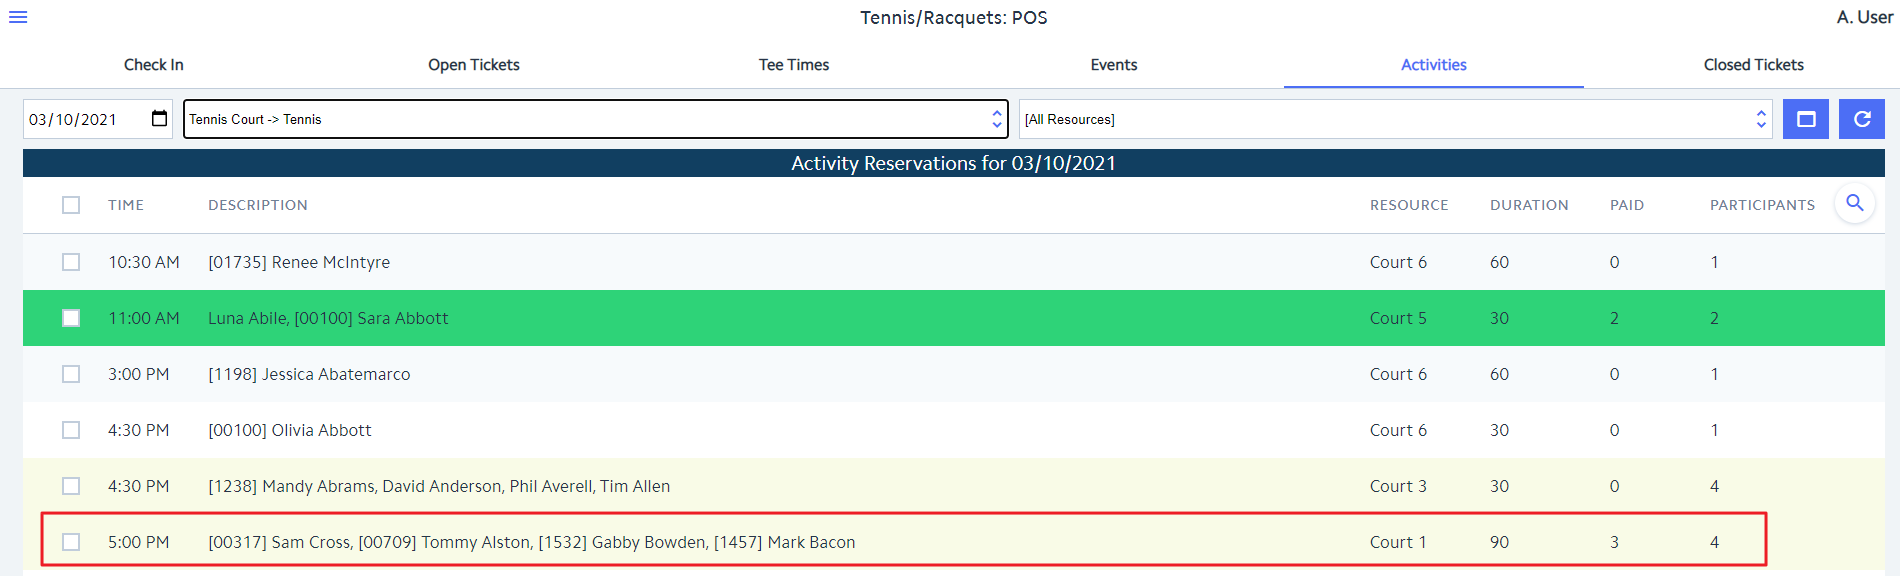
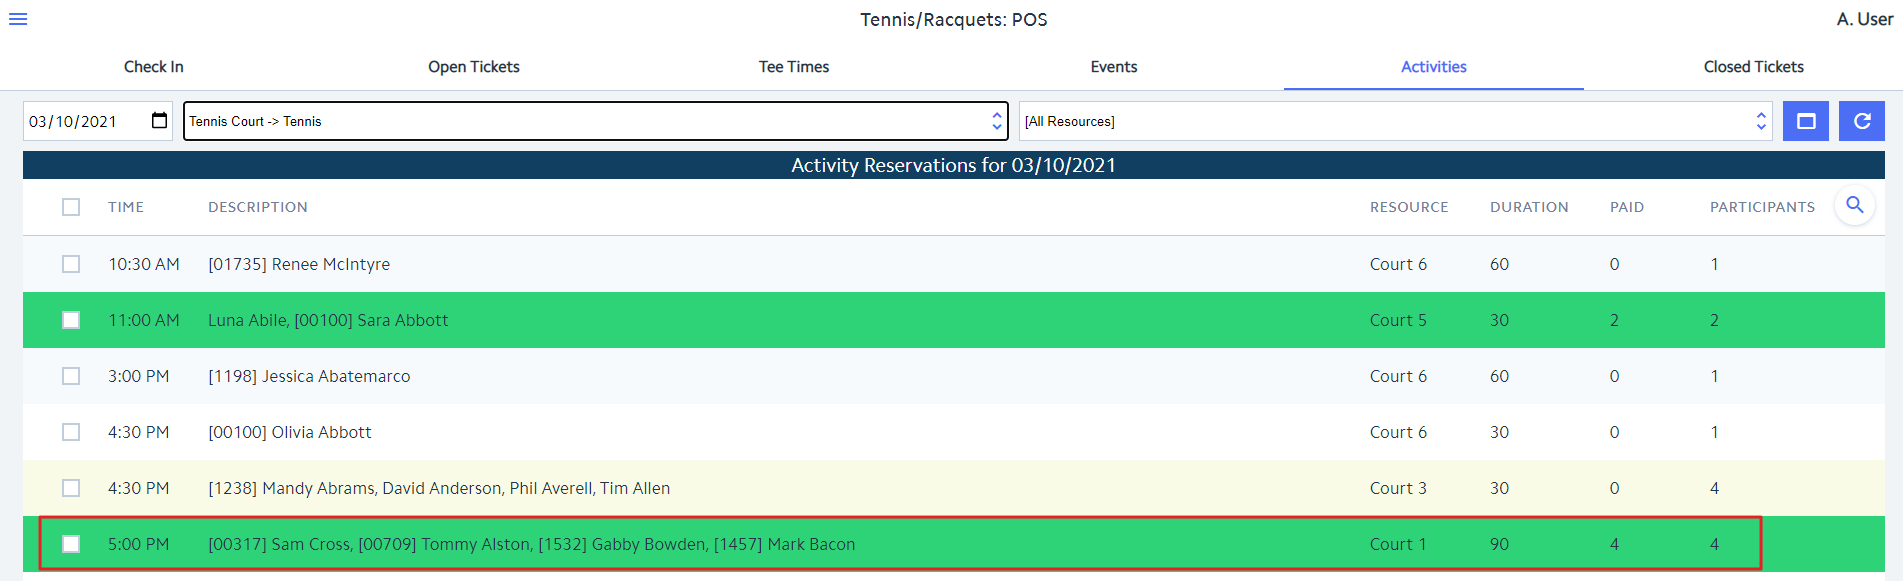
In the example below, Sam Cross is paying for 3 Members: himself, Tommy Alston and Gabby Bowden.

...

  1. A ticket will be opened

...

  1. where Items can be added as desired and the ticket can be closed based on the Member's payment preference.

Image Removed

...

Reservation Color Scheme

  • White - A ticket has not yet been created for the reservation.

  • Yellow- At least 1 ticket has been opened for

...

  • the reservation, but

...

  • not yet

...

  • settled

...

  • .

Image Removed

  • Please Note: When some participants have been paid for,

...

  • the reservation will remain yellow in color but the Paid count will reflect how many participants have settled. 

Image Removed

...

  • Green - All participants have been paid for

...

  • and

...

  • the

...

Image Removed

...

  • ticket

...

Image Removed 

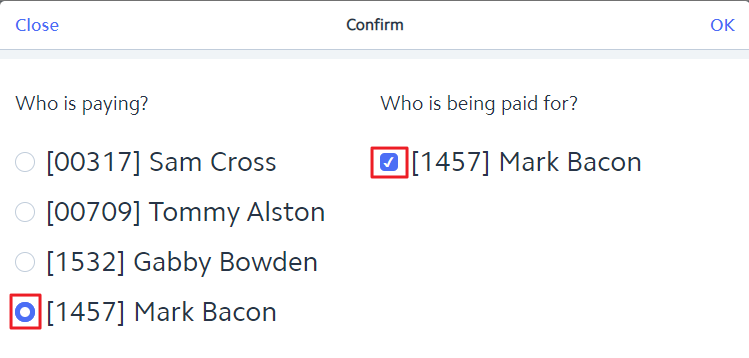
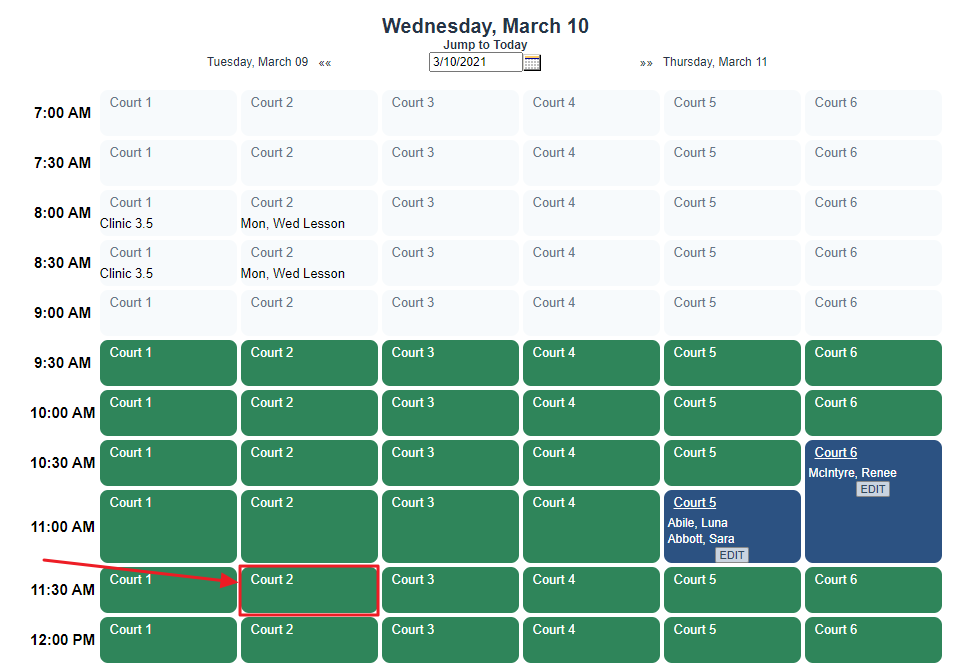
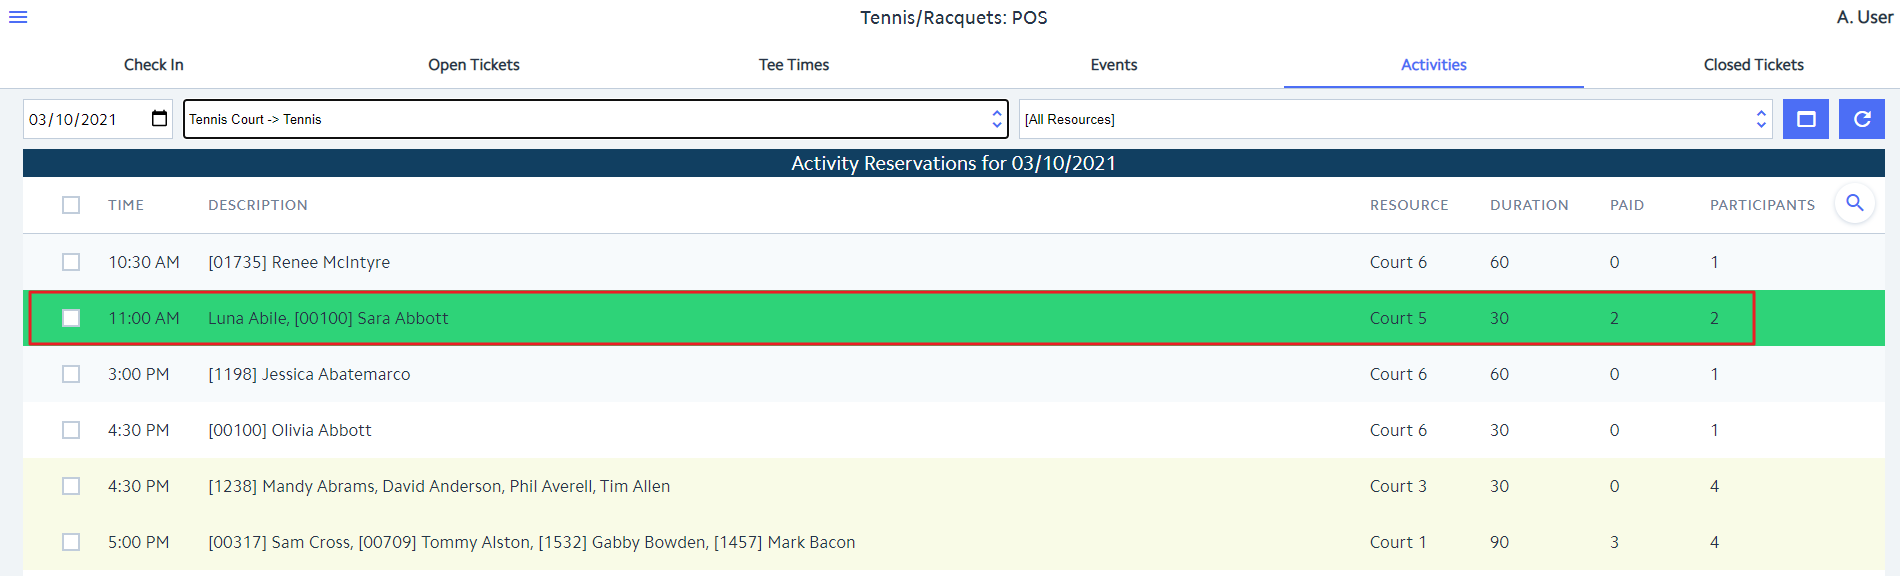
After creating a ticket for Mark Bacon and settling it, the reservation will change to green in color indicating that all participants have been paid for.   

Image Removed

The settled tickets can be found under the Closed Ticket tab. 

Image Removed

...

  • (s) has been settled.

Re-open a Closed Ticket for an Activity Reservation 

...

  1. Navigate to the Closed Tickets tab

...

  1. Select the ticket to be re-opened.  

Image Removed

...

  1. Please Note: Re-opening a ticket

...

  1. will change the reservation

...

  1. from green to yellow in color on the Activities Tab indicating that not all participants have been paid for.

...

Image Removed

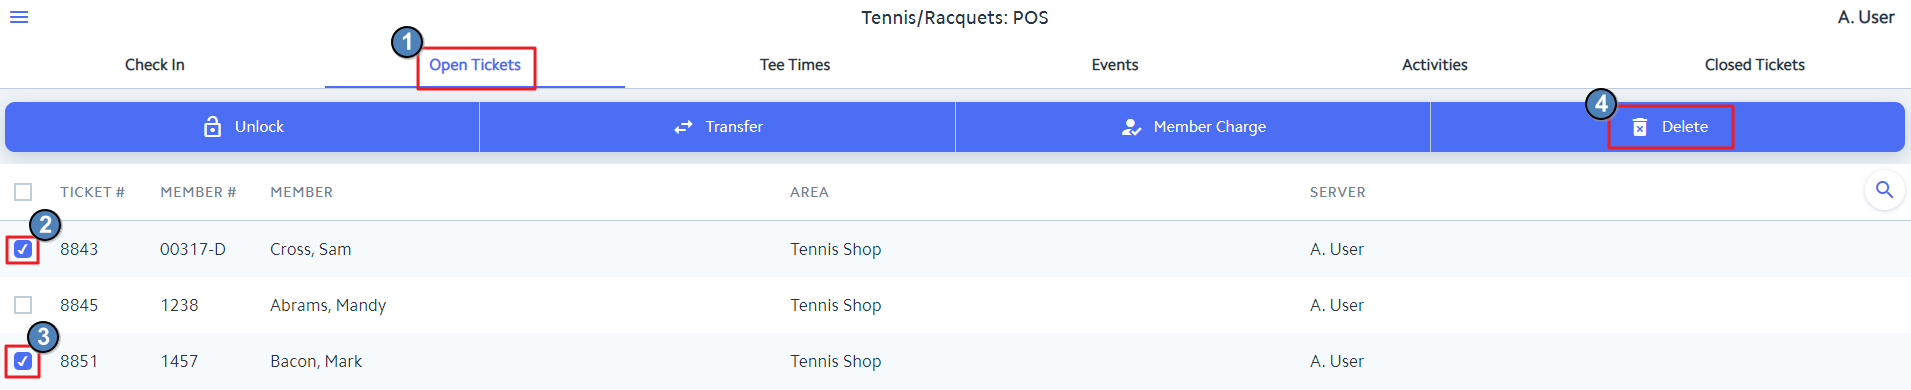
Taking it a step further and re-opening Sam Cross's ticket #8843 as shown below... 

Image Removed

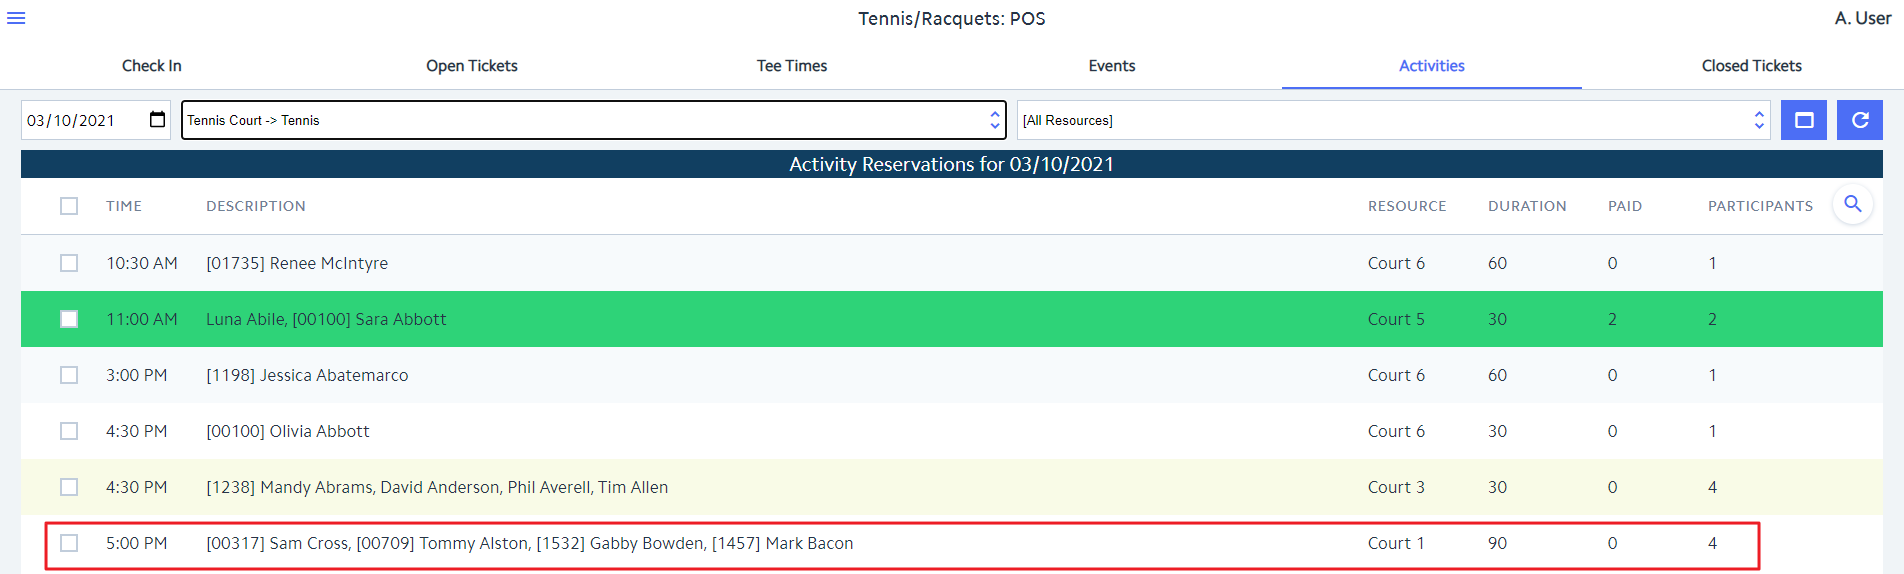
will result in the Paid count changing from 3 to 0.  The reservation will remain yellow in color since there are still open tickets associated with it.

Image Removed

...

  1. Make any needed changes, then Close the ticket.

Delete an Open Ticket for an Activity Reservation

...

  1. Navigate to the Open Tickets tab

...

  1. .

  2. Select the ticket(s) to be deleted. 

Image Removed

  1. Please Note: When deleting all open tickets associated with a reservation, the reservation will change from yellow to white in color

...

  1. indicating that no tickets have yet been created for the participants included in the reservation. 

Image Removed

...

  1. Click the Delete button.

Make Reservations Using the Admin Dashboard

Website Administrators with rights to access the various Activity Admin Dashboards have the ability to access the dashboards from their Mobile POS device. From the Activities tab, select the Activity Reservation option of the dashboard you want to access, then click the Admin Dashboard icon. 

Image Removed 

You will be single-signed into that particular Website Activity Admin Dashboard where you can perform all the actions necessary to manage reservations. It will open within a separate tab on your tablet or computer. To navigate back to the POS screen, select the POS tab. 

...

Image Added