...
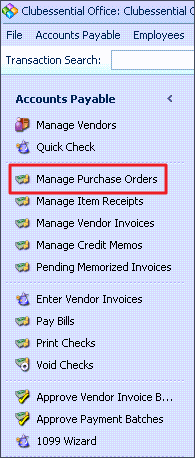
Once signed into CMA, navigate to Accounts Payable.


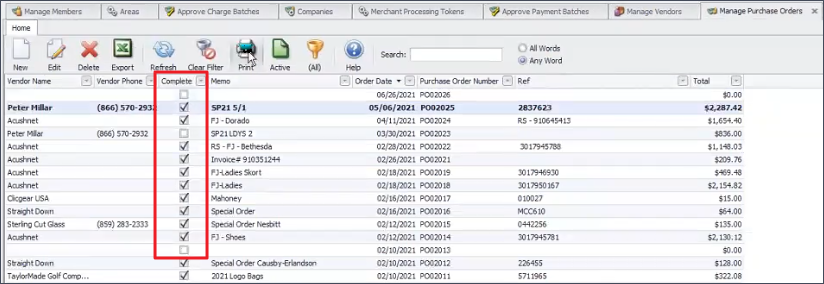
Click on Manage Purchase Orders. Here you can view, edit, or delete any existing purchase order.

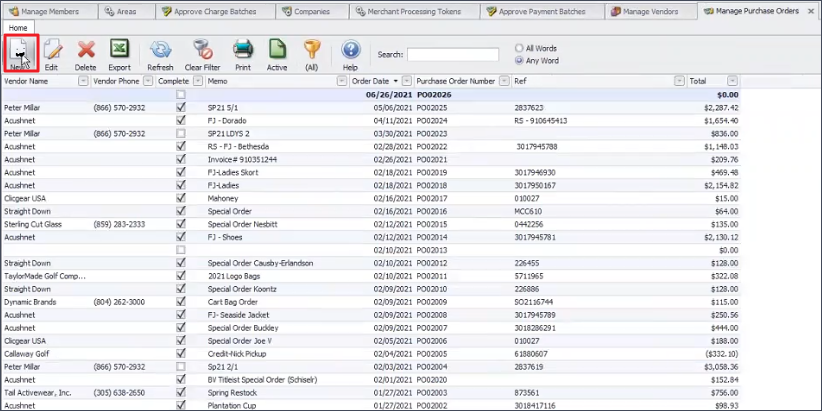
Click New to create a new purchase order.
Use the magnifying glass icon to select the Vendor. Vendor information will autofill from the vendor file.
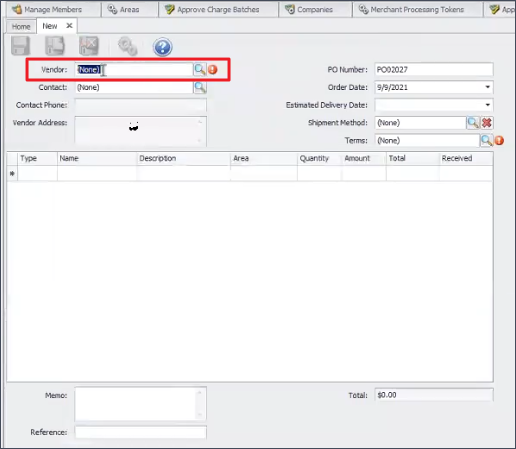
A PO Number will automatically be assigned. The Order Date will default to today’s date but can be changed if need be.
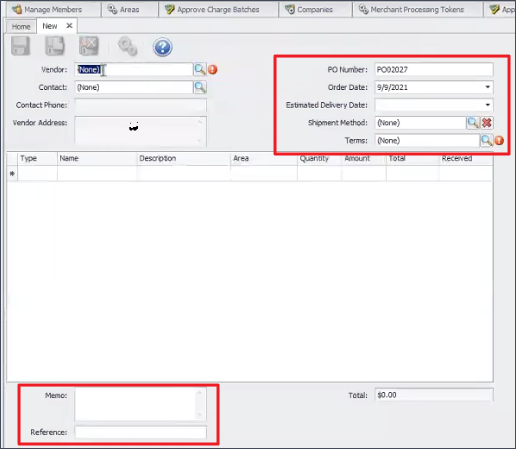
Optional Fields can be filled out depending on the amount of detail desired for the purchase order.
Estimated Delivery Date
Shipment Method
Terms
Memo: Add any notes regarding the purchase order including who might be in charge of accepting the order.
Reference Number
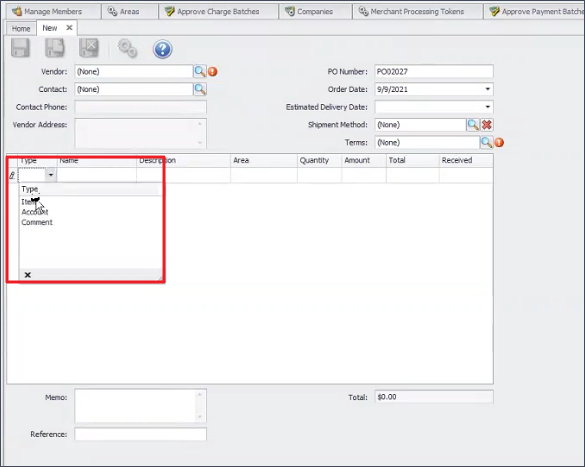
Add any Items.
Click into the Type field and select Item.
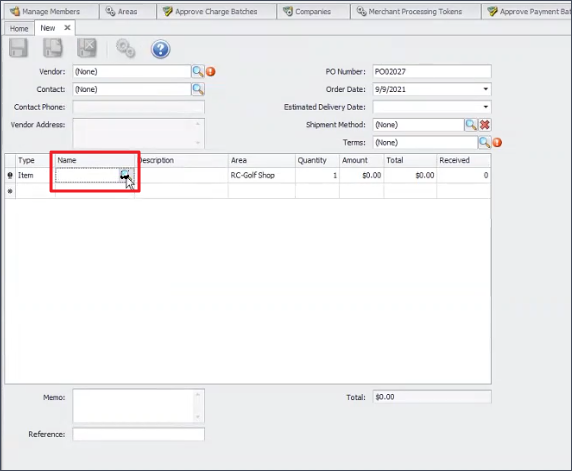
Select the specific Item by clicking on the magnifying glass in the Name field.
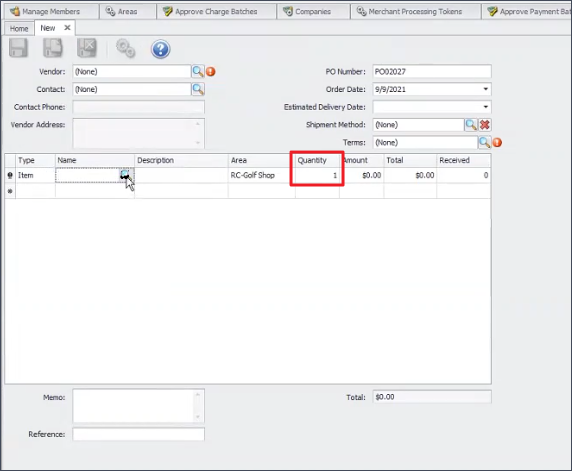
Enter the Quantity purchased.
Enter the dollar Amount.
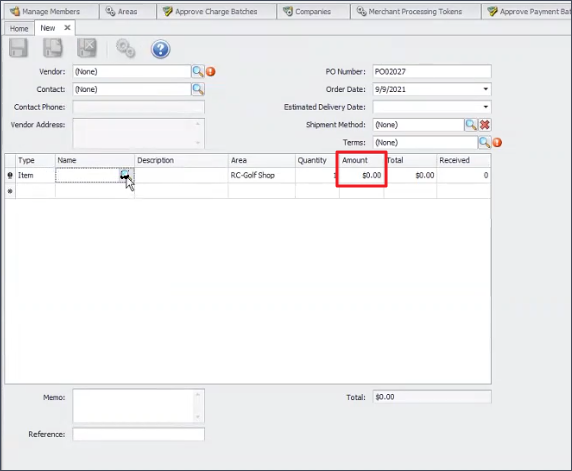
Select the Save icon to finish.

...
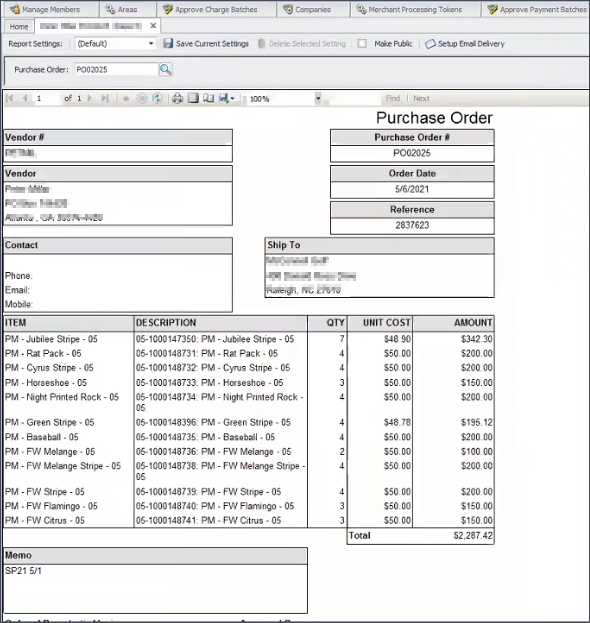
Any existing purchase orders can be viewed by double clicking the order while viewing the list.
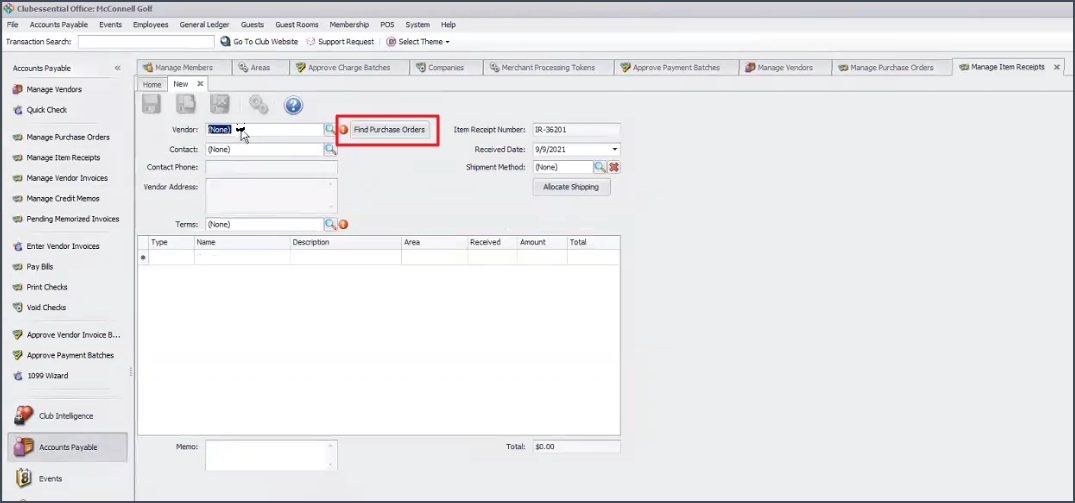
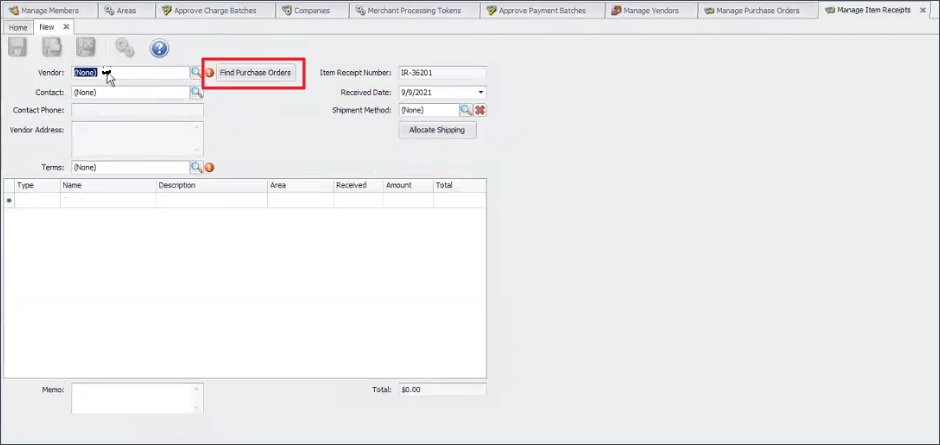
When creating an item receipt, the Find Purchase Orders button can be utilized and any info on the purchase order will be used to autofill the item receipt.
Once the item receipt is saved, the purchase order will be flagged as Complete.