Table of Contents
| Table of Contents | |||
|---|---|---|---|
|
...
Video
This video contains highlights from a training Webinar given on the Groups Unification process.
Note: Sections of the video have been referenced below with corresponding times in the video for ease of access
...
| Widget Connector | ||||||
|---|---|---|---|---|---|---|
|
Content
...
| Table of Contents | ||||||
|---|---|---|---|---|---|---|
|
Office
Groups and Group Creation
|
| Widget Connector | ||||||||||
|---|---|---|---|---|---|---|---|---|---|---|
|
Use Case(s)
A Club may wish to establish several different types of Membership Groups to accomplish various marketing and communication goals. For instance, a Club may wish to put all Members who are on the Board in a specific fixed, or Static group, so they can email minutes, calendar updates, etc. The club may also desire to establish Dynamic Groups, or Groups that fluctuate Membership based on certain parameters given to it (for instance all Members who have Birthdays for the current month). Additionally, the Club may also want the ability to set up Special Interest or Other Groups, like a Wine Club, whereby Members may sign up (or opt-in) to the Group(s) that are of interest to them via the Club’s Website. The Unified Suite provides the Club with the ability to meet their goals.
...
...
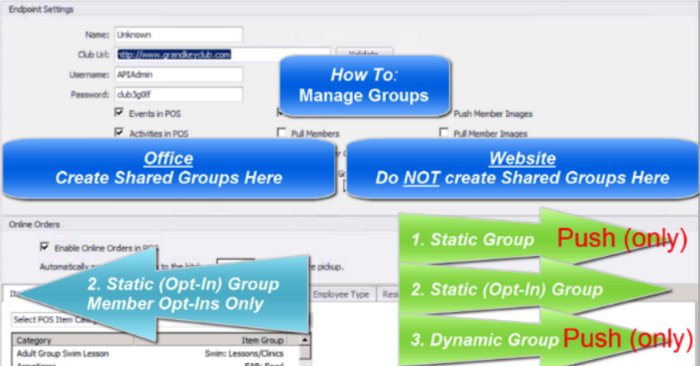
There are three types of Groups that can be created:
...
...
...
...
...
...
...
Create a Group
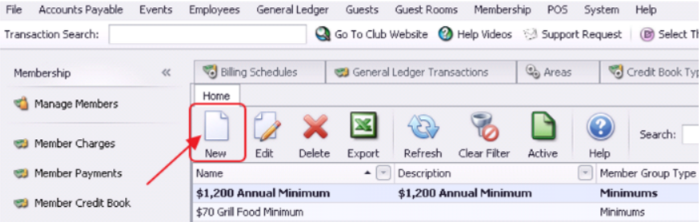
To create a new Group, first navigate to the following:
From the top navigation bar, navigate to Membership.
From the sub-navigation options, select Groups.

Click the New icon.
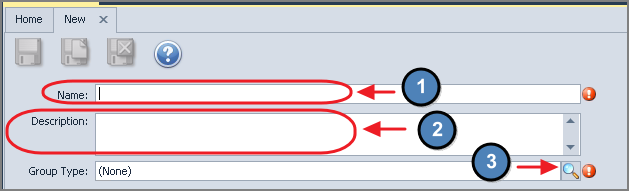
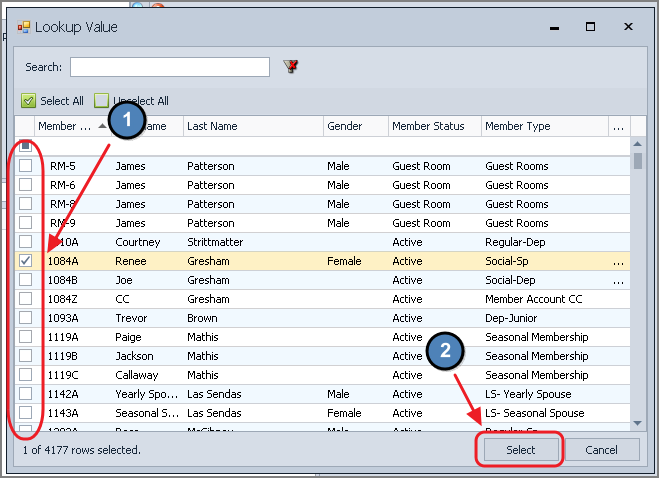
For all Groups, provide a Name, an additional Description (if desired), and choose the Group Type relevant to the New Group. Note the lookup feature may be utilized to assist with Group Type.
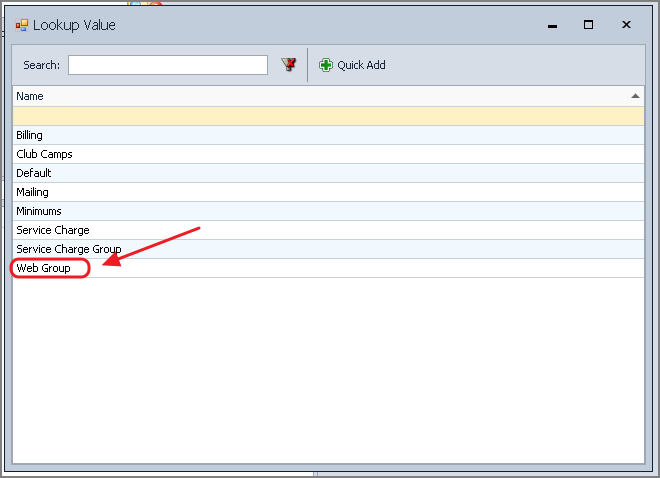
Once Group Type Lookup Value screen launches, select appropriate Group Type. Note - the Group Type is an internal reference, and does not automatically sync to the Web, simply because it may be titled, “Web Group”.
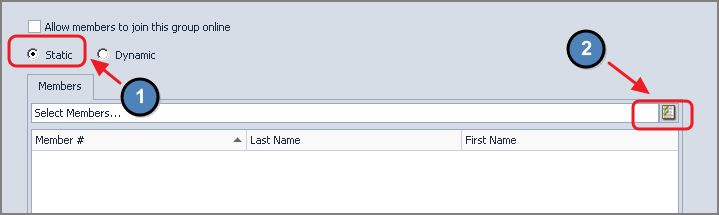
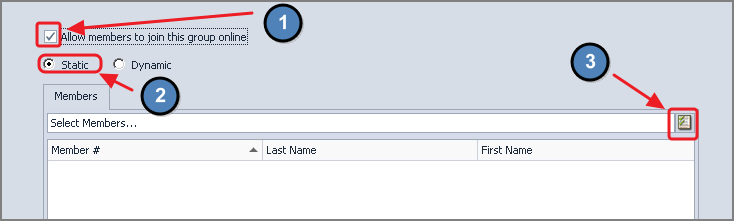
The following settings define the Type of Group.
...
...
...
...
...
...
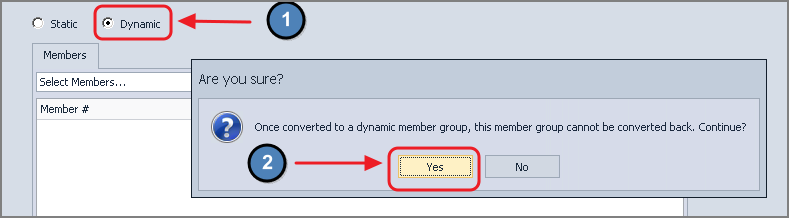
Dynamic Group Options
To set up a Dynamic Group, select the Dynamic option. Confirm Dynamic Group setup by clicking, “Yes.”
...
...
...
...
...
...
...
...
...
...
...
...
...
...
...
...
...
...
...
...
...
...
...
...
...
...
...
...
...
...
...
...

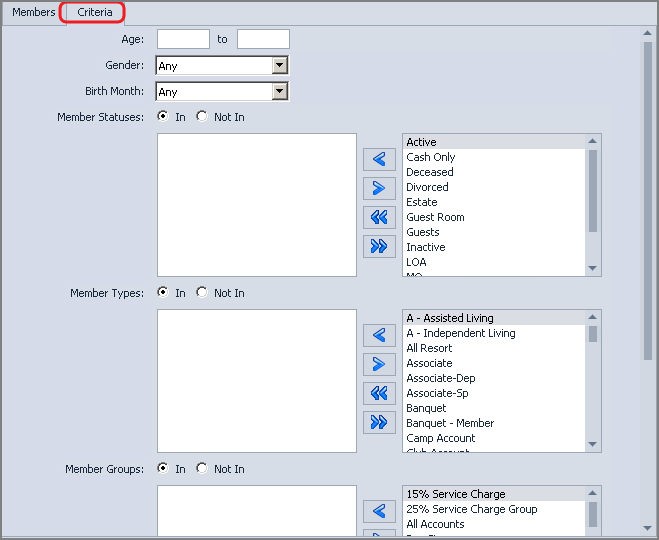
Utilize the Member Status filter to include any Active Status. It is not necessary to filter specifically by Member Type, unless your results must be restricted to those of a particular Member Type. Ie...Golf Member Types.
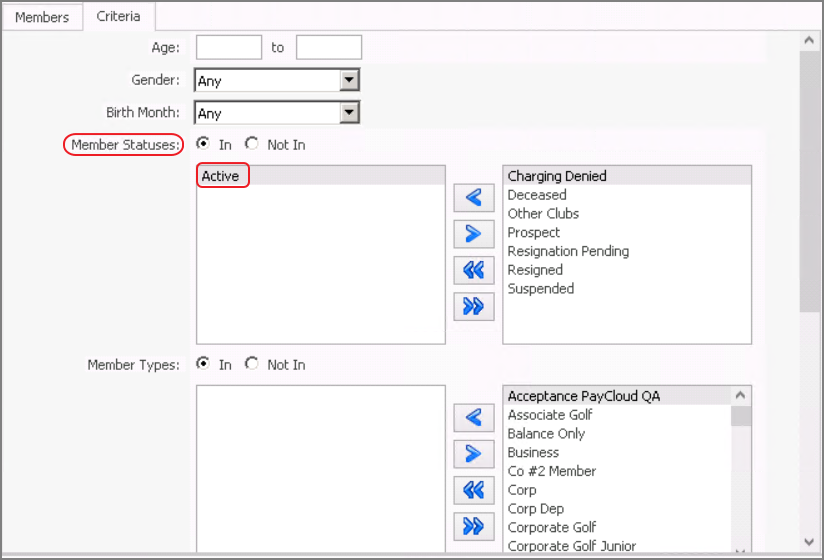
Note: To utilize the “Report Criteria,” click, on the “Valid Reports” option to view which reports can be utilized to define Membership.

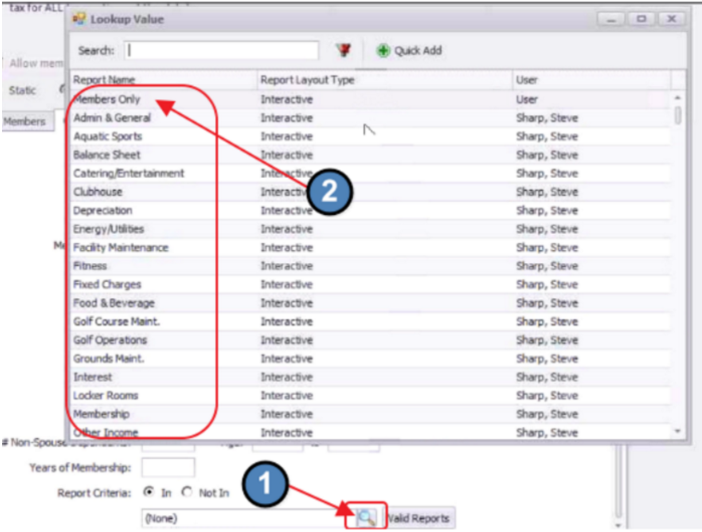
If a new report is needed, navigate to Interactive Reports, create and save the report (to a recognizable name).
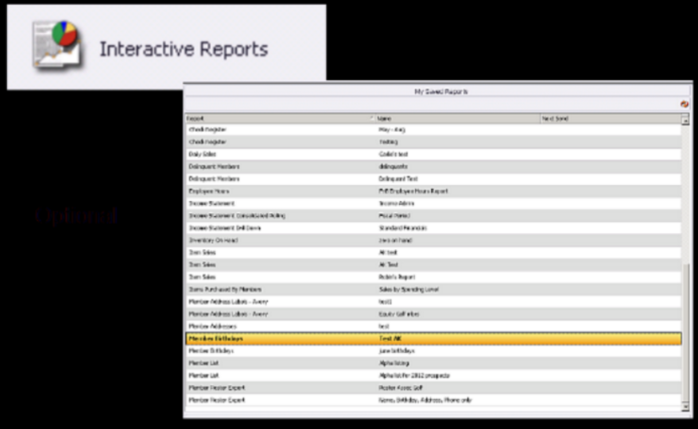
Navigate back to the Group setup screen, and then choose the new report utilizing the Report Lookup feature.
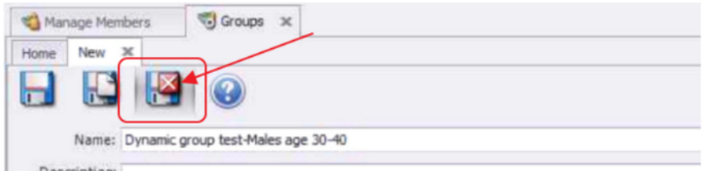
For all Groups, once setup is complete, click Save and Close.
...
...
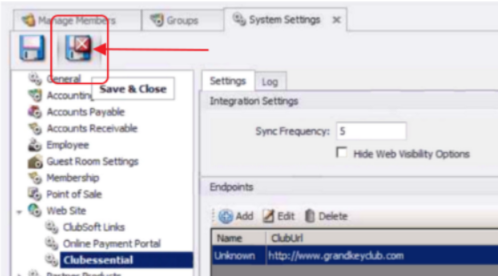
To set the Groups to Sync, navigate to the following:
Click on “System”
Select, “System Settings”
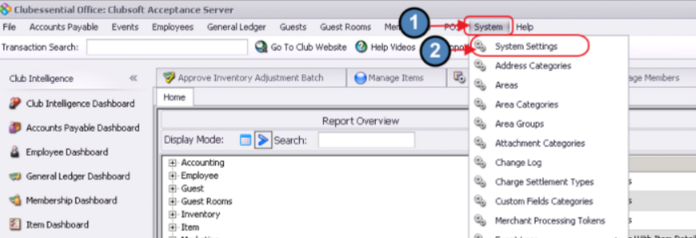
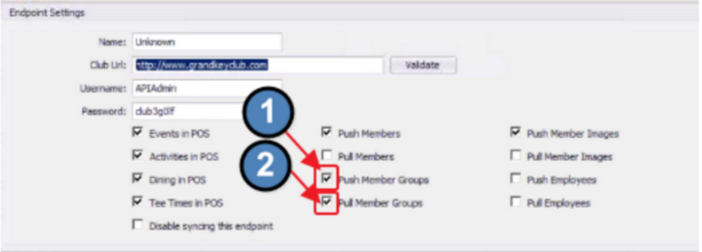
Next, click "Web Site" and then double-click on the Club url link.

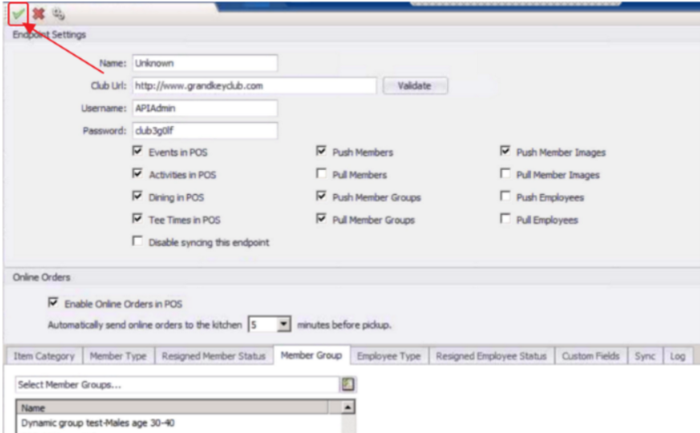
Ensure the “Push Member Groups”, and “Pull Member Groups” options are checked.
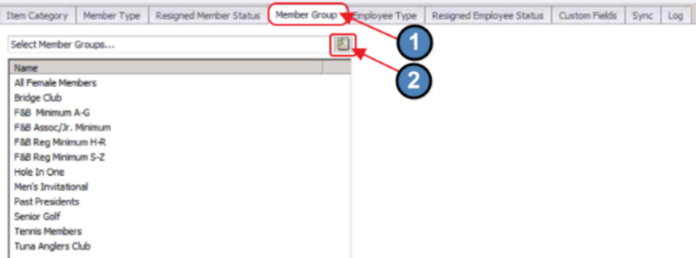
Next, ensure the Group is added to the Groups to Sync List.
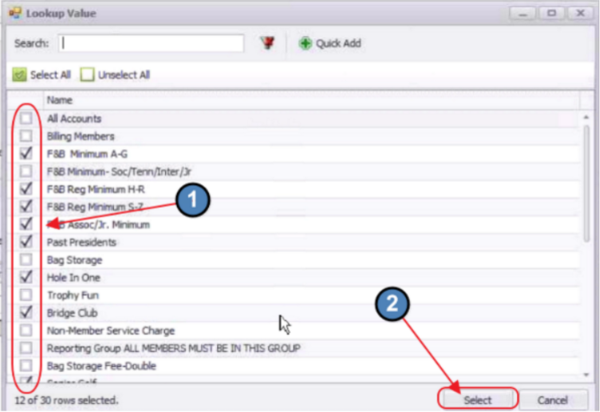
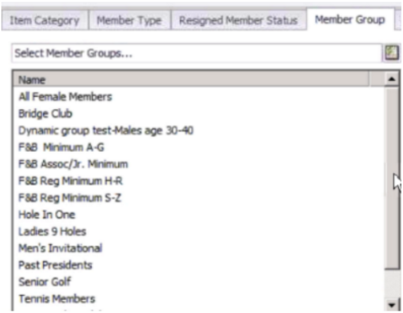
Click on the “Member Group” tab, and then click the Group selection box to choose Group and add to the list.
...
...
...
...
...
...
...
...
...
...
...
...
Note: This save must be done, or changes on the prior screen will be lost!
Once changes have been saved, the Sync will automatically run every (5) minutes.
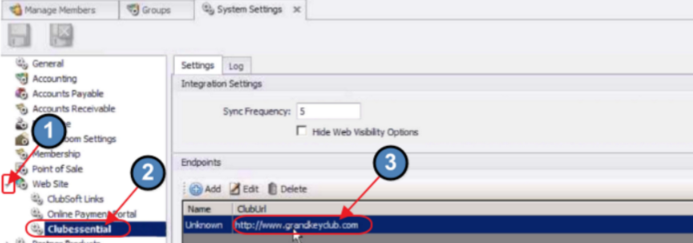
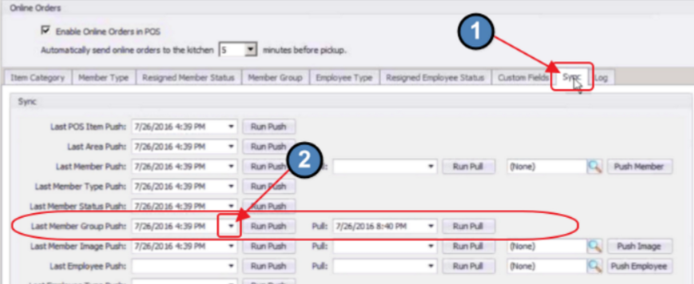
To force a Sync sooner than the auto-sync runs, go back into System, System Settings.

Click to expand the Web Site section, click on Clubessential, and then double-click on the Cluburl link.
...
...
...
...
...
...
...
...
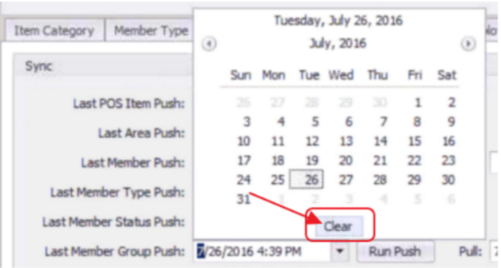
Once date has been cleared, click the “Run Push” button to initiate the Sync from Office to the Axis-Website.

The Sync process could take a couple of minutes depending on the number of Groups set to Sync.
...
...
...
...
Important Note: The only information that will be pulled from the Website back to Office, is the Membership tied to Members who join/opt-in to a Static Opt-In Group from the Website.
All other Group data will be pushed from Office to the Website.
Axis-Website
View Groups in Website
As an Administrator (View Groups and Send Emails)
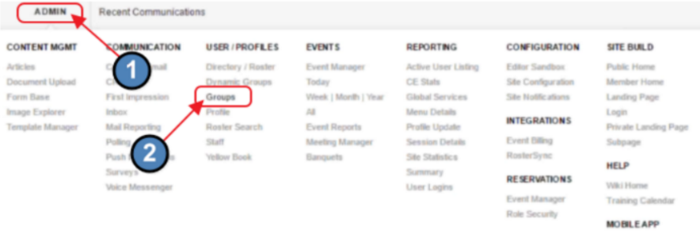
Once logged in to the Website as an Administrator, click the Admin Toolbar, and choose the Groups option.
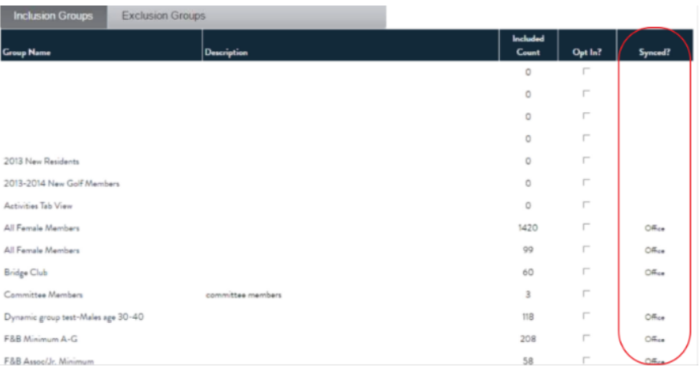
The Groups tab will display all Groups in the system.

All Groups Synced from Office will show “Office” in the Synced tab. The other Groups listed are Website only Groups, and are not shared with the Office system. Remember that Office Groups cannot be managed from the Website. All changes to the setup or Membership (other than Members opting in to a Static Opt-In Group) must be made in Office.
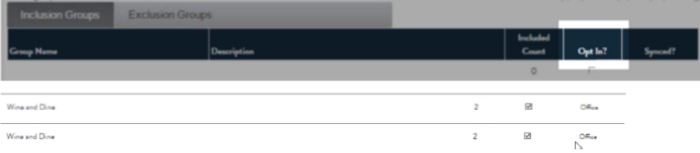
Additionally, Opt-In Groups are designated with a check in the “Opt In” column, like the Wine and Dine Group below. For Groups shared with Office, this feature must also be managed from Office.
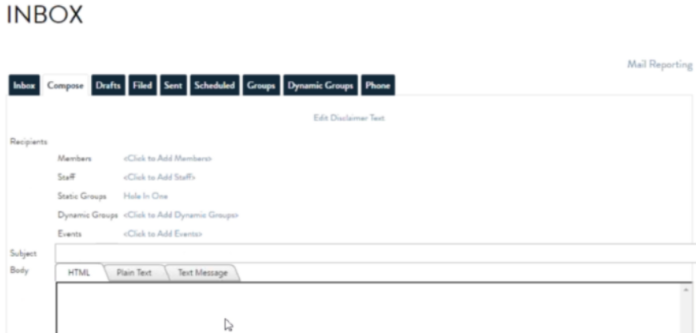
To send an email to all Members of a Group, click on the Group name.

Notice the Group Name and Group Members are returned. Click “Send Group Email” to launch the Email Composing screen.

Compose Email.
As a Member (Opt-In to a Group)
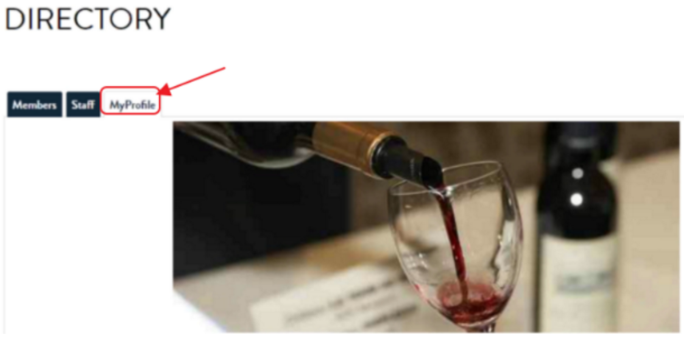
When a Member enters the site, navigate to “My Profile” to view available Opt-In Groups.
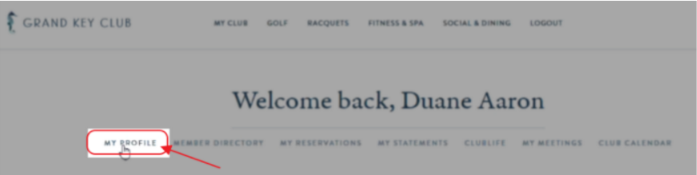
Member will land on “My Profile” tab.
Opt-In Groups will appear under the Member Profile Picture.
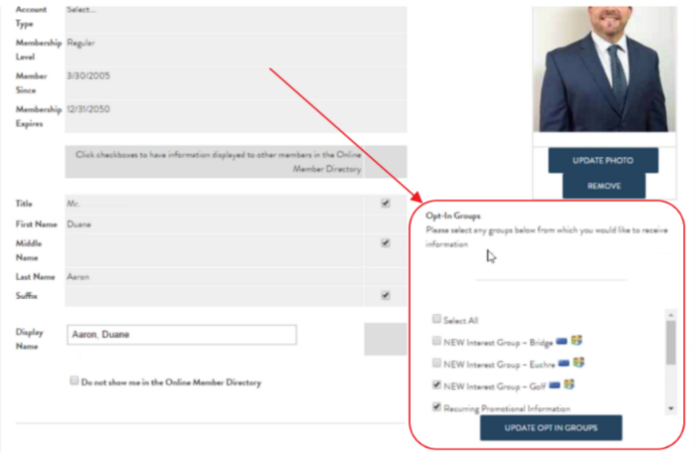
To opt-in to a Group, click the box next to the Group name (so that a checkmark appears in the box), and click, “Update Opt In Groups.”
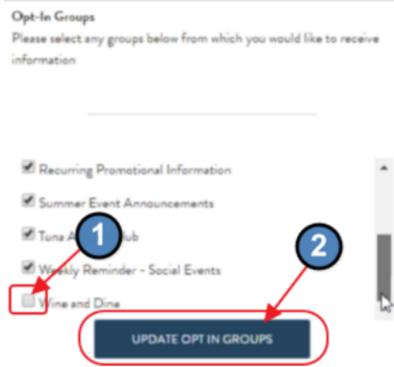
Upon next Sync, Member will be added to the Group within Office.
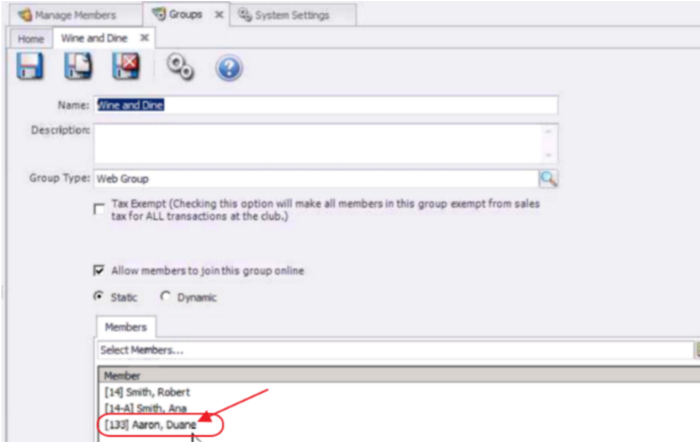
Reminder: This is the only data that is pulled back to Office.
Once synced, Member appears in Group in Office.
Best Practices
Create and Administer all Shared Groups in Office to ensure proper syncing with the Axis-Website.
FAQs
...
...
...
Downloadable Guide
...
