| Table of Contents | ||||
|---|---|---|---|---|
|
| Widget Connector | ||||
|---|---|---|---|---|
|
Use Cases
This new feature can be used for a variety of use cases. Let's say a member wants to reach out to the Banquets Coordinator to get more information on hosting an event, or a member of the golf staff wants to shoot a message to a member letting them know that their new clubs have arrived!
Enabling
This feature is available, however it will only be turned on upon request. Reach out to Clubessential if you are interested in enabling this feature in your club's app.
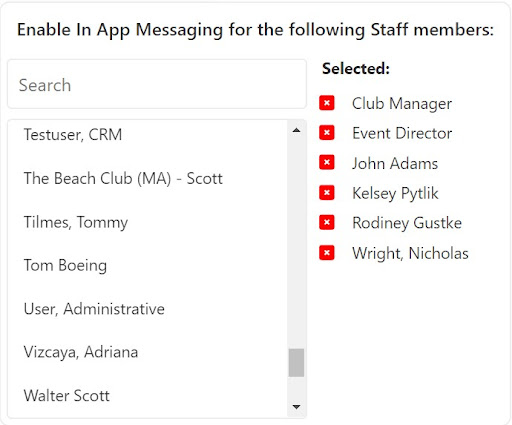
Specific staff must be selected to be eligible to receive messages from members. To select the participating staff:
While logged into your website: Place your mouse over the grey Admin bar and from the dropdown, select Mobile App Admin Dashboard.
Within the left-hand panel, select Settings.
In theEnable In App Messaging for the following Staff members: section, search or scroll to find specific staff members.
Simply click on the staff name and they will be moved to the Selected area.
Any staff can be removed from selected by clicking the red X next to their name.
Once finished selecting, click Save.
Sending Messages
The steps for sending messages and how they are received are the same for both staff and members.
NOTE: Users must be logged into the app (but doesn’t need to be open) in order to be a selected recipient.
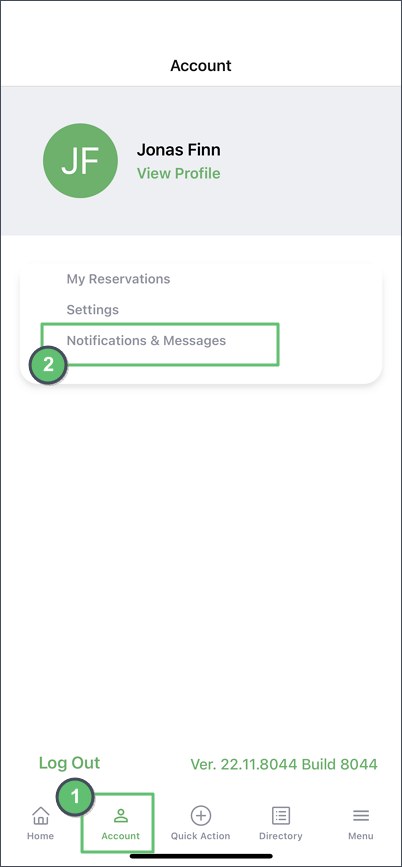
Once the app is opened, on the bottom menu bar, select Account.
Select Notifications & Messages.
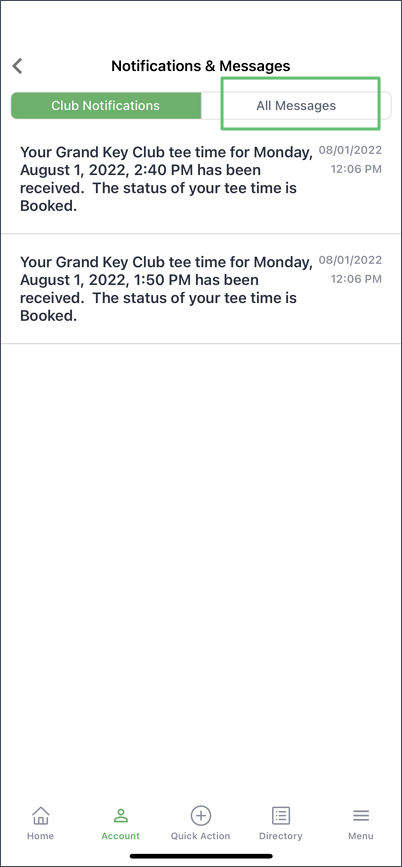
Tap on the All Messages tab. Previous messages and current conversations will be displayed here.
Simply tap on a message to open the conversation.
Sliding a message to the left will present to options:
Mark As Read
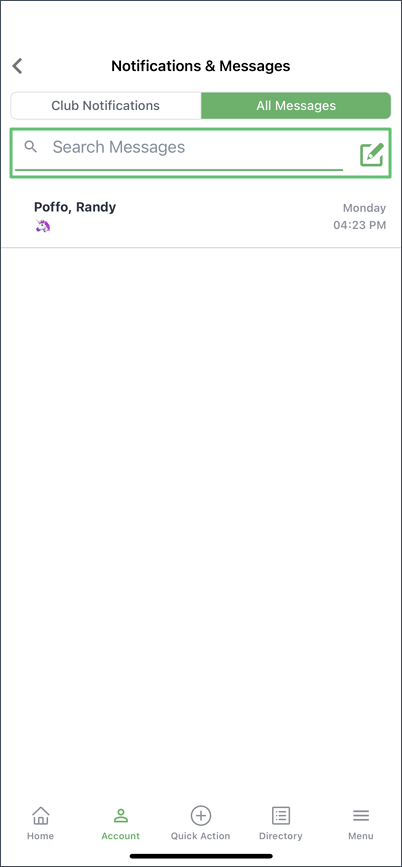
The search bar can be used to search messages for users or even words or phrases within the messages.
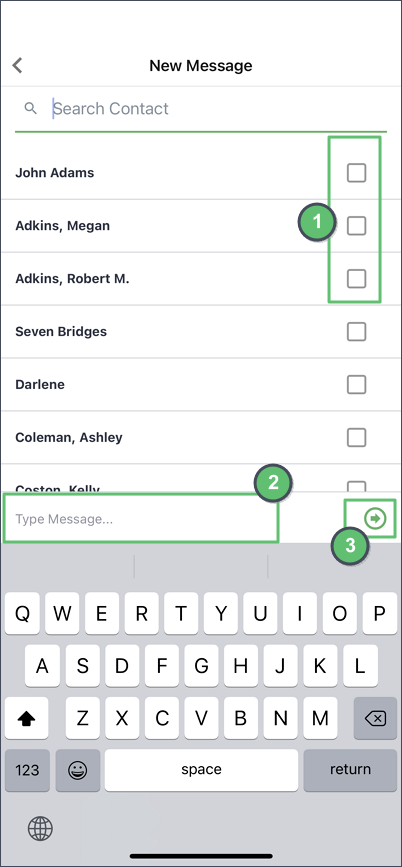
To create a new conversation, tap the pencil icon.
Search or scroll for members to be added to a message. Tap the checkbox next to each member to be messaged. Multiple can be selected.
At the bottom of the screen, tap into the area that says Type Message…
Your phone’s keyboard will appear for you to type the message.
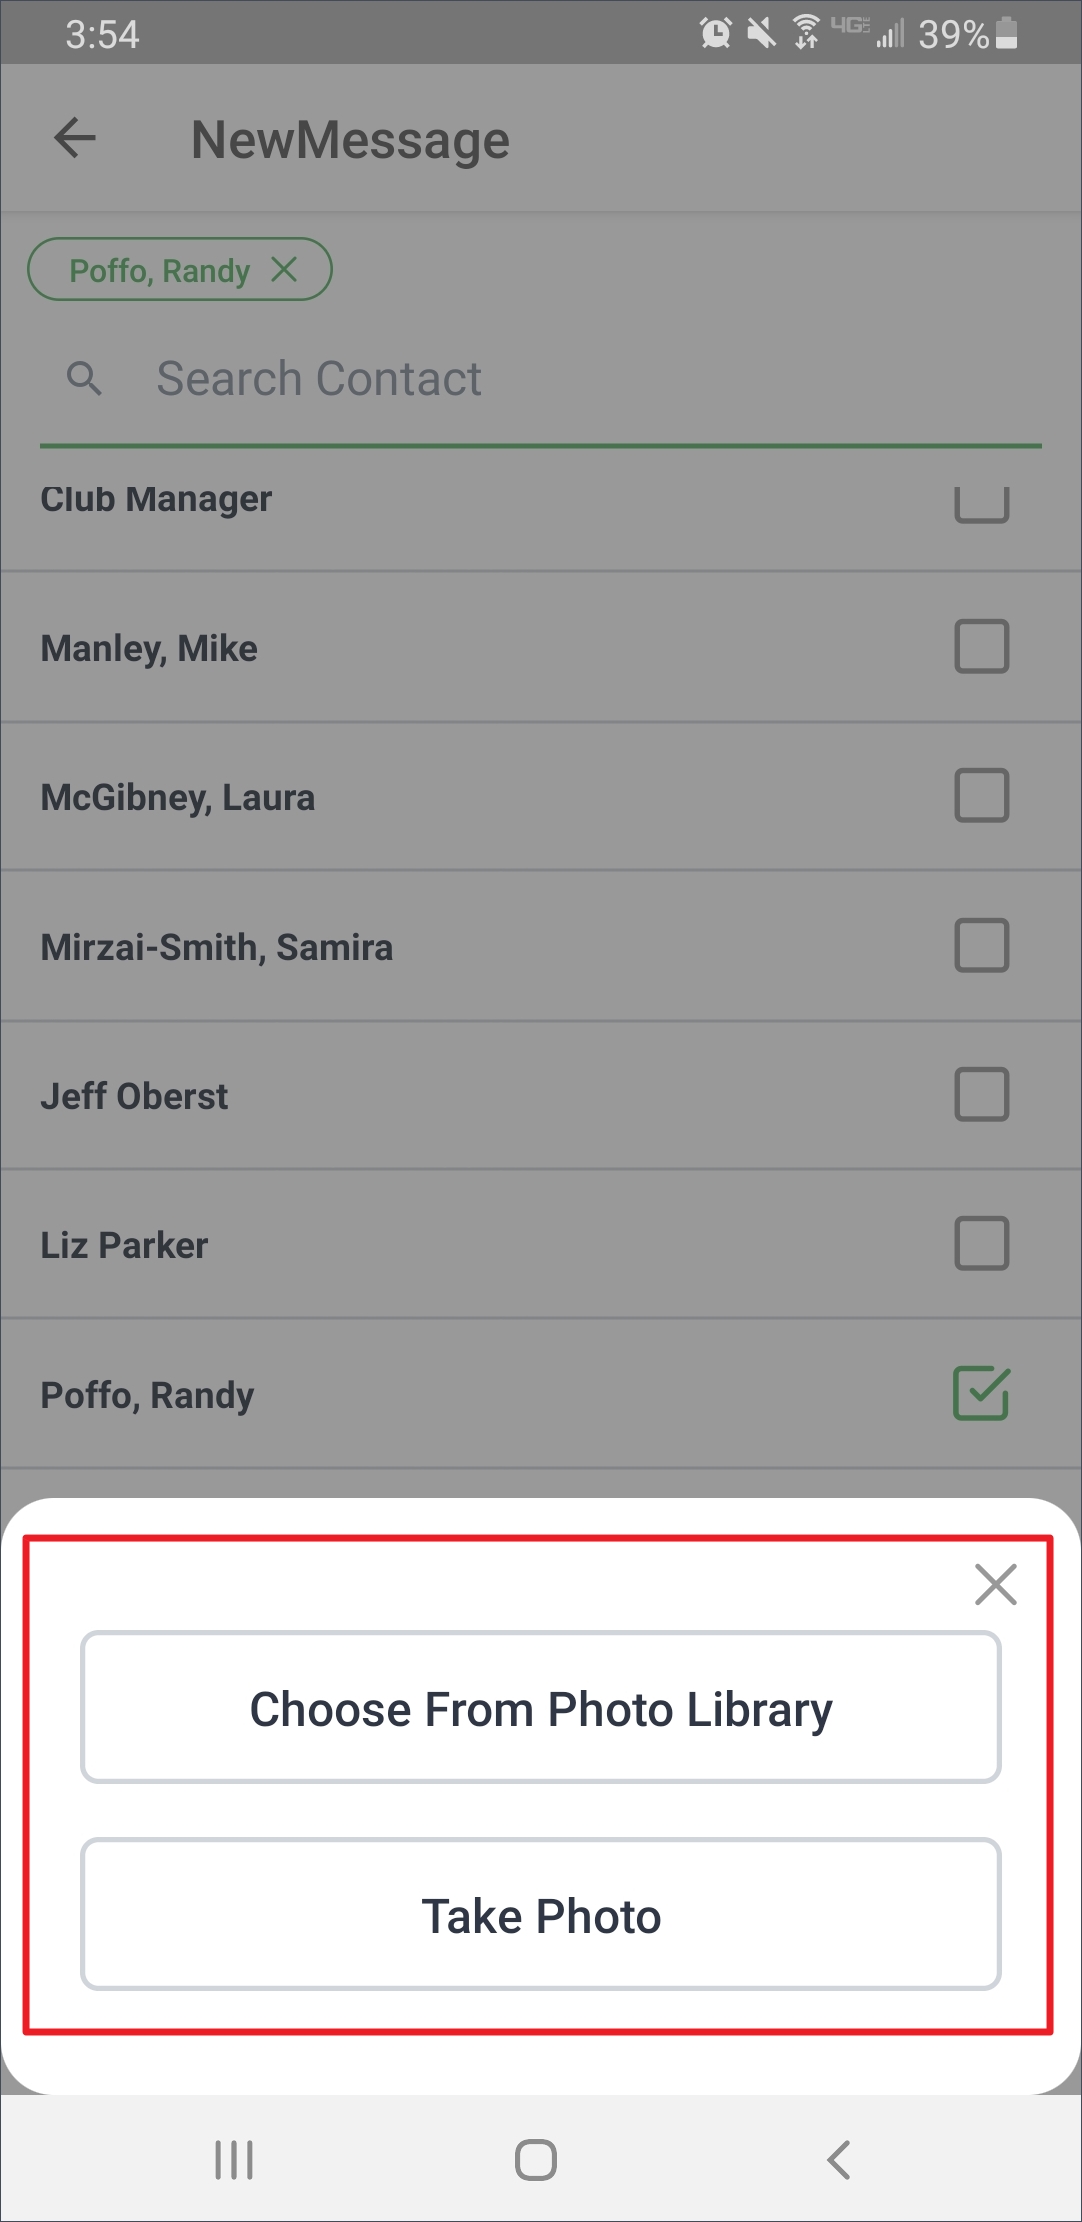
You also have the option of adding a photo when writing a post:
Attach a photo - Use the camera icon to add an image to the post. There are two options when adding an image:
Choose From Photo Library - Search the device’s images for a picture to add.
Take Photo - Use the device’s camera to take a new picture.
Select the arrow to send.
The message will send immediately. Members will receive a notification on their device (assuming notifications are turned on) and they can then review and reply within their Notifications & Messages section of their app.
Best Practices
Within the app, the “Display Name” is used when listing staff. Consider adding a job title to the display name to assist members with finding the right person to message.
Make sure notifications are turned on so you never miss an important message.
FAQs
Q. Are emojis supported?
A. Yes ![]() Emojis can be used while sending messages.
Emojis can be used while sending messages.
Q. Are Images supported?
A. Images are not supported yet but we plan to add this feature in the future.
Q. Can I send to the “ALL MEMBERS” group?
A. If a notification needs to be sent to all members, It is currently recommended to use Push Notifications instead of the In App Messaging.
