Versions Compared
| Version | Old Version 1 | New Version Current |
|---|---|---|
| Changes made by | ||
| Saved on |
Key
- This line was added.
- This line was removed.
- Formatting was changed.
Table of Contents
| Table of Contents | ||||||
|---|---|---|---|---|---|---|
|
Overview
The Mobile Point of Sale System allows for member specific, employee specific, conditional, and delivery messages to be created and displayed at the POS. Member specific messages will show when the member is assigned a ticket at the POS, employee specific messages will show when the employee signs into the POS, and Conditional messages will show when the conditions are met at the POS.
Required Permissions
Admin
Accessing the Tool
To access Notification Messages, log into the Mobile Point of Sale:
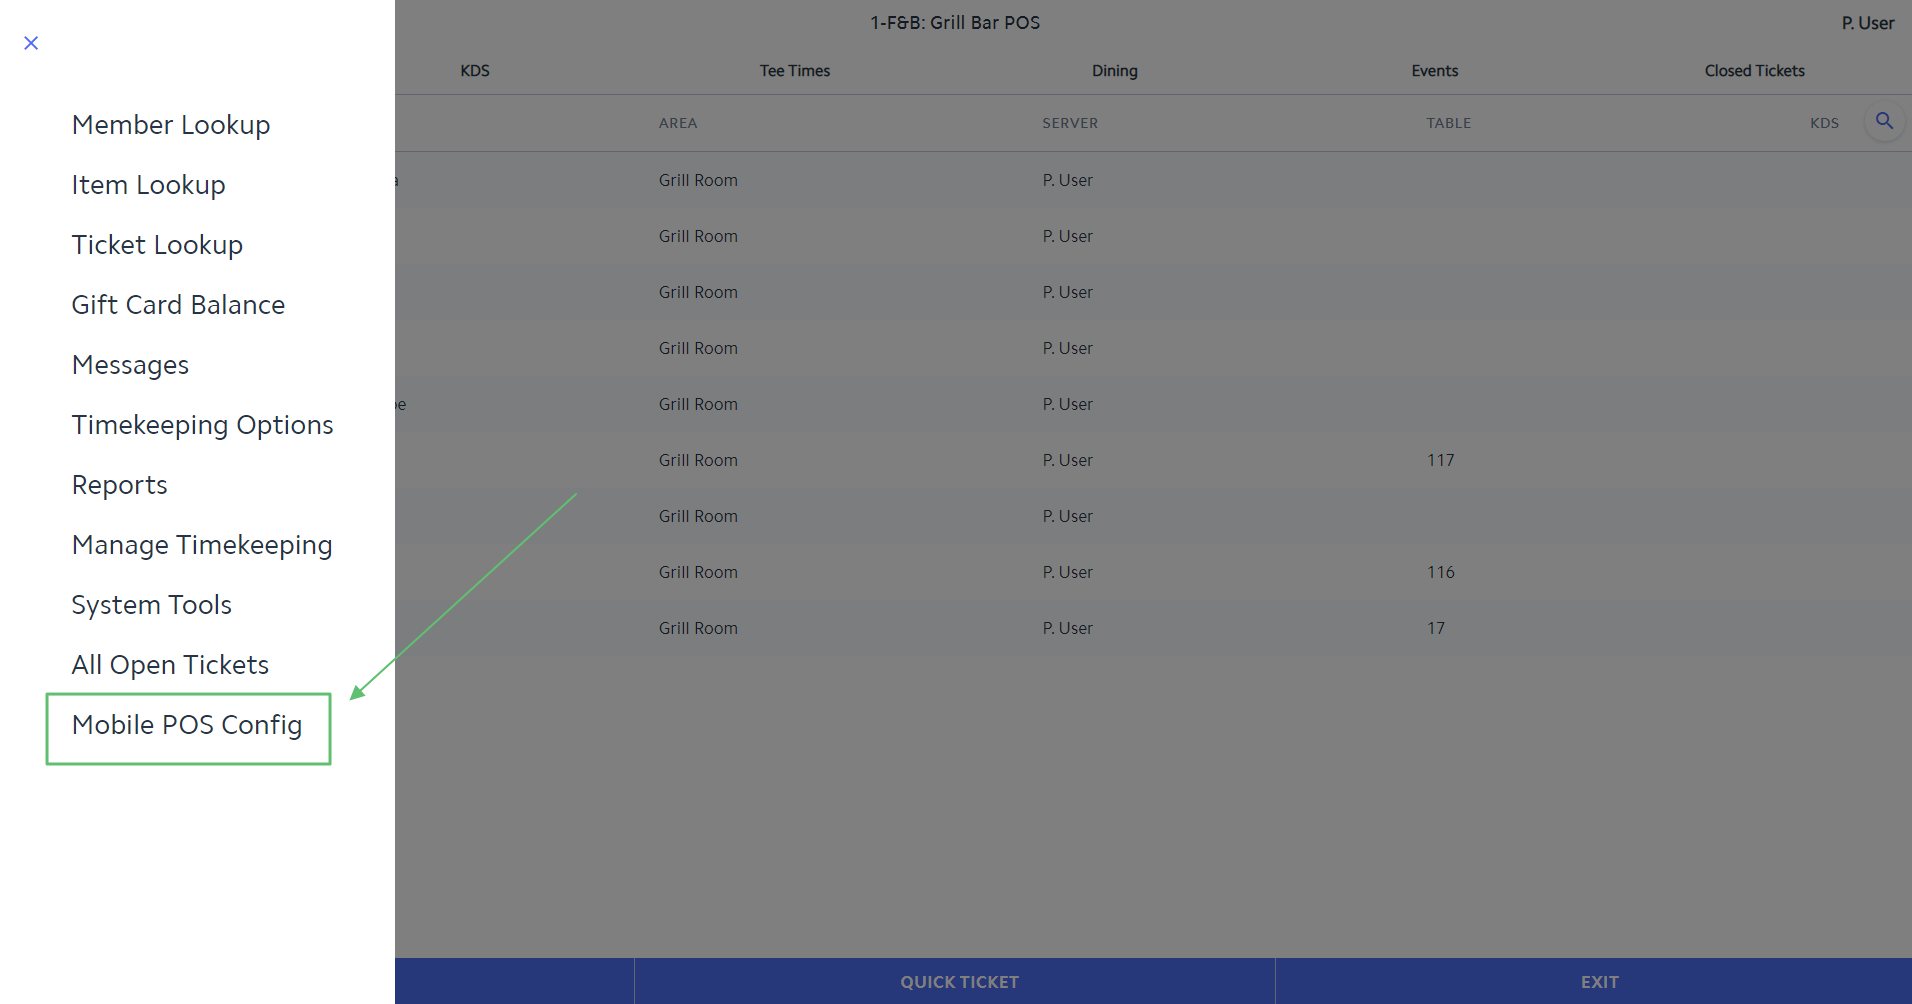
Select the Flyout Menu.
Choose the Mobile POS Config option.
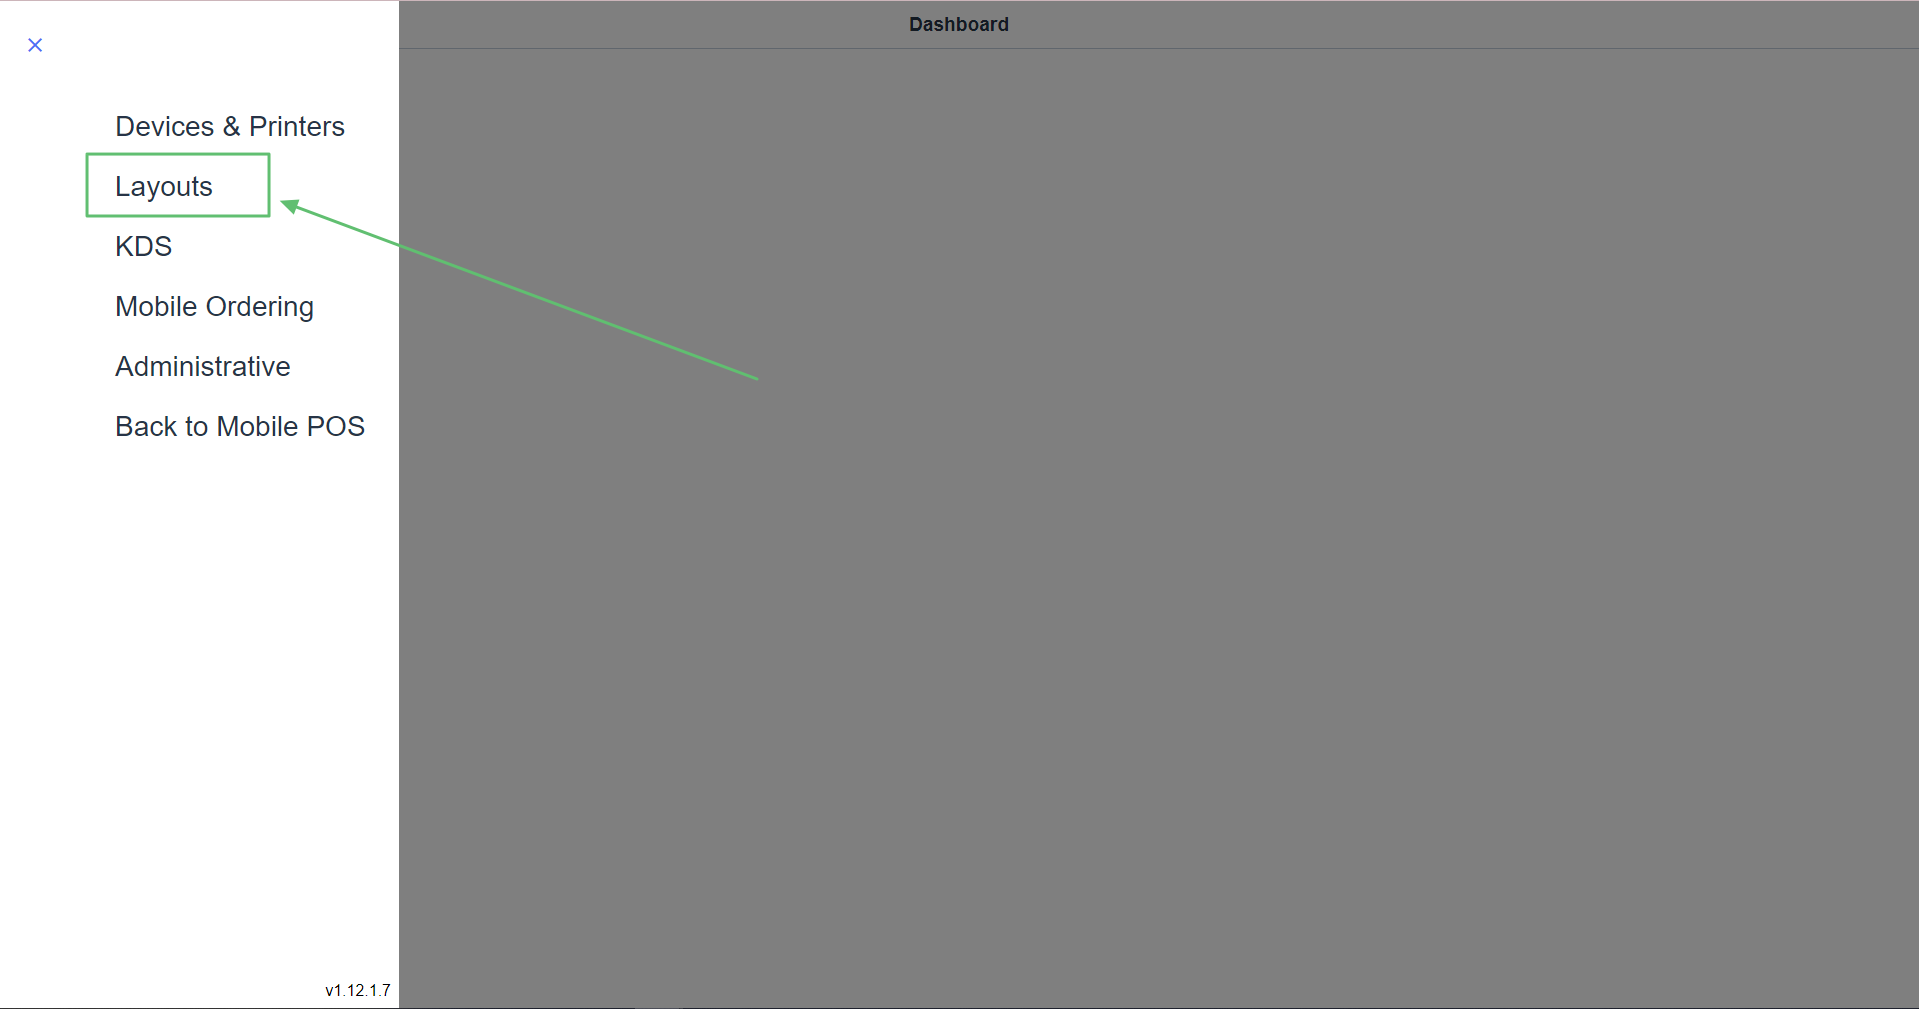
Choose Layouts.
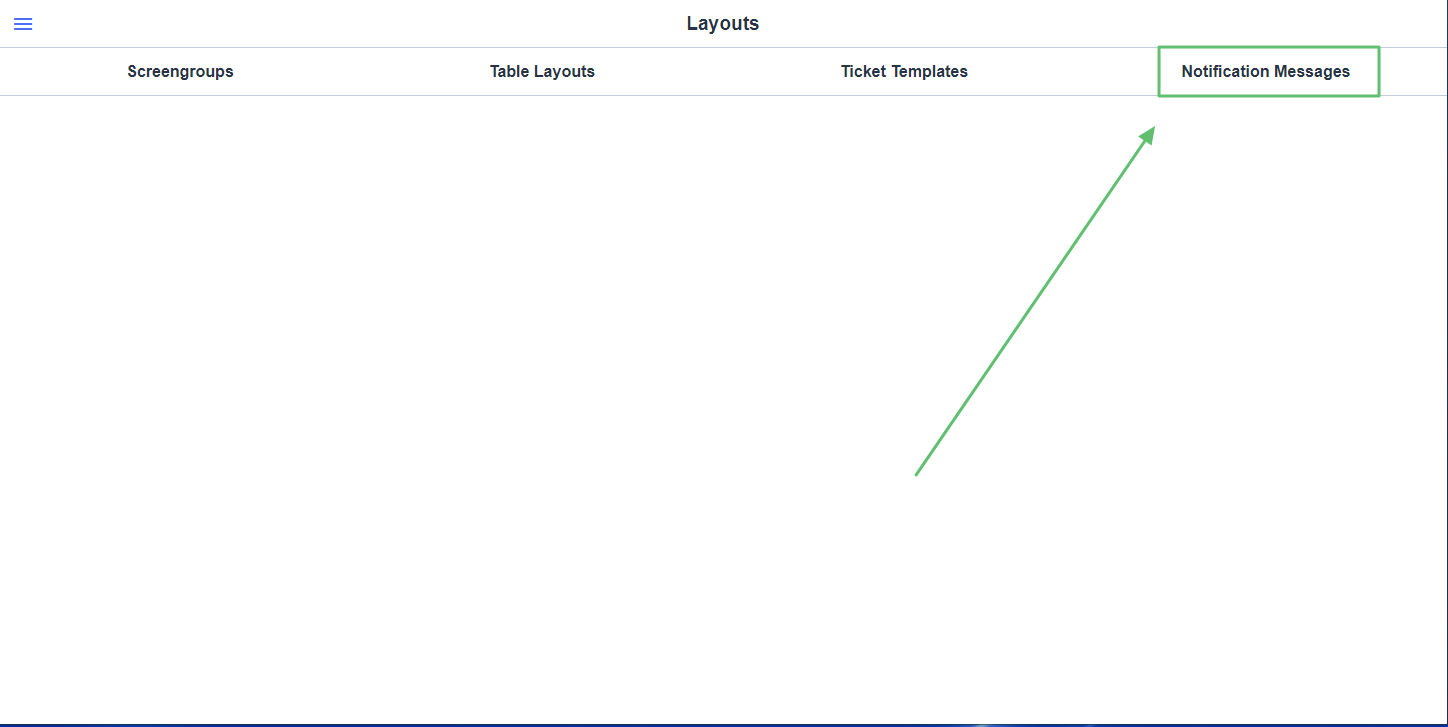
Select the Notification Messages Tab.
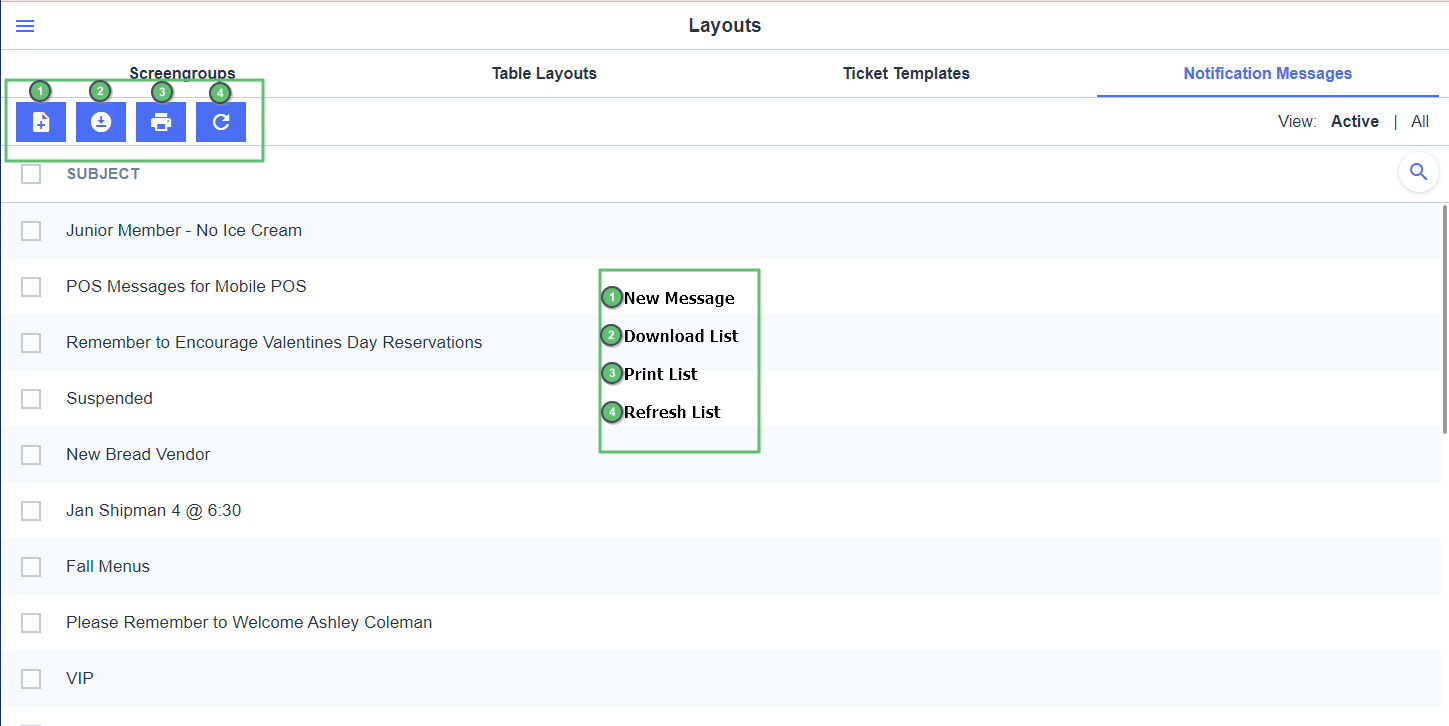
Notification Messages Landing Page
Create new message.
Download List.
Print List.
Refresh List.
Creating a New Message
To create a new Message select the New icon.
General Information
Complete Informationas shown/listed below.
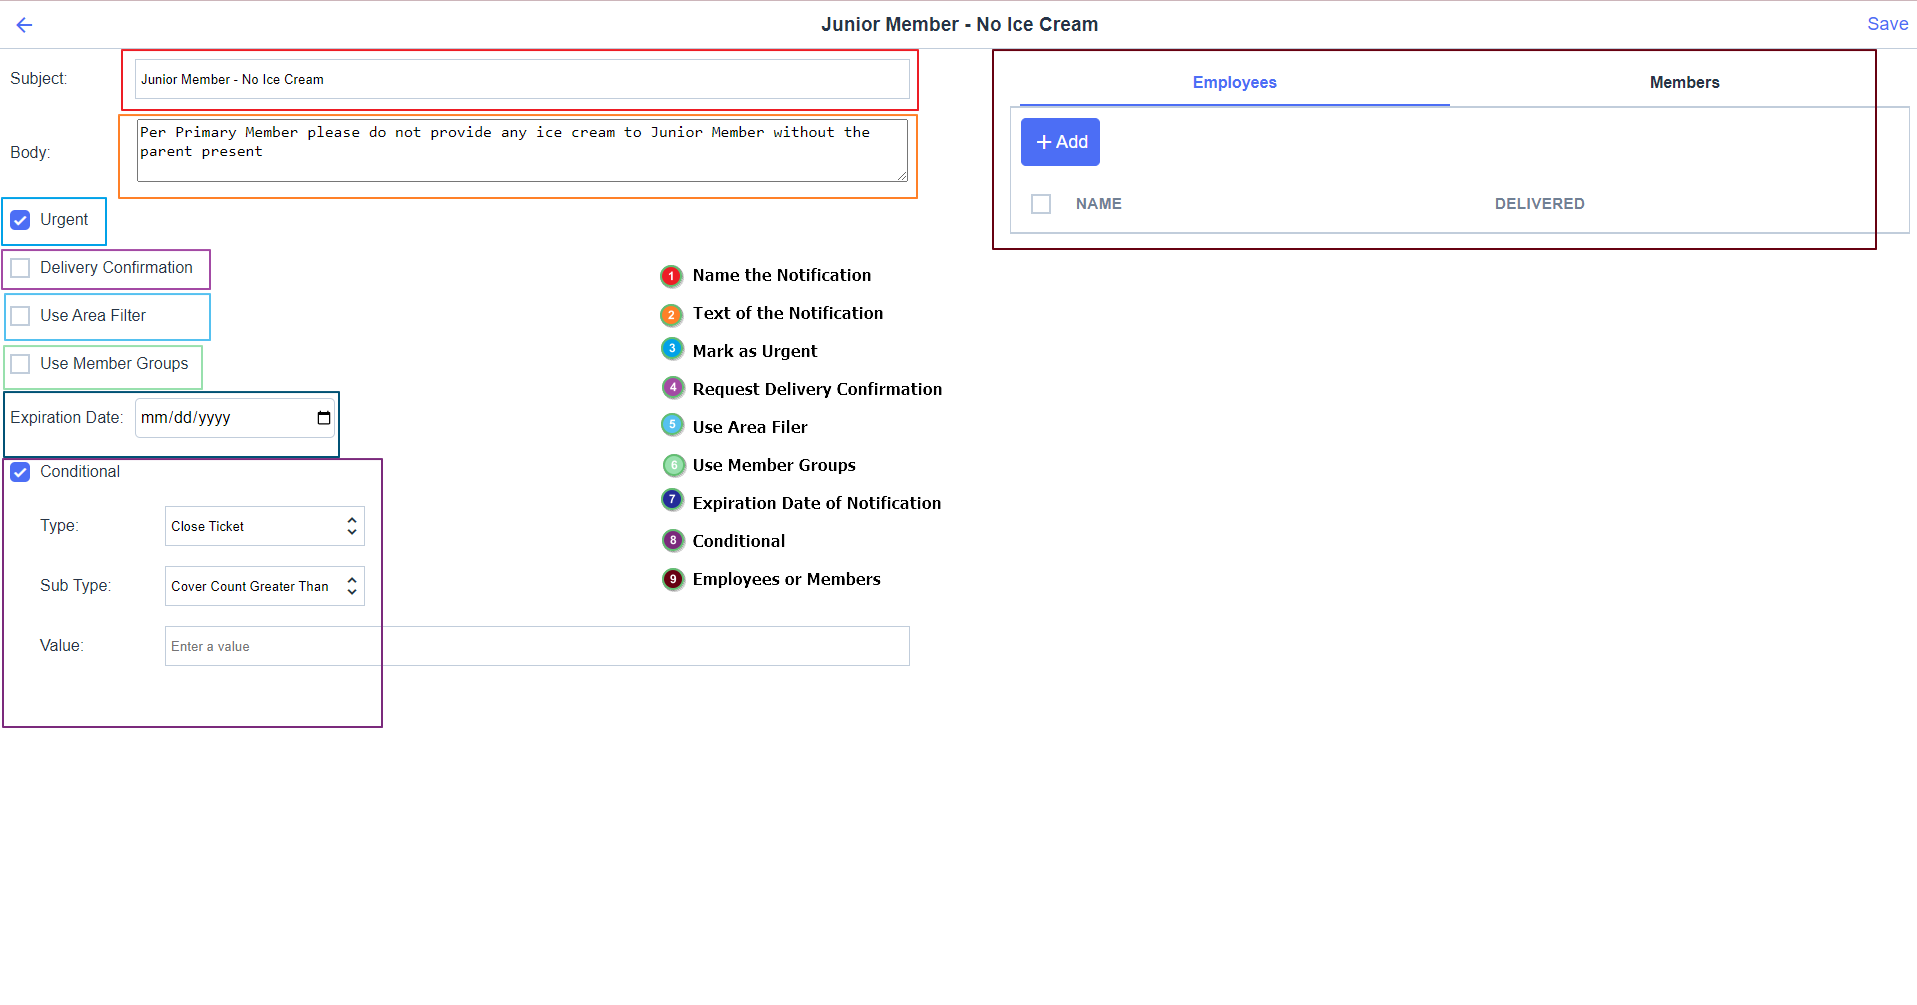
Subject - Enter the Subject of the POS Message.
Body - Enter the Body of the POS Message.
Expiration - If the message has an expiration date, enter it here.
Urgent - If checked, Urgent will display on the message in POS.
Delivery Confirmation - If checked, a Delivered button will populate on the message in POS. If selected, the message will not show again when the member is selected, or an employee signs in to the POS.
Use Area Filter - If checked, an additional tab will populate called Areas. If the message should only show in certain areas, please specify the applicable Areas on this tab.
Use Member Groups - Will change the Members tab to read Member Groups.
Conditional - Only applicable when Conditional is checked.
Leave Type set to Close Ticket Ticket.
Sub Type will remain Cover “Cover Count Greater Than Than.”
Value is the number you wish to set the cover count to be in order to trigger this message.
Member Specific Messages
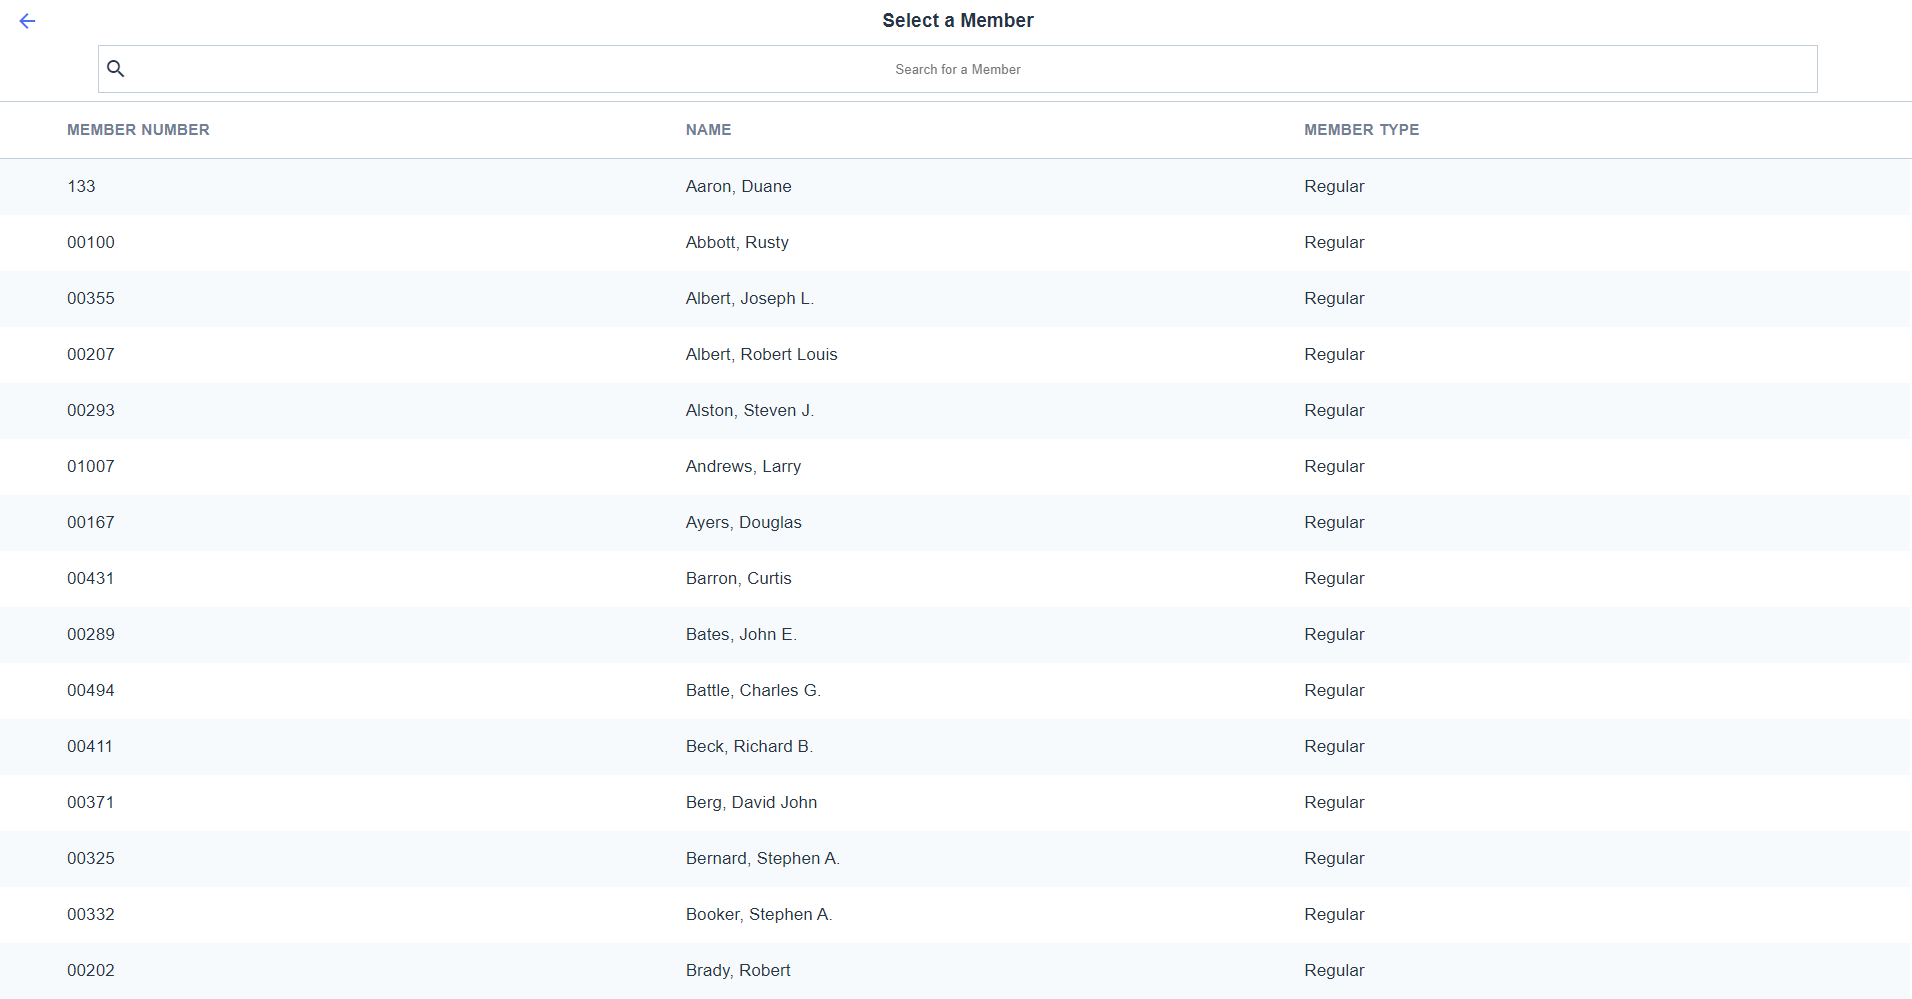
A member specific message will show when the member is assigned a ticket at the POS. To specify the member(s) to receive the message:
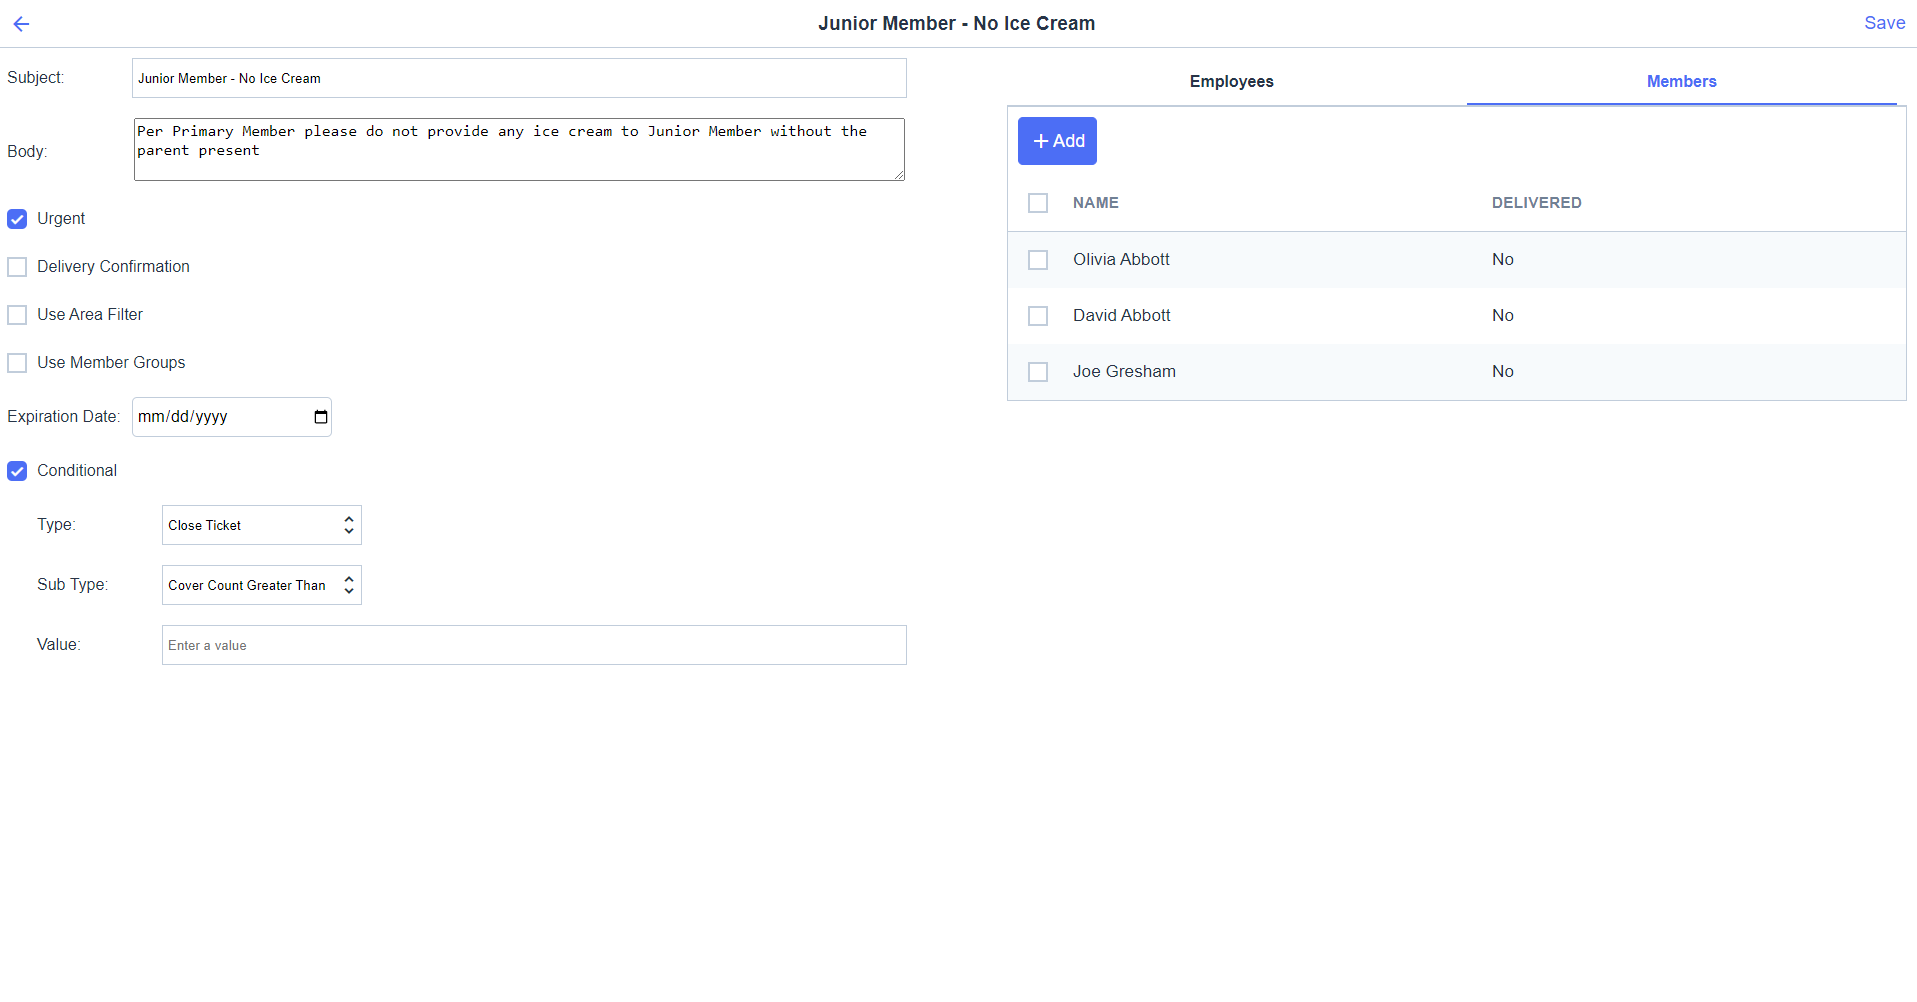
Navigate to the Members tab and select the applicable members.
Use the Select All or Un-Select All features in the left-hand corner, if applicable.
When the member is assigned a ticket
in the POS, the message will appear.
On mobile POS this message can be added to the prep ticket to let kitchen staff know in case of allergy.
Employee Specific Messages
An employee specific message will show when the employee signs in to the POS. To specify employee(s) receive the message:
Navigate to the Employees tab and select the applicable employees. Use the Select All or Un-Select All features in the upper left-hand corner, if applicable.
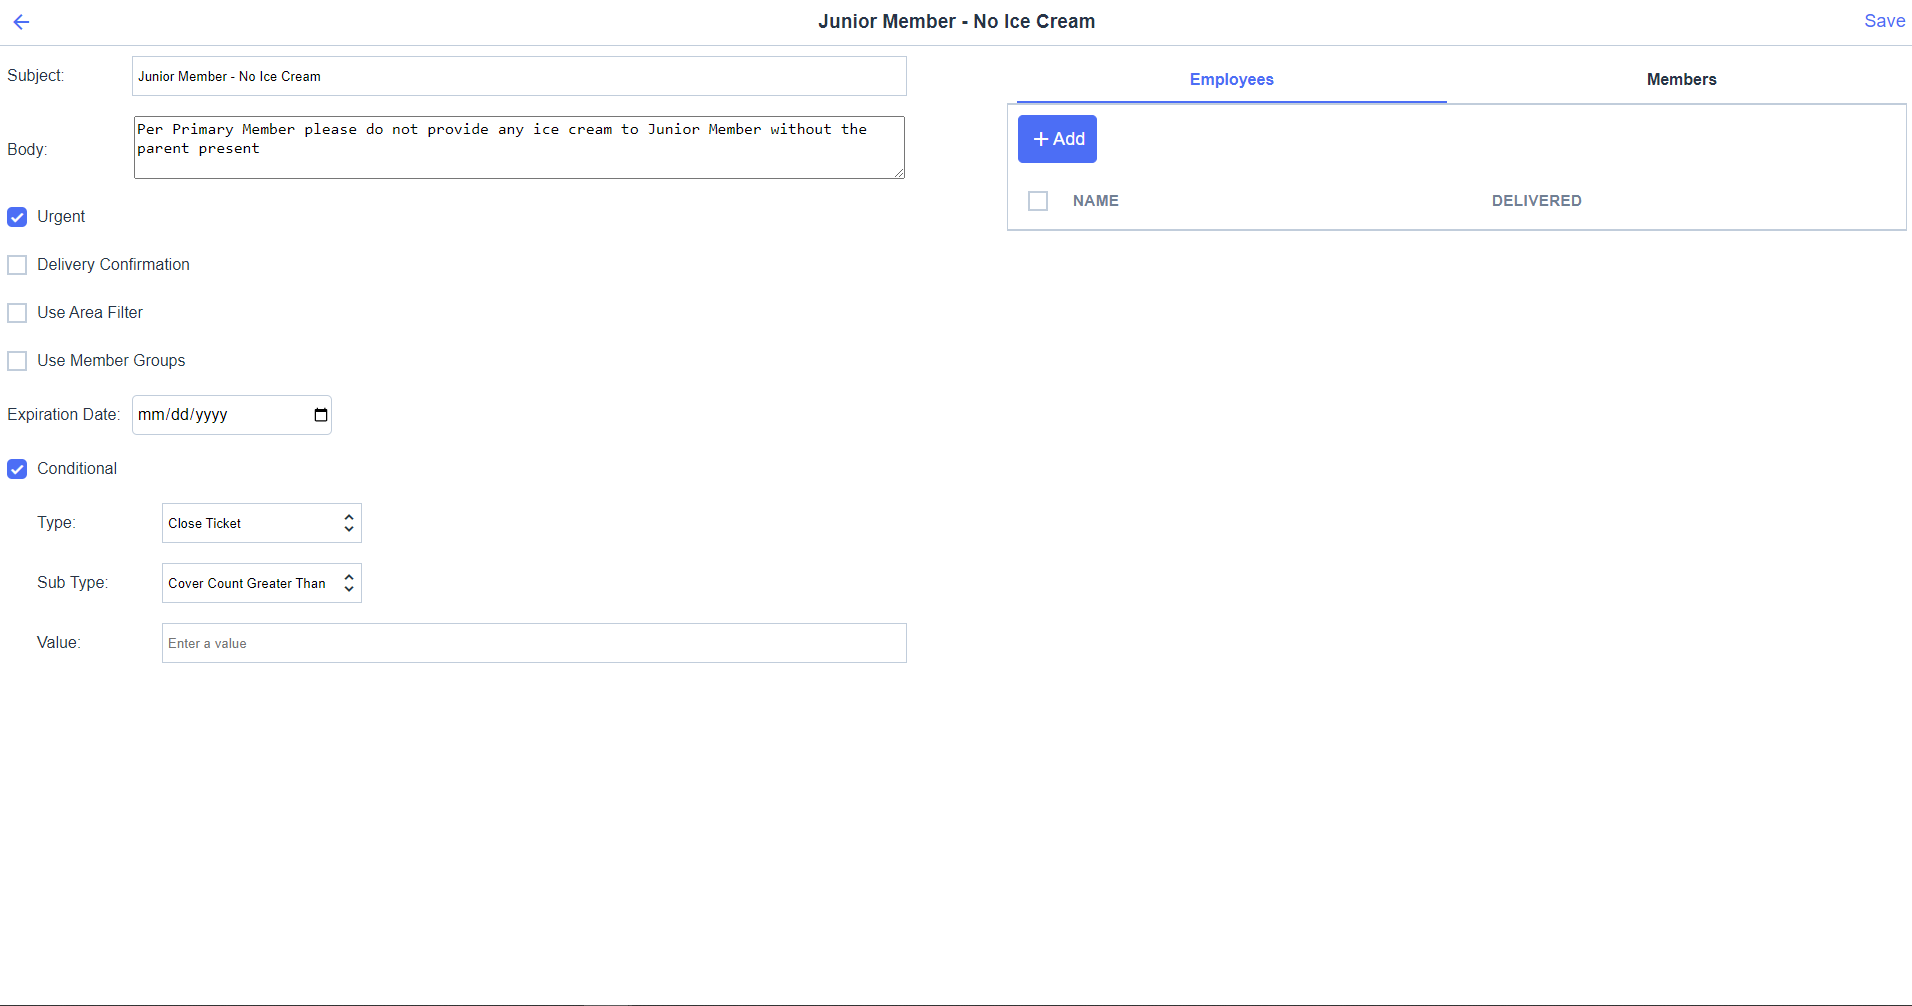
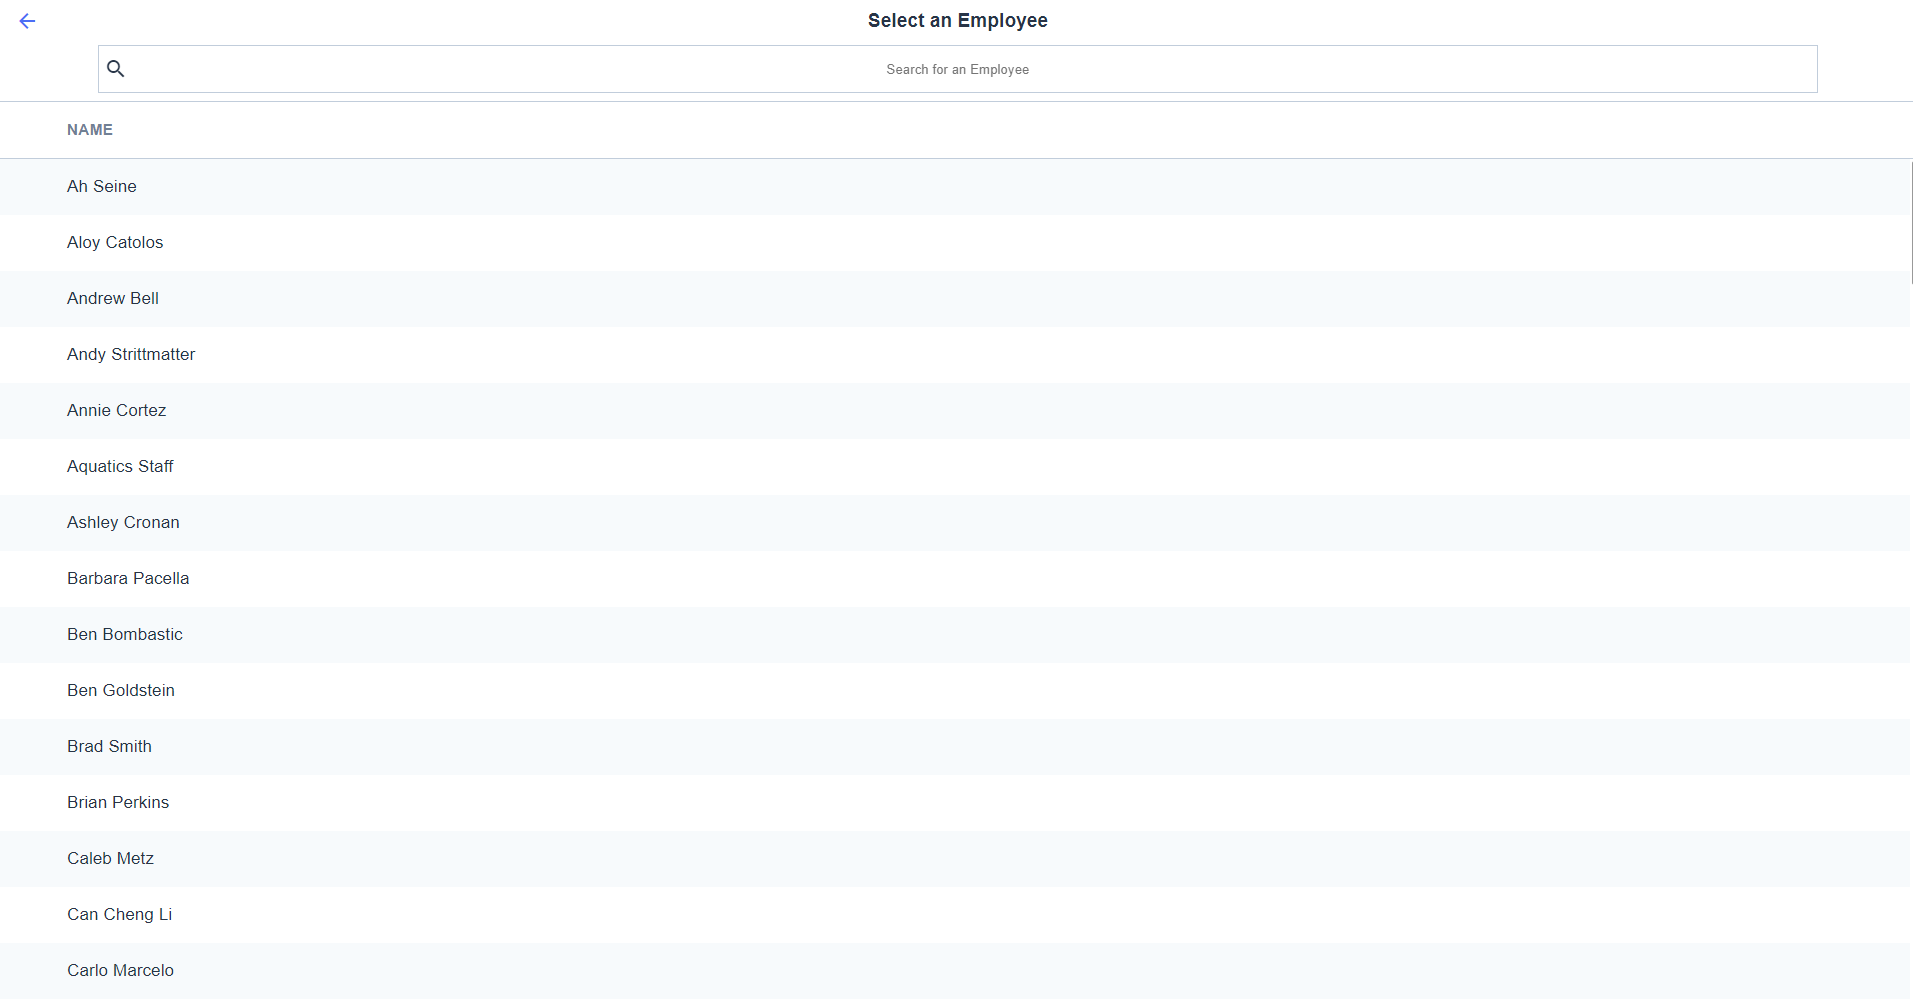
When the employee signs into the POS, the message will appear.
This will also display on Mobile POS as soon as the employee logs into it.
Member Group Specific Messages
Not only can messages be set to deliver when a specific member is added to a ticket, they can be set to any member of a specific static or dynamic office group add to a ticket. Once The Subject, Body, and Expiration date have been selected, the club can choose Groups from the radial button selector to the right of the Body. This will alter the Members Tab to a Member Groups Tab.
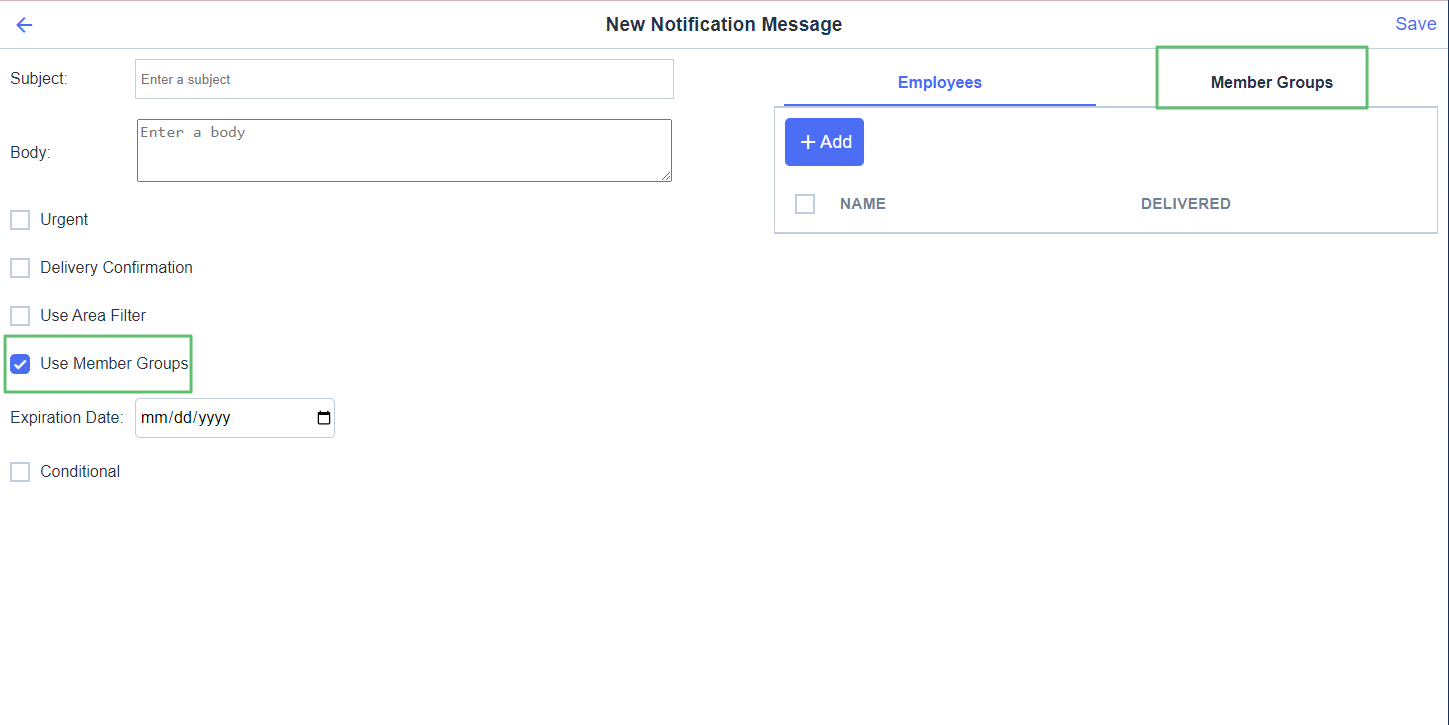
Please Note: When Groups is selected the system automatically disables the Delivery condition since there will be more than one member to receive the message delivery is now obsolete.
Once Groups is selected navigate to the Member Groups Tab and select add to choose whichever groups should receive this message when a member of the group is added to a ticket.
Best Practices
Oftentimes, it is a good idea to establish a general format for writing messages to increase your Staff’s ability to easily understand communicated messages. For instance, if a Member has a food allergy, use, “Attn: Dining - Food Allergy” to preface the message. Or for All Employee messages, include that it is an all employee message by starting the message with “Attn: All Staff” and then append the nature of the message prior to adding details - ie., Attn: All Staff - Monthly Meeting”. Using specific formats to highlight the audience as well as the topic can train staff to quickly and consistently interpret your Club’s messages.
Keep tabs on your messages to ensure they are reaching the appropriate parties. To identify whether or not a message has been viewed or delivered, open the message in CMA and review the columns next to the assigned Employees or Members.
FAQs
Q: If more than one message is assigned to an Employee/Member, will both messages display?
A: Yes, messages will display one at a time, until all assigned messages have been shown and acknowledged.
