Versions Compared
Key
- This line was added.
- This line was removed.
- Formatting was changed.
Table of Contents
| Table of Contents | ||||||
|---|---|---|---|---|---|---|
|
Overview
PayCloud payments sync over to the back-office program, where they are turned into batches that can be found in the Approved Payment batch grid of the Membership module.
Required Permissions
System>System Settings
Accessing the Tool
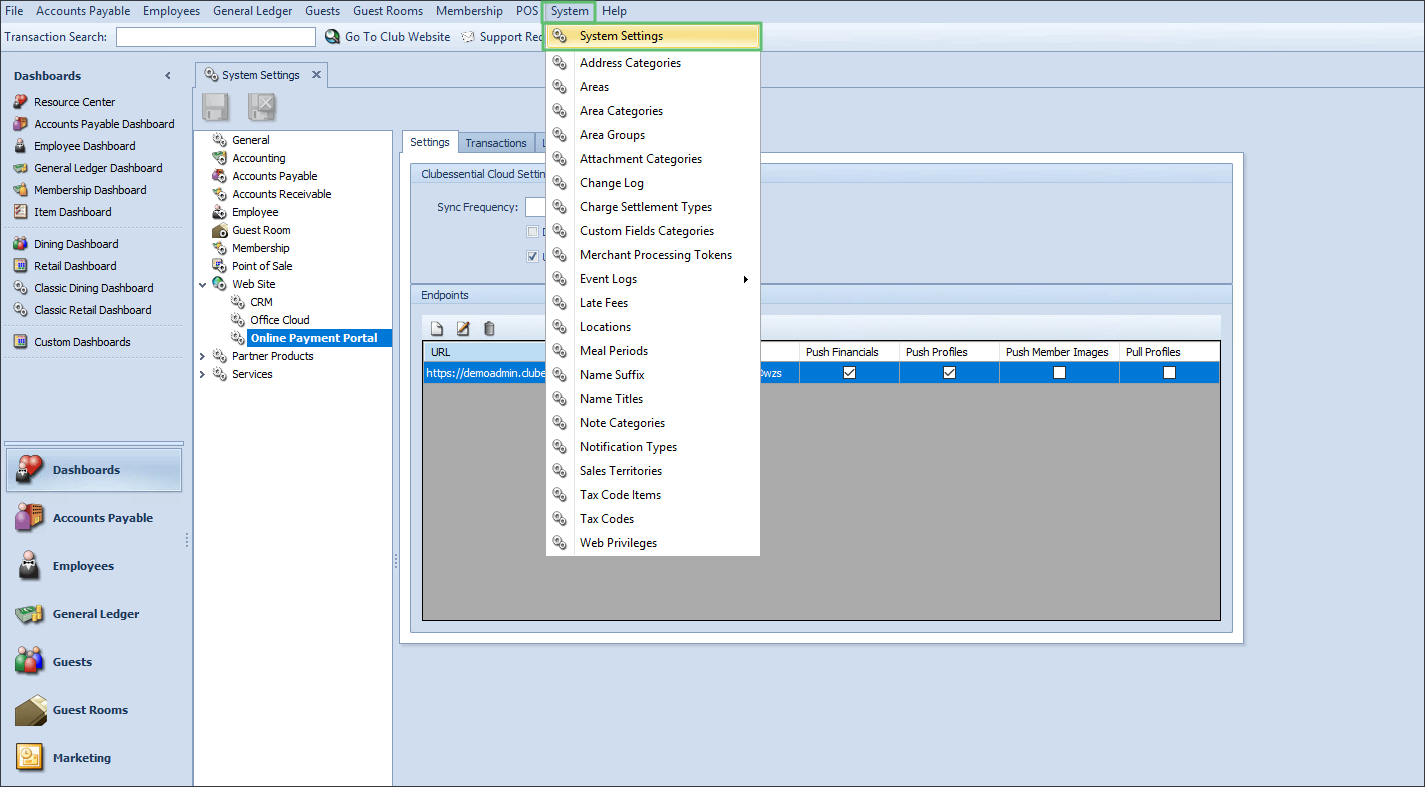
Click on System along the top, select System Settings in the drop-down menu.
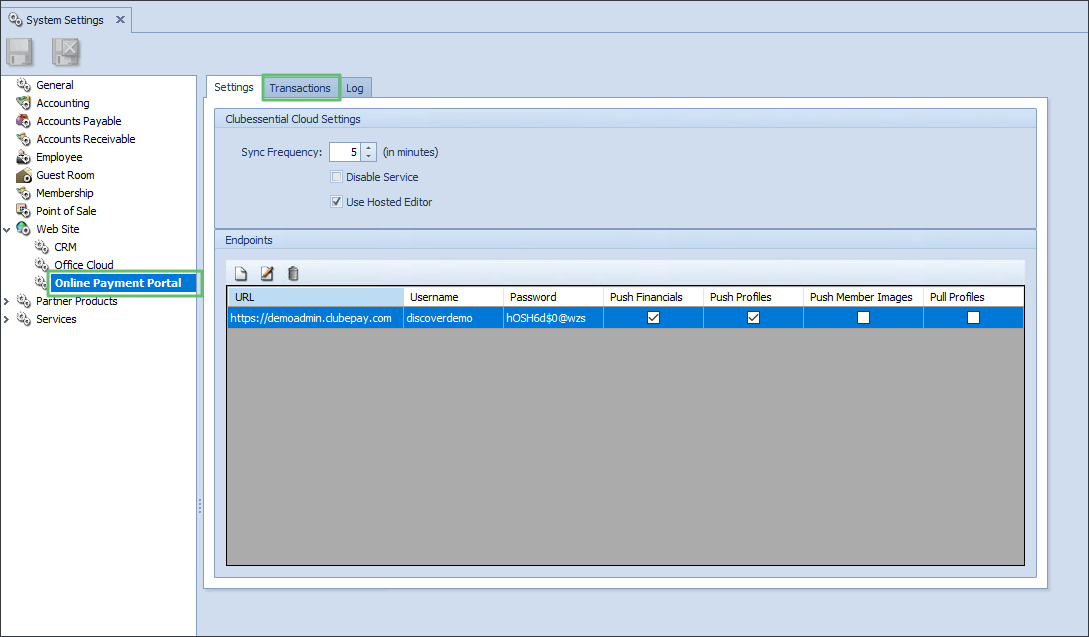
Click on (+) beside Website to reach the drop-down menu, select Online Payment Portal
Syncing in Payments
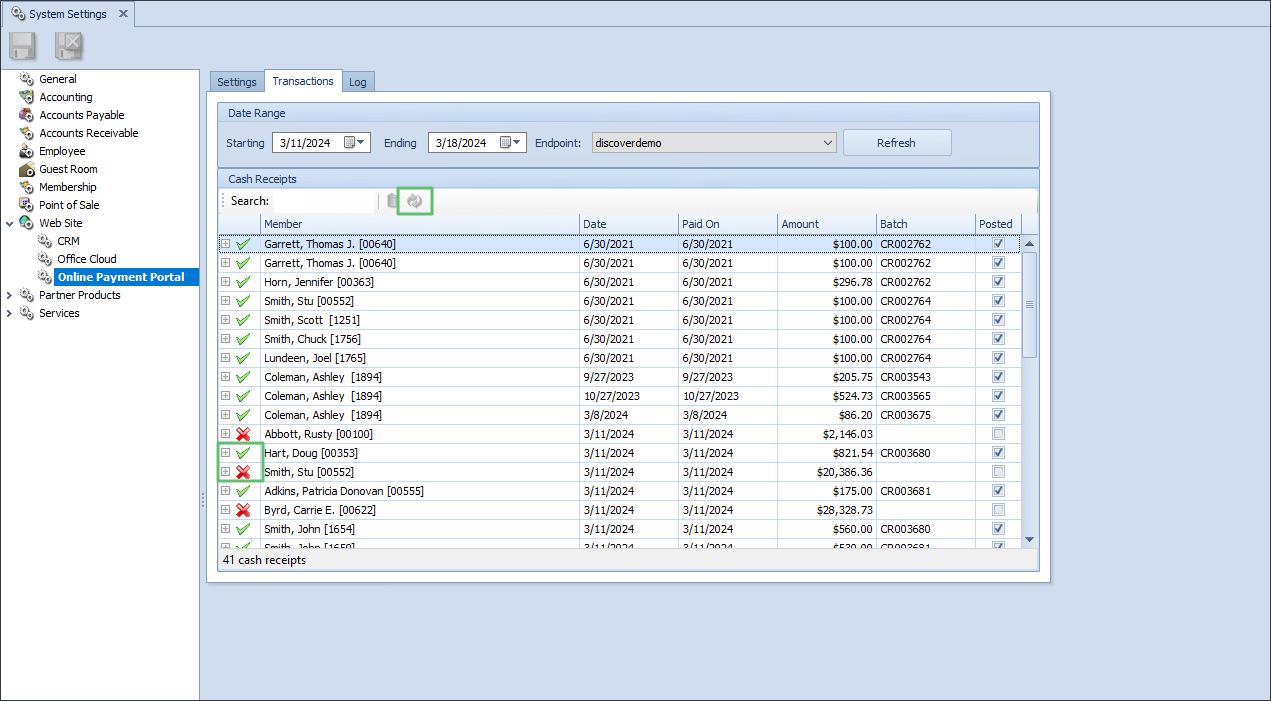
Click on the Transactions tab.
If you do not see a Green Checkmark or Red X to the left of the payment, then that means it has not synced over into the system.
Red X items will not have a batch or date associated with that line while Green Checkmark will have a date and batch associated with it.
If you see a line with neither icon, then that means it has not imported into the system. In this case, move on to step 7.
Click on the rows with the missing Green Checkmark or Red X.
Then click the import button.
When the proper row is selected, the import button will turn an orange shade.
For this example, we had to white out the checkmark and batch number.
**Make sure your date ranges match your needs and select refresh to show the proper date range in the grid. **
After importing it, the row will display an icon to the left of the member name and will have a date, and batch number attached to it.
Best Practices
FAQs
What if I do not see the payment in this grid?
A: The PayCloud website needs to be checked to see if the payment came through there.
Q: Why does this happen?
A: This is often associated with a failure of communication. Failures of communication are caused by internet connectivity issues or Clubsoft services not running on the server.
