...
| Table of Contents | ||||||||||
|---|---|---|---|---|---|---|---|---|---|---|
|
Exporting Interactive Reports to Excel
Interactive Reports
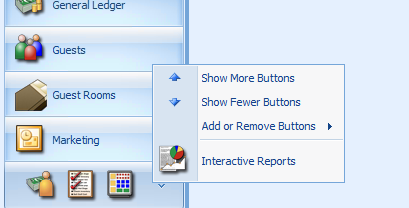
- In CMA on the left menu click on Interactive Report Icon
Select Membership > Click on the + sign to open the report options > select Member Address Labels – Avery

Set all the criteria’s to filter what members you want included in the export
A few important pieces of criteria to consider:- Member Types –multi select the member types you want included
- Field – how many address lines to include
- Notification Types – defined by the club: what type of events and communication does the club
send out - Sort By - sort by name will sort Alpha Last Name. There are numerous other sort options, member
number, zip code, etc… - Display Name – this depends on how many name fields you use in the member file. Default will
print the first, middle, last name of the member. The statement name is usually used as a more
formal name such as Mr. John Smith & Mrs. Tina Smith.
- Once all the criteria are set, then click View Report
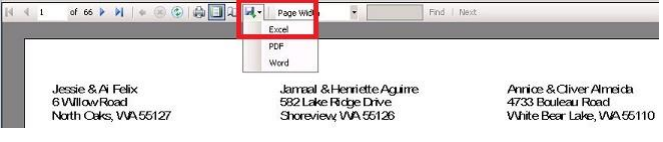
Click on the Export Icon > select Excel > Give it a File Name and save to the directory you want the file
stored
Formatting Data in Excel
- Open the File in Excel > top tool bar click Data

Notice Column A and C are not showing: expand both columns
Highlight column B > Cut and Paste to Column A
Highlight column A > Top toolbar Select Data > Text to Column
Check Delimited > Next
- In the following screen check Tab and Other > click in the blank box next to Other>
hold the ALT Keydown while entering 010 from the key pad (this will not populate the box with the 010 this is a commandand the box will remain blank) *very important; this will not work using the numbers at the top of thekeyboard, you must use the numbers on the keypad only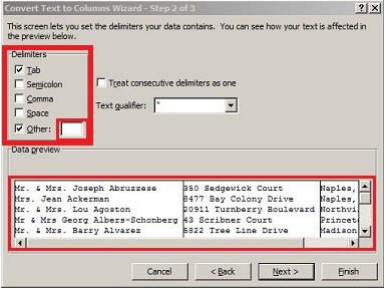
You will notice in the Data preview box the address lines have moved over to columns > click Finish
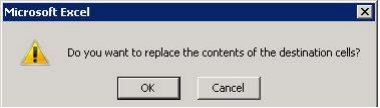
- A box will appear > click OK
The file at this point will still need some data manipulation before it is usable. Some members might have three address lines and some might have more.
- Before continuing scroll down and find the columns with the longest address and note the City/State/Zip Code column (city, state and zip are in the same cell at this point).
- Highlight the entire spreadsheet by clicking on the Icon to the left of Column A

- Right click the mouse anywhere on the highlighted spreadsheet > Format Cells > click Alignment Tab >
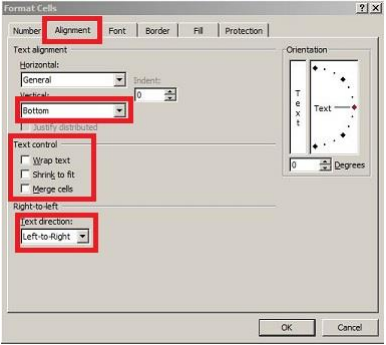
A few things to look for:
- Un-check Wrap text
- Un-check Merge cells
- Text direction and Vertical can be your preference
- Click OK
- The spreadsheet will still be highlighted and you should still be in Data > Adjust your column width and
height > click on Sort > Select the last Column containing city/state/zip code > sort on Values > select Order Z to A

- Find the first line that the city and zip are not aligned to the above address lines > highlight all lines
- containing the city/state/zip > right click Cut and Paste to the same columns as the City column above
- If a column contains a Country > Highlight the column Cut and Paste to 3 columns over *if you do not do
this step the following steps will overwrite the country if not moved - Top Tool Bar click on the Data > Highlight the column containing the city/State/Zip Code > Select Text to Column

Check Delimited > Next
Un-check everything and check Comma only > Finish (this will move the City to a separate column)
Highlight the column containing the State/Zip Code you should still be on the Data tab > Select Text to
ColumnCheck Delimited > Next
- Un-check everything and check Space only > Finish (this will move the Zip Code to a separate column)
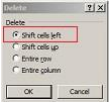
- Delete the blank column > Shift Cells Left
- Highlight the entire spreadsheet > click Sort > Select the Column containing the State > sort on Values >
select Order A to Z (this will help find addresses in other countries or not entered correctly) - Once City, State, and Zip Code columns are aligned highlight the Zip Code Column > right click on the
highlighted column > Format Cells > select the Number Tab > select Special > Zip Code (do not select Zip
Code + 4)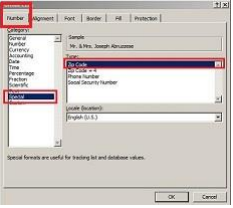
- Top Tool Bar click Home and highlight Zip Code column or All columns > click Align Text Left
You are ready to use the data for mail merge
...