...
Table of Contents
| Table of Contents |
|---|
...
|
...
|
...
|
...
...
Installing CMA and POS
- Install the Clubsoft Prerequisites by going to the Clubessential shared folder > Setup > double click Clubsoft Application Suite Prerequisites.msi then follow the prompts to install it (Next > Install > Finish).

2. Install the Clubessential Management Application (CMA) by going to the Clubessential shared folder > Setup > CMA > double click on Setup.exe then click Install.


NOTE: It is not required for Office to be installed on the Food & Beverage POS terminals, however, many clubs prefer to do this so that Food and Beverage Managers can make quick changes during service if necessary.
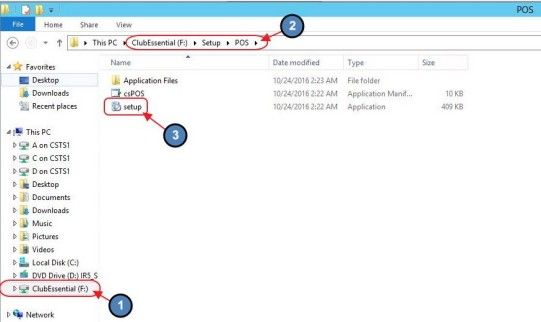
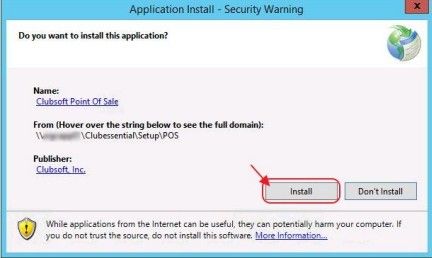
3. Install the Point of Sale (POS) by going to Clubessential shared folder > Setup > POS > double click on Setup.exe then click Install.
Best Practices
When mapping the shared application folder, use the UNC path to reduce risk of spreading viruses.
While it is not required, installing the Clubessential Office Management Application at the POS stations is oftentimes helpful for the Food and Beverage Managers to be able to make quick edits/updates to the system.
FAQs
Q. What version of Windows can I use?
A. Clubessential software is no longer tested for Windows XP or previous versions of Windows Operating System. In terms of Server environment, Clubessential software is no longer tested for Windows Server 2003 or previous versions of Windows Server Operating System since they are no longer supported by Microsoft.
...
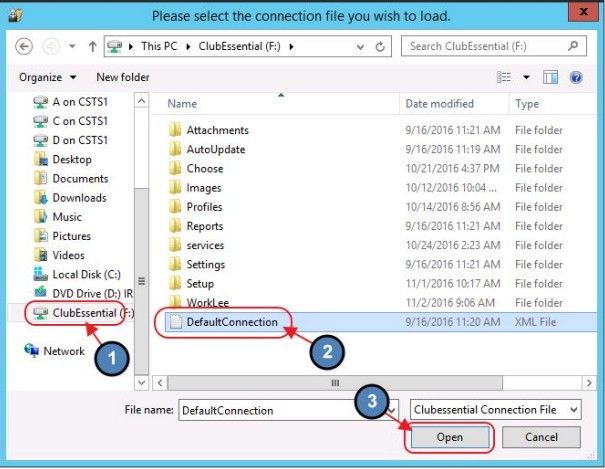
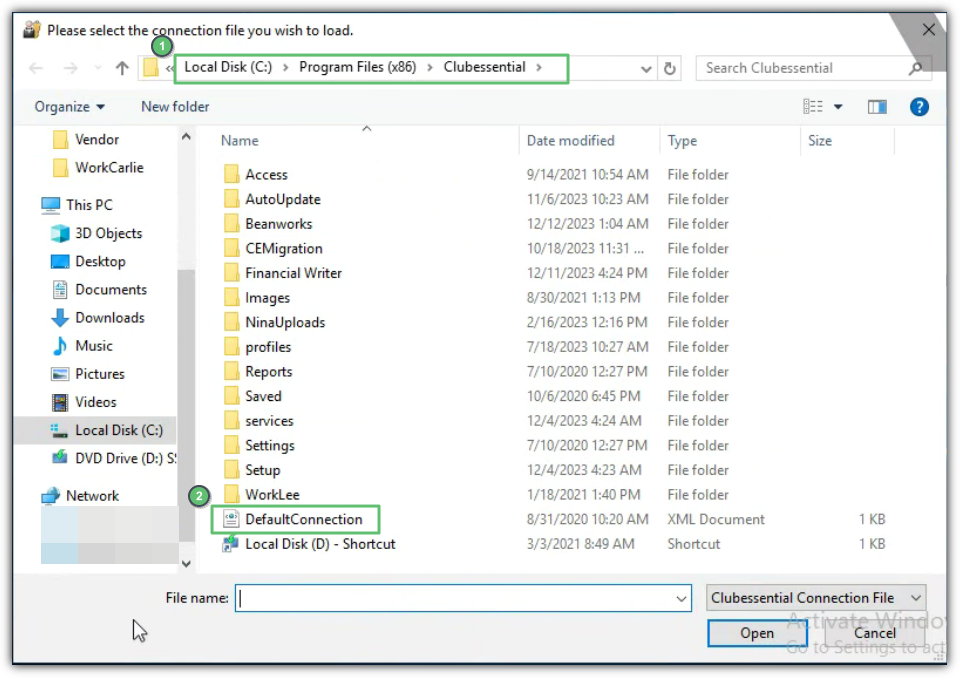
Q. When launching the application for the first time, I was asked to select the appropriate connection file. What is it?
A. When launching the application for the first time, you may be asked to select the appropriate database connection file. If so, browse to the Clubessential shared folder and select the DefaultConnection.xml file.
Q. When launching the application for the first time, connection to the SQL database failed. Now what?
A. If connection to the database fails when launching the application for the first time, check that the user has rights to the SQL database and has local administrator rights.
If the user has access to both the SQL database and local admin, follow these steps:
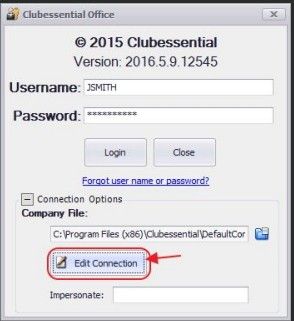
1. Click the + sign next to Connection Options.
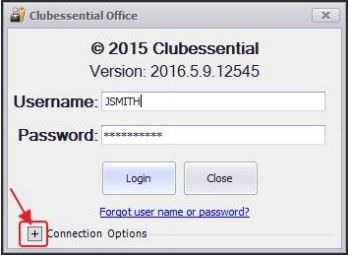
2. Click the Edit Connection button.
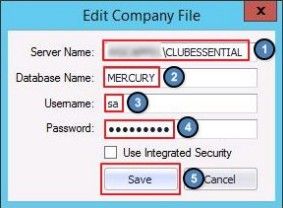
3. Check to make sure the Server Name and the Database Name fields have the correct information. Server name should be the SQL Server computer name and the instance name. In most cases this will be SERVER\CLUBESSENTIAL.
Database name is typically MERCURY in a single database club. Username/Password or Integrated Security options should remain unchanged from the original installation.
Q. What do I do when application Shows “Inaccessible Logs” Error?
A. If you receive the following error, “Inaccessible Logs; Security Data Portal Dot Fetch Error,” follow the instructions below:
Warning: Modifying the registry incorrectly can cause serious system-wide problems. Please make sure to create a backup of the Registry prior to making any changes.
1. Go to Start Menu and launch the Registry Editor.
2. Within the Registry Editor go to: HKEY_LOCAL_MACHINE\SYSTEM\CurrentControlSet\Services.
3. Right-click eventlog and choose permissions. Add full control permissions for Authenticated Users. (Note: If Authenticated Users is not found, click add and type in Authenticated Users).
4. Expand eventlog, right-click security, and choose permissions. Click add, type “Authenticated Users” and click OK.
5. Add full control, and then click OK.
Downloadable Guide
Installing Office (CMA/POS) on Local Workstations - Onsite Server - Guide
...
|
Use Case
Due to a Club’s IT depth, the Club has opted to host the Office application locally, rather than going with a hosted environment solution. Once the initial Server has been configured, the Club then installs the appropriate applications on the local workstations within their Pro Shop, Administrative Office, Dining Rooms, and Spa so all designated users may log-in and access the necessary programs.
Content
|
|---|
Prerequisites to Installation
The shared application folder can be mapped to a network drive on all workstations, though we recommend using the Universal Naming Convention (UNC) path. (Example: \\SRV-NAME\Clubessential).
Note: Using the UNC path can help minimize spread of viruses.
Accessing the Tool
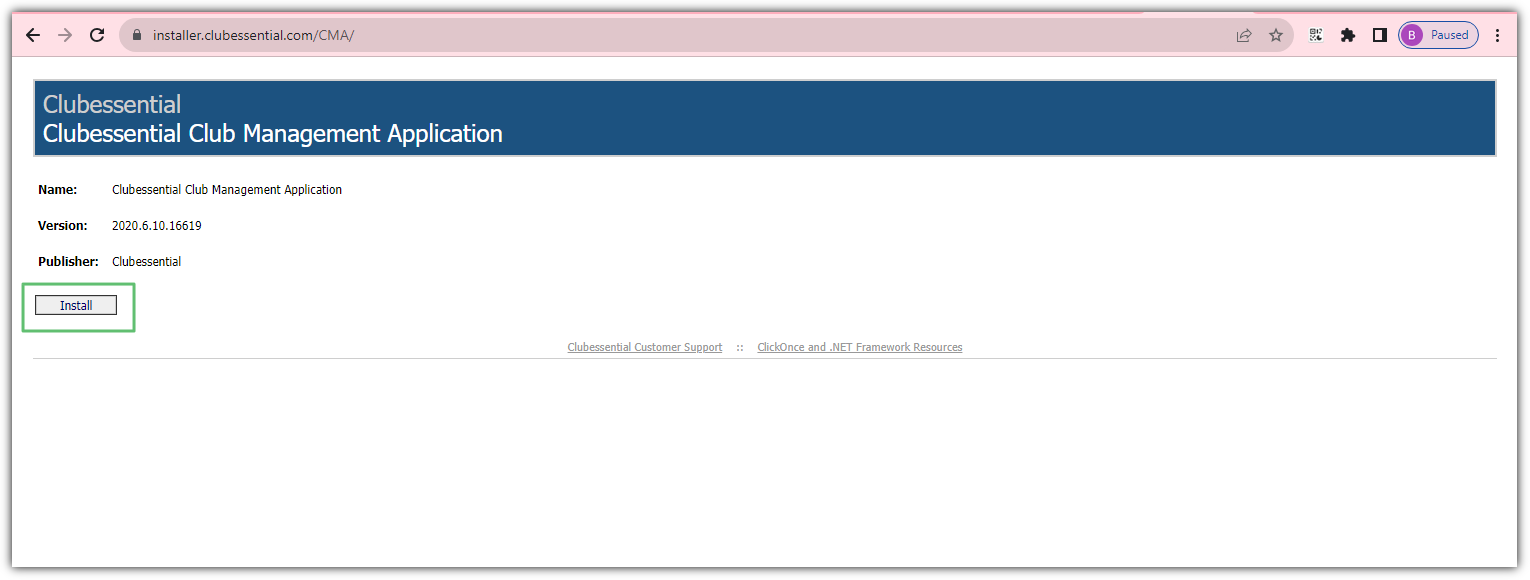
In a web browser, such as Google Chrome, visit the installation URL. The URL for the CMA installer is https://installer.clubessential.com/CMA and the URL for the POS installer is https://installer.clubessential.com/POS
Click the “Install” button on that page to download the installer.
Go to your downloads folder and double click the installer to launch it.
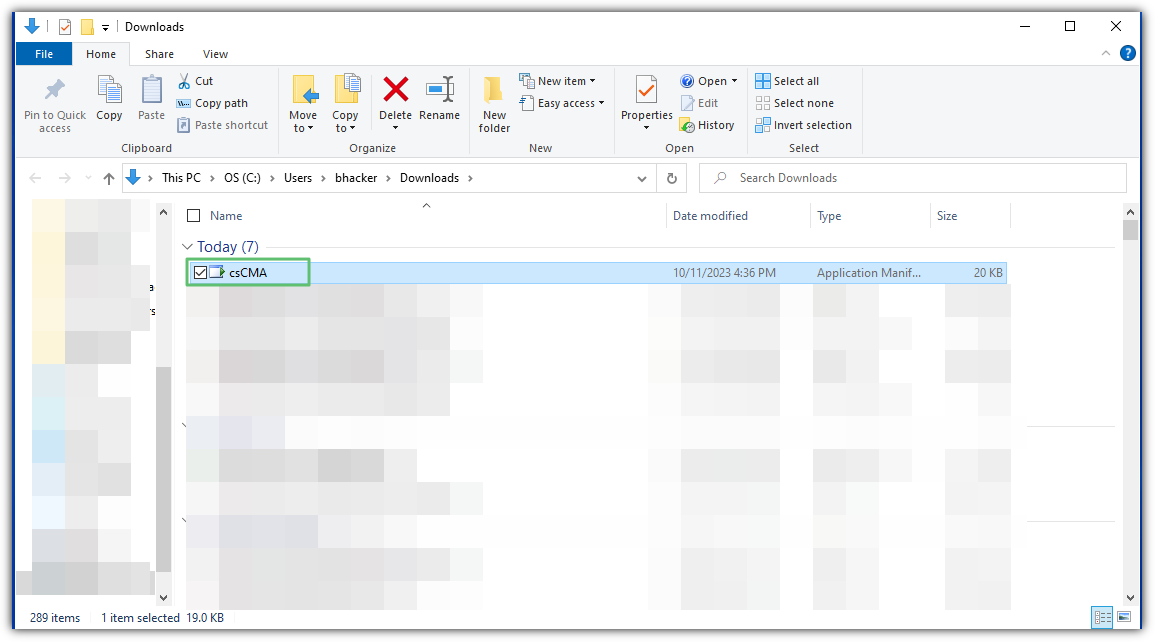
When launched, click the “Install” button. The installation process will begin, and may take several minutes. You may do other tasks while the installation process runs.

Once the installation is complete, CMA or POS will launch, and the shortcut will appear on your desktop.
You will be prompted for the connection file. Locate the Clubessential file and double click on Default Connection.
Complete the same steps using the POS link above to get Classic POS on your PC. If the default connection file was assigned to CMA, you will not need to assign when installing the POS.
