Versions Compared

Key

  • This line was added.
  • This line was removed.
  • Formatting was changed.

Table of Contents

Table of Contents
minLevel1
maxLevel7
excludeTable of Contents

Dynamic Groups Created in the Website

  1. Login to the website as an Administrator.

  2. Navigate to the Admin tab.

  3. Under Users/Profiles, click Dynamic Groups.

  4. Click the Group Explorer tab, review existing Dynamic Group list

  5. To review the rules applied to a group, click the name of the group to select, drag group to the middle of the screen.

  6. If the Member Type Filter is applied, review the Member Types in the Selection box. Any changes in the naming of the Member Types from the previous accounting system (upper case, lowercase, abbreviations), can affect which Member Types are selected. Ensure the Member Types currently being sync from Office are the ones selection for the Group.

Additional Resources

Office Groups

Website Groups


  • Office Member Type Sync to Website in which member types have changed

Dynamic Groups can be affected by the member sync from Office to the Website after a club has been unified. This group will need to be reviewed to ensure the proper member types are being selected in the dynamic group filter.

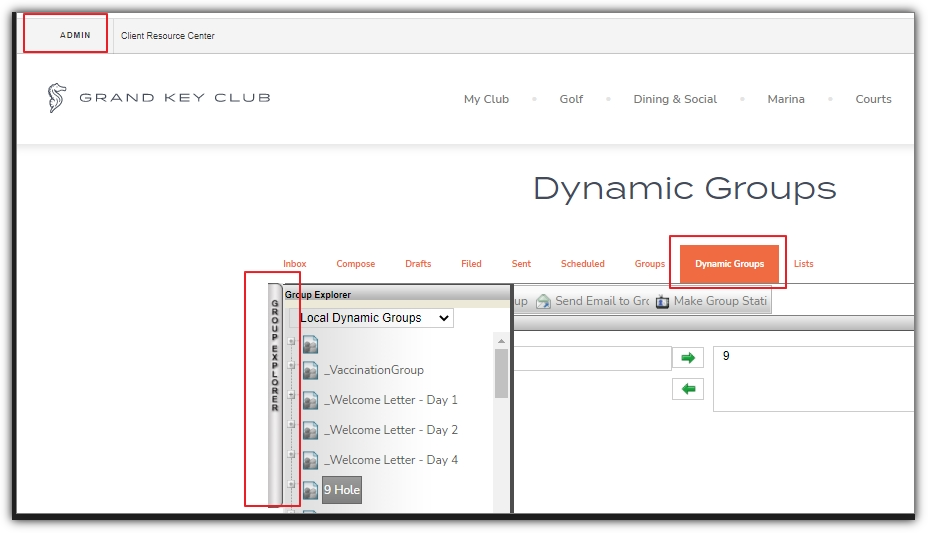
To do this, access Dynamic Groups.

Open the Group Explorer.

Drag the Member Type Group to the center of the Dynamic Groups screen.

Review the member types listed. Any change in the member types, even if the old type was in UPPER CASE and the new type has the same name, but appears in mixed case; it must still be updated. Ie. GOLF vs. Golf