...
Table of Contents
| Table of Contents |
|---|
...
|
...
|
...
|
...
|
...
...
Content
|
|---|
Home Page
...
Use Case(s)
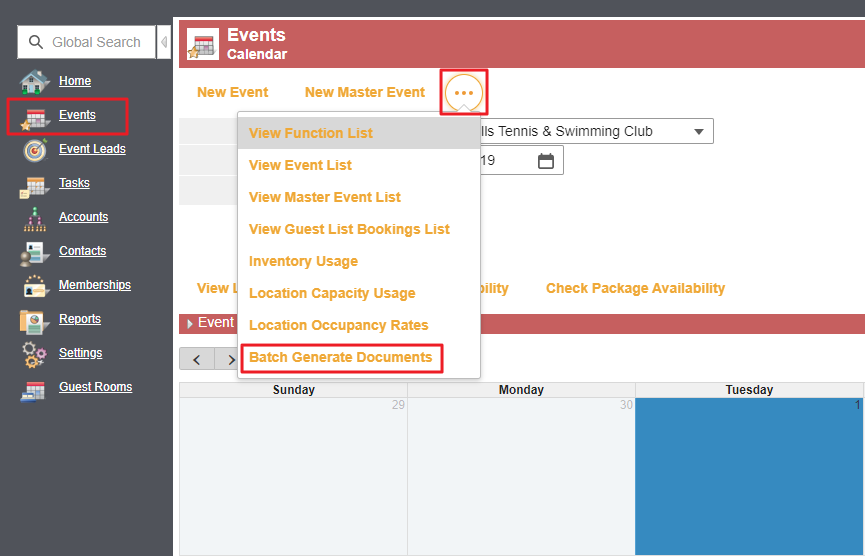
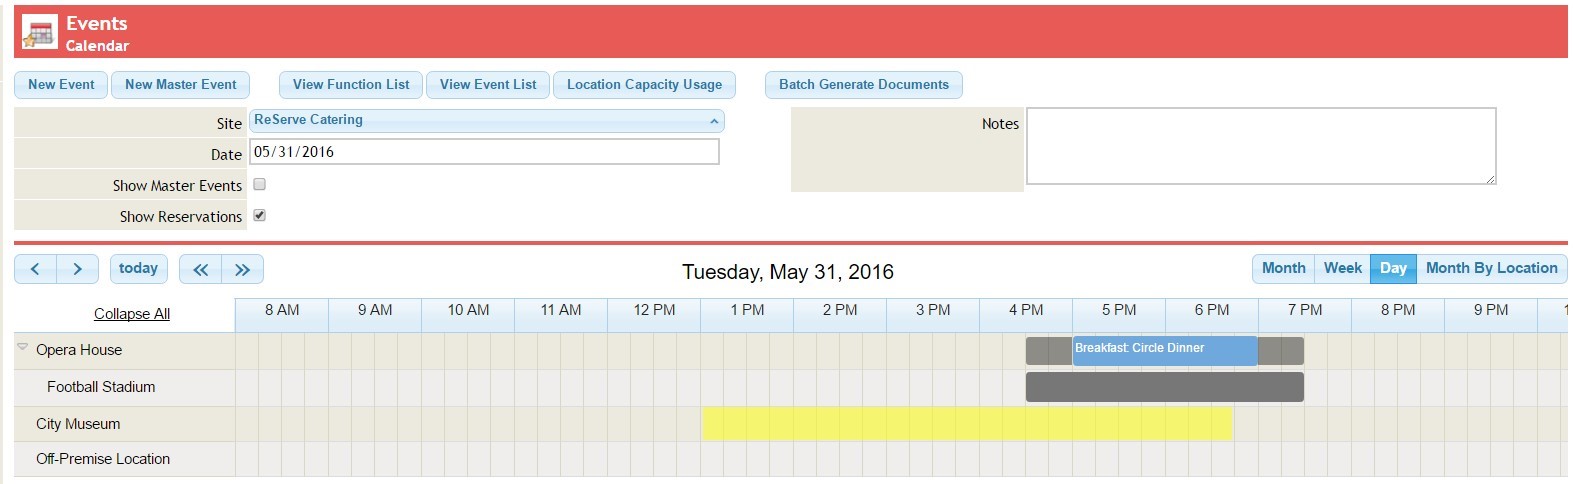
The Banquets Manager begins every day by reviewing the Home Page, which summarizes the most relevant information (Task, Events, and Leads) pertinent to the current day. They then navigate through the system effortlessly as they follow up on Leads, convert them to Events, and then move through the Event life cycle; skipping steps that may not be appropriate depending on the nature of the Event(s).
...
...
...
Batch Generate Documents
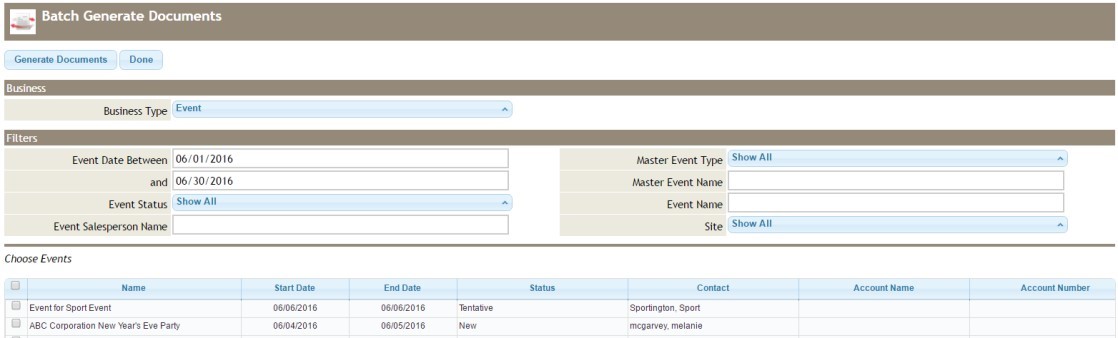
Documents, such as Event Orders, can be Batch Generated from this page by clicking on the Batch Generate Documents button.
Filter and select your events and then select a document. Your batch will be sent to the bottom of your home page in the Background Activities section.
...
...
...
...
...
...
...
...
...
...
...
...
...
...
...
...
...
...
...
...
...
...
...
...
...
...
...
...
...
...
...
...
...
...
...
...
...
...
...
...
Generating Documents
In order to generate/preview a document from the Event or Function Details screen, scroll down to the Communication History section header. Click on the “Generate Event Document” button.

This will direct to the Generate Documents page. A list of available documents will display. Check the box to select the desired document and then click the “Generate Documents” button.
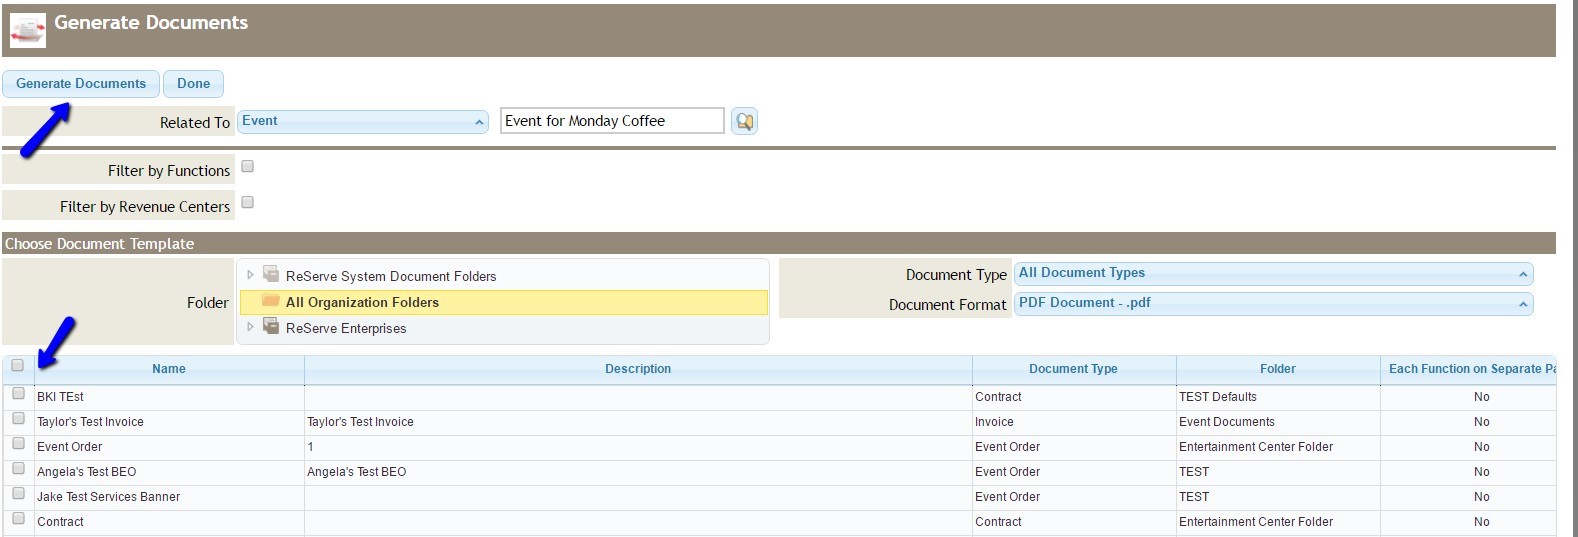
Your document will be available to view according to the way your browser works.
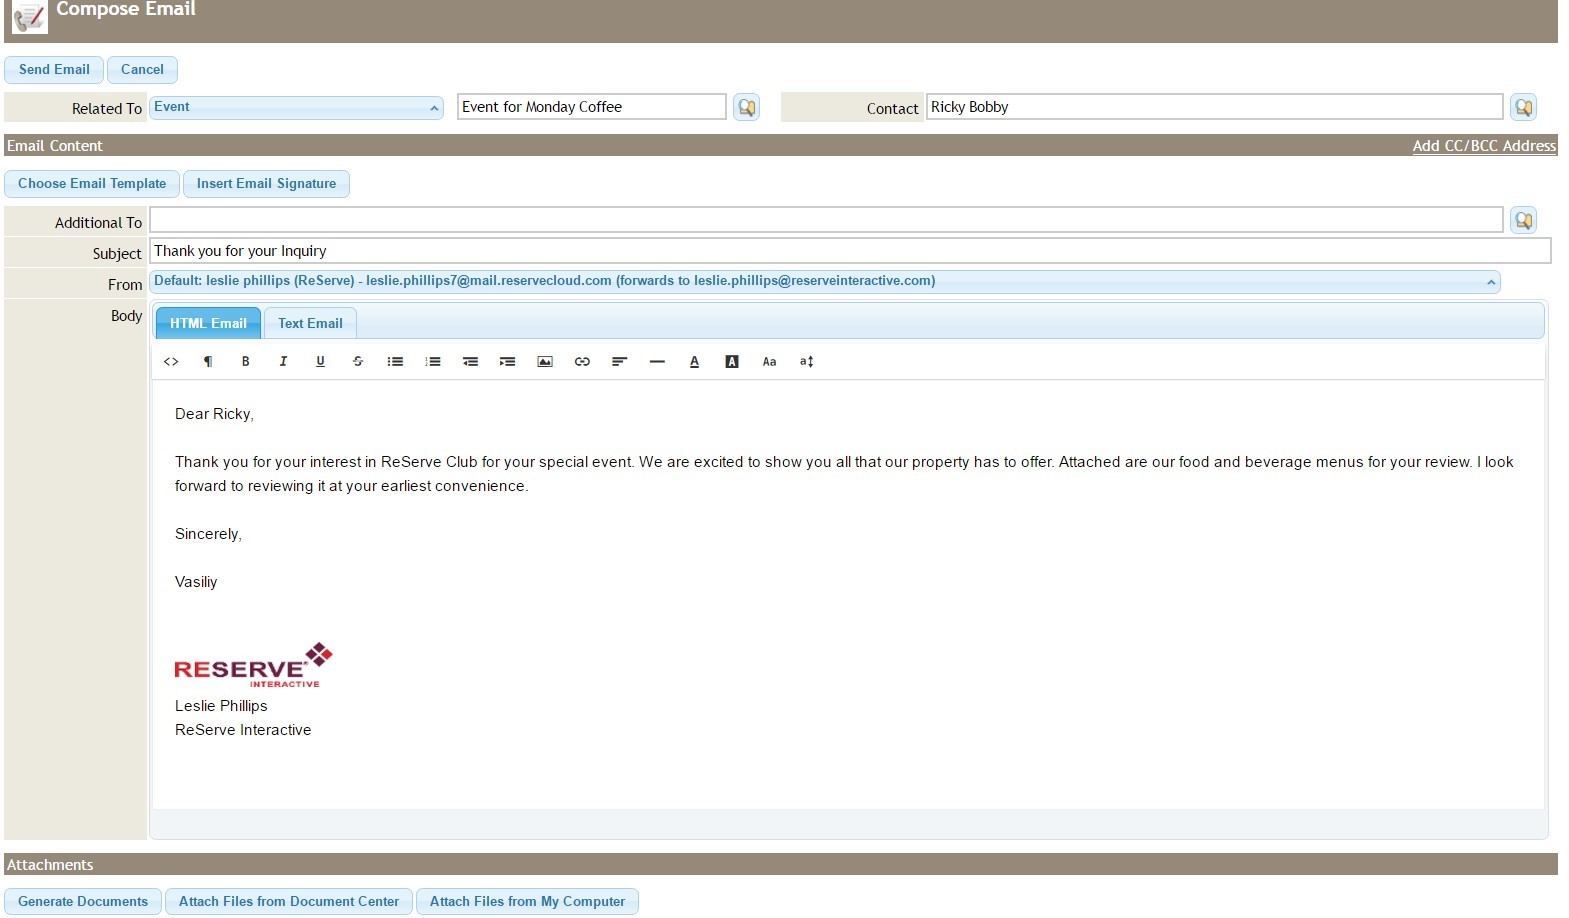
Send Email
...
...
View Financial Details
If changes need to be made to an event’s financial information, like adding a discount percentage, scheduling deposits, or recording payments, this can be accomplished under the Event Financial Details Screen. In order to access this screen, click on the “View Financial Details” button at the top of the screen under the Event title bar.
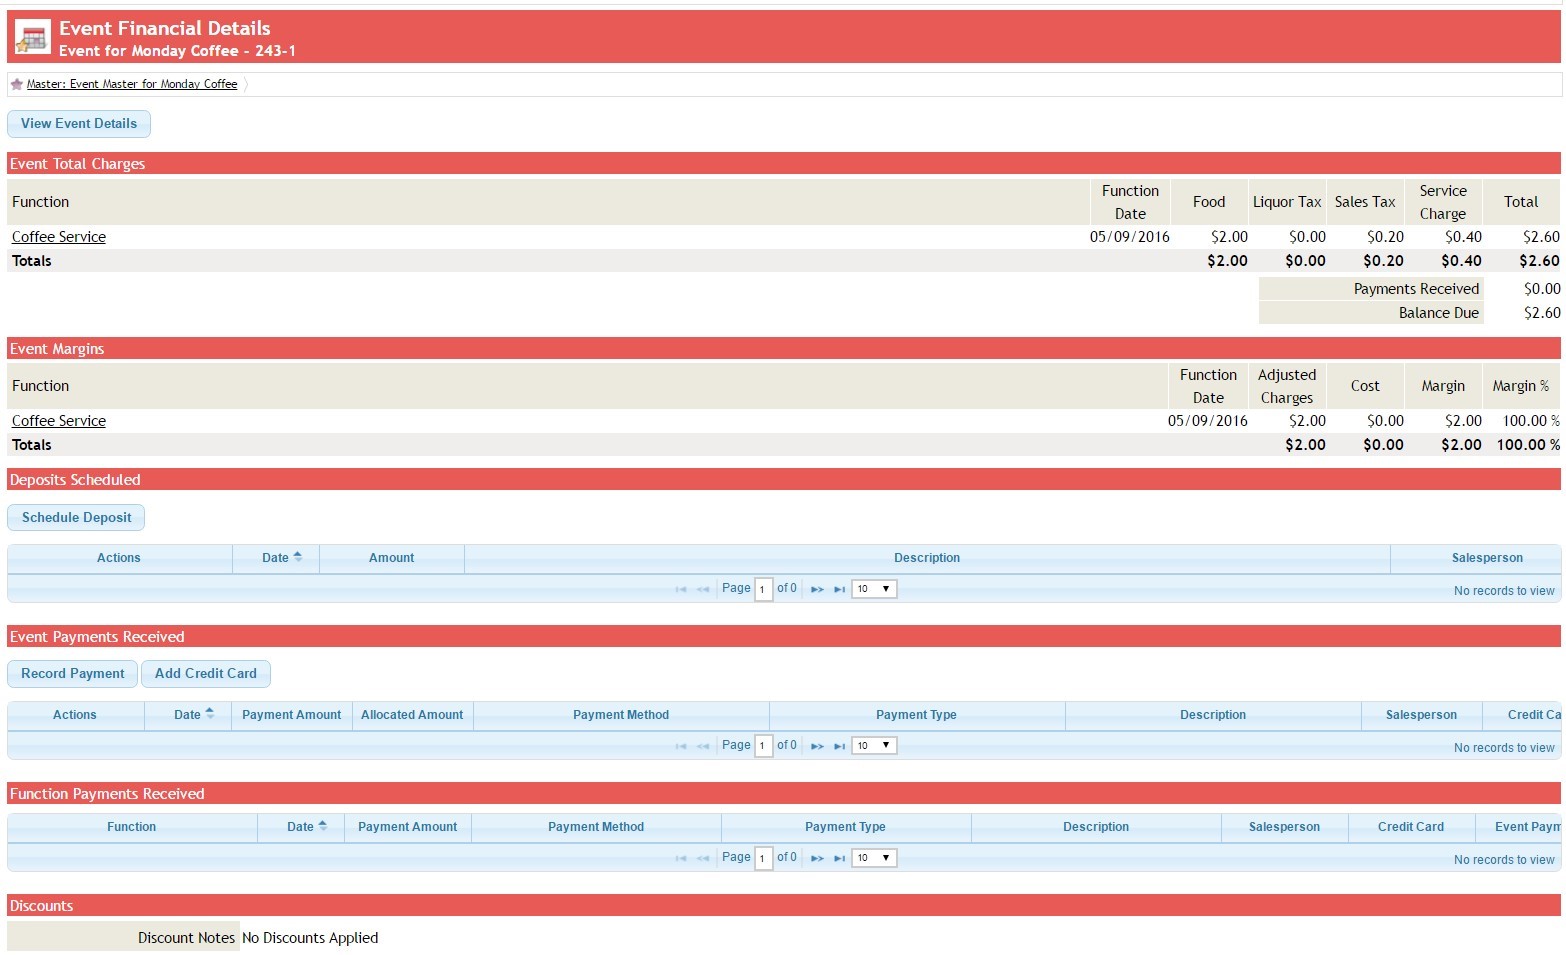
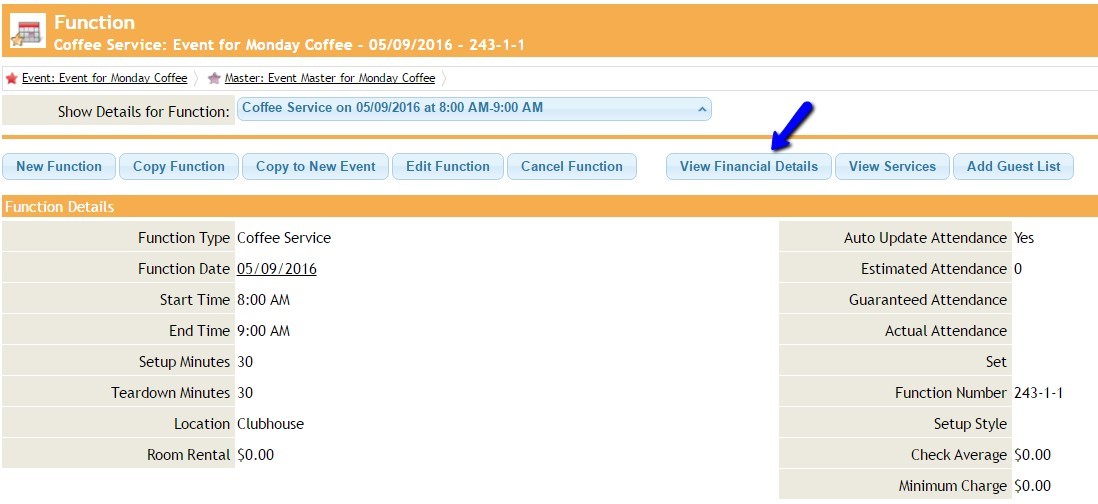
Dollar amount Adjustments, if needed, are added at the Function Level and can be accessed by clicking on the function name link, from within the Event Financial Details page, or from the Function Page by clicking the on View Financial Details button.
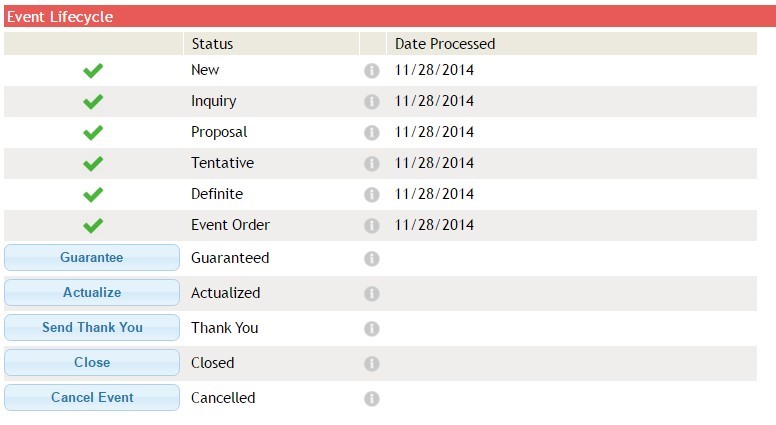
Event Lifecycle
Banquets is designed around the stages of a typical event’s lifecycle and allows you to automate your practices. The stages in the event’s lifecycle are listed on the Event Details page.
...
Using the Event Lifecycle
...
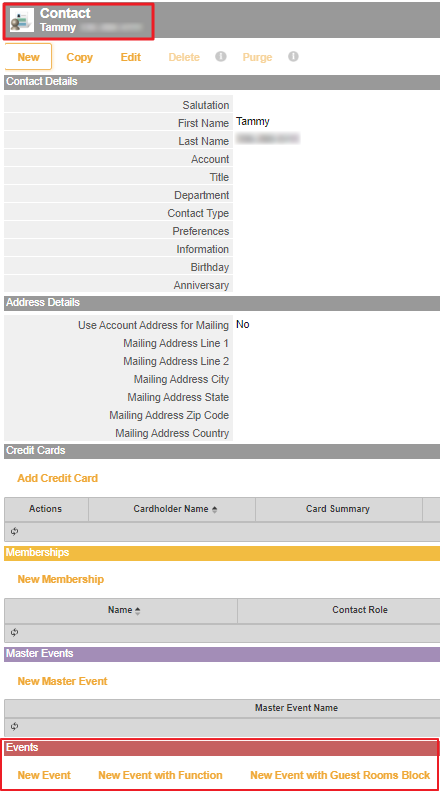
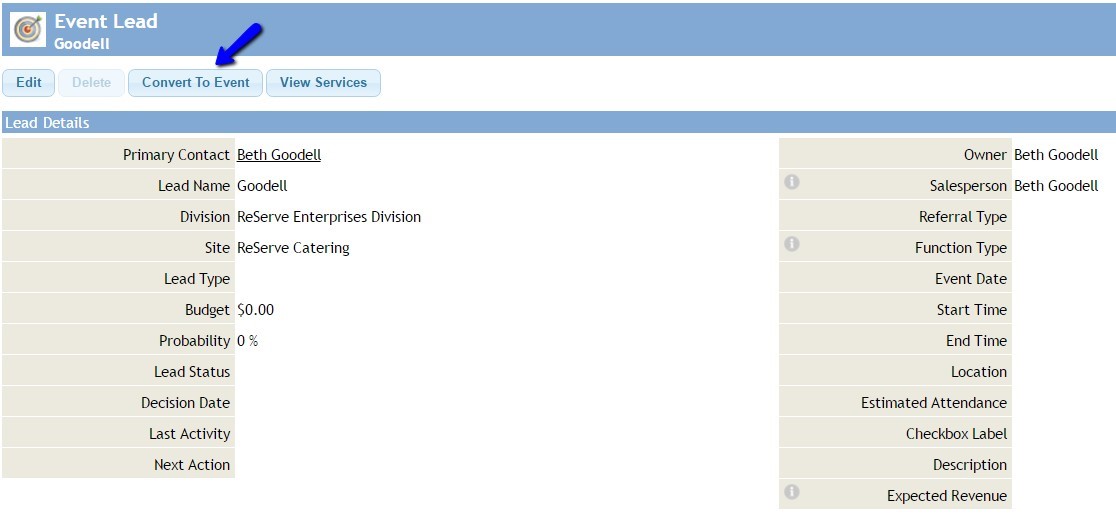
Creating Leads
It is now possible to create “Leads” in Banquets. Leads are intended to be used as a tool to keep track of potential business when the contact might not have a set date. Leads can be created by clicking on the Lead icon from the Navigation Bar and then selecting the “New” button.
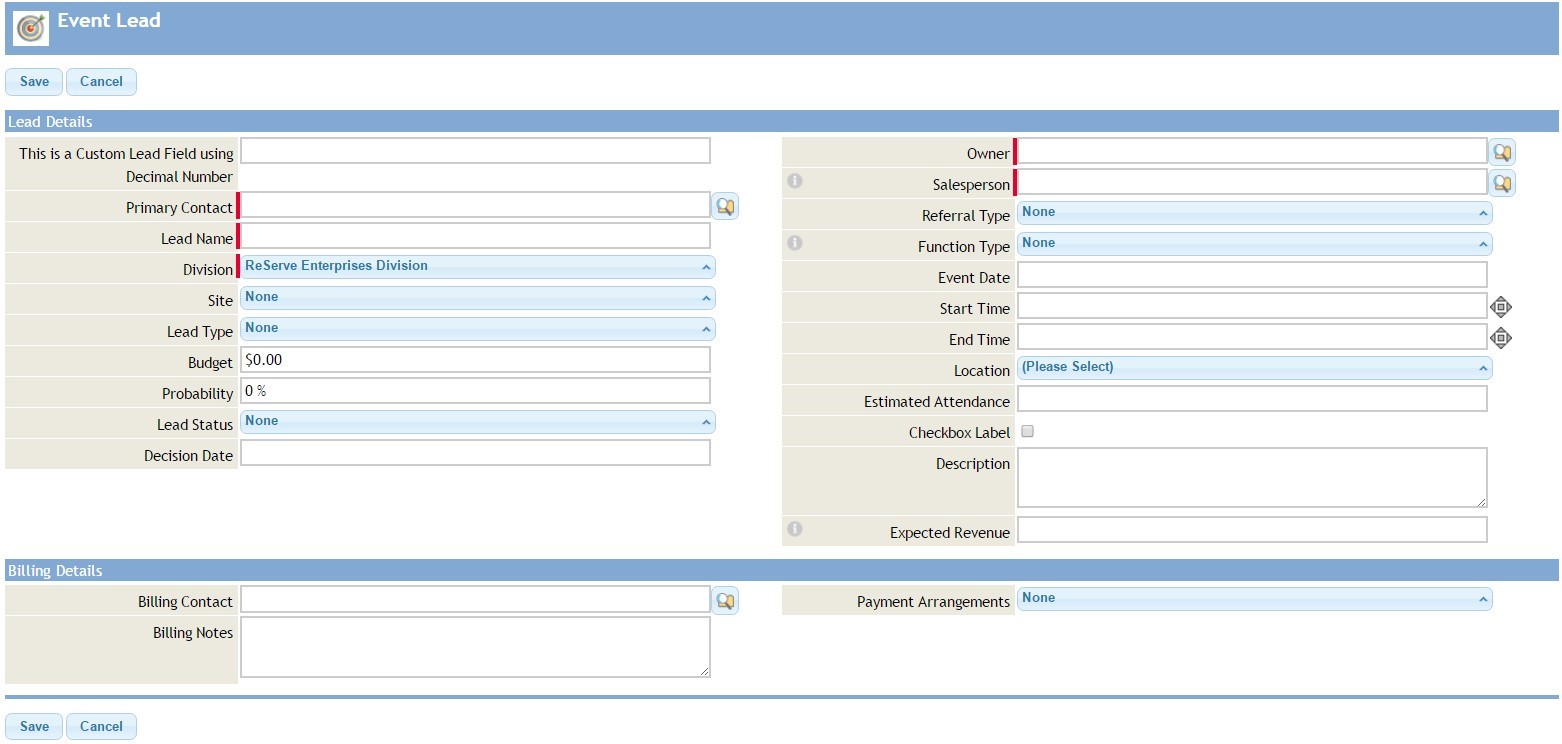
Leads can also be created from a contact’s page by clicking on the “New Lead” button under the Leads section header.
If a lead turns into a booked event, the “Convert to Event” button can be used to convert the lead to a new event.
FAQs
Q: How do I add all items at once in a menu?
A: In order to add all items in the service menus, click the “Check All Items” button.
Q: When using the Lifecycle do we have to follow the steps in order?
...
...
...
Downloadable Guide
Banquets Events and Events Lifecycle - Written Guide
...
