Versions Compared
Key
- This line was added.
- This line was removed.
- Formatting was changed.
Table of Contents
| Table of Contents | ||||||
|---|---|---|---|---|---|---|
|
| Widget Connector | ||||
|---|---|---|---|---|
|
Overview
Installment Billings are designed as a Club specific solution to billing individual members on a non-perpetual basis. For instance, many Clubs charge their new members an Initiation Fee upon joining the club. Installment Billings allow the Club to bill these members for a period of time or until a specific date for this fee. The Office system can generate various frequencies of Installment Billings including Monthly, Quarterly, Semi-Annually, and Annually. In this document, we will explain the various functionalities of an Installment Billing, and how to create a new billing.
Important: Please note that all Installment Billings act as Pre-Bill; setting up a charge for the month of May will cause the charge to be billed on the April 30th Member Statement.
Required Permissions
Membership
Add/Edit/Delete Installment Billing
Accessing the Tool
Please Note: Installment Billings are applied on an individual Member basis.
To access Installment Billings:
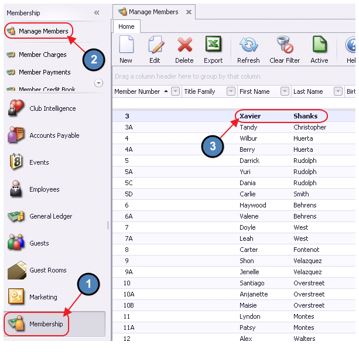
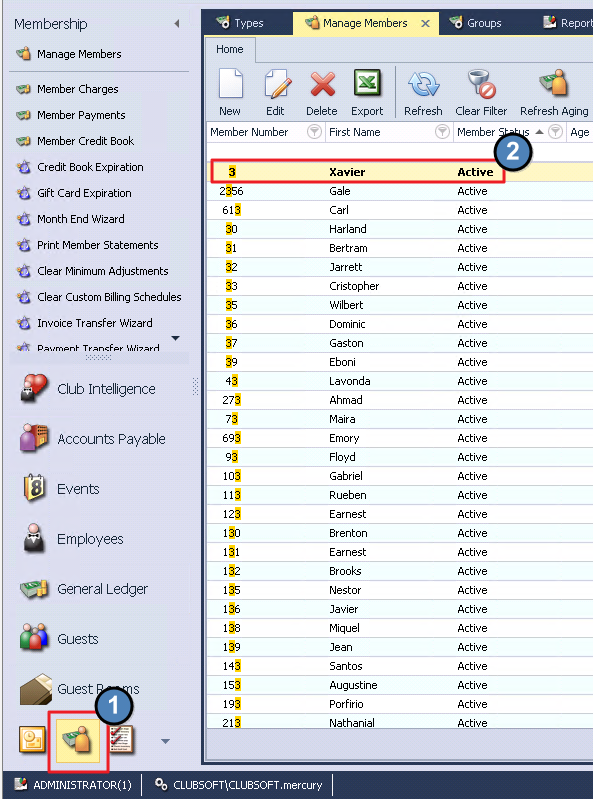
Select Membership from the left user menu.
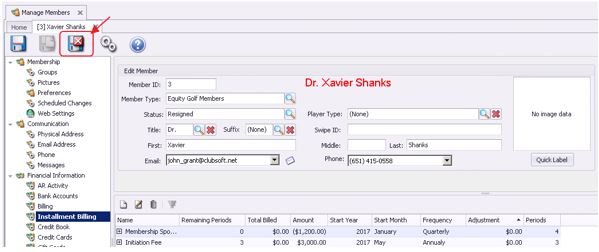
Choose Manage Members. Double-click the appropriate Member to be charged an Installment Billing.
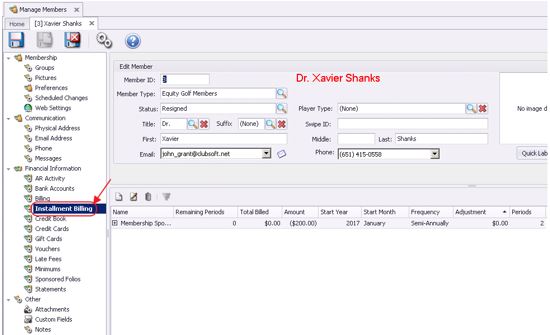
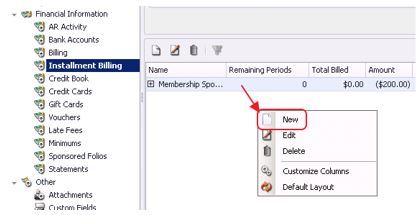
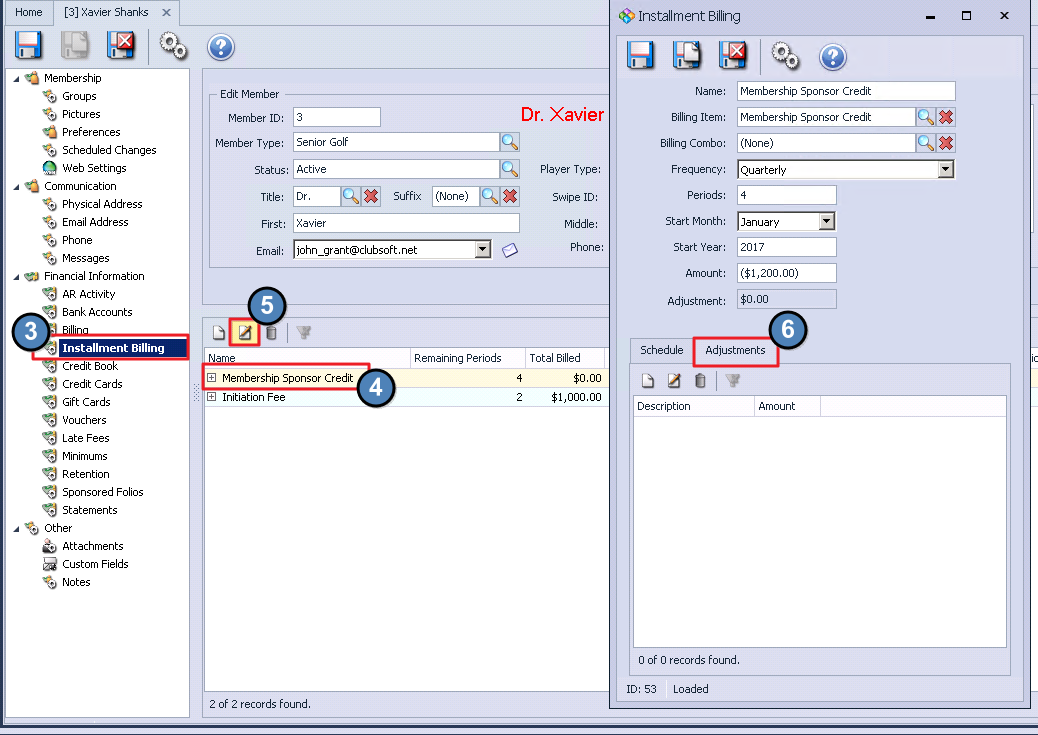
Select Installment Billing on the left pane within the Member’s profile. The Installment Billings Grid will launch displaying a list of current Installment Billings.
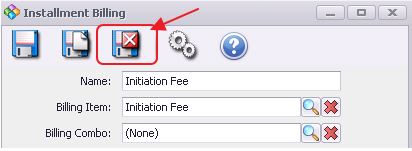
The primary functions associated with managing Installment Billings are embedded in the Installment Billing setup screen, which can be accessed by double-clicking on an existing Billing (to edit an existing Billing), or clicking the New button (to create a new Billing).
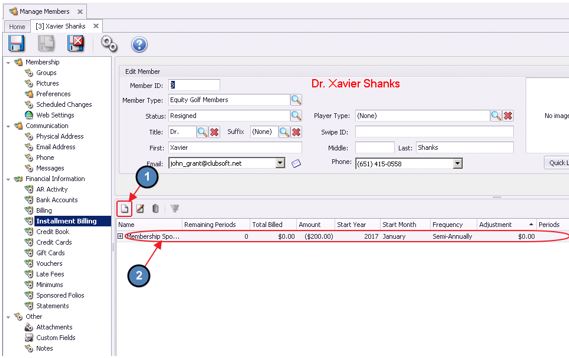
Create a New Installment Billing
To create a new Installment Billing,
Navigate to the Installment Billing section within the appropriate member’s profile and perform either of the following to launch the Installment Billing setup screen:
Click the New icon on the toolbar. OR
Right-click anywhere on the Installment Billing Grid and select New.
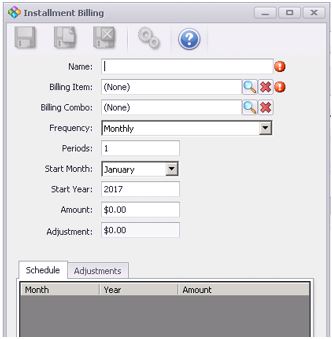
The Installment Billing Setup screen will launch.
Please follow the instructions below:
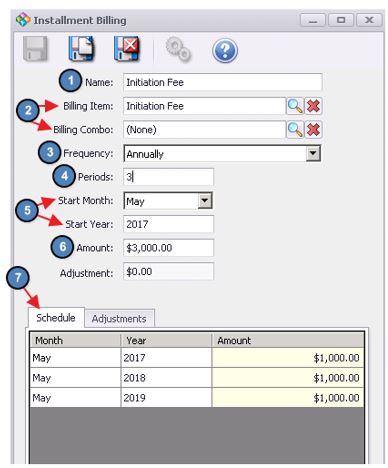
Name - Enter a Name for the Installment Billing.
Billing Item - Use the lookup and select the appropriate Item to be charged at Month End. The Item selected here determines the GL to be credited.
Billing Combo - If the entity to be charged at Month End is an Item Combo, rather than an Item, use the lookup and select the appropriate Item Combo to be charged at Month End.
Please Note: For Installment Billing using an Item Combo, the system will recognize only Frequency when billing, not Periods.
Frequency - Select the Frequency of the Installment Billing (Monthly, Quarterly, Semi-Annually, or Annually).
Periods - Enter the number of Billings the schedule will consist of.
Start Month/ Start Year - Select the Month and Year of the first scheduled billing.
Important - Keep in mind that all installment Billings act as Pre- Bill, setting up a charge for the month of May will cause the charge to be billed on the April 30th Member Statement.
Amount - Enter the total amount to be billed over time.
(Note: Adjustment field will be covered later in the document).
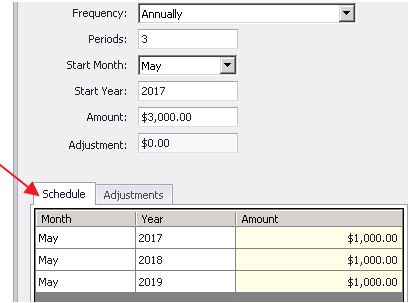
Schedule - Based on the information entered, a schedule is created. In this example, we set up an Annual Installment Billing to charge the Member $1,000 every May for the next three years, starting in 2017 ($3,000 total).
If necessary, the amount billed each period can be changed. However, please note that the sum of the periods must equal the Amount entered on the schedule.
Save & Close - Be sure to select Save & Close when setup is complete.
Save & Close Member Profile - In addition to saving and closing the installment billing, please be sure to also Save & Close the Member’s profile after the Installment Billing has been created.
Adjustments Tab
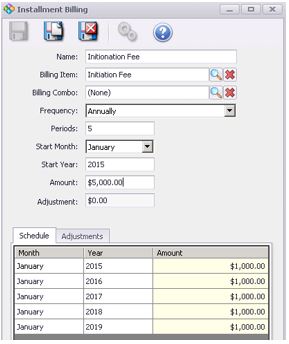
The Adjustment tab can be used to set up an Installment Billing Schedule that already has payments applied to it, and do not need additional billings processed for the dates in the past. This tool is oftentimes used when Clubs are converting from a different system, or just starting to use the installment billings functionality. To demonstrate, let’s create an Installment Billing for a Membership that began three years ago and has $2,000 of the initial $5,000 left to be paid.
Enter the appropriate information in each of the below steps as explained in the above section of this document; Name, Billing Item, Frequency, Periods, Start Month, Start Year, Amount.
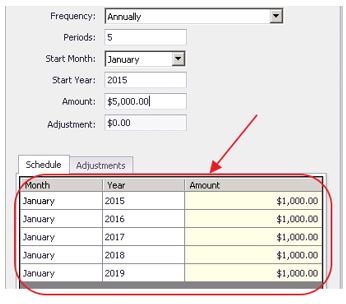
As shown, the Schedule includes five Installments;January, 2015 - January, 2019.
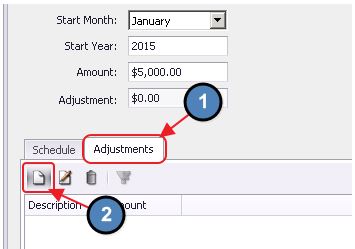
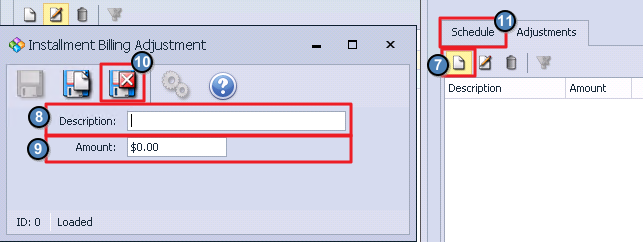
Assuming it is April 11, 2017, three of the five installments would have been billed previously. To adjust for this, navigate to the Adjustments tab and select New.
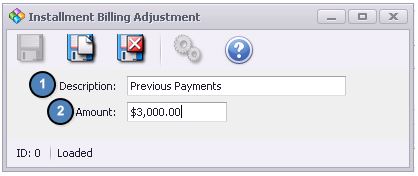
Enter a Description that explains the Adjustment and the Amount of the Adjustment. The adjustment amount entered will now populate on the Installment Billing’s main screen.
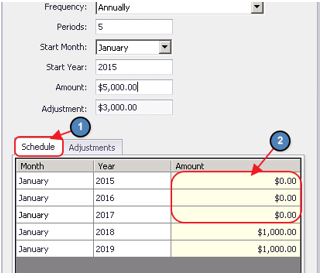
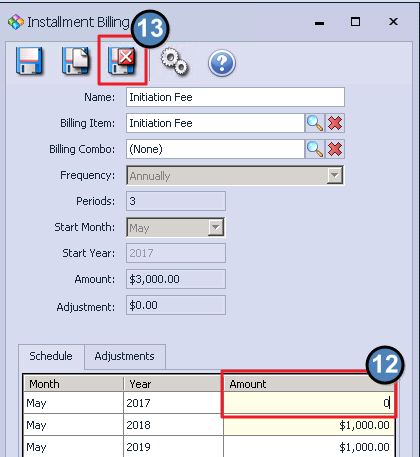
After the Adjustments are entered, the Schedule must be updated. Since the $3,000 Adjustment entered relates to Installments from January 2015, 2016 and 2017, we will adjust those Installments to $0 on the Schedule.
Click Save & Close.
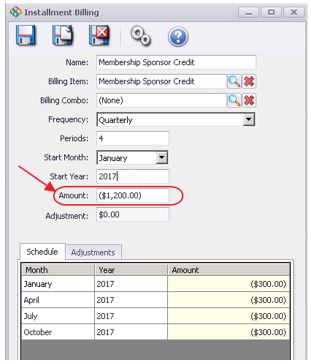
Credit Installments
Credit Installments can be used to apply a credit toward a Member’s balance at a certain frequency. A typical Credit Installment could be a Quarterly Membership Sponsor Credit if a Member gets another Member to join the Club.
Please follow the below instructions to set up a Credit Installment:
Follow the same steps used to create a normal Installment Billing, however in the Amount field please enter a negative amount so the system will Credit the Member, rather than bill them the Amount.
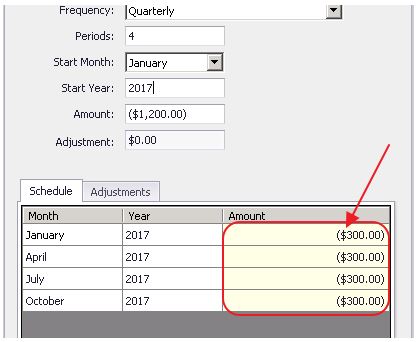
Based on the information entered, a schedule is created. In this example, we set up a Quarterly Credit Installment to Credit the Member $300 every Quarter of 2017.
Select Save & Close.
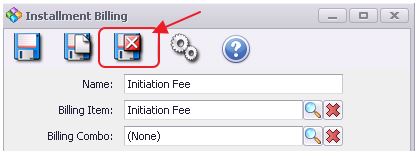
Remove Installment Billing
To
access Installment
Billings, select Membership from the left user menu and choose Manage Members.
Double-click the appropriateMember that needs the installment billing removed
Select Installment Billing on the left pane within the Member’s profile
. The Installment Billings Grid will launch displaying a list of current Installment Billings.
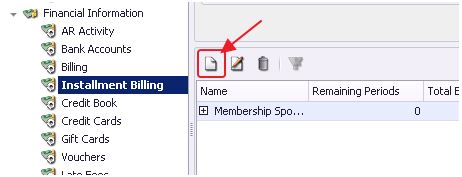
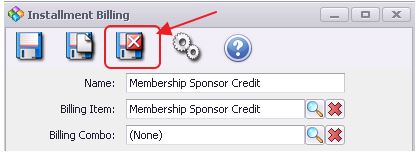
Click on the Installment billing that needs to be removed.
Click the Edit icon.
The installment billing will open in a pop-out window.
Click the Adjustments tab
Click the New Icon in the Adjustment tab
Provide the name you would like for the adjustment in the Description field
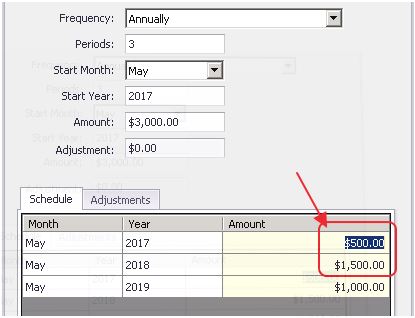
Provide the remaining amount of the installment billing to remove it.
If it is a credit, input a credit amount: -$####. Negative numbers is identified by parenthesis. If it is a charge, input a positive figure: $####
Please Note: In the photo above, we are dealing with a charge, so the figure is positive and does not display a negative number.
Save & Exit adjustment.
Click on the Schedule tab.
On the Schedule tab, you will also make the same adjustment to the payments. This means changing the unbilled periods to $0 which should equal the adjustment amount.
The option to save will reappear at the top once this is done, so you will then Save & Exit.
Save & Exit out of the Member’s profile for the change to remain permanent.
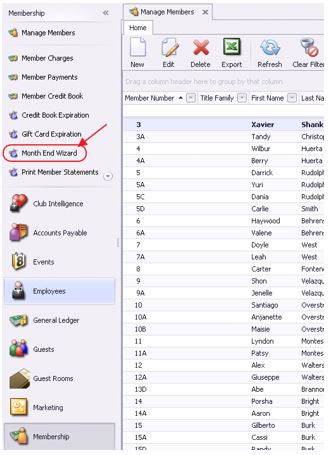
Month End Wizard - Installment Billings
Installment Billings are charged to Members through the Month End Wizard and will be included in the same batches as Dues and other charges set up through Member Billing Schedules.
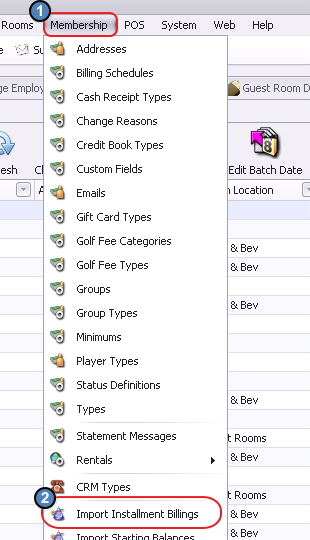
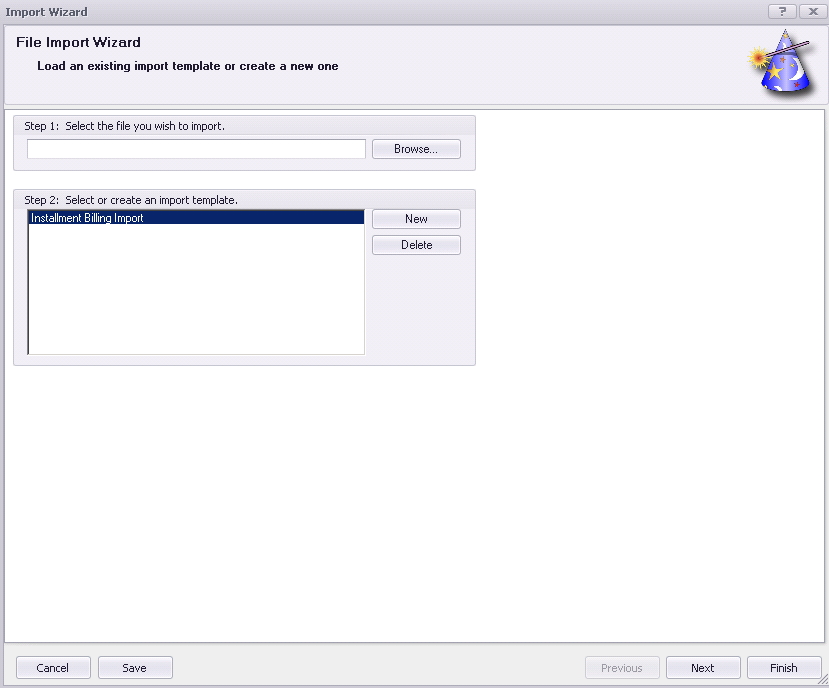
Import Installment Billings
In addition to manually creating installment billings, Installment Billings may also be imported. Typically, this feature is utilized in conjunction with the implementation of your system, and will be utilized by your implementation team, however, this feature is also available to you.
To access the import:
Select Membership from the top menu.
Choose Import Installment Billings.
Follow the Import Wizard prompts to complete the import.
An example installment billing template (CSV file) has been laid out below.
Best Practices
Set up installment billings to help simplify and automate billings that occur in regular cycles, and have a start and end date.
Use the Import feature to add a large number of installment billings at once.
For Installment Billing using an Item Combo, the system will recognize only Frequency when billing, not Periods.
When removing an installment billing, you must change the schedule and the adjustment before saving the changes or you will not be able to save the changes at all.
FAQs
Q. Do you have a sample template I could use in the Installment Billings import?
A. Yes, click on embedded link, and download file for use.
Why can’t I just delete Installment Billings?
A: For auditing purposes this option is not effective. It would remove all proof that the schedule existed and would be difficult to track if ever there were questions about it. Once deleted, it wont be visible in reports.
