Versions Compared
Key
- This line was added.
- This line was removed.
- Formatting was changed.
Table of Contents
| Table of Contents | ||||||
|---|---|---|---|---|---|---|
|
Overview
This guide will cover adding a New Club User for access to Reserve Cloud.
Required Permissions
User Admin
Accessing the Tool
Access Reserve Cloud.
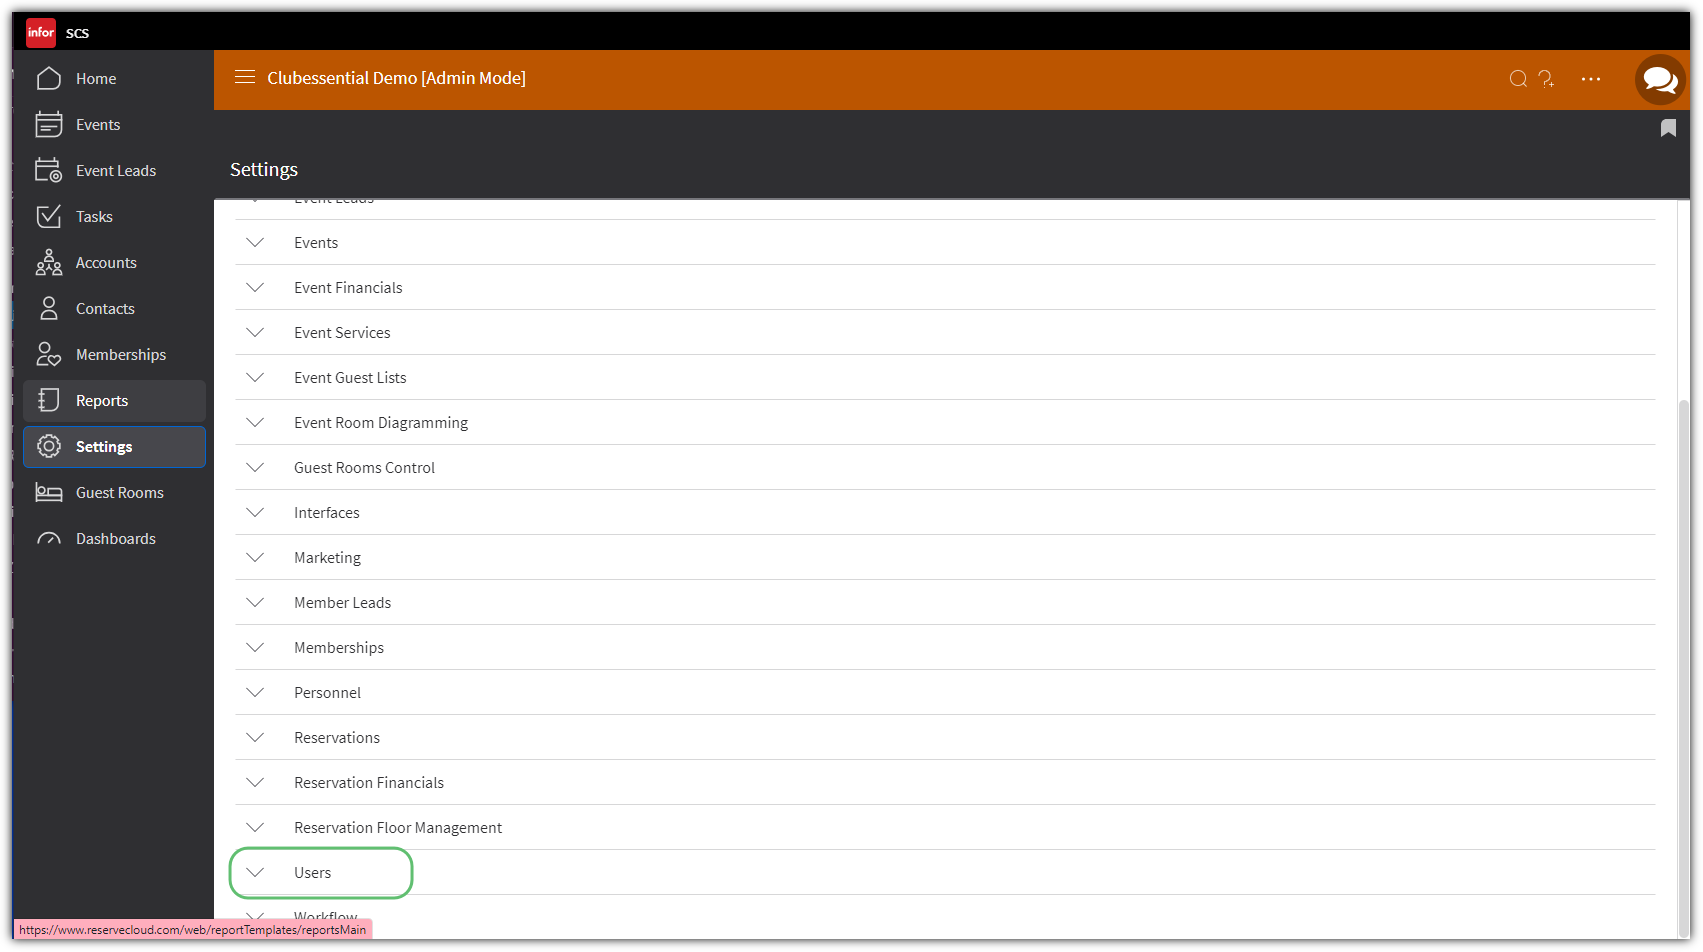
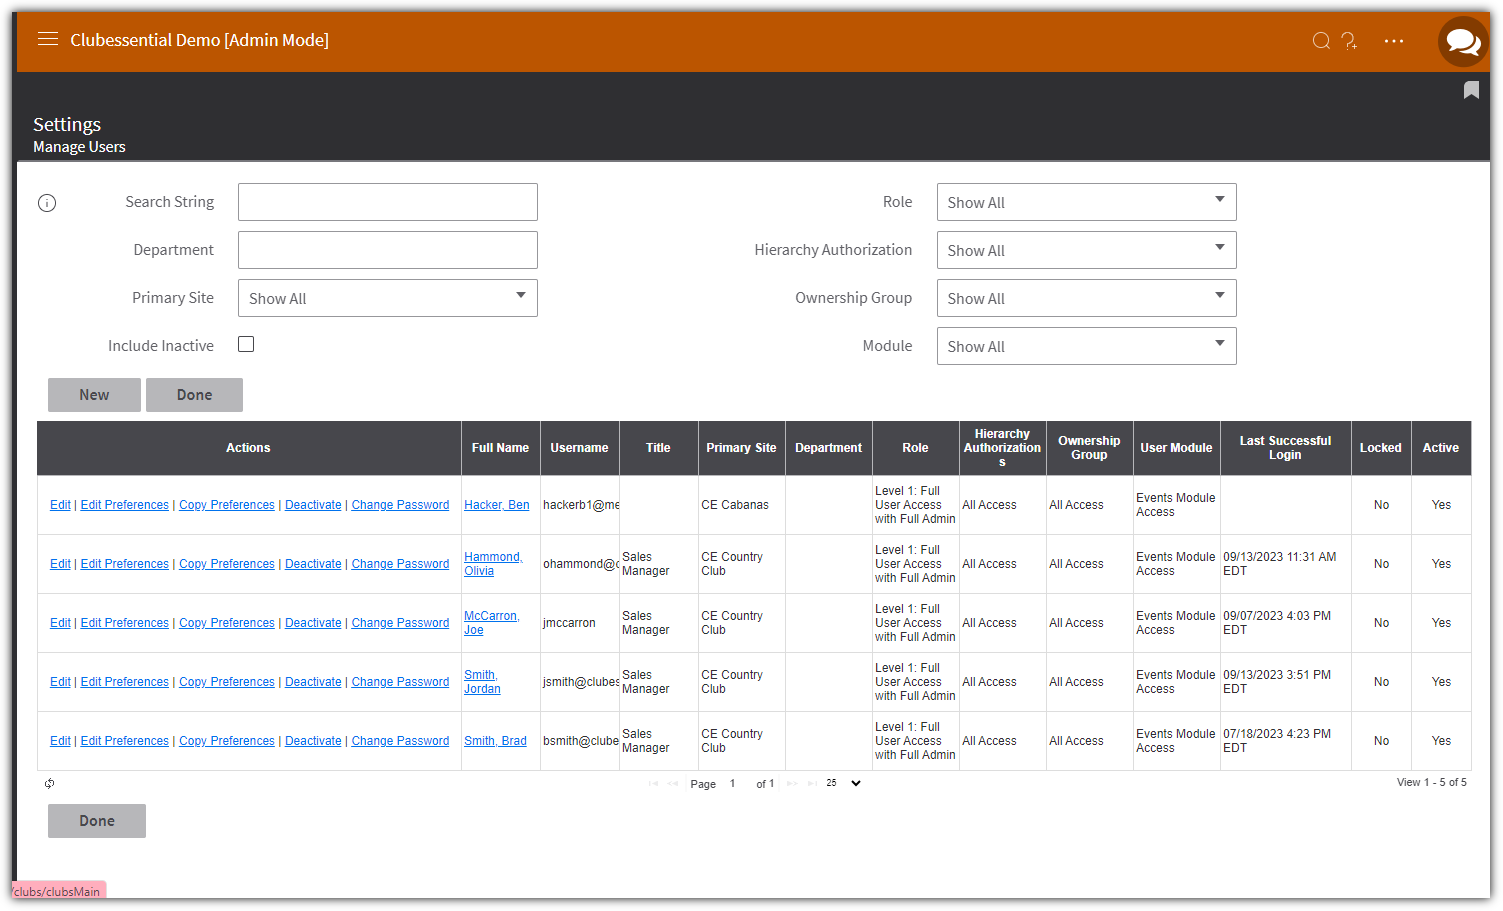
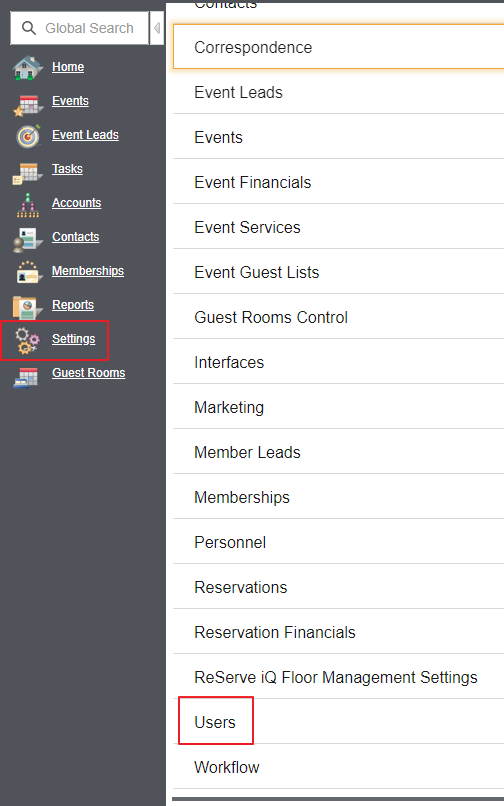
To add a new user, first view the Settingsmenu on the bottom left of the home page. Once in the Settings menu, select Users.
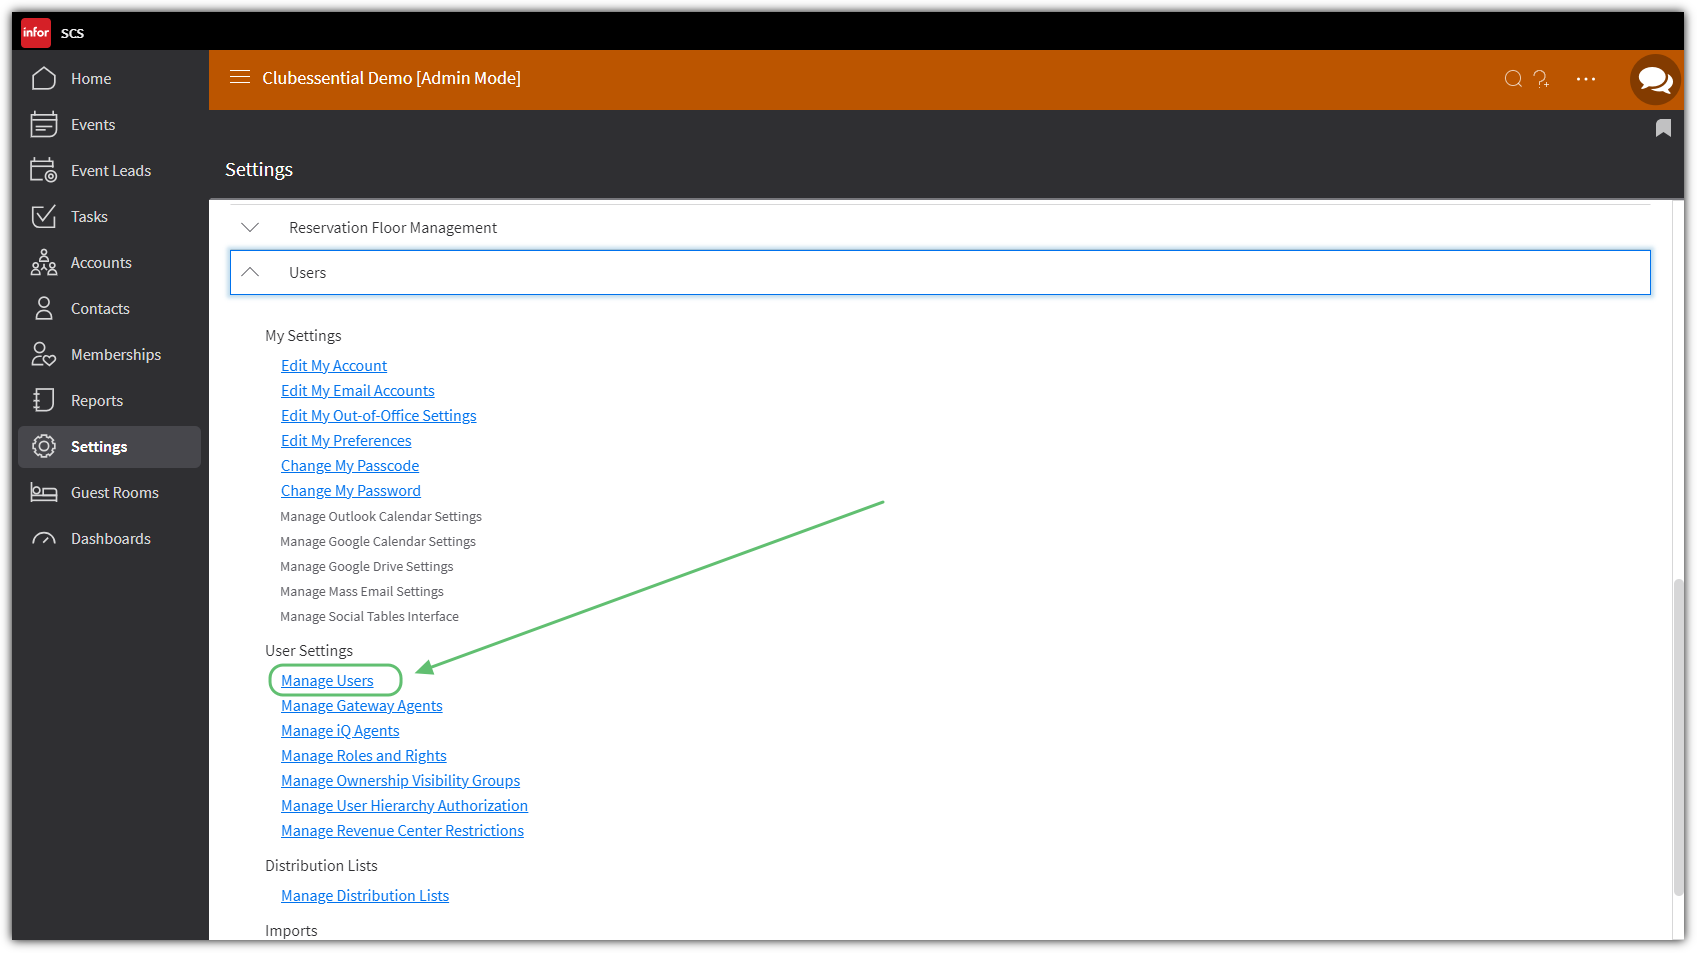
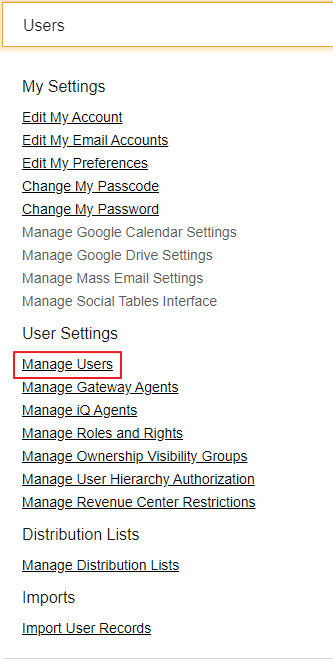
The Users drop-down menu will expand to show My Settings, User Settings, Distribution Lists, and Imports. Under User Settings, you will select Manage Users.
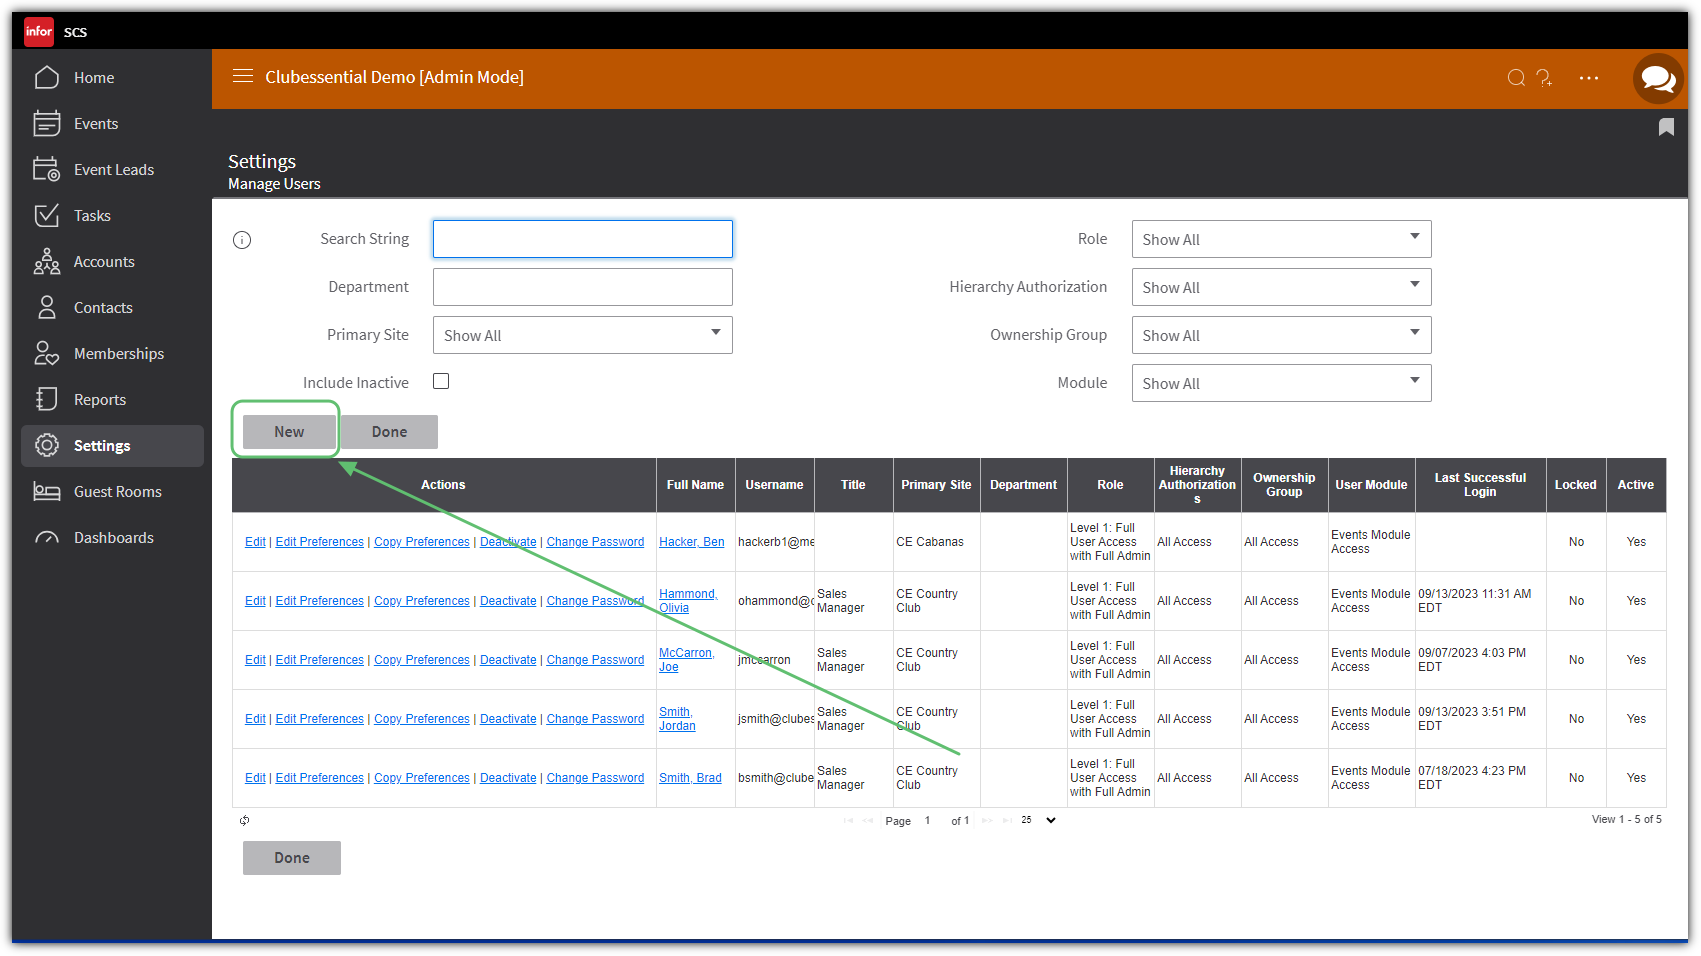
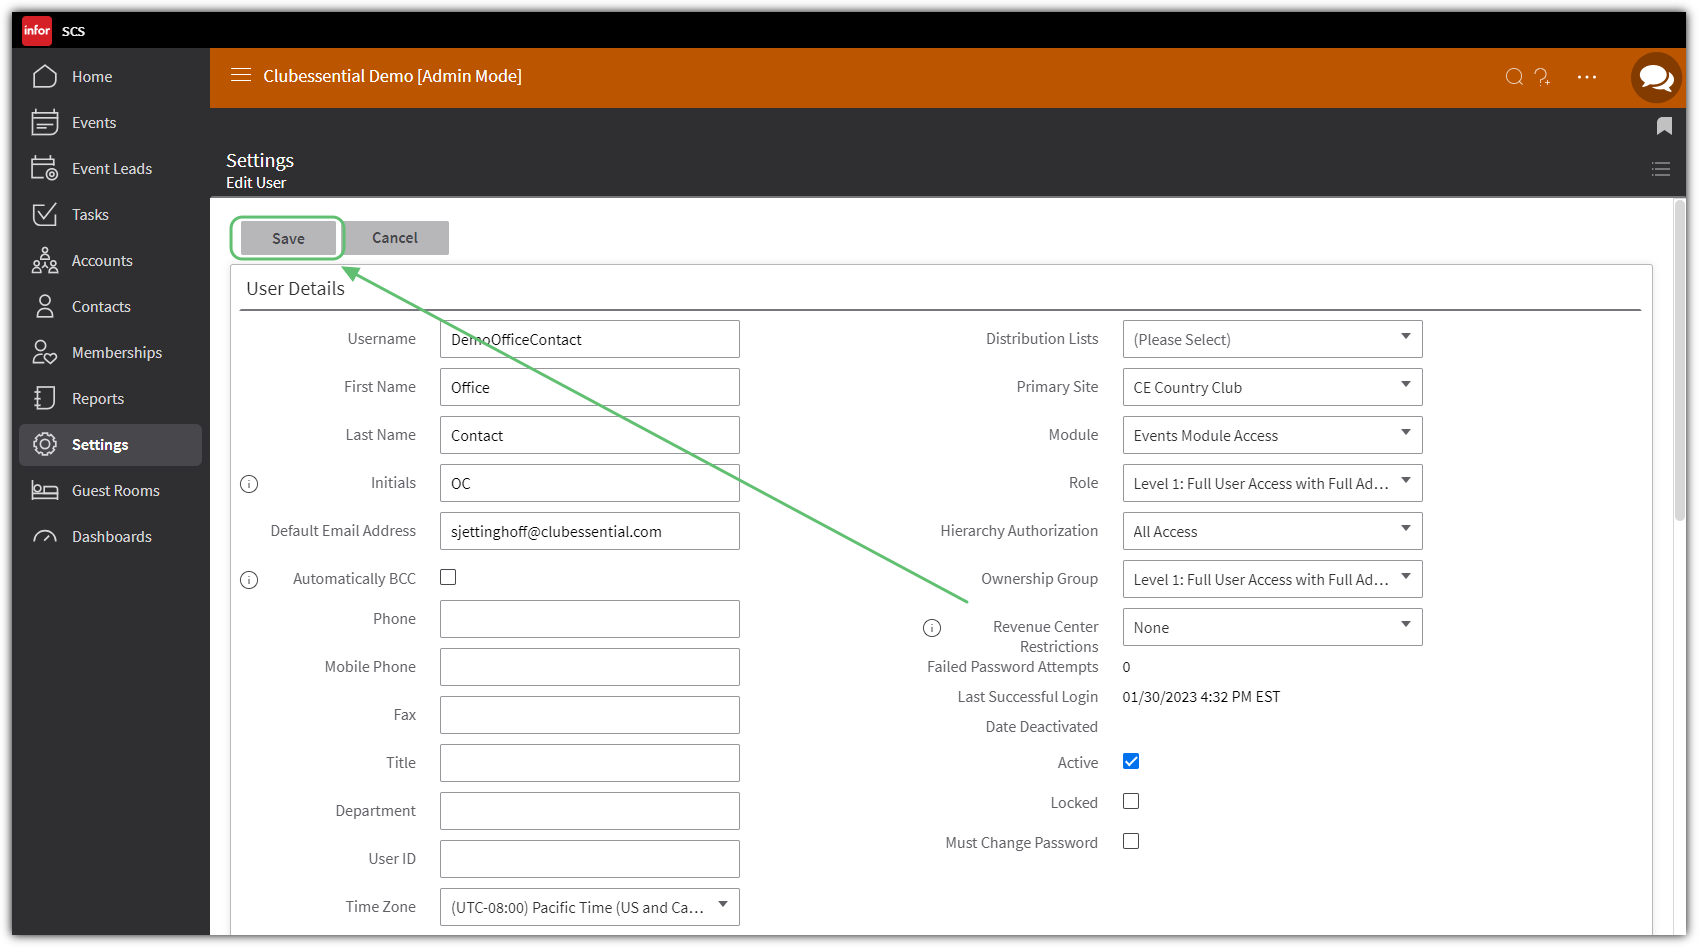
New User Detail
Complete the New User information sections with all appropriate information. Required Fields include Username, Password, First Name, Last Name, and Module, Role, Hierarchy Authorization, Ownership Group, and Change Password.
When selecting a new user’s role, refer to these settings for various roles
User Admin: Able to create new Users, make changes to Settings, and add/edit Events
Module - Events Module Access
Role - Full User Access with Full Admin
Hierarchy - All Access
Ownership Group - Admin Access
Settings Admin: Able to make changes to Settings, and add/edit Events
Module - Events Module Access
Role - Full User Access with Limited Admin
Hierarchy - All access
Ownership Group - Full User Access
Full User: Able to add/edit Events, but not make changes to Settings
Module - Events Module Access
Role - Full User with No Admin
Hierarchy - All access
Ownership Group - Full User Access
View Only: Able to access calendar of events, but not able to add/edit events
Module - Events Module Access
Role - View Only
Hierarchy - All access
Ownership Group - View Only
Once the new user details have been added, click Save. The Reserve system will then return to the User listing.
Inactive Users
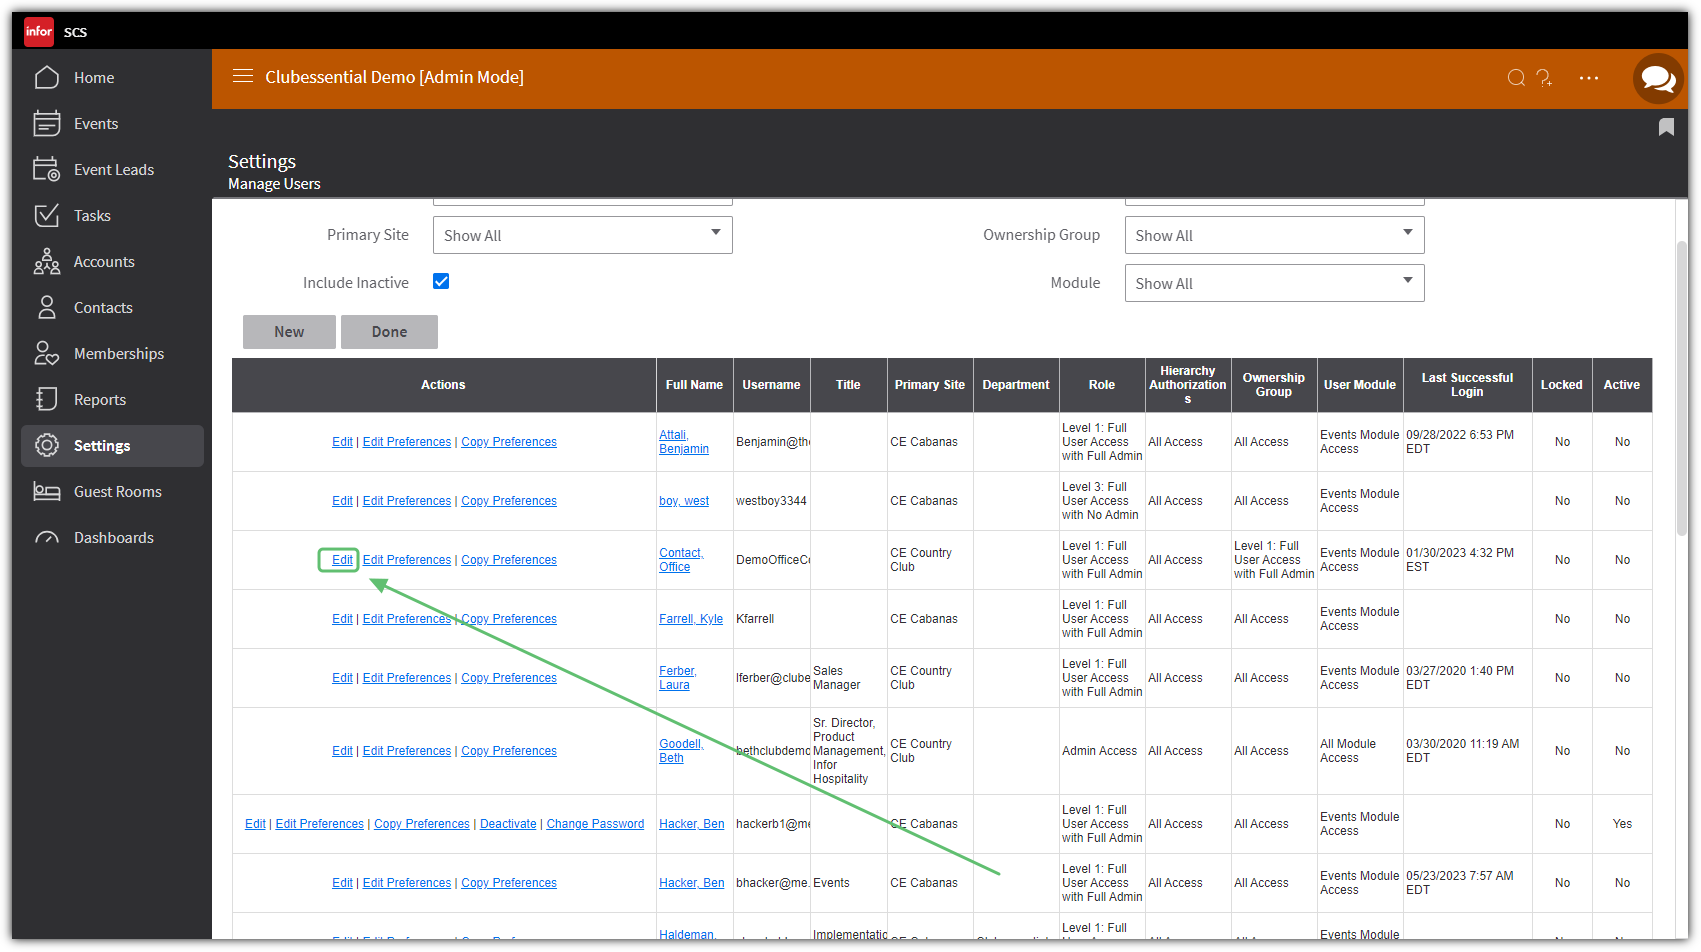
Users go inactive after a period of non-use, and aren't visible on the Manage Users screen unless you check 'include inactive'.
WIthin Within the Users menu, selectManage Users.
Once in the Manage Users menu select Include Inactive. Next, select Edit Edit next to the User you wish to make Active.
Check the Activebox, located in the right-hand column.
Save and Close.
Best Practices
Only give New Users the access that is needed, it is not recommended to make everyone an Admin User.
Make sure when creating a New User, check the box that allows for New Users to reset their password on the next login for security purposes.
When adding a new user, be sure to include an Email Address. The User will need this to access any forgotten login information.
FAQs
What role is required to add a new User?
User Admin role is required to add any new users to the system.
How can I delete a User that is no longer with the Club?
Access the Settings menu, then Users, and Manage Users. From here, click Deactivate next to their name. Please Note: There is not a delete option, only deactivate.
