...
3) The Member Group setup screen will launch. Enter all relevant information shown/listed below:
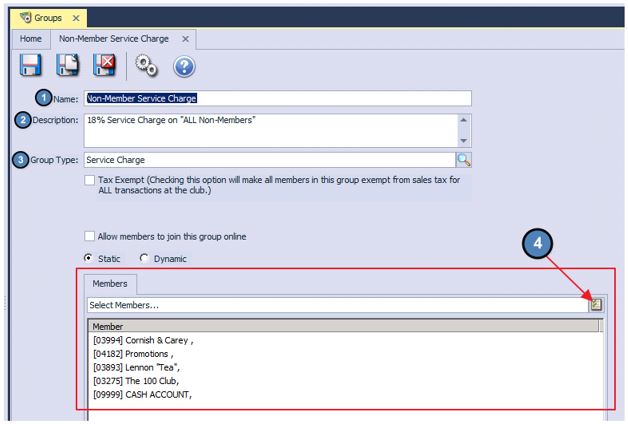
- Name - Give the Member Group a name.
- Description - Enter an optional description for internal purposes.
- Group Type - Select Service Charge as the Group Type.
- Members - Select all Members who should be included in the group.
...
2) Click Add New Rule and enter the appropriate information shown/listed below:
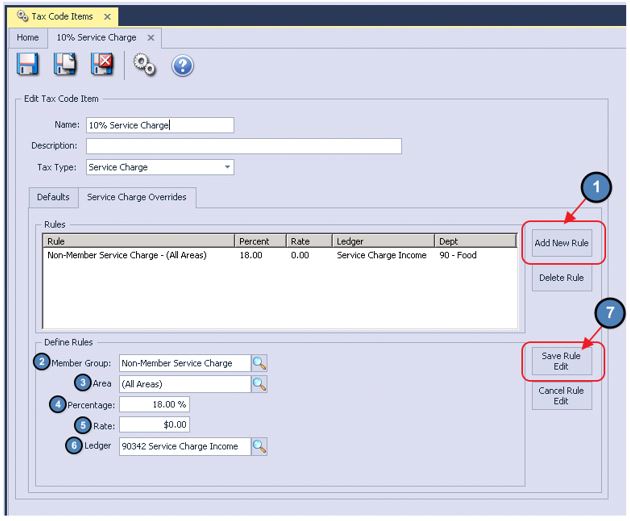
- Member Group - Select the Service Charge Member Group. Please note that only Member Groups with a Service Charge Group Type will be displayed in the lookup.
- Area - Select the Area the override applies or select All Areas if the override should occur at all Areas in the club.
...
Tax Codes
As previously mentioned, Tax Codes are where the user sets up the combinations of Tax and Service Charge to apply to an item/area.
Accessing Tax Codes
To access Tax Codes,
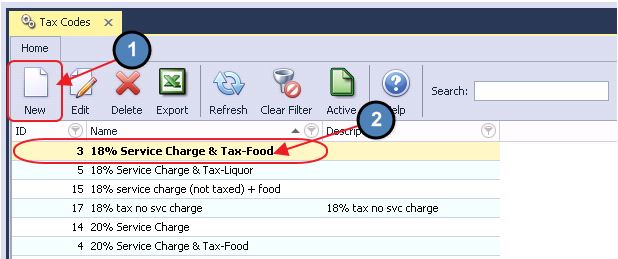
1) Navigate to System across the top toolbar and select Tax Codes.
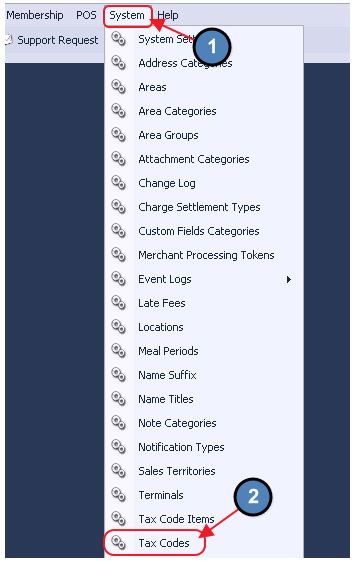
2) The Tax Codes grid will launch.
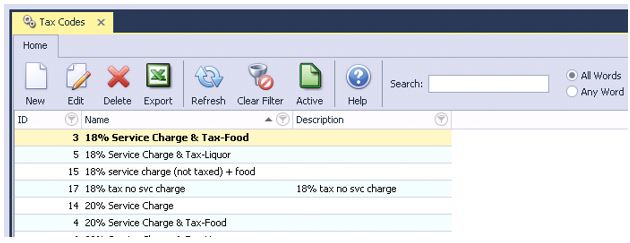
3) The primary functions associated with managing Tax Codes are embedded in the Tax Code setup screen, which can be accessed by clicking the New button or double-clicking on an existing code.
Creating a New Tax Code
Best Practices
When ticket splitting is required, ensure to enter Items as normal, and then hit the Split Ticket button to launch the Ticket Splitting screen.
Ensure ticket to be split (or tickets with Item(s) to split) is marked as “Selected” in the Split Ticket screen, prior to attempting to move Items to another ticket.
When combining Tickets, ensure all tickets are at the same table prior to merging them by utilizing the Change Table feature in the main POS screen. Once all tickets are at the same table, utilize the Split Ticket feature to combine the tickets.
FAQs
Q: I need to move an Item back to its original ticket - how do I do that?
A: Ensure the new ticket created is marked as “Selected” in the Split Ticket screen. Then, highlight the Item from the left screen on the Split Ticket screen, and then click on the original ticket to return the item to it.
Q: When splitting a ticket by a fixed amount (ie - $10.00 on one ticket, and the remainder on another), how do I ensure the $10.00 ticket is the final amount due, inclusive of all tax, etc?
A: When splitting a ticket to a fixed all-inclusive amount, ensure to check the Tax Included box, located on the Split Ticket screen when splitting the ticket.Can I give a rain check a fixed expiration date, like 12/31/2017, rather than having it expire in 365 days?
Downloadable Guide
...
To create a new Tax Code,
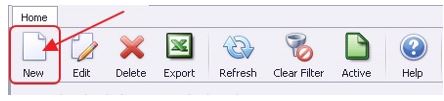
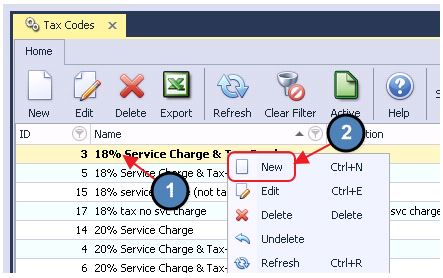
1) Navigate to the Tax Codes Grid and perform either of the following to launch the Tax Code setup screen:
a) Click the New icon on the toolbar.
b) Right-click anywhere on the Tax Codes Grid and select New.
2) The Tax Code Item setup screen will launch.
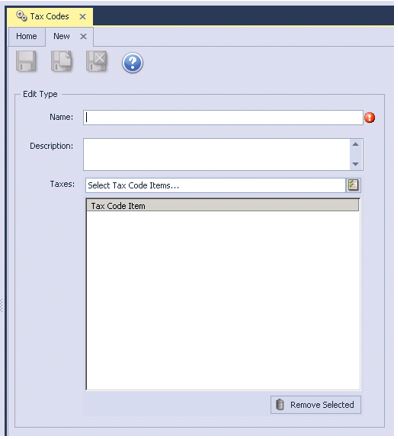
3) Please enter all appropriate information shown/listed below:
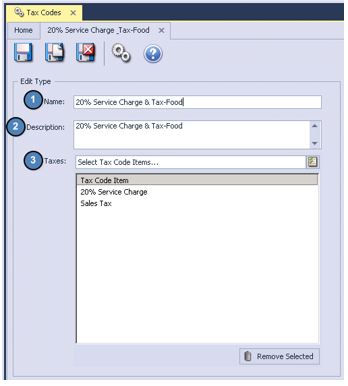
- Name - Give the Tax Code a name. The name you give the Tax Code should be given a distinctive description, especially if there is more than one percentage or rate.
- Description - Enter an optional description for internal purposes.
- Taxes - Select the applicable combination of Tax Code Items using the Lookup. Again, Tax Codes are what you select to apply Tax and Service Charges to items. Be sure to select the correct combination.
Example: Sales Tax and 20% Service Charge
Applying Tax Codes and Overrides
Tax Codes are applied at the Item Group level, but can be overridden at the Item Category level if applicable.
Item Group
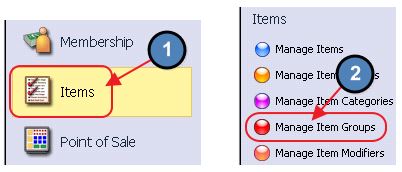
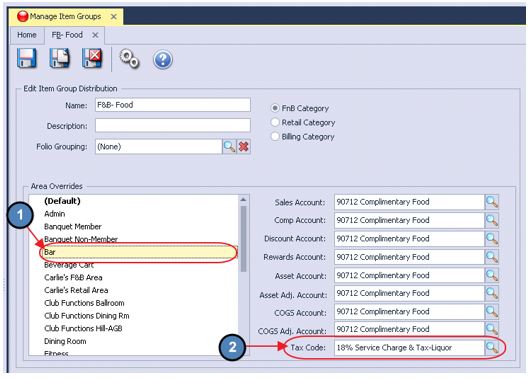
1) Navigate to Items on the left user menu and select Manage Item Groups.
2) The Item Groups Grid will launch. Double click on the applicable Item Group to launch the Item Group setup screen.
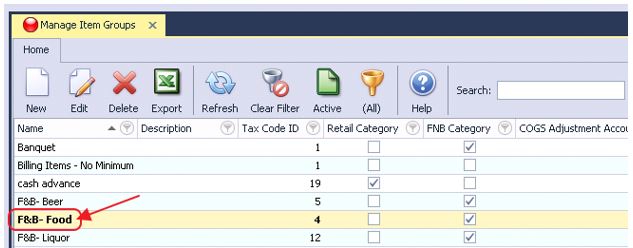
3) Navigate to the Tax Code field and select the proper Tax Code.
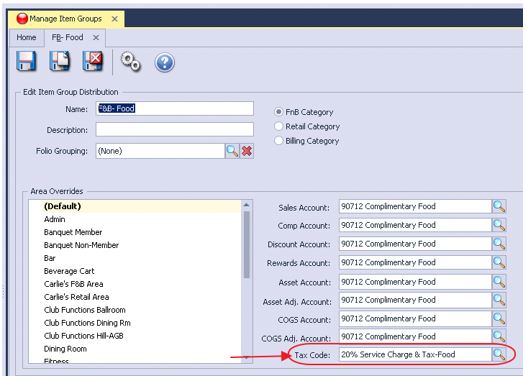
Area Overrides - If different Areas have different Tax Codes, be sure to highlight the applicable Area from the left pane labeled Area Overrides and choose the correct Tax Code.
Item Category
As previously mentioned, if a certain Item Category should have a different Tax Code than its Item Group, the Item Group settings can be overridden.
To override the Item Group Settings,
1) Navigate to Items on the left user menu and select Manage Item Categories.
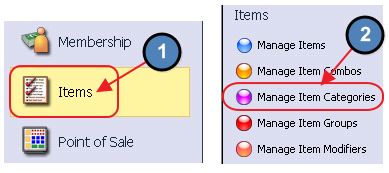
2) The Item Categories Grid will launch. Double click the applicable Item Category to launch the Item Category setup screen.
3) Check Override Item Group Settings.
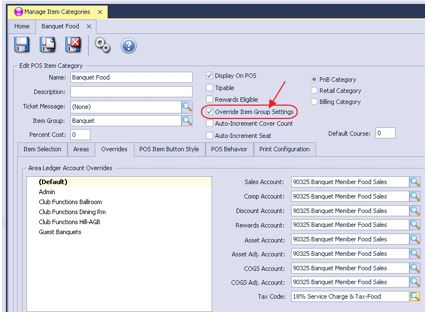
4) Navigate to the Overrides Tab and select the applicable Tax Code. If the Overrides tab is not active be sure to check Override Item Group Settings.
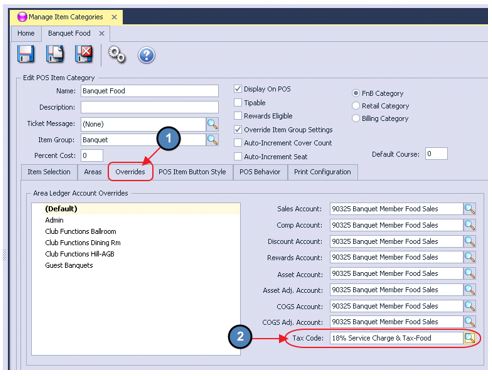
Area Overrides - If different Areas have different Tax Codes, be sure to highlight the applicable Area from the left pane and choose the correct Tax Code.
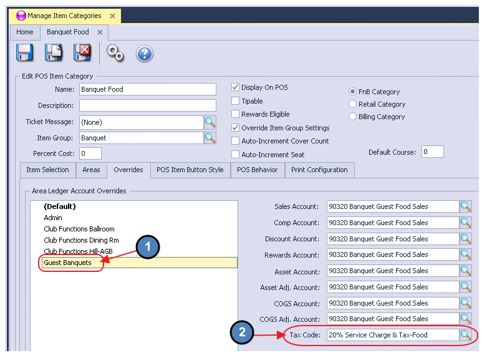
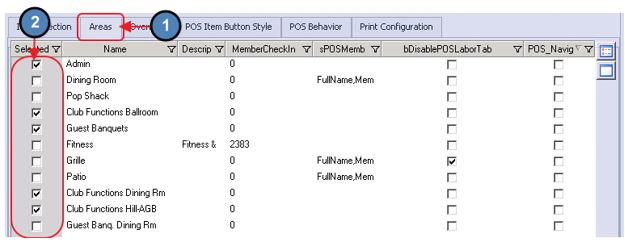
Note: Only Areas selected on the Areas tab within the Item Category will show as an override option on the Overrides tab.
Change Tax Code Item Percentage/Rate
To change the Tax percentage of a particular Tax Code Item,
1) Navigate to the Tax Code Items Grid and double click the appropriate Tax Code Item.
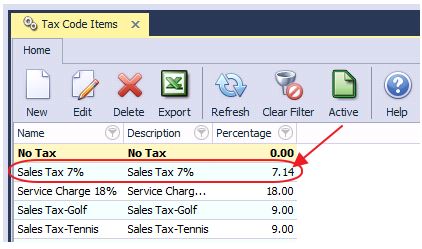
2) Change the Percentage or Rate appropriately.
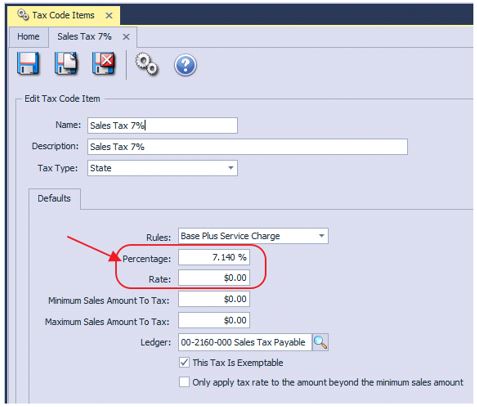
Important:
All items pointing to the Tax Code Item will immediately be affected by the change. Do not change the tax percentage or rate until the new rate goes into effect.
If the Tax Rate or Tax Code is changed in the middle of the day, all items that have previously been rung up and added to a ticket will have the old rate. The only way to get the new tax rate is to delete the ticket and re-enter the sale.
Sales and credits will be calculated at the new rate from the time you change the rate.
- The systems applies taxes and service charge on an item level not a subtotal level.
Reporting
If at any time a user would like a list of items and their respective Tax Codes, please follow the below instructions.
1) Navigate to the Interactive Reports module on the left user menu, expand Item, and select Item G/L Posting Summary.
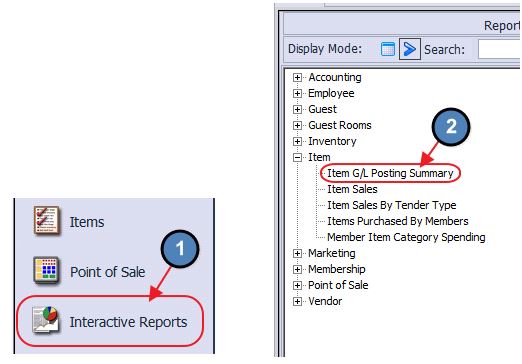
2) If the user would like a list of ALL items and their Tax Codes, leave the Item field set to None. To see just one item, select the applicable item within the Item field. Set the Type to Tax Code and select View Report.
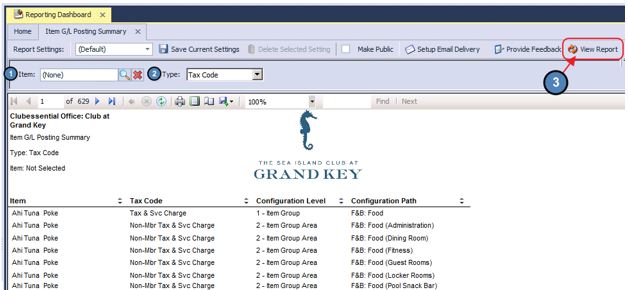
The Report will display the item, the Tax Code, Configuration Level, and Configuration Path.
Configuration Level - The level, either Item Group or Item Category that is defining the Item’s Tax Code.
Configuration Path - The location of the Item Group/Category that is assigning the Tax to the Item.
Note: If an item displays more than once, this means the item has varying taxes applied depending on the Area in which it is sold.
Best Practices
Plan for legislative or upcoming Club changes to Taxes and/or Service charges to ensure implementation is proper.
Periodically review the Item G/L Posting Summary to ensure tax applications are proper.
FAQs
Q: When I change a tax rate, how soon is it applied?
A: The tax rate changes immediately upon saving the change. If performed in middle of the day, tickets created prior to the change will contain the old tax rate.
Q: When looking to establish a Sales Tax override for an Item Category (to make it different than its Item Group default), I am unable to locate the Overrides tab, where is it?
A: If the Overrides tab is not active within the Items Category, be sure the Override Item Group Settings option is checked within the Category.
Downloadable Guide
Tax and Service Charge - Guide