| Table of Contents | ||||||||||
|---|---|---|---|---|---|---|---|---|---|---|
|
...
The following Image Explorer Interface screen will launch.
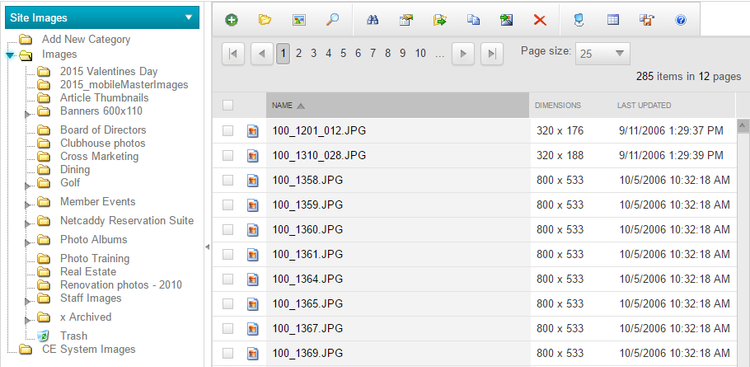
Image Explorer Interface
The Image Explorer is a repository for all images used on the website. It is simply a holding place to organize imagery, and allows for images to be edited.
Organizing Images
It is important to organize images, so the images are easy to find. Organizing folders is extremely important when working within Photo Albums, as Photo Albums pull images from an entire folder, or multiple folders. There is never a reason to delete images from the website, as there is no limit to the amount of images stored.
Folders are typically named after year, event, topic, dimension, or Photo Album title.
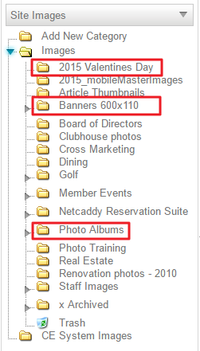
To add a New Folder, click the Add New Category folder at the top of the folder structure.
...
Once the upload interface is launched, we can upload imagery in several ways.

Images can be resized on upload by choosing the Resize on Upload button.
...
First, the image will need to be resized to reach the desired width or height. Open the Resize button to begin.
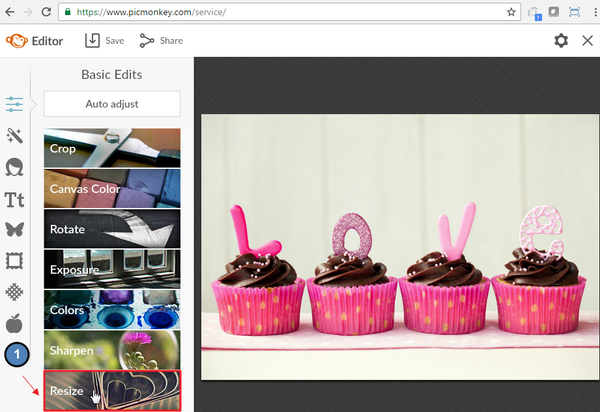
The Keep Proportions option is checked by default, which should remain enabled as this ensures that when the image is resized the appropriate aspect ratio is kept.
...
An option to Save and Replace or Save a Copy prompt.
- Save and Replace: this will replace the original image in the Image Explorer. Not recommended, as it’s best to keep the original dimensions so the image may be edited again at a later time.
...
Images may be placed on page, by using the click to edits throughout the website. This will open the Axis Editor.
First, navigate to the page you wish to add the photo and open the click to edit in the desired area where you would like to add the image. Note, this may be in a content area, sidebar marketing area, or a banner image.

Once the Axis Editor is launched, images can be added in two ways.
...
Images can be inserted in two ways, by double clicking on the image or using the Image Icon in the Image Explorer Toolbar
- Double click the image to insert.
...
- Click the Image Icon in the Toolbar.
...