...
Options Include:
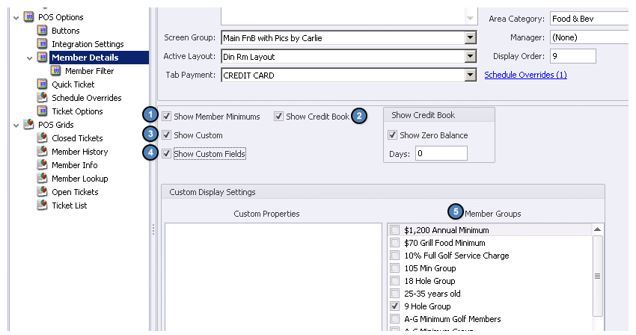
Show Member Minimums
Show Credit Book
Show Custom
Show Custom Fields
- Member Groups
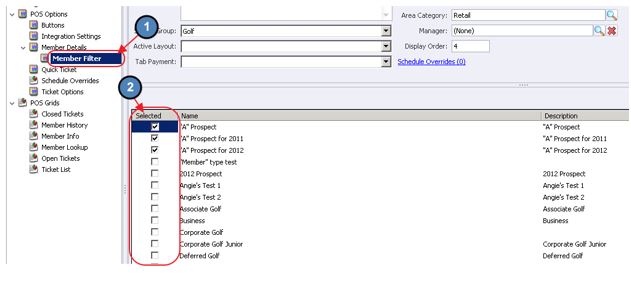
Member Filter
The Member Filter Tab allows the user to omit certain Member Types from showing in the POS.
To apply this feature, select the correct Area and navigate to the Member Filter Tab. Select the Applicable Member Types. Any members within the Member Types selected on this screen will not show in the POS for the Area they are selected.
Quick Ticket
To enable the Quick Ticket feature at POS (only applicable to F&B Areas) navigate to the Quick Ticket tab and select the Show Quick Ticket Button at POS.
This option can also be configured to default to the Guest Member if desired. To do so, check the Default to Guest Member check box. Furthermore, the user can enter a Default Cover count for all Quick Tickets.
Also, ‘Quick Ticket’ can be configured to show as the Table Name on the Open Tickets Grid in the POS.


Schedule Overrides
If the Employee Scheduling Module is utilized and the user would like to override the system set employee scheduling rules, please select the Override System Employee Schedule Settings check box.
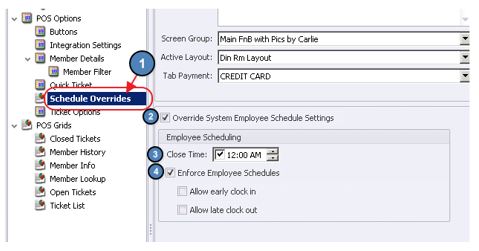
Once selected, additional options will populate.
...
Options include:
Close Time - This is the time the Area closes.
...
Allow late clock out - If checked, please specify how many minutes late an employee can clock out.
Ticket Options
The Ticket Options tab is where the Send, Pay, and Settle Ticket templates are applied. Please contact Clubessential Support for more information on this tab.
POS Grids
To add/ remove columns from the various grids within the POS, please see the below instructions on each specific grid.
Closed Tickets
To add/ remove columns on the Closed Tickets screen in System Tools, please navigate to the Closed Tickets Tab and check/ uncheck the applicable columns. Available columns are included in the screenshot below.
...
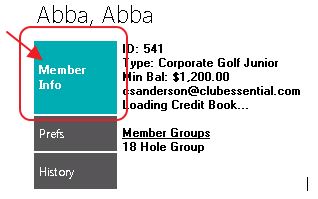
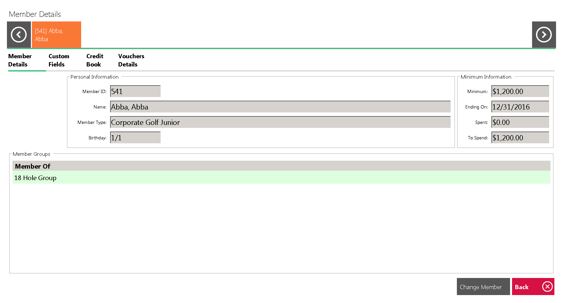
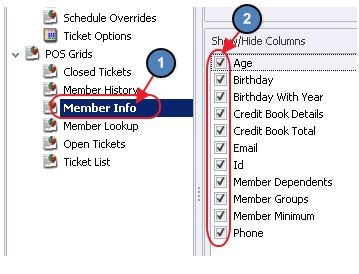
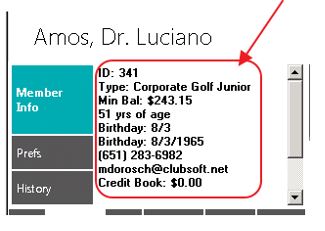
To add/ remove information next to the Member Info button, please navigate to the Member Info Tab and check/ uncheck the applicable columns. Available columns are included in the screenshot below.
Member Lookup
To add/ remove columns on the Member Lookup screen, please navigate to the Member Lookup Tab. Current Visible Columns are on the left, and Available Columns are on the right. Assign a column by selecting an Available column and clicking on the Left Arrow. Conversely, to un-assign a column, click on the Assigned column, and then click the Right Arrow.
...
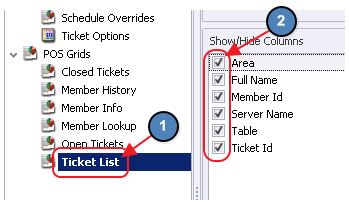
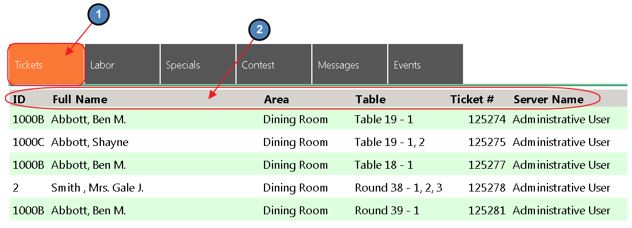
To add/ remove columns on the main Ticket List screen, please navigate to the Ticket List Tab and check/ uncheck the applicable columns. Available columns are included in the screenshot below.
Best Practices
When setting up areas, ensure the settings in the system, align with the best possible operational flow of your respective F&B area. If settings are not necessary/used, ensure they are disabled to prevent staff from clicking unnecessary buttons.
Use settings to provide opportunities for your staff to enhance the Member experience. Settings such as Member Preferences, and/or enabling view-only access to Tee Sheets from the Dining area for planning purposes can increase your staff’s ability to provide a better level of service to your Members.
FAQs
Q: When settings are changed in the POS, do users need to exit out, and log back into the POS for the changes to take effect?
...