...
Navigate Settings > Event Services.

Select Manage Service Items.

Note: Multi-site Organizations, with site specific items that are not shared across their organization, will want to add and/or edit items within the appropriate site(s). Multi-site Organizations whose items ARE shared across all sites will want to add and/or edit items within the Master List. Organizations with a single site will want to add/edit items where they see the ‘edit’ link available next to the existing items. This could be at the Master or Site level.
Click the New button.

You will now be taken to the screen where you can create a Service Item. You can enter in as little or as much information about the item as you would like. However, if you want to enter in a price, the item MUST have a Revenue Center.

*Note that when you select a Revenue Center it automatically populates the applied rates. These can be toggled if the item needs another set of applied rates.
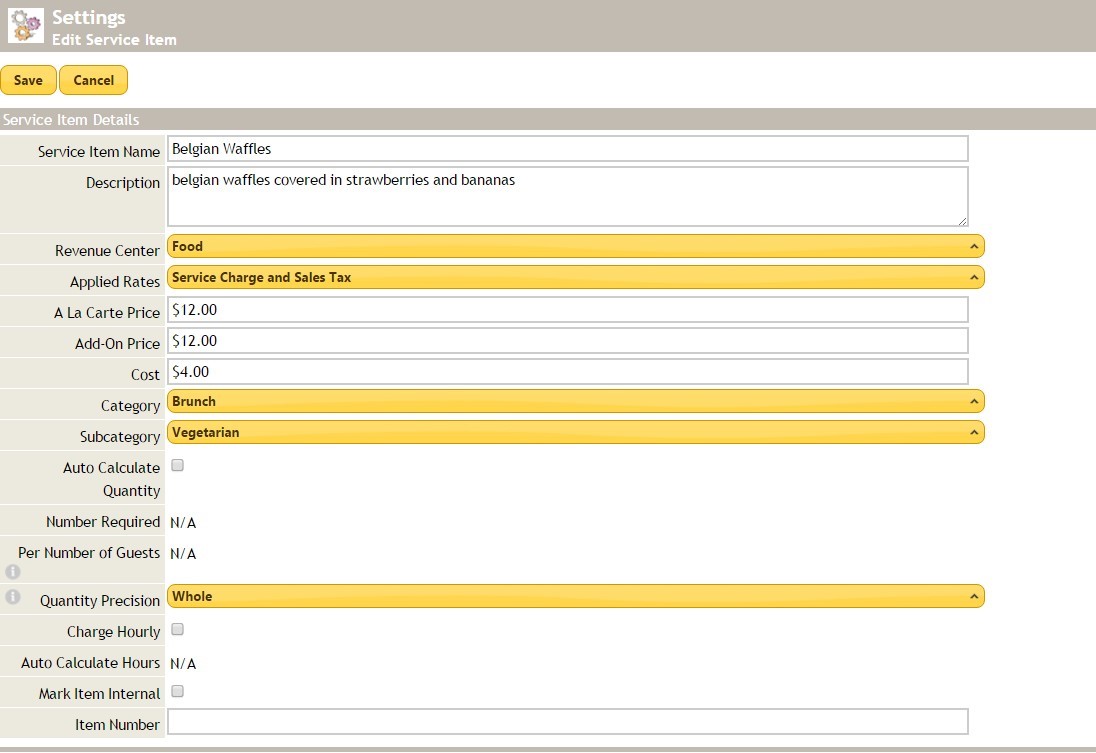
A completed Service Item might look like this. Click Save finished.
The completed item then displays will all of the other Service Items.

Deleting Service Items
To delete a Service Item, follow the same steps as above until you reach the step where you would press the New button Instead of pressing this button, click the Delete link next to the item you wish to remove.

Editing Service Items
To edit a Service Item, click the Edit link next to the item you wish to change.

Make any edits you would like to the Service Item. Click Save when finished.
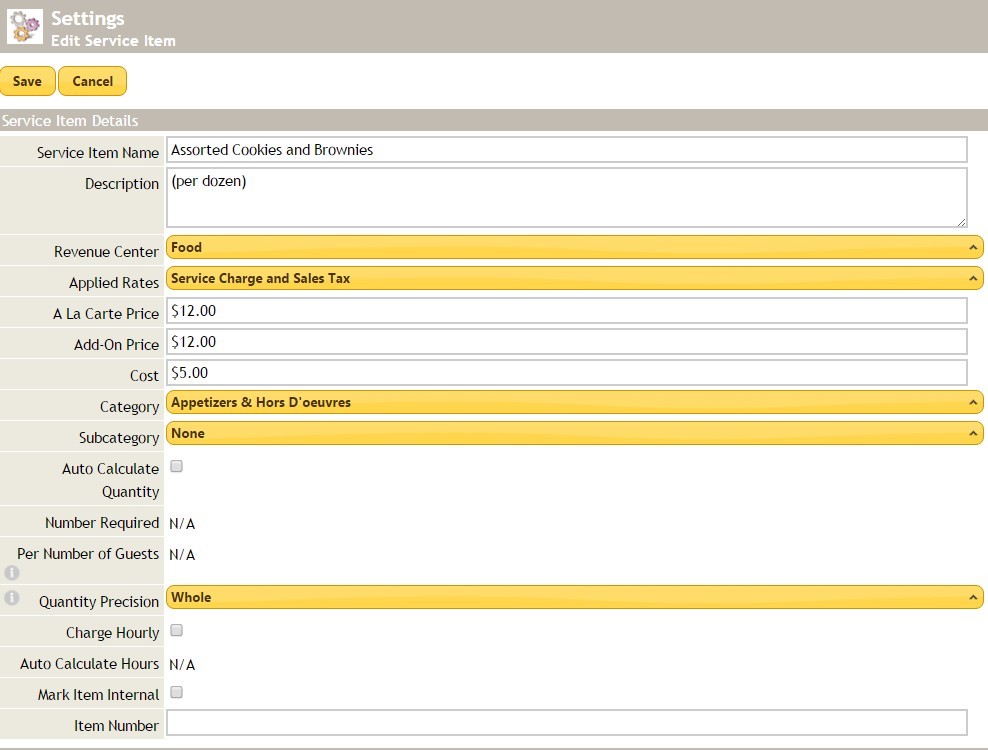
*For the purposes of this example, we edited the Assorted Cookies and Brownies item. We added a description, a price, a cost and placed the item in a category.
The item is then displayed with all of the other items.

*You can see the changes we made in the last step here.
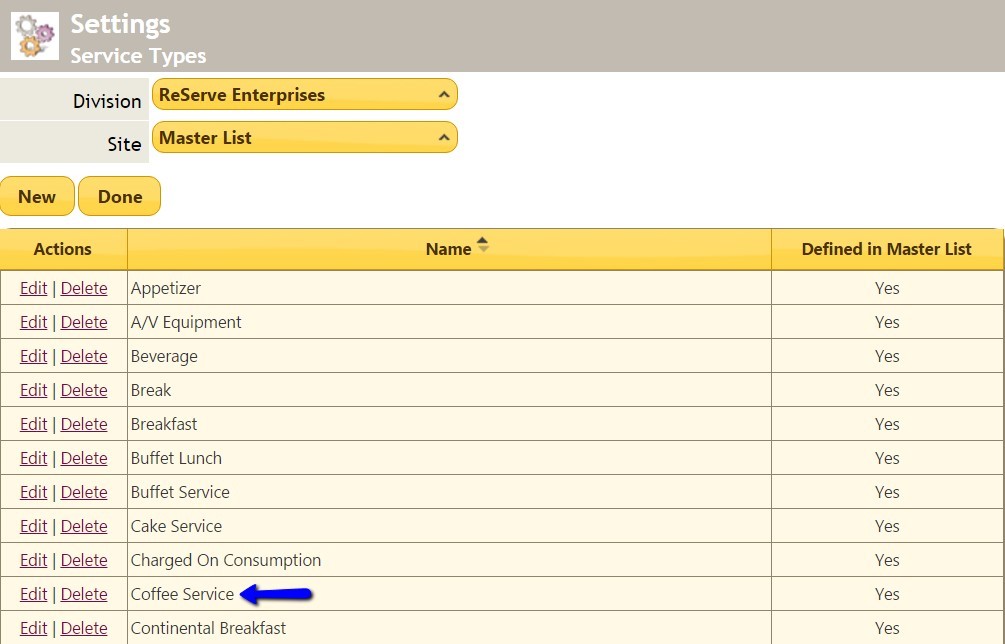
Manage Service Types
Service Types are the groupings that service items live under in a menu. They display in the column on the far left of an event order with services.
...
Navigate Settings > Event Services.


Note: Multi-site Organizations, with site specific service types that are not shared across their organization, will want to add and/or edit service types within the appropriate site(s). Multi-site Organizations whose service types ARE shared across all sites will want to add and/or edit service types within the Master List. Organizations with a single site will want to add/edit service types where they see the ‘edit’ link available next to the existing service types. This could be at the Master or Site level.
Click the New button.

Enter a name into the Service Type area. Click Save when finished.

The new Service Type is then displayed with all the other service types.
Deleting a Service Type
To delete a Service Type, follow the same steps as above until you reach the step where you would press the New button. Instead of pressing this button, click the Delete link next to the Service Type you wish to remove.

Editing Service Types


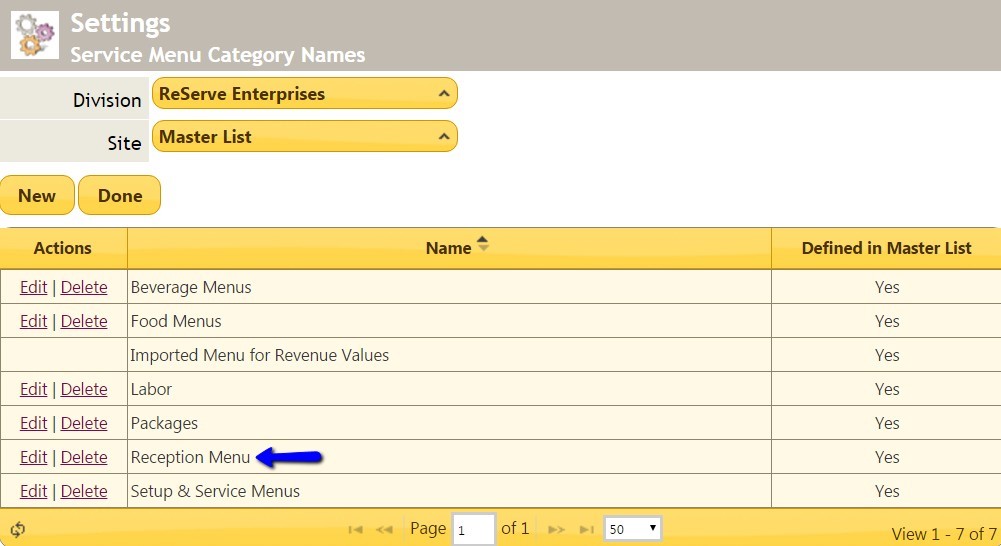
Manage Service Menu Categories
...
Navigate Settings > Event Services.

Select Manage Service Menu Categories.

Note: Multi-site Organizations, with site specific menu categories that are not shared across their organization, will want to add and/or edit menu categories within the appropriate site(s). Multi-site Organizations whose menu categories ARE shared across all sites will want to add and/or edit menu categories within the Master List. Organizations with a single site will want to add/edit menu categories where they see the ‘edit’ link available next to the existing menu categories. This could be at the Master or Site level.
Click the New button.

Enter a name into the Service Menu Category area. Click Save when finished.

The new service menu category is then displayed with all the other categories.
Deleting Service Menu Categories
To delete a Service Menu Category, follow the same steps as above until you reach the step where you would press the New button. Instead of pressing this button, click the Delete link next to the category you wish to remove.

Editing Service Menu Categories
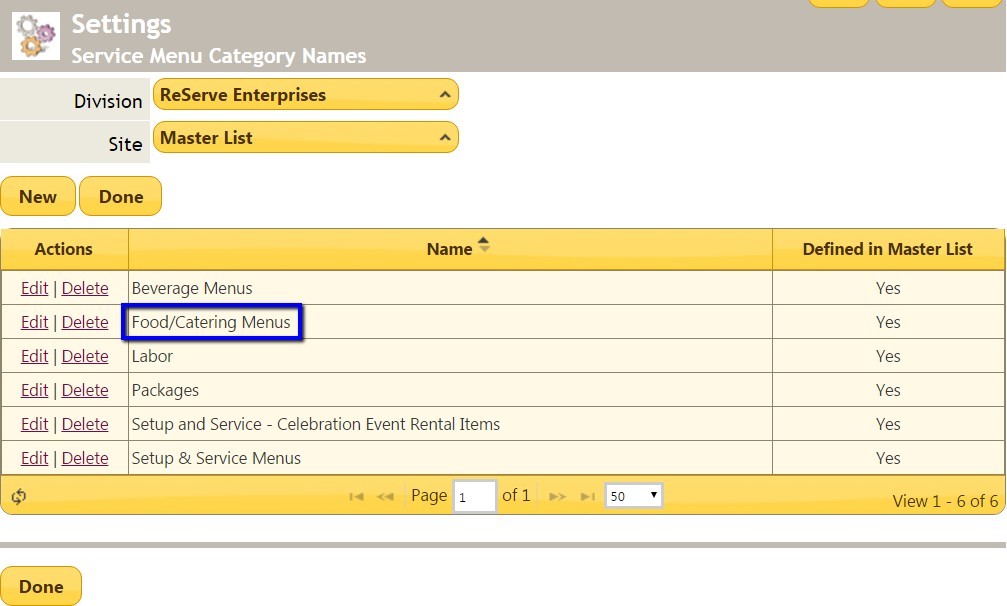
To edit a Service Menu Category, click the Edit link next to the category you wish to change.

You will be brought to the edit screen where you can change the name or spelling of the Service Menu Category. Press Save when finished.

The updated Service Menu Category name is displayed with the other categories, and all service menus that had the original category name will be updated with the new category name.
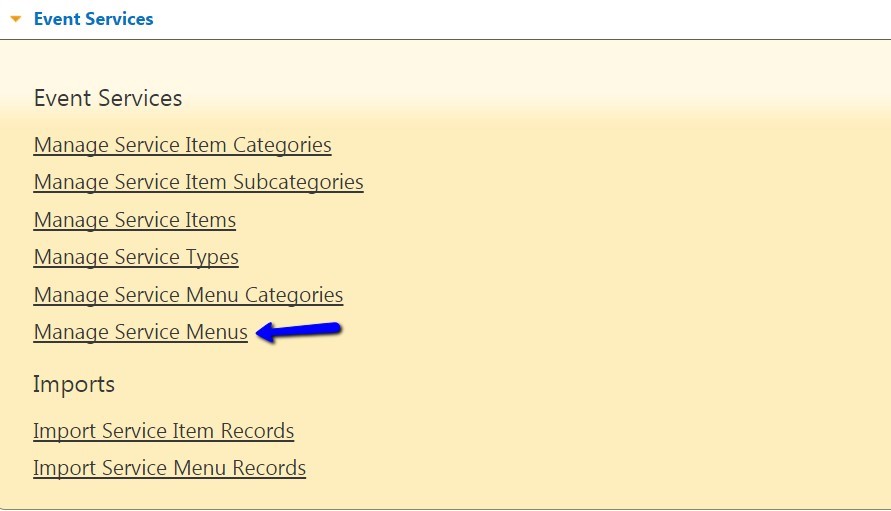
Manage Service Menus
Service Menus are made up of several components: Service Types, Service Items and Pricing Types. Each menu must include at least one Service Type (a titled grouping for service items). Each Service Type can hold as many Service Items as you want. Menus can be priced in several different ways, and there will be more details below.
...
Navigate Settings > Event Services.

Select Manage Service Menus.
Note: Multi-site Organizations, with site specific service menus that are not shared across their organization, will want to add and/or edit service menus within the appropriate site(s). Multi-site Organizations whose service menus ARE shared across all sites will want to add and/or edit service menus within the Master List. Organizations with a single site will want to add/edit service menus where they see the ‘edit’ link available next to the existing service menus. This could be at the Master or Site level.
Click the New button.

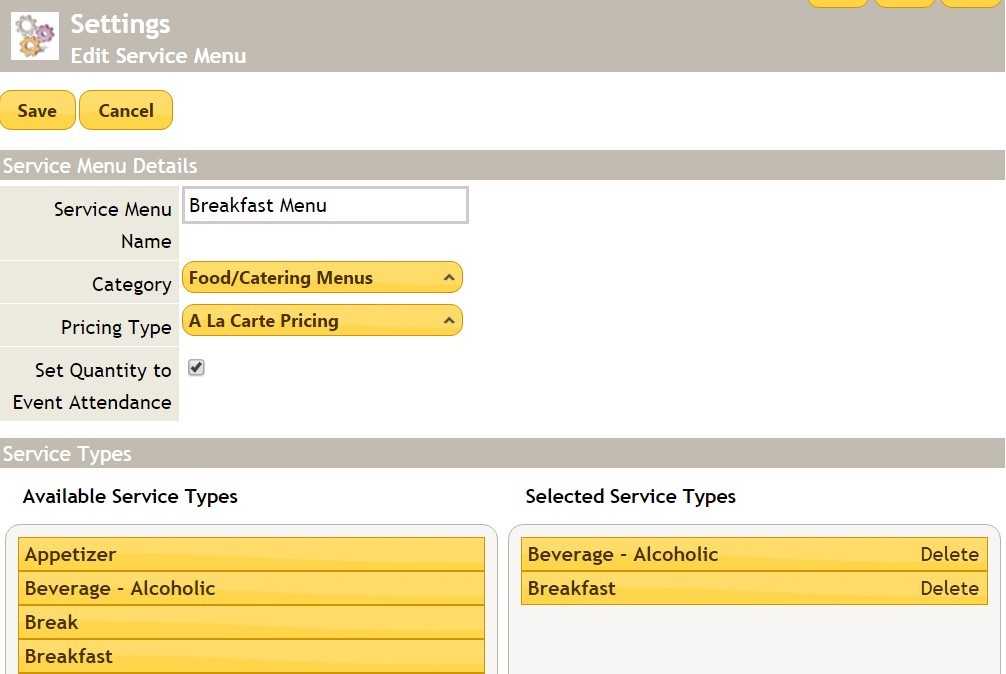
You will now be taken to the screen where you can start creating a Service Menu. You will need to enter in a Service Menu Name, choose a Category and choose a Pricing Type. Pricing types include A La Carte Pricing, Package Pricing - Dollar Amount Allocation and Package pricing - Percentage Amount Allocation. Drag and drop Service Types from the list of Available Service Types to the Selected Service Types area. Be sure to drag them in the order you would like them to appear on your menu.
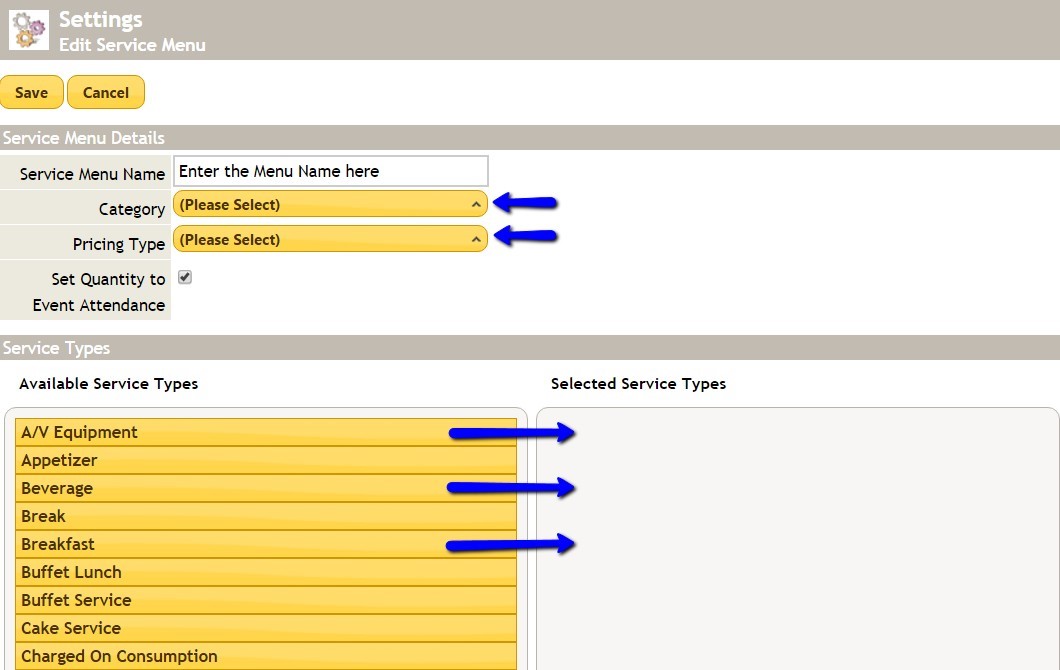
A La Carte Pricing: Each item within the menu is priced individually.
...
A completed Service Menu might look like this. Click Save when finished.
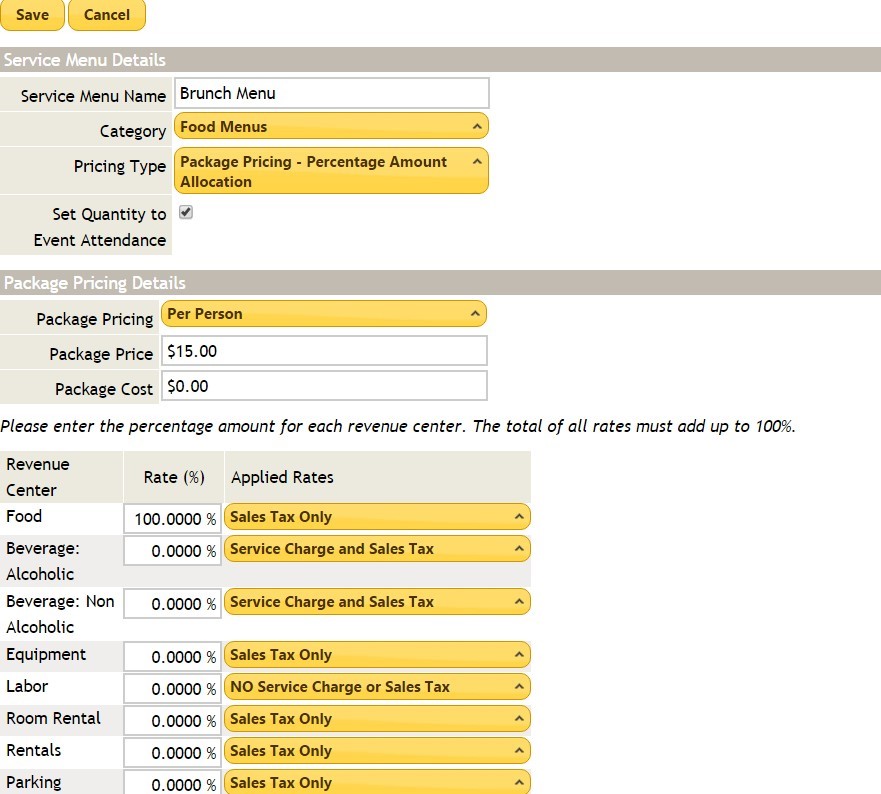
*For the purposes of this example, we created a Brunch Menu with Package Pricing – Percentage Amount Allocation that is priced per person. 100% of our revenue is being allocated to the Food Revenue Center.
After saving, you will be taken to this screen where you can add items to the menu. Click the Add Items button under the Service Type (grey headers) you would like it to appear under. You will be taken to the Master List of items where you will be able to search for whichever item you need.
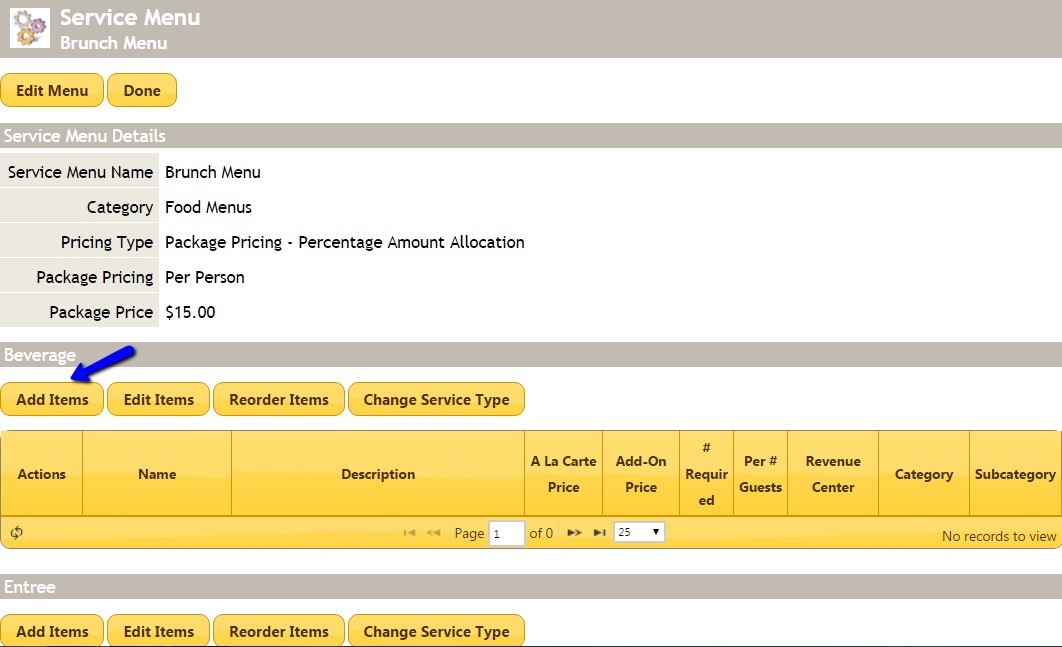
When you finished adding all of the items to your menu, click Done. The menu is now able to be added to a function.
...
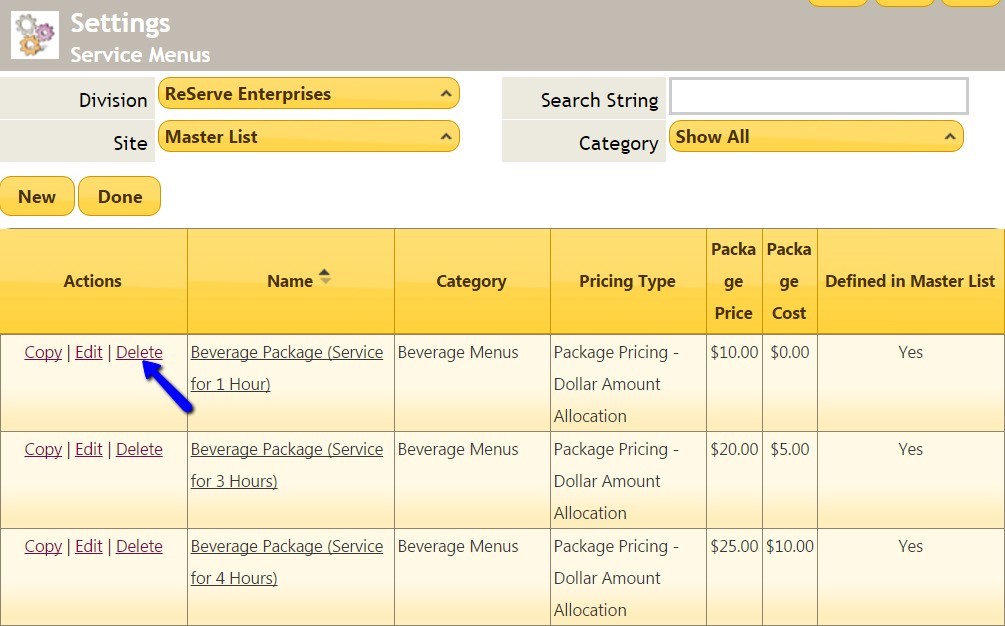
To delete a Service Menu, follow the same steps as above until you reach the step where you would click the New button. Instead of pressing this button, click the Delete link next to the menu you wish to remove.
Editing Service Menus
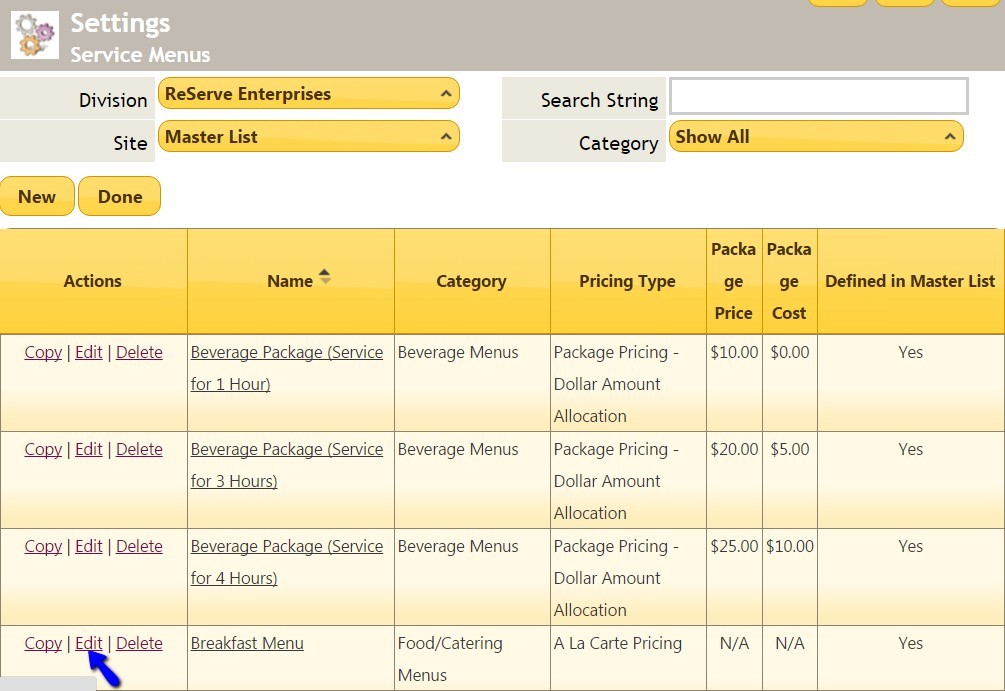
To edit a Service Menu, click the Edit link next to the Menu you wish to change.
You will be taken to this screen first where you can edit the menu’s name, pricing and service types. Click Save when finished to edit items within the menu.
After saving, you will be taken to this screen where you can make several edits to the components within the menu.
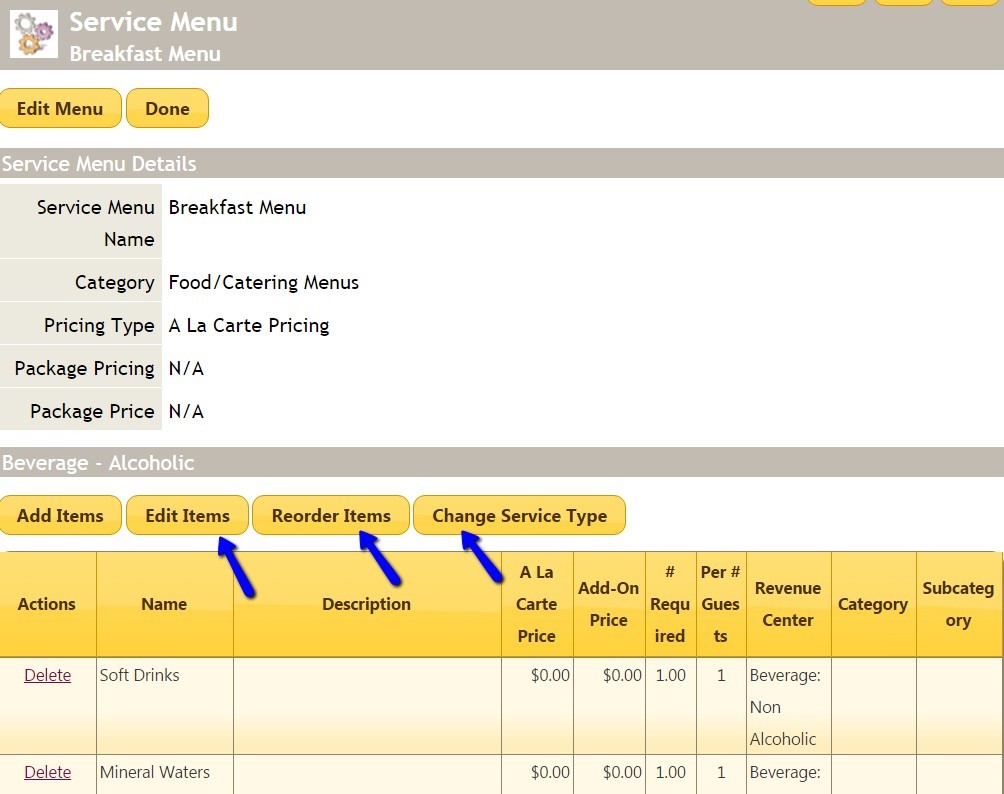
Click the Edit Items button to change item pricing, calculate auto quantity and quantity precision.
Click the Reorder Items button to change the order the items are listed in under the service type.
Click the Change Service Type button to change the named grouping that the service item is listed under.
When you have finished, click Done.
FAQs
Q: What is the best way to set pricing, so that I do not have to manually recalculate allocated amounts every time we change the price of an overall package.
...