Overview
An Area is used to define settings pertaining to a designated location of the Club where transactions will occur. Although Areas are set up during Implementation, occasionally, an area will need to be modified to coincide with operational changes. In this document, we will discuss the various settings to be maintained in an F&B Area. Use Case The main Dining Room at a Club has a new Manager, and slight changes to the original configuration of the Dining Room area will need to be configured. The Dining Room will be moving to a Buffet-only option on the weekends, and therefore will need to adjust the Scheduled Overrides. Additionally, they will be tweaking a few other options, including allowing the Servers to view the Tee Sheet in the Dining Room, and requiring Servers to now enter Comp reasons when comping an item within the area. |
Content
Accessing the Tool
To access Areas,
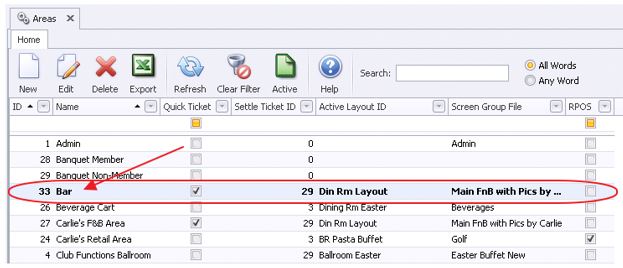
1) Navigate to System across the top toolbar and select Areas.

2) The Areas Grid will launch.

3) The primary functions associated with managing Areas are embedded in the Area setup screen, which can be accessed by double-clicking on an existing Area.
F&B Areas- Tab Overview
In this section we will review the various tabs within an F&B Area.
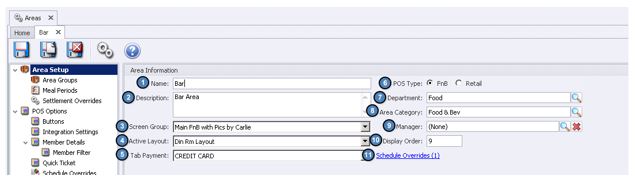
Area Setup
Name - Enter the Name of the Area.
Description - Enter an optional Description of the Area.
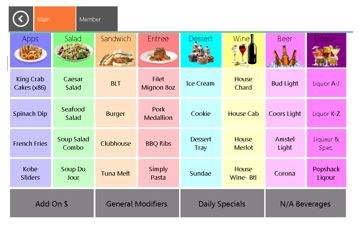
Screen Group - Select the Screen Group/ Menu to be displayed at POS for the Area.
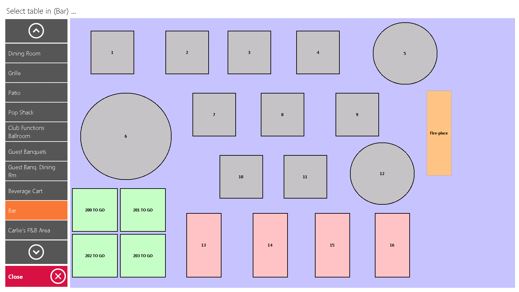
Active Layout - Select the Area Layout to be displayed at the POS for the Area (Select a Table Phase).
Tab Payment - Set this field to the F&B Credit Card Charge Settlement Type. This allows the user to hold a guest’s credit card information on the Tab key in POS.
POS Type - For F&B Areas set this field to FnB.
Department - Select the Department to be associate with this Area (Required).
Area Category - Select the Area Category to be associated with this Area (Required).
Manager - Select the Manager of this Area using the lookup (Optional).
Display Order - Select the Display Order this Area should appear in the Select a Table phase at POS.
Note: For the Display Order to work correctly, each F&B Area must have a sequential Display Order. Otherwise, the Display Order will be alphabetized.
Schedule Overrides - This allows the user to override the Screen Group (Menu) that shows in the POS, during a certain time frame for this Area.
For instance, assume the club has a breakfast buffet on Sunday from 8:00am- 12:00pm and they only want the Buffet Screen Group to show during this time frame.
1 & 2 ) Enter the Start and End Time of the Schedule Override.3) Select the Screen Group to show during this time frame.4) Select Save.
FAQs
Q: I no longer have an option to select my device when I log-in. How can I re-enable this option?
A: Go to System Tools, Utilities Tab, and check Always Prompt for Terminal.
Downloadable Guide
POS Terminal/Workstation Device Setup - Guide