Overview
In this manual, we will discuss the various functionalities within our Retail POS System. Use Case The Retail POS system is used in Golf Shops, and other areas of the Club (Spa, for instance), where retail goods (or services) are transacted. |
Content
Accessing the Tool
To access the POS,
1) Click on the POS Icon.

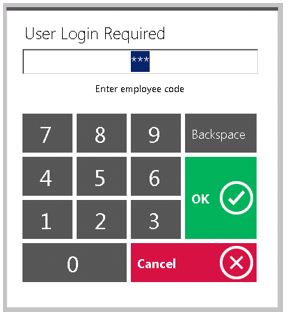
2) A logo will display moving around the screen, click anywhere on the screen to get the user login prompt. Enter your Employee Swipe Id (the number assigned to each user).
If you are using the Office system to track hours, an additional screen will display prompting the user to select a Job Code.

If the user only has one Job Code assigned to their employee profile, it will display “you have successfully logged in”.
Opening a Ticket
In this section we will discuss the necessary procedures to follow when opening a ticket.
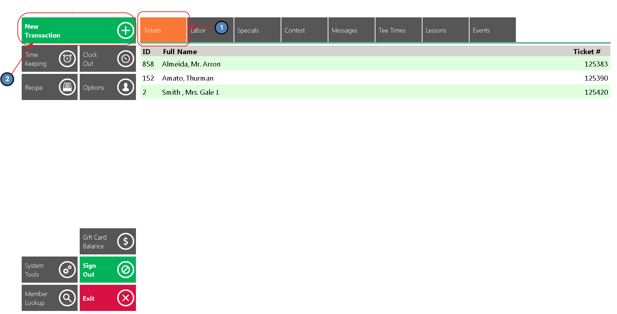
If you have any open tickets they will be displayed on the Tickets Tab: you can touch or mouse click to open the ticket.
To open a new ticket, click on the green New Transaction button.
Best Practices
When setting up areas, ensure the settings in the system, align with the best possible operational flow of your respective Retail area. If settings are not necessary/used, ensure they are disabled to prevent staff from clicking unnecessary buttons.
Use settings to provide opportunities for your staff to enhance the Member experience. Settings such as Member Info, Member Preferences, and Member History can increase your staff’s ability to provide a better level of service to your Members.
FAQs
Q: When settings are changed in the POS, do users need to exit out, and log back into the POS for the changes to take effect?
A: Yes, once changes are made, ensure users exit, and log in to a new POS session to ensure change(s) in settings take effect.
Downloadable Guide