Overview
Item configuration points transactions to the General Ledger Account for financials. All POS and Billing Items are linked to an Item such as: Scheduled Billings, Installment Billings, Store Credits, Gift Certificate, POS Transactions, etc. In this guide you will learn how to setup Item Groups, Item Categories, and Items. Items can be used in various ways such as combos, vouchers, etc. This guide will teach the different usages of items.. Use Case(s)
|
Content
Accessing the Tool
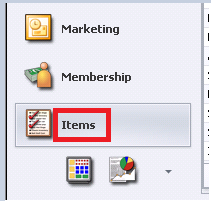
The Items Module is located in the left hand navigation. See image to the right for detail.
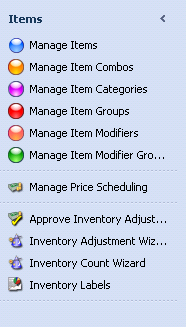
When you select the Items module; the top left panel will list the Item Option menu(s) that we will cover in this guide. Items will open in the Manage Items tab.
Item Rules
The Item Setup consists of three tiers: Items, Categories, and Groups. All Items belong to a Category, all Categories belong to a Group.
Example of a Tier:
Food (Item Group)
Entrée (Item Category)
Lobster Ravioli (Item)
8oz Steak (Item)
Trout w/Crab Sauce (Item)
An Item can only belong to one Category and one Group. You can have unlimited number of Items in a Category and you can have unlimited number of Categories in a Group.
Please Note: The Tax and Service Charge percentages are determined by either the Item Category or Item Group (not the Item level).
You can enter the GL Sales Account on the Item, Category, or Group level.
Please Note:
Item overrides the category and group settings.
The Category can override the Group settings (only if the Override Group Settings is checked).
The Group settings will be used if there is no override on the Item or Category setting.
Standard Icons
.png?version=2&modificationDate=1512983009387&cacheVersion=1&api=v2&width=704&height=64)
The toolbar above all grids list the standard icons:
New, Edit, Delete, Export to Excel, Refresh, Clear Filter Active/Inactive Items, Help (Navigates to Client Facing Knowledge Base), and the Search field.
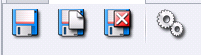
On all maintenance screens the above toolbar lists the standard icons:
Save
Remains on the screen.
Save & New
Saves the record and clears the screen for a new record.
Save & Close
Saves and exits the maintenance screen.
Audit Logs
Shows date of last change, old/new values, and user who made the change.
Manage Item Groups
Select Items, then Manage Item Groups.
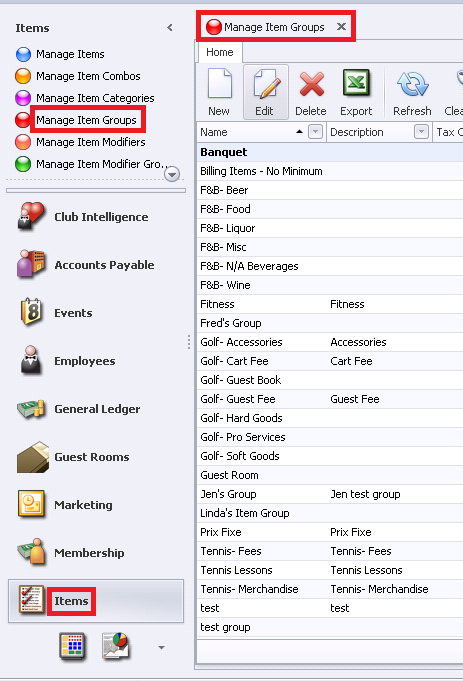
The Grid that displays will vary from user to user. For example, if the user is only allowed to see Retail items they will not see FNB or Billing Items.
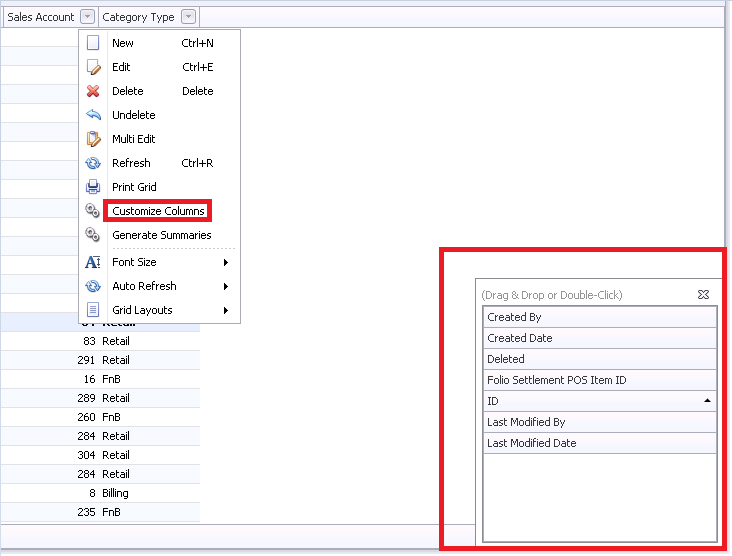
To customize your grid to display different columns:
Right click anywhere on the grid and select Customize Columns. A list of Columns will appear and can be added to the grid by simply double clicking or dragging and dropping the column in question. The columns available will vary by module.
Click on the column heading to sort by any column or use the funnels to filter the information
listed.
To edit an Item Group:
Highlight the Item Group and double-click or select the Edit icon on the toolbar.
To add new groups, click the New icon.
The Item Group screen will appear. See details below.

Name
Enter the name of the group.
Description
Additional description of the group; this is optional for internal viewing only.
Folio Grouping
Relates to Guest Room Items.
Select the Group Category that relates to the Items that will be associated with the Group
Select FnB Category if the Group is for Food & Beverage POS or Banquet Items.
Select Retail Category if the Group is for Retail POS Items.
Select Billing Category if the Group is for Billing Items (these items will not be available in POS).
Area Overrides
Within System, then Areas:
Highlight the Default Area and enter the Account information to the right of the screen (required).
Please Note: Each Area can have different Account allocations by highlighting the Area name and entering the accounts.
Select the Accounts for General Ledger allocations:
Sales Account
Select the revenue account that will be credited when items are sold.
Comp Account
Select the account that will be debited for the amount of comps made at POS.
Discount Account
Select the account that will be debited for the amount of discounts made at POS.
Rewards Account
The field is related to a future enhancement and currently not used; you can use any account but it is required before you can save and exit.
Asset Account
For Retail Items only: select the account that should be debited when inventory is received and credited when inventory is sold.
Asset Adjustment Account
For Retail Items only: Select the account that will be used when making Inventory Adjustments (can be a debit or credit based on the adjustment).
COGS Account (Cost of Goods Sold)
For Retail Items only: select the account that should be debited when inventory is sold (that offsets the credit to the inventory asset account).
COGS Adjustment Account
For Retail Items only: select the account that will be used when making Inventory Adjustments (can be a debit or credit based on the adjustment).
Tax Code
The tax code selected will determine the amount of tax and service charge that will be added to items when sold. (You may refer to the Tax and Service Charge Setup Manual for more information).
When finished select Save & Close.
Manage Item Categories
Select Items then Manage Item Categories.

Please Note:
The Grid will vary from user to user. Example: if the user is only allowed to see Retail items they will not see FNB or Billing Categories.
You can customize your grid to display different columns (Please click Here if you need a refresher on how to customize Grids).
You can click on the column heading to sort by any column or use the funnels to filter the information listed.
Above the grid is a toolbar listing the standard icons:
New, Edit, Delete, Export to Excel, Refresh, Clear Filter, Active/Inactive Items, and Help.
To edit an Item Category, highlight the Item Category and double click or select the Edit Icon on the toolbar.
To add a new Category:
Click the New icon. The Item Category screen will appear. At the top of the screen are the standard icons: Save, Save & New, Save & Close, and the Audit Log.
In the middle of the screen are various Tabs; we will cover each Tab’s function in this section.


Name
This field is required. Enter the name of the Category.
Description
Additional description of the Category; this is optional for internal viewing only.
Ticket Message
This is optional, select a ticket message that will print on POS receipts each time this item is charged.
For example, if your club is having an upcoming scotch tasting, you might attach a Ticket Message to a category that includes your scotch items that provides details of the event.
Please Note: The same type of settings can also be set at the Item level.
Item Group
This field is required. Click on the search icon to see available Item Groups. If you need to setup a new Item Group click on the Quick Add button (click here for more on Manage Item Group).
Percent Cost
You can add a theoretical cost percentage for this category. This cost percent will be applied to all items associated with this category and report on the Interactive Reports > Inventory > Gross Margin Report.
Please Note: The Item level allows a cost dollar; if you have a percentage on the category level the Item cost dollar will override the category cost percent.
Display at POS
Check this box if the items in this category are to displayed at Point-of-Sale. This is a default setting and can be overridden on the Item level.
Tipable
Check this box if items associated with this Category can have a tip or service charge applied. This is a default setting and can be overridden on the Item level.
Rewards Eligible
This feature is a future enhancement and is not currently available.
Override Item Group Settings
If this box is checked the system will use the Category settings and ignore the Group settings. The Override Tab will be activated and required if this field is checked.
Auto-Increment Cover Count
Applies to F&B POS Only. When an item in this category is sold at POS it will automatically increase the cover count by one. This only applies to F&B Areas that track covers. This is a default setting and can be overridden on the Item level.
Auto-Increment Seat
Applies to F&B POS Only. When an item in this category is sold at POS it will automatically increment the seat number. This only applies to F&B Area that are setup for Seat Position. This is a default setting and can be overridden on the Item level.
Category
Select the Category Type that relates to the Items associated with this Category.
Select FnB Category if the Group is for Food & Beverage POS Items and Banquet
Select Retail Category if the Group is for Retail POS Items
Select Billing Category if the Group is for Billing Items such as Minimums, Dues, Scheduled Billings, etc…(items in this category will not be seen at POS).
Default Course
Applies to F&B POS Only. If you have POS Areas in your club that use coursing it is recommended that you set the default course for the food Categories being sent to the kitchen. The Category level is only the default and can be overridden on the Item level and overridden at POS.
Items Selection Tab
The Selected Items box will list all Items setup for this Category. This section gives you the ability to organize the items how you want them to appear in the POS button.

Move Up/Down Arrows
Highlight an item and click the Up or Down Arrow to move the item one line at a time.
Always Alphabetize
Check the Always Alphabetize flag to list alphabetically A to Z. If checked, the move up and move down feature will be removed.
Select Items Lookup
This will list all items in the system from all categories. You can move an item from another category to the displayed category by clicking the item to select, and then clicking Select on the bottom of the Lookup value.

Please Note: Another way to change the Item’s Category: Go to the Manage Items module and change within the item itself.
Available Item Combos
To display a list of combos in the system from all categories, change the Source to Item Combo and select the Item Lookup.

Area Tab
Select the Areas in which the items in this Category are allowed to be sold.

If the Area is not checked, the items in this category will not be seen at POS. Employee must be given security rights to each Area; if they do not have permissions they will not see the Area at POS, on reports, and in searches.
The two buttons to the far right of screen: top button is Select All the bottom button is Unselect All.
The last column is called POS_Navagation; if you put a check mark for the Area it will create buttons at the top of the POS ordering screen for quick selection (see below POS screenshot).

Override Tab
The Override Tab is only available if Override Item Group Settings is checked. When this field is checked, the Item Group settings will be ignored and the Category settings will override the Group settings.
Please Note: If the Accounts are grayed out like the screenshot above the Override Item Group Settings is not checked.

POS Button Style
POS Button Style allows for the change of the button size or font size.

Button Image
Upload an image to display on the button instead of text. You cannot see the button but if you hold your mouse at the end of the line or just click the end of the line you can browse to the image file.
Background Color
Click the down arrow and select the color for the background.
Foreground Color
Click the down arrow and select the color for the text.
Caption H Align
Click the down arrow and select the horizontal alignment of the text.
Caption V Align
Click the down arrow and select the vertical alignment of the text.
Image H Align
Click the down arrow and select the horizontal alignment of the image.
Image V Align
Click the down arrow and select the vertical alignment of the image.
Font Size
Enter the font you want the text size to be. This is for the button text in POS for the items associated with this category. You will not see the font change in the preview box since this is pertaining to the size of the Items not the Category text.
Image Height
Change the image height; 100 pixels is a good starting point.
Image Width
Change the image height; 100 pixels is a good starting point.
POS Button Preview
This box will give you a preview of what the alignment and colors.
Please Note:
All fields related to Color and Text are default settings for the Item buttons associated with the category. For example, I might have a POS button on my screen group design that is set to list all the items that belong to the Appetizer Category. The system will look at the button style settings and create buttons for the items based on these settings.
All the fields related to the Image pertain to the Category.
The category settings are defaults and can be overwritten on an Item level.
POS Behavior

Print on Pay
If checked, Items in this Item Category will print on Pay Receipts. A Pay Receipt is the receipt the server presents to a member for signature (or payment method and additional gratuities to be added).
Print on Settle
If checked, Items in this Item Category will print on Settle Receipts. A Settle Receipt is the Receipt that is printed after the sale is tendered to Member Charge, Cash, etc. It will print the final total with additional tip and payment method.
Do not print modifiers
If this field is checked and the modifier has a price, the price will add into the base price and the modifier WILL NOT print on the member receipt. Example: if a pizza is 10 and three additional items were added at 1 dollar each the check will show 13.00 pizza total. If the field is unchecked the modifiers will be listed individually on the member receipt.
Please Note:
If Print on Pay and Print on Settle are not checked the Items will not be listed on the receipts. The only time a club should choose not to print an item on a receipt is if it is a zero priced item. Example: The club might want to track Member Green Fees or towels that are not charged; they will ring up the item at POS for reporting purposes but do not want it on the member receipt.
Do not print modifiers is usually unchecked for food but is checked for Liquor. Example: if there are additional charges for food add-ons most clubs want to show that on the receipt. However if there are extra charges for Liquor on the rocks or up most clubs don’t want that listed on the receipt and prefer to add the extra charge into the base price.
Print Configuration Tab
Please Note: This tab applies to FnB Item Categories Only and does not apply to Retail or Billing Categories.
The Print Configuration Tab tells the system which Prep-Printer the items within this category are sent (Hot, Cold, Bar, etc.). The F&B Items will inherit the print configuration but can be changed on an item level.

Message Type is always set to ItemCategory.
The From Type works in conjunction with the From field. These fields are used if the club has more than one kitchen or bar. Click the down arrow to get a list of options.
From Type Options:
POSDevice
If the item is to print to a specific prep printer (kitchen/bar) based on the Terminal location,click the down arrow and choose From a Terminal Device (the system will list all devices but you must select a Terminal device not a Printer device).
Example: The club has an upstairs and downstairs kitchen, if an item is sent from a POS terminal upstairs it will always print to the upstairs kitchen no matter what Area was selected
Area
Is used if the item is to print to a specific prep printer (kitchen/bar) based on the Area the ticket was open. From click the down arrow and choose the Area.
Example: you have an upstairs and downstairs kitchen, if an item is sent from the Dining Room it always prints to the downstairs kitchen even if it was sent from an upstairs terminal.
Please Note: If Area is selected ALL Areas that send orders must be setup > to Add another Area configuration click the *asterisk; this will create another line.
Area Category
This option works the same as Areas except it pulls from the Area Category instead of individual Areas
Anywhere
If there is only one kitchen or bar select this option.
From Column Options:
Please Note: The list will vary from club to club.
If POSDevice was selected the list will populate all devices (both printer and terminal).
If Area was selected the list will populate all the Areas setup in your system. You must setup and configure each Area that prints orders to a remote printer.
If Area Category was selected the list will populate all the Area Categories set up in your system.
Anywhere will only give the option Anywhere.
To Type Options:
The To Type works in conjunction with the To field.

To Type:
POSDevice – Devices are both terminals and printers.
POSDevice Group – this is the preferred setup; using groups makes it easy to reroute orders to a different printer if a printer dies or orders need to reroute to a different kitchen or bar.
To:
If POSDevice was selected the system will list all Terminals and Printers setup in your system.
If POSDevice Group was selected the system will list all device groups set up in your system.
Start Time & End Time
Used when an Area of the club uses more than one kitchen or bar in one day.
Example: The clubs orders print to a grill kitchen from 8am to 3pm and then from 3:01pm to close the orders print to the Main Kitchen printer.

Day Of Week
Used only if certain days Areas of the club use more than one kitchen or bar, if this applies to more than one day each day will need to be setup separately.

Message
The Category setup should always be sNameOnOrder: this tells the system to default the send name to what the item description is. The Send Name can be changed on the item level.

Please Note:
Do not leave the Message field blank or None; if blank or None no Item description will print on the prep-printers unless you manually enter the name on the item level.
If you accidently clicked None and want to fix; highlight the line by clicking the pencil on the left of the line and hit your delete key on the keyboard.
Click Save & Close when done.
The print configuration is setup by the Clubessential Trainer during implementation.
Manage Items
In CMA, select Items then select Manage Items.

Please Note:
- Grids are user defined; the available custom fields are determined by your employee security rights.
- Contact your administrator to inquire about your employee security settings if you have questions.
- Clubessential employees are not allowed to change employee security rights; only a club administrator is allowed to make these changes
- You can customize your grid to display different columns and use the funnels to filter information
There are three types of Items, each have different requirements and capabilities. In the following sections we will cover each separately.
- Billing Items: In this section, we will cover setting up items to be used for billings such as Dues, Initiation Fees, minimums, etc. These items are not available at POS.
- FnB Items: In this section, we will cover the fields that apply to the Food and Beverage Point of Sale.
- Retail Items: In this section, we will cover the fields that apply to the Retail Point of Sale such as Golf, Tennis, Spa.
Manage Billing Items
Edit an Item
Highlight the Item and double-click or select the Edit icon on the toolbar.
Create a New Item
Click the New Icon. The Item Maintenance screen will appear, details below.

Billing Item
Must be checked.
Active
The system defaults to Active.
Name
Give the item a Name.
Description
This field is not used for billings.
Price
Typically there is no price on the item level, the prices are set up in the billing setup. The item is mainly used to direct the transactions to the correct Debit or Credit Ledgers. If this item will not be used as a recurring billing item and manually charged through Member Charge you can add a price.
Item Category
Click the search icon and select the appropriate Item Category.
A/R Override
Click the search icon and select the GL Accounts Receivable Debit Account.
Sales Account
Click the search icon and select the GL Credit Account for income.
Manage F&B Items
Edit an Item
Highlight the Item and double-click or select the Edit icon on the toolbar.
Create an Item
Click the New Icon
The Item Maintenance screen will appear, the fields in the Red boxes can be applied to F&B Items.

FnB Item must be checked.
Item Setup Option:
Name
This field is required. Enter the name of the Item, use the Tab key on your keyboard to advance to the Description field.

Please Note: When you tab out of the name box, you will receive the prompt Would you like to set the Order Name and Button Caption fields to the new value?
ALWAYS click YES to have the system automatically populate the Descriptions for the following:
Order Name
The name that prints on the prep ticket sent to the kitchen or bar.
POS Receipts
Member Receipt.
Button Caption
The name that appears on the POS Button)
Retail Price
Enter the non-member price (see note below).
Member Price
Enter the member price.
Please Note:
If you have a Member and a Non-Member Price you will need to identify member/non-members in the Member Type Rule/Use Member Pricing setup; check with your controller or authorized person.
If both members and non-members are charged the same price you only need to enter a Retail Price.
Item Category
This field is required. Click the search icon and select the appropriate Item Category.
Average Cost
The average cost for F&B Items is a theoretical cost. The Office system does not have an F&B Inventory system but you can manually enter the cost. Items that have a cost in the setup will be added to a the Gross Margin Report.
Ask For Price
If this box is checked, the POS system will prompt the user to enter a price each time this item is ordered. This is usually used for Items such as Market Price or Open Food.
Ask For Name
When checked, the POS system will prompt the user to enter a name for the item each time the item is ordered. This is usually used in conjunction with Ask for Price on items such as Open Food. The name entered will print on the prep tickets and Member Receipts.
Ask For Quantity
When checked, the POS system will prompt the user to enter a quantity each time the item is ordered.
Credit Book Eligible
If the item can be paid with the member’s Credit Book (sweeps), check this box. Mainly used for retail items but can be used for F&B too.
Track Countdown
Checking this box allows you to enter a quantity limit to be sold at POS. If all fields are set up it will show the countdown on the Item Button.
Example: There are only 10 Steaks and want the system to show the remaining steaks available at POS on the item button. This feature also disallows the item to be sold once it reaches the countdown limit. The count will change to X86 on the button. See example below of what the button looks like at POS.

Setup
When you check Track Countdown two new fields will appear. Check Show QTY Countdown on POS Button and enter QTY in the QTY Countdown box.

Please Note: This feature is also available in POS > System Tools > Items, then check Change Countdown.
Daily Special
If you have a Button Type setup as Special on the screen group design it will automatically add the Daily Special Item to the button choices.
The Item will be listed in the Main POS screen then Specials Tab.
Please Note: This works well in conjunction with Track Countdown. If the Track Countdown Item also has the Daily Special checked it gives the server the ability to see what the current countdown is before approaching the table and will display X86 once it reaches its limit (see POS screenshot below).

Auto Increment Seat
When checked, the POS system will auto-increment the seat number. Checking this is not advised if the server does not take the order in sequential seat order.
Disable Ability to Discount
When checked the item will not be eligible for Discounts or Comps in PO
Active
System defaults to Active. Uncheck this box ONLY if the item is no longer available. You will still see the Item at POS but it will not let you ring it up. This is used if items are temporarily not available.
Don’t Display at POS
When checked the Item will NOT be displayed at POS
Please Note: If the Item is marked as Active it still will not display at POS if this field is checked.
Tax Inclusive
Put a check only if the price includes Tax and Service Charge and you do not want the system to break it out on the Member Receipt.
Allow Fractional Quantity & Price
Designed for Yacht clubs that sell gasoline and need fractional pricing.
Auto Increment Cover
If this box is checked when the item is sold at POS, it will automatically increase the cover count. Typically, with this feature, only Entrees might have this checked. If your members often choose salads or appetizers as their entrée it is advisable not to check this field.
Please Note: See your accountant before entering Account information. If there is an account on the Item level it will override the Item Category and Group setting. Typically for F&B Items the GL Accounts are setup on the either the Item Category or Item Group level, not the Item level.
Sales Account
Select the revenue account that should be credited when items are sold.
Comp Account
Select the account that should be debited for the amount of any comps made at POS.
Discount Account
Select the account that should be debited for the amount of any discounts made at POS.
Rewards Account
The field is related to a future feature. Select the clearing account.
Point of Sale Option

Default Send
This is the description that will print on the Prep-printers (kitchen or bar). Do Not leave the field blank if the item needs to print to a remote printer….see notes on next page
Please Note: If you have Expanded Print turned on the Default Send description can only be 10 characters including spaces. The information you entered in the Name field will automatically populate the Default Send if you answered Yes to the below message when entering the name.

Ticket Message
If necessary, select a ticket message that will print on POS receipts each time this item is charged. For example, if your club is hosting an upcoming scotch tasting you might attach a message to each scotch item that provides details of the event. (The same type of setting can also be adjusted in the Item Category Area).
Bin Number
This number is used if the club has Bin numbers on the wine list. The servers will be able to look up Wine by Bin Number at POS. This is very useful if the club has a large wine list.
Cook Time
Not currently used.
Default Course
If your club enters orders by Course it is advisable to assign a default course to the Item. This Default Course can be changed at POS.
Print on Pay
When checked, the item will print on the Pay Receipts. A Pay Receipt is what the server presents to a member before closing the ticket to a settlement type.
Print on Settle
When checked, the item will print on the Settle Receipt. A Settle Receipt includes everything that the Pay Receipt displays but also includes the form of payment and additional gratuities.
Please Note: The only time Print on Pay/Settle should not be checked is if the Item is a zero price. If the item has a price and one of these two fields are not checked; the total on the ticket will be correct but the item will not be listed.
Do not print modifiers
If this field is checked and the modifier has a price, the price will add into the base price and the modifier WILL NOT print on the member receipt.
Example: if a pizza is $10 and three additional toppings were added at $1 each, the Pizza will show as $13.00.
If the field is unchecked the modifiers will be listed individually on the member receipt with associated price. Example: The pizza will be $10 with three additional line items $1 each, for $3. Typically this is not checked for Food Items but is instead checked for Liquor Items.
Example: If the club charges an additional $1 for Liquor on the Rocks, they would not want the additional charge of $1 to print on the receipt as Rocks - $1 and prefer to add the charge into the base price.
Button Style
This area allows you to change how the item button will appear in POS.

Name on Screen
This is the description to display on the POS button. The information entered in the Name field will automatically populate this field if Yes is selected in the below message.

Graphic File Name
Upload an image to display on the button. Holding the mouse at the end of the line, a light gray box will appear or click the end of the line to browse to the image file.
Background Color
Click the down arrow and select the the background color.
Foreground Color
Click the down arrow and select the text color.
Caption H Align
Click the down arrow and select the horizontal alignment of the text.
Caption V Align
Click the down arrow and select the vertical alignment of the text.
Image H Align
Click the down arrow and select the horizontal alignment of the image.
Image V Align
Click the down arrow and select the vertical alignment of the image.
Font Size
Enter the text size.
Image Height
Change the image height; 100 is a good starting point.
Image Width
Change the image width; 100 is a good starting point.
POS Button Preview
This box previews the alignment and colors.
Print Configuration
If the POS Item needs to be sent to a prep printer (kitchen or bar) the settings in this section are what determine where the order will be sent.
The print configuration is set on the Item Category level; the Item inherits the Category settings. The default Category Print Configuration lines will appear in purple. Nothing needs to be done unless you want to override the Category settings.

To Change the Print Configuration on the Item level:
If you want to change the Print Configuration click the Print Icon with the red circle.
Selecting this option will put a strikethrough on the line, cancelling the default category settings and adds another line in yellow. Click Print Configuration Page for instructions or leave as is, if the Item is not to print anywhere.

Please Note: To revert back to the default Category settings click on the Purple ball.
Modifiers
Modifiers give the ability to set modifications or choices for additional prep instructions on the item such as Meat Temperatures, side choices, etc. Every time the item is rung up in POS, the modifiers will prompt the server to select from the modifier group.
Select the LookUp value to get a list of available Modifier Groups. Click to select the Modifier Group to be added, and choose Select on the bottom of the Lookup to add Modifier Group to the Item.
Select the LookUp value to get a list of available Modifier Groups. Click to select the Modifier Group to be added, and choose Select on the bottom of the Lookup to add Modifier Group to the Item. Groups listed in the Name box will be forced at POS.

Please Note:
Use the Up/Down Arrows to arrange the order
If the modifier group you want does not exist > click Quick Add; this will take you to the Modifier Group screen to add a new modifier. You can refer to Modifier Groups section of this manual for further instructions.
Recipe
The Recipe can be seen in the main POS screen by clicking the Recipe Button and searching for the item.
Enter the recipe in the blank area of the Recipe Box. At the top of the Recipe Box is an Editor Toolbar listing basic MSWord functions allowing for customization.

Please Note: Only servers in an Employee Group with the appropriate security rights will see the Recipe button. To activate this option, go to Employees, then go to Employee Groups and double click on the Group and put a check on Display Recipe Button at POS Terminal (see your accountant or authorized personnel to verify these changes; Clubessential cannot change employee security rights).

Manage Retail Items
To Edit an Item:
Highlight the Item and double-click or select the Edit icon on the toolbar.
To Create a New Item:
Click the New Icon
Item Setup Option:
The Item Maintenance screen will appear: the fields in the Red boxes can be applied to Retail Items.

Retail Item
Must be checked.
Name
This field is required. Enter the name of the Item and use the Tab key on your keyboard to advance to the Description field.

When you tab out of the name box, you will receive a prompt Would you like to set the Order Name and Button Caption fields to the new value?
Always click YES to have the system automatically populate the Descriptions for the following items:
Order Name (This does not apply to Retail)
POS Receipts (Member Receipt)
Button Caption (the name that appears on the POS Button)
Retail Price – Enter the non-member price.
Member Price – Enter the member price.
Please Note: If you have a Member and Non-Member Price, identify member/non-members in the Member Type setup. Check with your controller or authorized person to verify. If both members and non-members are charged the same price, only enter a Retail Price.
Item Category
This field is required. Click the search icon and select the appropriate Item Category.
Average Cost
The average cost is calculated by the system and cannot be changed if the item is checked as Inventoried Item.
Ask For Price
If this box is checked the POS system will prompt the user to enter a price each time this item is ordered. This is usually used for Items that do not have a set price such are repairs.
Ask For Name
When checked the POS system will prompt the user to enter a name for the item each time the item is ordered. This is usually used in conjunction with Ask for Price for example repairs, you can add a more specific description of the repair. The name entered will print on the Member Receipts.
Ask For Quantity
When checked the POS system will prompt the user to enter a quantity for the item each time the item is ordered.
Credit Book Eligible
If the item can be paid for with a member’s Credit Book (sweeps), you will want to check this box.
Inventoried Item
Check this box if this item will be tracked as part of the perpetual inventory tracking.
Please Note: If this field is checked the cost field will be grayed out. Only through Item Receipts can the cost be calculated and only through Inventory Adjustments can the cost be changed.
Disable Ability to Discount
When checked the item will not be eligible for Discounts or Comps in POS.
Active
System defaults to Active. Uncheck this box ONLY if the item is no longer available. The Item will still be visible at POS but it will not be clickable. This is used if items are temporarily not available.
Don’t Display at POS
When checked the Item will NOT be displayed at POS.
Please Note: If the Item is marked as Active it still will not display at POS if this field is checked.
Round of Golf
If you have our Links Tee Sheet this does not apply to your club. The Rounds report will be tracked by the Tee Sheet sign in’s. If you do not have the Links Tee Sheet and would like to track this item as a round of Golf check this field.
Please Note: When this field is checked the option Golf Rounds Setup will be activated.
Ask for Guest
When checked, the user will be prompted to enter the Guest Name each time this item is sold at POS. This feature is commonly used for items such as Guest Green Fees.
Please Note: This allows the shop to track the number of visits of individual guest.
Tax Inclusive
Check only if the price includes Tax and Service Charge and you do not want the system to break it out on the Member Receipt.
Allow Fractional Quantity & Price
Designed for Yacht clubs that sell gasoline and need fractional pricing.
Please Note: See your accountant before entering Account information. If there is an account on the Item level it will override the Item Category and Group setting. Typically for Retail Items the GL Accounts are setup on the either the Item Category or Item Group level, not the Item level.
Sales Account
Select the revenue account that should be credited when items are sold
Comp Account
Select the account that should be debited for the amount of any comps made at POS.
Discount Account
Select the account that should be debited for the amount of any discounts made at POS.
Rewards Account
The field is related to a future feature. Select the clearing account.
Golf Rounds Setup
If Round of Golf is checked it will activate this option different types of play can be set up here.

Click the lookup or drop down for choices; the choices are hardcoded and cannot be changed.
Number of Holes:
Full
Half
Other
Time of Week:
Weekday
Weekend
Holiday
Other
Round Type:
Member
Guest
Jr
Tournament
Comp
Outside tournament
Member Event
PGA
Inventory
Only If the field Inventoried Item is checked does the information need to be entered.

SKU Number
The system will automatically create a SKU Number.
Please Note: The SKU will not be generated until you SAVE. You can create your own SKU if you do not want the system generated SKU; we highly recommend that if you want your own numbering system that you use the UPC code.
Preferred Vendor
The vendor you purchase the Item from. To find your preferred vendor, click the search Icon and select the Vendor.
UPC Code
You can scan or enter the Item UPC code
Please Note: You can also create your own Numbering system; some shops want to use their old SKU so they do not have to re-label all their merchandise. When you scan the item in POS the system will first look at the UPC code, if there is no UPC code the system will look at the generated SKU.
EPIC Code
This field is not currently used.
Default Vendor Ref
Enter the number the supplying Vendor uses to refer to this ite
Re-Order
This field is not currently used.
Allow To Be Sold Without Qty Available
If this field is NOT checked the system will look at the QTY on hand, if the item has a zero QTY you will not be not be allowed to sell the item at POS.
Please Note: If the shop wants the item immediately available to sell but does not enter the inventory the day it arrives, it is highly recommended that this field is checked.
Labels
The Label option will display the Item label format and QTY On Hand. Labels can be printed for a single item in the maintenance screen.

Top is the description of the Item.
The price.
Bar Code
Bottom Right is the SKU
Bottom Left is a cost code: the shop can use this code to see the purchased date and cost.
QTY field defaults to the total on Hand; you can change the QTY if you wish to print less or more labels, then click Print.
Pictures
Pictures can be uploaded of the Item(s); the picture can only be seen in this screen and nowhere else in the system
Point of Sale Screen
The Point of Sale screen is where you will specify if the item is to print on the POS Receipts.
Print on Pay
When checked, the item will print on the Pay Receipts. A Pay Receipt is what is presented to the member before closing the ticket to a settlement type.
Print on Settle
When checked, the item will print on the Settle Receipt. A Settle Receipt includes everything that the Pay Receipt displays but also includes the form of payment and additional gratuities. Typically Retail Shops do not print a Pay Receipt and only Print a Settle Receipt.
Please Note: If Print on Pay and Print on Settle are not checked the Items will not be listed on the receipts. The only time a club should choose not to print an item on a receipt is if it is a zero priced item.
Example: The club might want to track Member Green Fees that are not charged or towels given at the Pool; they would ring up the item at POS for reporting purposes but do not want it on the member receipt. If the item has a price and one of these two fields are not checked; the total on the ticket will be correct but the item will not be listed.
Button Style
This area allows you to change how the button for the Item will appear in POS.
Name on Screen
This is the description to display on the POS button. The information you entered in the Name field will automatically populate this field if you answered Yes to the below message.

Graphic File Name
You can upload an image to display on the button. Holding the mouse at the end of the line, a light gray box will appear or click the end of the line to browse to the correct image file.
Background Color
Click the down arrow and select the color you want for the background.
Foreground Color
Click the down arrow and select the color you want for the text
Caption H Align
Click the down arrow and select the horizontal alignment of the text.
Caption V Align
Click the down arrow and select the vertical alignment of the text.
Image H Align
Click the down arrow and select the horizontal alignment of the image.
Image V Align
Click the down arrow and select the vertical alignment of the image.
Font Size
Enter the font you want the text size to be.
Image Height
Change the image height; 100 is a good starting point.
Image Width
Change the image width; 100 is a good starting point.
POS Button Preview
This box will give you a preview of what the alignment and colors will look like.
Vouchers
How to Sell the Voucher:
In POS sell the Voucher Item and close the ticket (once a voucher has been sold it is immediately ready to be redeemed).
How to Redeem the Voucher:
When an item associated with the Voucher is sold the system will see the member has purchased the Voucher and will prompt a confirmation message. Member Carlie Smith has a voucher for Item ‘1 Hour Lesson’; Would you like to use the Voucher? See example below.

Selecting YES:
The system charges the item on the ticket and credits the amount; the ticket total will be zero. It also credits any difference between the Item Price and the Voucher Price. This allows you to use existing POS Items at a different price when setting up Vouchers.
Please Note: The income is recorded at the time you sell the Voucher Item; the system uses Credit Item when redeeming the Voucher to reduce the amount remaining.
Selecting NO:
The item will be added to the ticket as normal. The members can chose to use or not use one of their vouchers.
Voucher Rules
Once you sell a voucher, changes to the voucher setup will not affect any Vouchers previously sold. Only vouchers sold after the changes will contain the new setup.
Example: A voucher is setup to use items 1, 2 and 3. Days later you decided that item 4 should also be included. Any member that bought the voucher set up with items 1, 2 and 3 will not get credit when they buy item. Anyone who buys the voucher after the changes will include items 1, 2, 3 and 4.
Please Note: The vouchers can only be sold through POS. You cannot sell or redeem them through member charge.
Voucher Setup
Credit Item
Create a POS item just like any other item; set the price at 0. This item will be used to credit the sale. The GL and Tax Code need to match the Voucher Item being sold; to ensure the setup is correct, point the Credit Item to the same Category as the Voucher Item.
Please Note: The income is recorded at the time you sell the Voucher Item; the system uses the Credit Item when redeeming the Voucher to reduce the amount remaining.
Voucher Item
Create a POS item; enter a Name, Price and Category.
Please Note: The Retail Price is the total value of the Voucher.

Select the Voucher Option:
Voucher Item
Check this box to activates the Item as a Voucher.
Allow Family Use
Check this box if all family members can redeem the voucher.
Quantity
Enter the number of full QTY to redeem.
Credit Item
Enter the item created in Step 1.
Expiration
Select the Expiration method.
Expiration Date
Select the calendar date.
Expiration in Days
Select the number of days to expire.
Voucher Items
Items that will be available to be redeemed (there is no limit).

Select the New Icon.
The Voucher Detail Box will display, enter the first Item.

VoucherPOSItem
One of the items available to redeem.
Price
This is the value to be reduced from the total value of the Voucher.
Example: if the total voucher value is sold for $800 and the Item price is $40 the remaining after redeemed will be 800 – 40 = 760.
Quantity
This is the QTY to be reduced from the Voucher QTY total.
Example: if the Voucher had a QTY total of 10 to be redeemed and the Item QTY is set at .5 the remaining after redeemed will be 10 – .5 = 9.5
Click Save & Close.
Please Note: If more than one item qualifies; repeat steps 4a to 4c until all items have been set up. Please remember to Save & Close when finished.
Downloadable Guide
Inventory Adjustment Wizard - Guide