Overview
Clubessential’s new print service is a new and updated method to handle all printing being done by Classic and Mobile POS devices.
Benefits
Streamlined Installation: The installation process has been streamlined. There is no longer a VPN tunnel required to print. POS software communicates directly with the print service.
Self-Install: Clubessential support is not required to install the new print service
Status Indicator: The system will notify Clubessential if the service stops running. We will reach out proactively to help determine the cause.
Automatic Updates: The service will automatically update as new features are released. Once installed, there will be no need to manage.
Logs: Logs of daily printing are generated every day and be available up to one week.
Note:
This print service should be installed a machine that will not be turned off. Ideally the best choice will be installing on a server or machine where all network printers are already installed and shared. Otherwise, File and Prtiner sharing will need to be enabled via the Control Panel > Network and Sharing Center > Advanced sharing settings on each individual workstation that a printer is installed on/shared from.
Steps
The first step will be to prepare a location on the machine for the print service to be downloaded. If the machine is currently using Clubessential software or has in the past, there will more than likely be a folder called Clubessential within the local drive. If not, one will need to be added.
If there is no existing folder, open up the File Explorer and select your Local Disk. From here, right click in any open space, then hover over New > select Folder. Name the folder Clubessential.

Next, add a folder specifically for the print service. Open this folder and add a new folder called Print Service
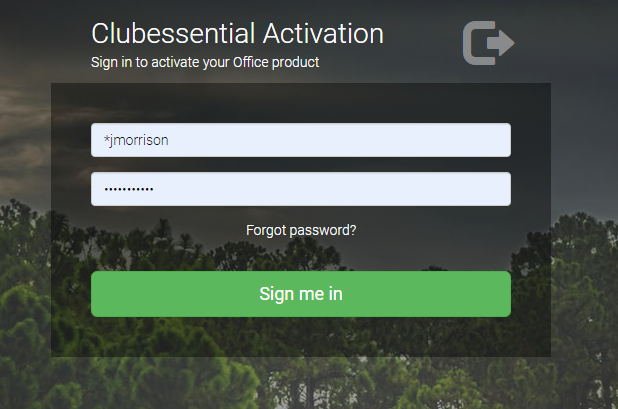
When installing the new print service, Clubessential will send an email that contains a hyperlink that leads to the activation website. (this will be the same link that was used to download Mobile POS)
Enter the same username and password used when logging into Mobile POS.
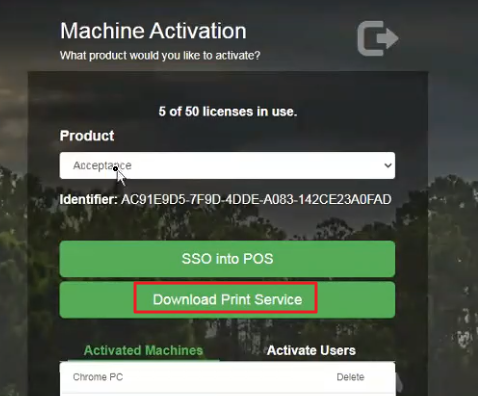
Select the green button Download Print Service.
Once the download has finished, if the program does not run right away, click on the service either in the downloads bar of the browser or the downloads folder to run. If there are any pop-ups regarding running the service, select More info > Run anyway.
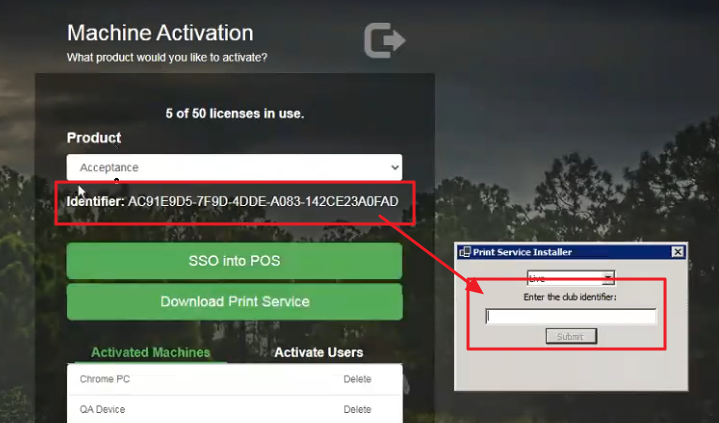
Once the Print Service Installer window is open, there will be a field for Club Identifier. This Identifier can be found on the activation website. Simply copy and paste the identifier into the field and select Submit.
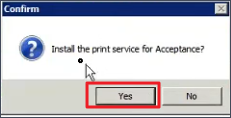
A confirmation message will appear. Select Yes.
A File explorer window will open. Select the Print Service folder that was previously created as its destination and click on Select Folder.
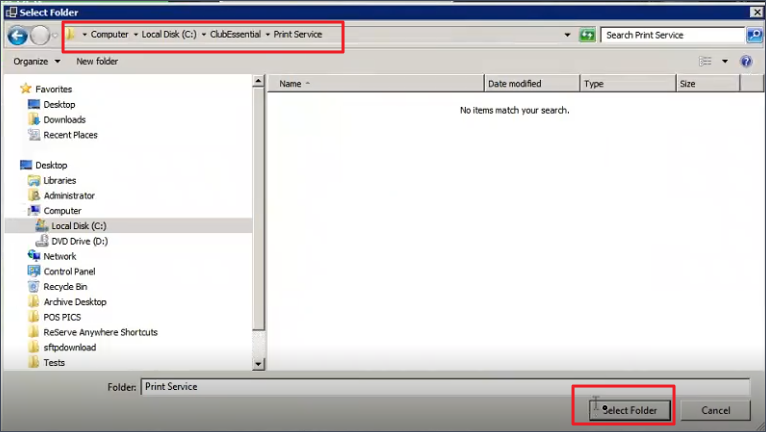
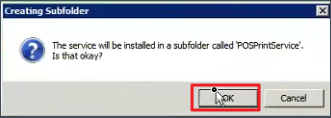
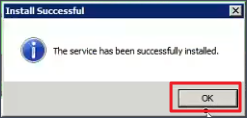
A message will appear that says the service will be installed in a subfolder. Select OK. The service will then download and install. Once it is finished, there will be a message that says The service has been successfully installed.
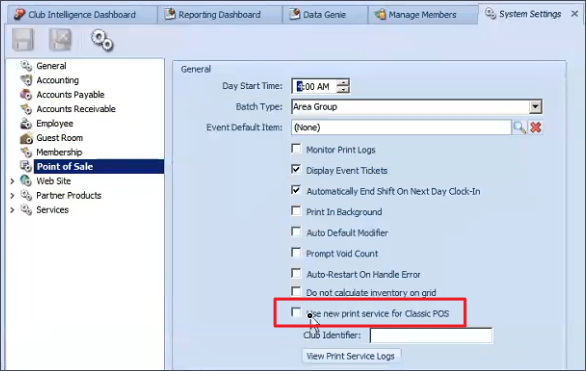
To Run the print service. Sign into CMA. Select System within the top navigation and from the drop down menu, click System Settings.
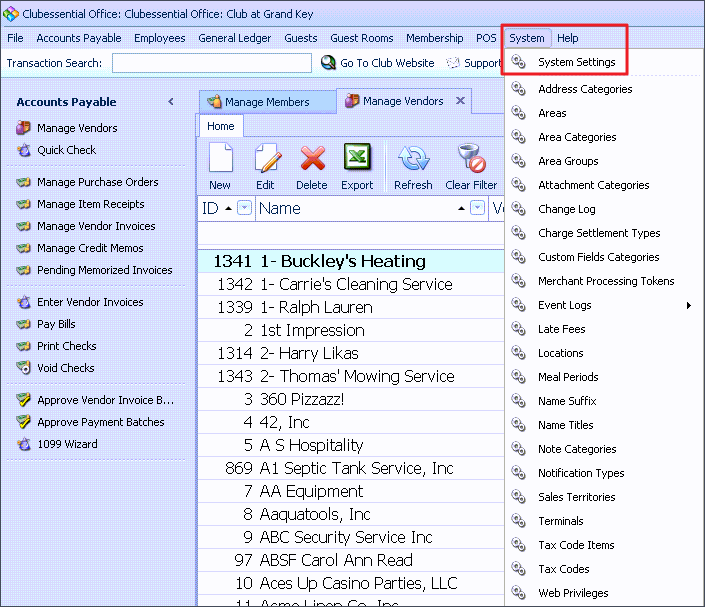
Next, select Point of Sale.

Under the General area, place a check mark that says Use new print service for Classic POS.
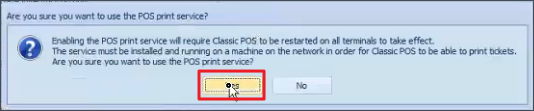
A message will appear stating that all terminals must be restarted for the changes to take effect. Click Yes. (Note: Classic POS terminals will need to to have the Classic POS application closed and re-opened)
Paste in the Club Identifier in the field. It is the same one that was used previously and can be found on the activation website.
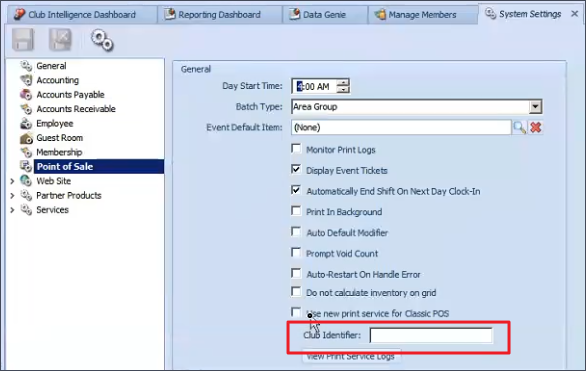
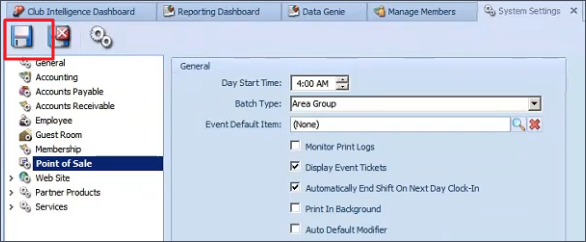
Once pasted, select the Save Icon.
Once it is running, logs can be seen by clicking the button View Print Service Logs.

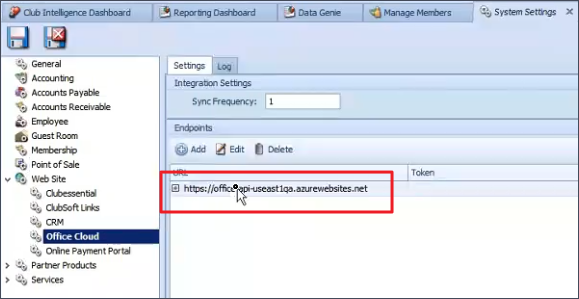
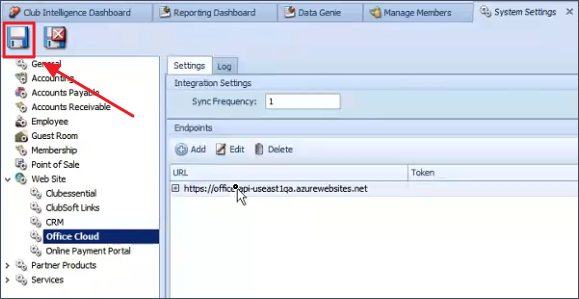
Underneath Point of Sale Select the arrow next to Web Site to expand the menu. Select Office Cloud.
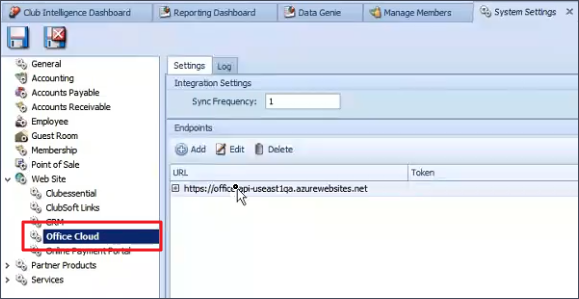
Double click on the URL that is present
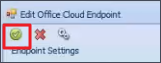
Within the Edit Office Cloud Endpoint window, place a checkmark next to the box that says New Print Service Enabled.

Select the Green Arrow to save
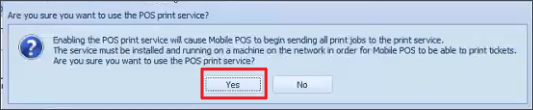
A message will appear to confirm enabling the new print service. Click Yes
Make sure to select the Save Icon again.
Best Practices
It is suggested to install the service on more than one machine. This will not cause duplicate printing. This is a contingency in the case that the machine that typically handles printing is shut down, there will be no down time.
This print service should be installed a machine that will not be turned off. Ideally the best choice will be installing on a server or machine where printers are already installed and shared.