Overview
Screen Group Designer is a tool used to build various POS menus that will be utilized throughout the club. Screen Group buttons can be customized in terms of their position on screen, size, color, and font. Various types of buttons can be created within a Screen Group. These Button Types include Item Category, Individual Item, Modifier, Modifier Groups, Specials, Item Combo, and Screen Group. In this guide we will discuss how to create a new Screen Group, how to add each type of button created within a Screen Group, how to customize the look and feel of a Screen Group, as well as how to apply a Screen Group to a specific Area. Use Case(s)
|
Content
Accessing the Tool
To access System Tools,
1) Select System Tools on the bottom left corner of the main POS screen.
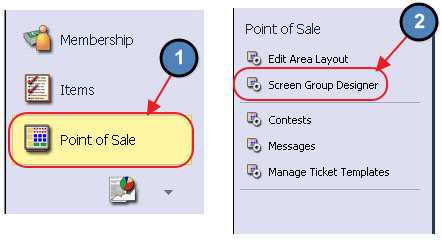
2) The Screen Group Designer Grid will launch.
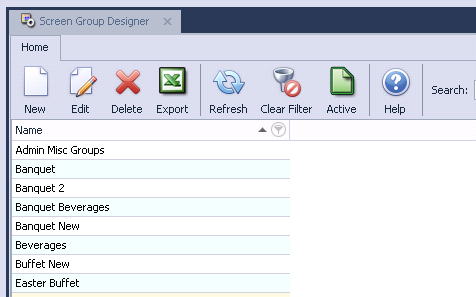
3) The primary functions associated with managing Screen Groups, creation, formatting, assigning, etc., are embedded in the Screen Group setup screen. This screen can be accessed by double-clicking on an existing Screen Group, or clicking the New button.
Creating a New Screen Group
To create a new Screen Group:
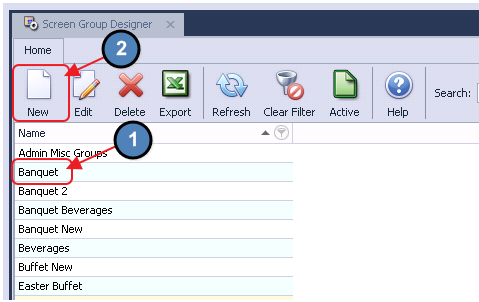
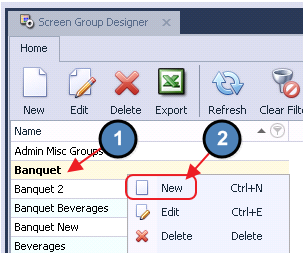
1) Navigate to the Screen Group Designer Grid and perform either of the following options to launch the Screen Group setup screen.
Option 1
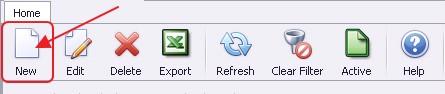
Click the New icon on the toolbar.
Option 2
Right-click anywhere on the Screen Group Designer Grid and select New.
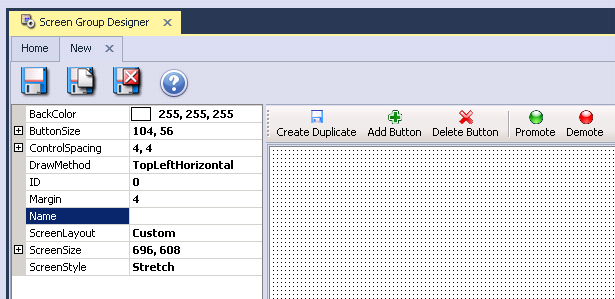
2) The Screen Group setup screen will launch.
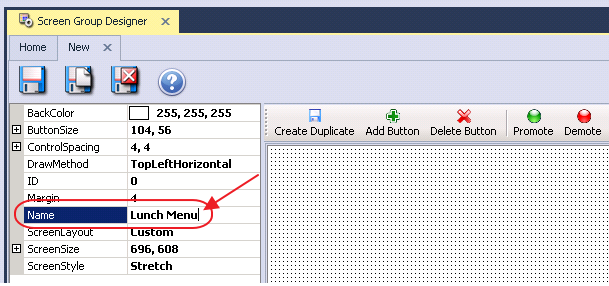
3) Enter in a Name for the new Screen Group (Ex: Lunch Menu).
Please Note: The Draw Method (how the screen is spatially organized) for a new Screen Group defaults to Top Left Horizontal. In this Draw Method, Screen Groups cannot be customized.
Please review the Customizing Screen Groups section of this document for an exact explanation on how to customize Screen Groups.
Button Types
As previously mentioned, there are several types of buttons that can be added to Screen Groups. In this section, we will review each type of button.
Category Button
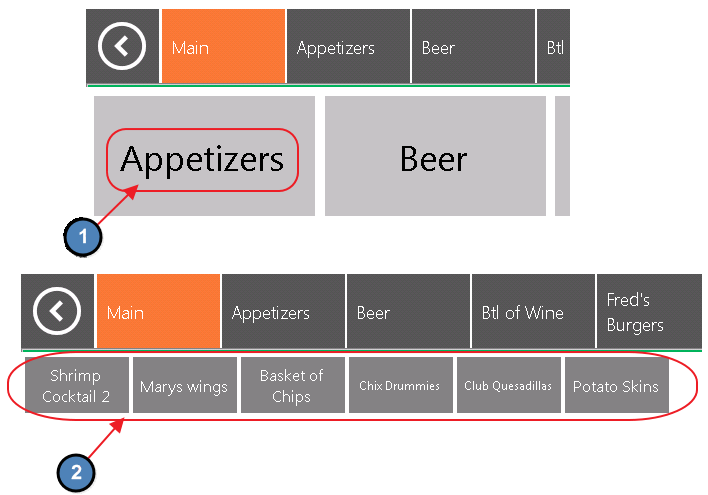
The most commonly used type of button is a Category Button. Selecting a Category Button within the POS will display all Items within the Category. For example, by selecting the Appetizer button, all Items within the Appetizer Item Category will display.

For more information on Item Categories, please see our Items Manual.
Creating a Category Button
To create a Category button:
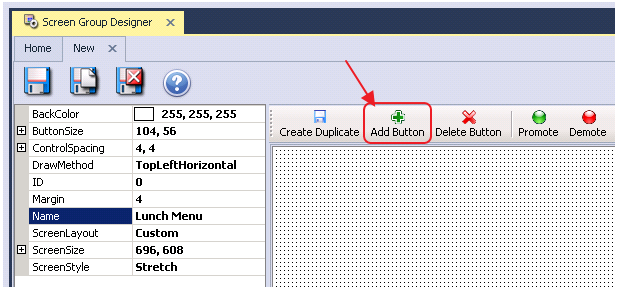
1) Select Add Button.

2) Select Category as the Button Type (Set to Category by default).
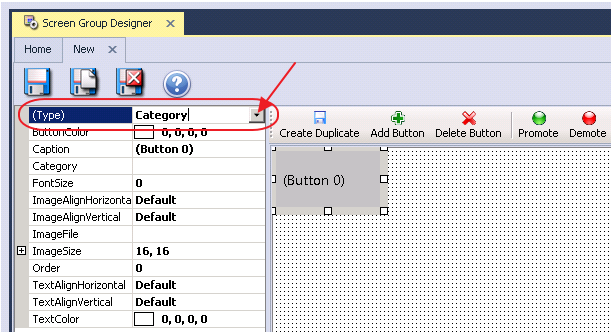
3) Select the Category for which you’d like to create a button.
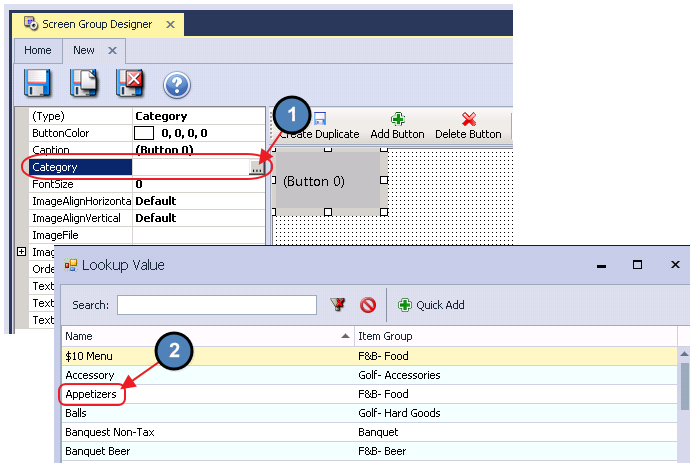
4) This button will link to a screen that automatically displays all Items within the Item Category.
Please Note: It is not necessary to create a Screen Group that includes an individual button for each Appetizer Item, the system does this for you as a result of the Category button.
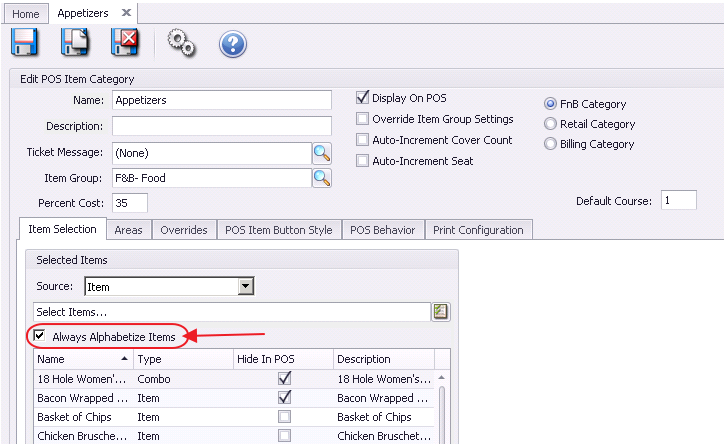
5) If necessary, the order in which the Items within a Category display on screen can be adjusted through the Item Category setup/edit form.
Option 1
Select the Item and use the Move Up and Move Down buttons to arrange the display order.

Option 2
Item Button
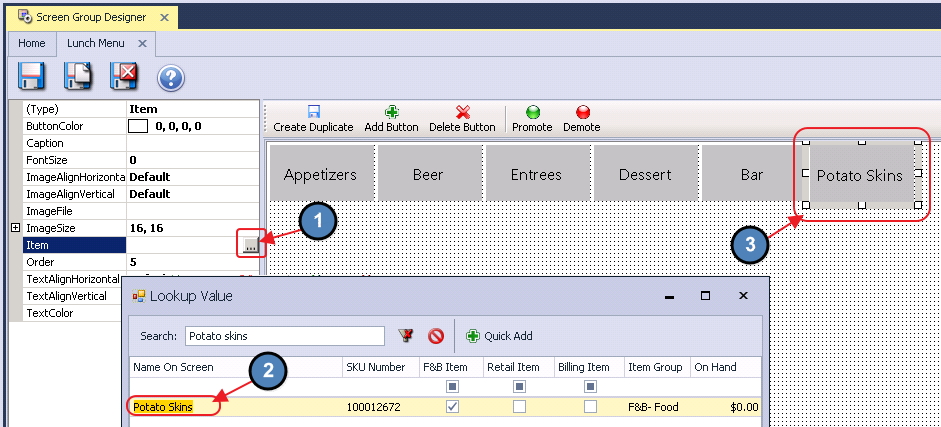
Users can use the Item Button to link a POS button to an individual Item, such as Potato Skins. Some Clubs find it useful to add buttons for frequently ordered Items, such as Diet Coke on their home screens. For more information on Items, please see our Items Manual.

Creating an Item Button
To create a button for an individual Item:
1) Select Add Button.

2) Select Item as the Button Type.
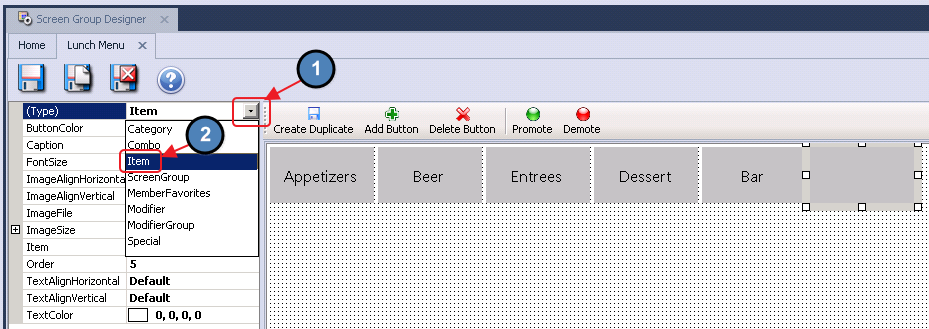
3) Select the Item for which you’d like to create a button.
Modifier Button
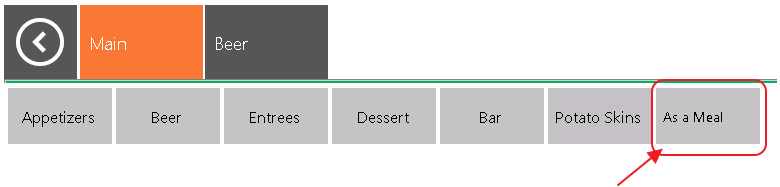
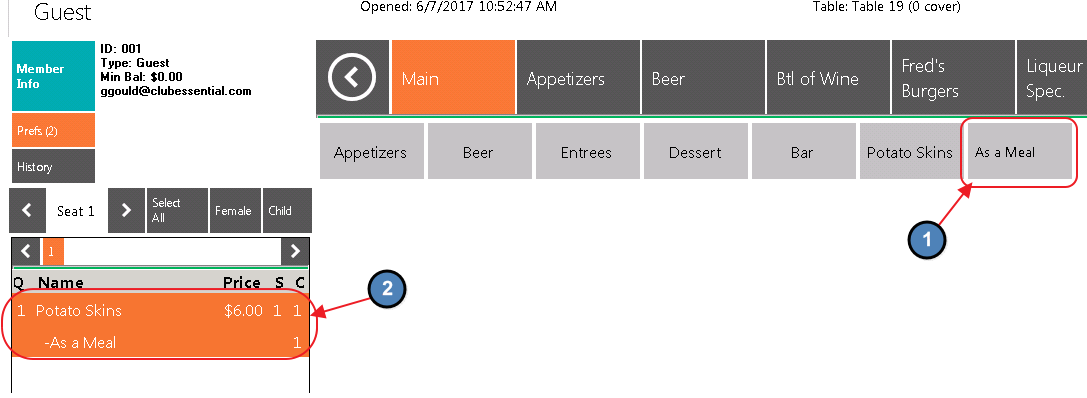
Modifier buttons provide the wait staff with quick access to frequently used Modifiers. For example, you might place the As a Meal button on your home screen.
Please note: Most Items have forced Modifiers attached to their setup. However, this option gives users the ability to add frequently used Modifiers that would not typically be attached to an Item. For more information on Item Modifiers, please see our Item Modifier Controls Manual.
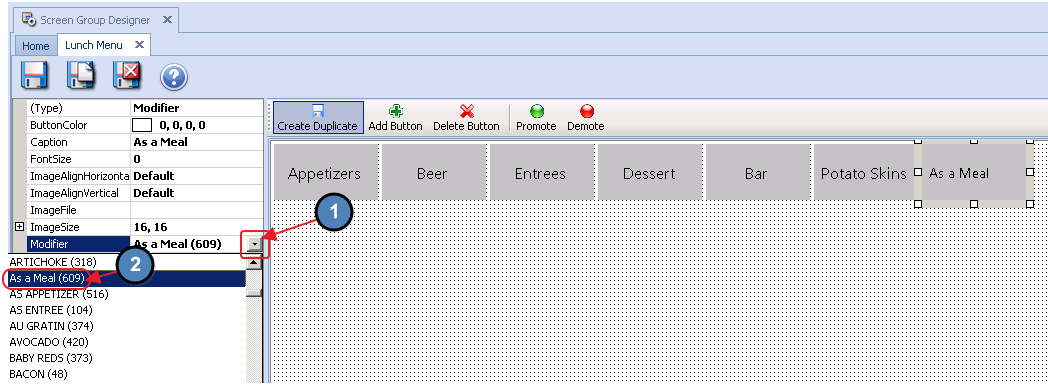
Creating a Modifier Button
To create a button for an individual Modifier:
1) Select Add Button.
2) Select Modifier as the Button Type.
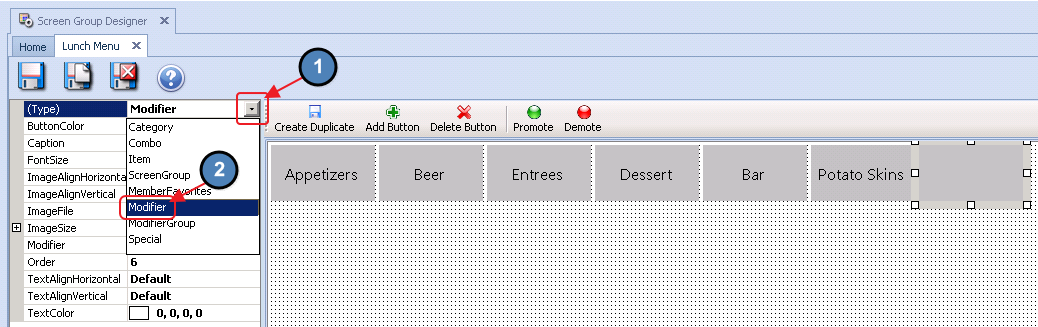
3) Select the Modifier for which you’d like to create a button.

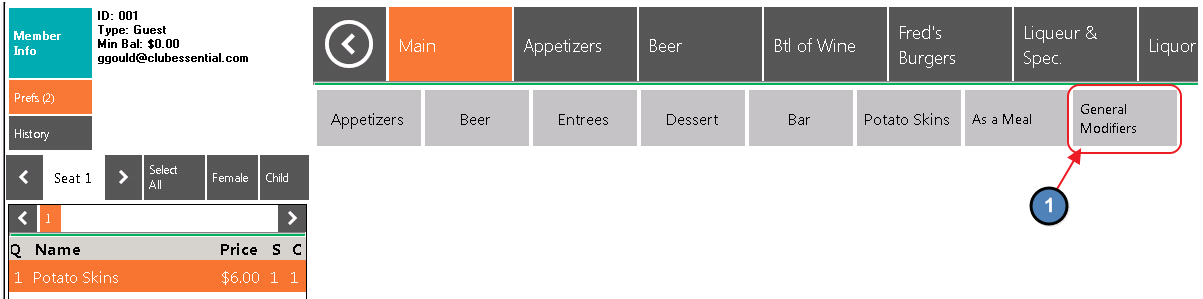
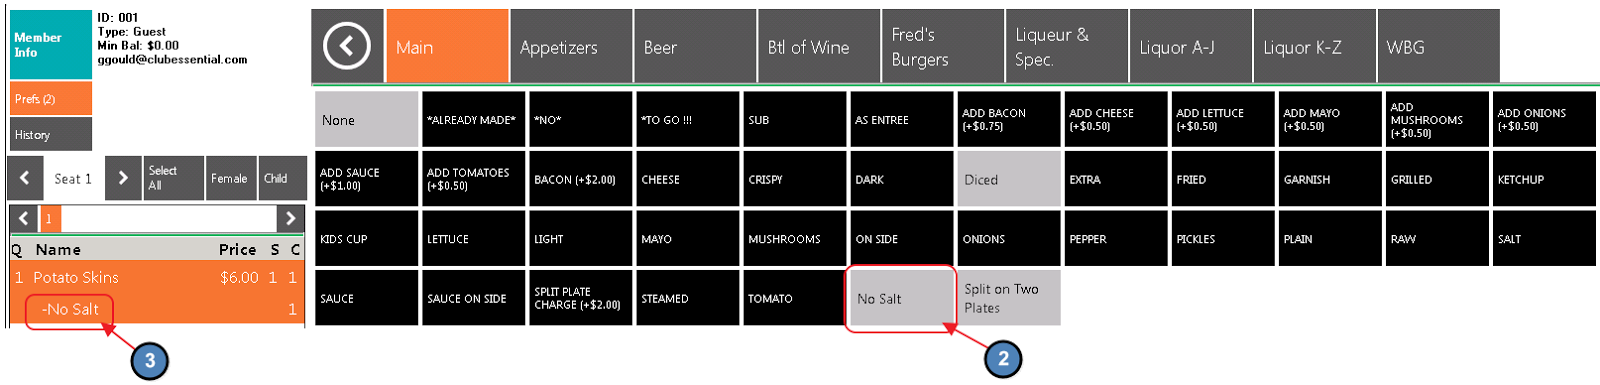
Modifier Group Button
A Modifier Group Button provides the wait staff quick access to frequently used Modifier Groups. Modifier Groups represent a collection of Modifiers nested under a single entity. For example, you might use this to place a button on your home screen that links to a list of General Modifiers such as No Salt, Split Item, or Bring Two Plates. For more information on creating Modifier Groups, please see our Item Modifier Controls Manual. 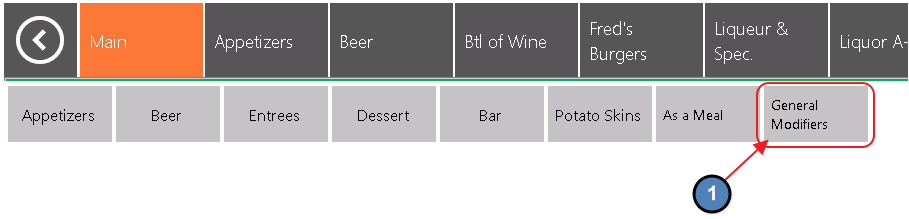
Creating a Modifier Group Button
To create a button for a Modifier Group:
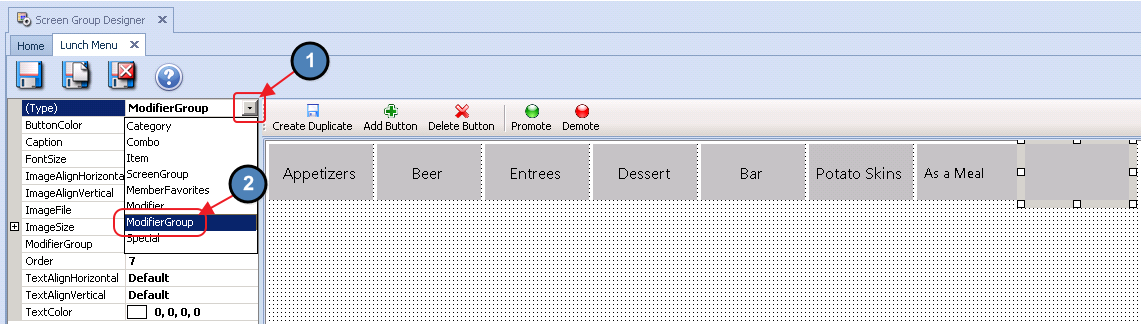
1) Select Add Button.
2) Select Modifier Group as the Button Type.
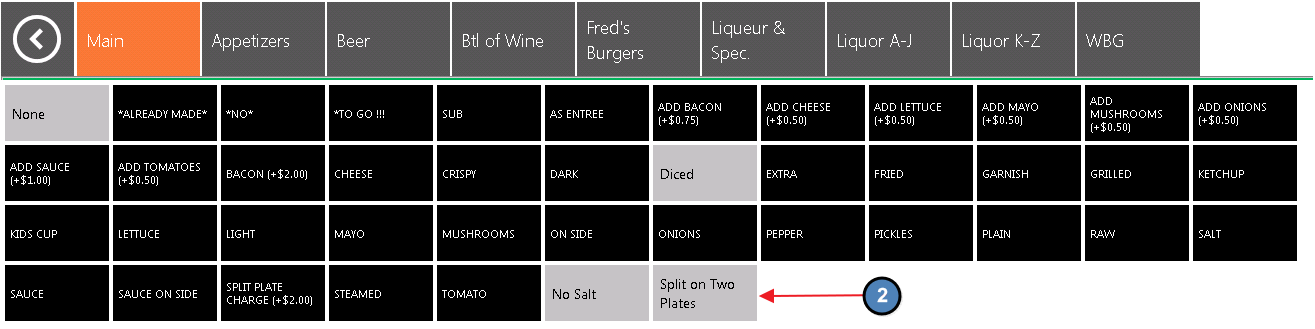
4) Now, when selected at the POS, this button will take the user to a list of Modifiers within the Modifier Group, that can then be used on currently ordered Items.
Daily Specials Button
A Daily Specials button provides the wait staff quick access to the specials of the day.
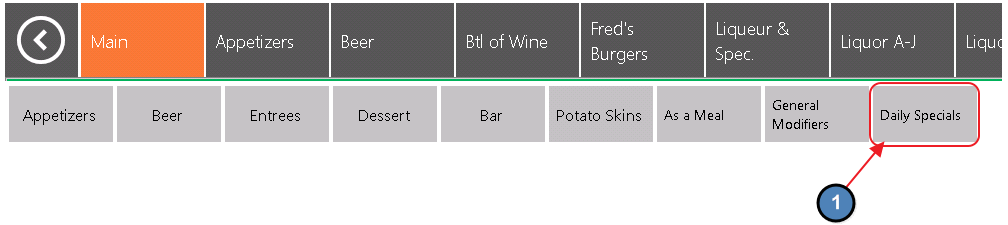
Only Items marked as “Daily Specials” on the Item setup/edit form will display on this screen.
Best Practices
System Tools provide an extremely useful toolbox to assist your Management and/or Leads with functions and reporting beyond the normal scope of base level POS usage. Ensure your Management/Lead team is familiar with the functions described within this guide to promote elevated Member and Guest experience, staff guidance and system troubleshooting as required.
FAQs
Q: Can someone have rights to System Tools without having rights to adjust Items?
A: Yes. In addition to the Allow System Tools security role, a separate role, Allow Item Management, is available to differentiate those who have the ability to access System Tools with those who have the ability to edit items within the Items tab of System Tools. By disabling the Allow Items Management role, users who may have access to other System Tools will be unable to make edits to Items within the toolset.
Downloadable Guide