Table of Contents
Overview
This document will guide the Admin or local IT in the process of locating and setting up a label printer’s printing preferences after it has been installed on the workstation/server.
Required Permissions
Accessing the Printer - pre Windows 10
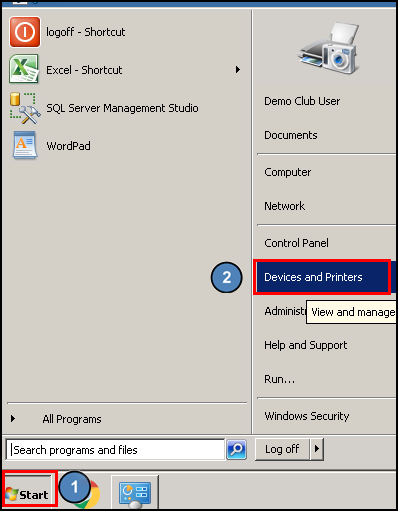
Navigate to the Start menu, then select Device and Printers from the right hand list. This opens the Printer list in a file explorer window.
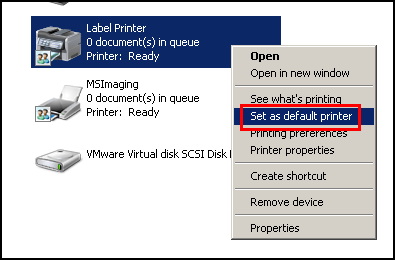
Find and right-click the applicable label printer and select Set as default printer.
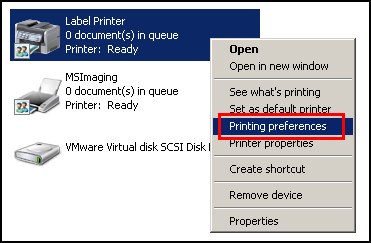
Once the printer is set as the default, right-click the printer again and select Printing Preferences.
Paper Style DK1209 Preferences
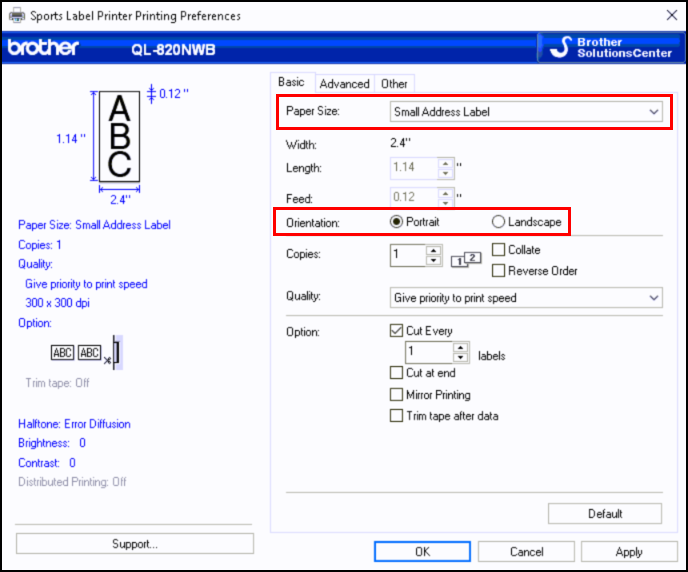
Within the Printing Preferences window,
Navigate to the Basic Tab.
Select the correct Paper Size (this will depend on what size the club purchases however is normally Small Address Labels).
Next, select the Orientation of Portrait.
Under the Option portion, select Cut Every to choose the number of labels to print before cutting, as well as Cut at end of the print job if desired.
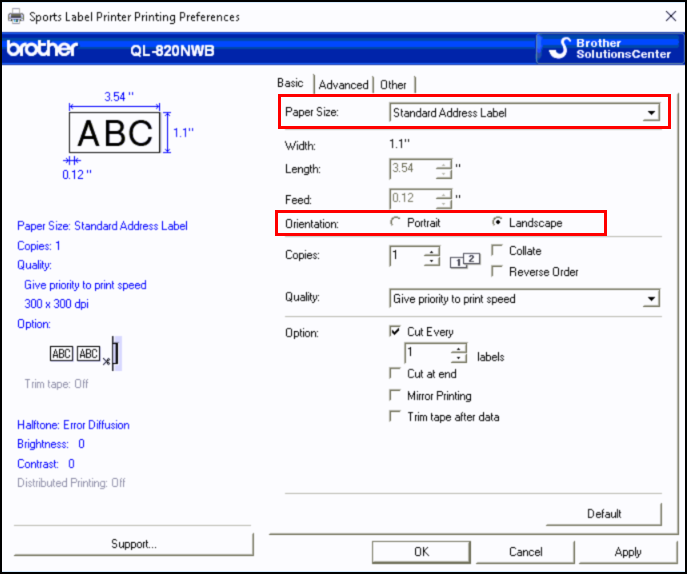
Paper Style DK1201 Preferences
Within the Printing Preferences window,
Navigate to the Basic Tab.
Select the correct Paper Size (this will depend on what size the club purchases however is normally Standard Address Labels).
Next, select Orientation of Landscape.
Under the Option portion, select Cut Every to choose the number of labels to print before cutting, as well as Cut at end of the print job if desired.
Access Printer - Windows 10
To access the label printer on a Windows 10 workstation,
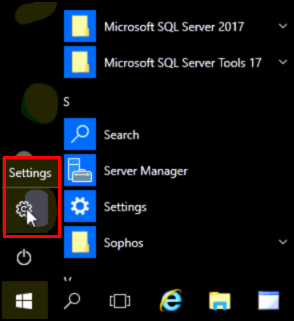
Navigate to the Start menu and select the Settings gear icon.
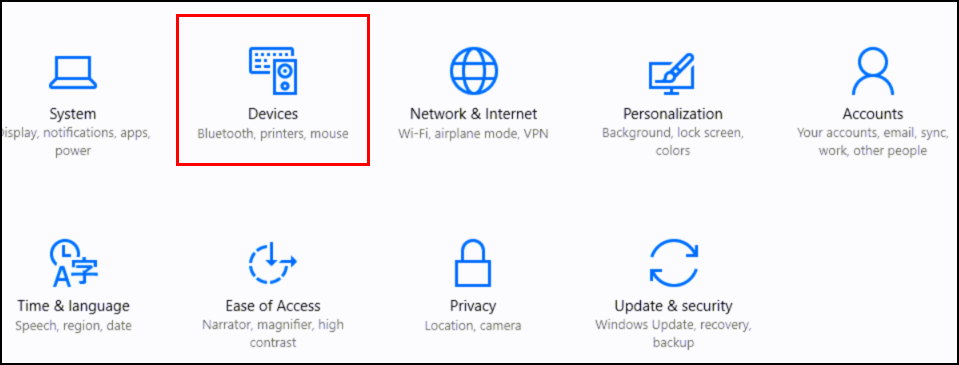
Select Devices (Bluetooth, printers, mouse).
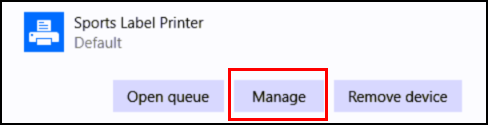
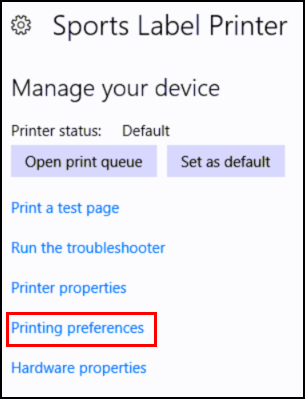
Within the list of printers, click Manage next to the printer in question.
Click Printing Preferences.
Follow the same instructions as above to update the preferences.
Best Practices
F.A.Q.s
Q. Why can’t I find the printer in the drop down when attempting to print labels from CMA?
A. Most likely the workstation the club is trying to print from isn’t connected to the label printer. Make sure Local IT has installed the printer.
Q. I see an error about paper size when attempting to print labels from CMA?
A. If the club chooses a different size from the dk1209 or dk1201 then they will need to select the correct size and orientation in order to match in the printer’s preferences.
Q. Can I install the label printer on the server?
A. Yes it needs to be networked with its own IP address and share name. This will allow any networked workstation to find the printer and print labels to it.
