Table of Contents
Overview
The Inventory Adjustment Wizard allows an authorized user to make adjustments to Inventory in terms of both quantity and cost. Additionally, the overall average cost of an Item may be adjusted utilizing this tool.
Required Permissions
Items Module
Inventory Adjustment Wizard
Accessing the Tool
To access the Inventory Adjustment Wizard:
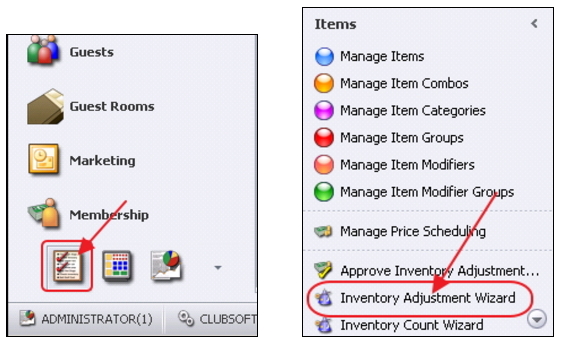
Select the Items module.
Select Inventory Adjustment Wizard.
Prepare - Post All Charge/Inventory Batches
Prior to performing any steps related to the Inventory Adjustment Wizard, care must be taken to ensure all POS charge batches and Inventory batches are posted.
To review for unposted batches, within Items:
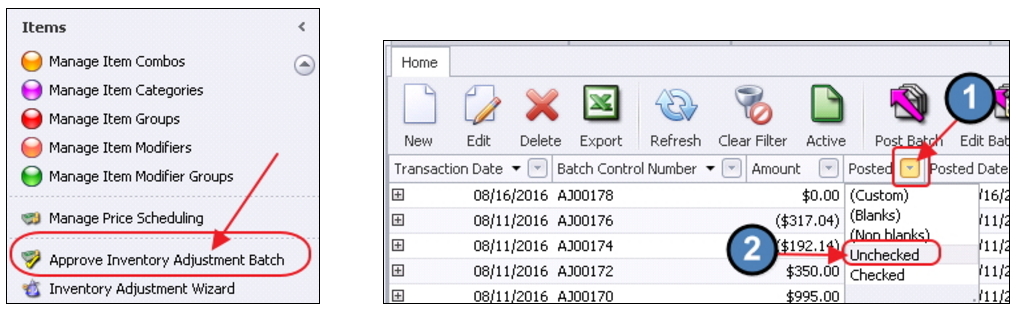
Click on the Approve Inventory Adjustment Batch.
Set Posted filter to Unchecked to return all unposted batches.
Contact Accounting to post any listed batches before continuing to next step.
Note: Clubessential is not allowed to change employee privileges for security purposes. If you are unable to access this feature, contact your Club Administrator.
Do NOT proceed to next step if you have not checked with your Accounting Office that all POS batches for your area have been posted.
Make Inventory Adjustment
Once all batches have been posted, navigate to the Inventory Adjustment Wizard.
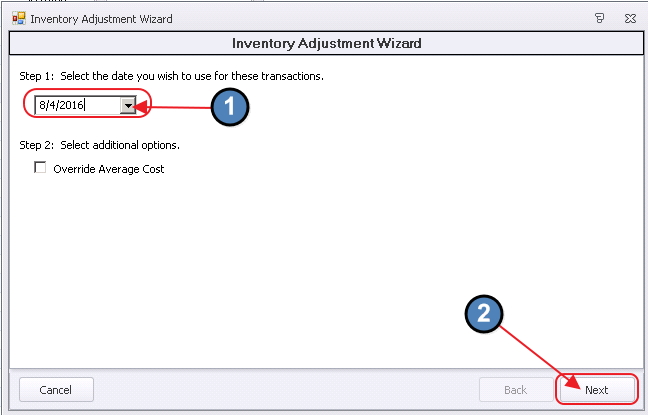
Enter the G/L date to use for the transactions. It will default to current date.
Click Next.
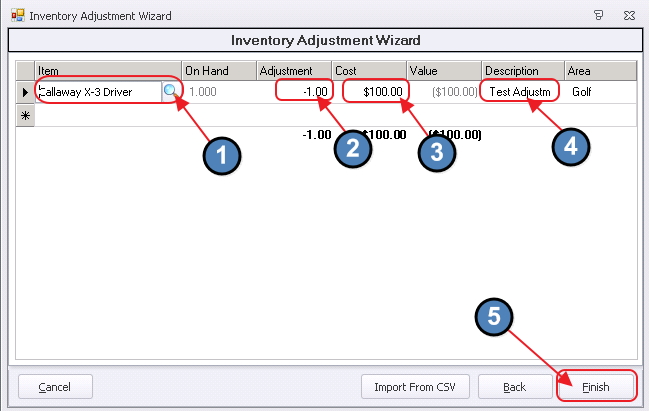
Next, enter the Adjustment.
Enter the Item (use the Lookup feature for assistance).
The On Hand Quantity will be displayed.
Enter the Adjustment (Quantity).
Enter Adjustment as a positive to increase inventory, or as a negative to decrease inventory.
The Cost field will populate with the Item’s current average cost. This may be overridden.
The Value field will calculate based on Quantity entered multiplied by Cost.
Enter a Description to describe the Adjustment (optional).
Add additional adjustments by repeating the above steps, and when all adjustment lines have been entered, click Finish.
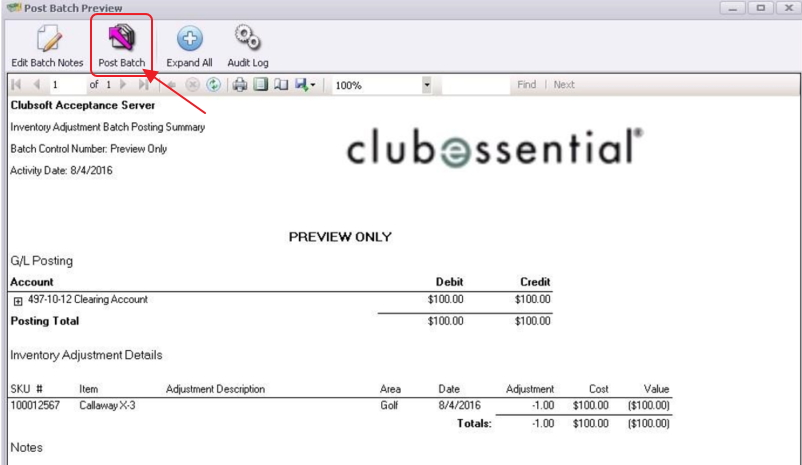
The Post Batch Preview screen will show the adjustment that will be made to the GL.
Click Post Batch to post.
Review - Inventory Transaction History
The Inventory Transaction History Report will contain the posted batch, as well as the adjustment amount for future reference.
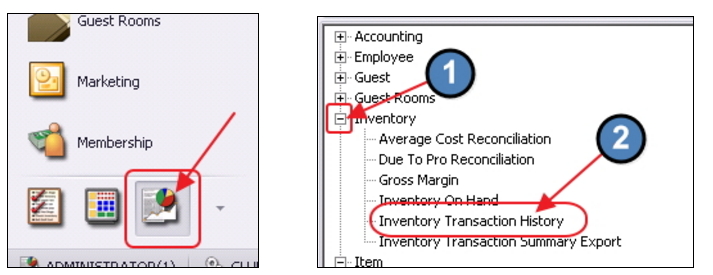
Click on Interactive Reports.
Expand the Inventory Report section.
Choose Inventory Transaction History report.
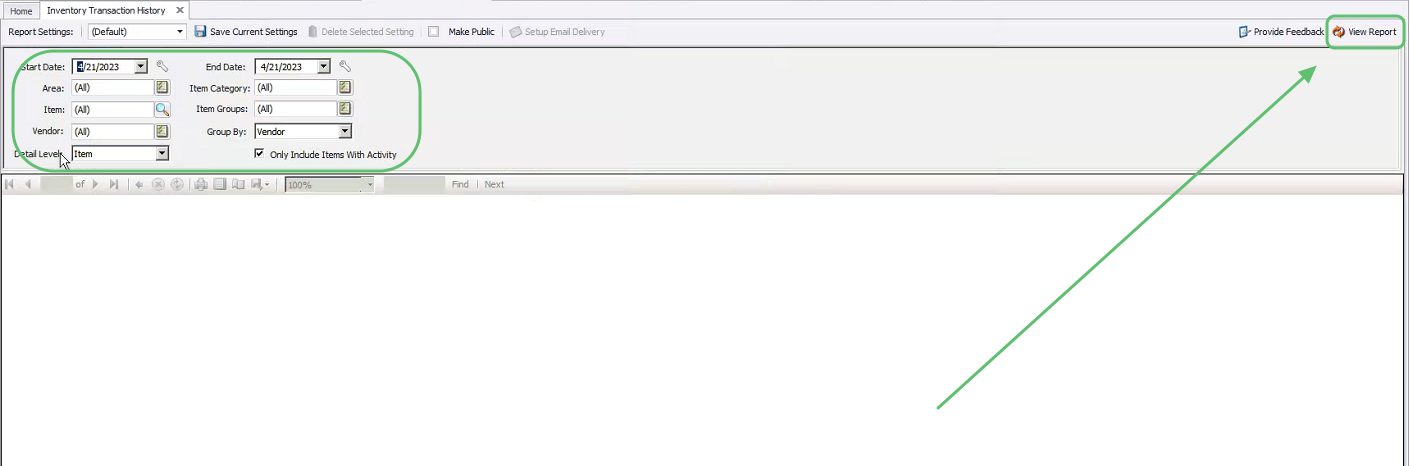
Set appropriate parameters and click, View Report.
Click to expand and view the details of the adjustment.
Inventory Adjustment - Override Average Cost
In addition to regular Inventory Adjustments, a Club may also wish to override the entire average cost of an item.
This could be performed in conjunction with an inventory restructuring that will impact item’s cost, and/or a general inventory clean up.
When performing an override of the average cost:
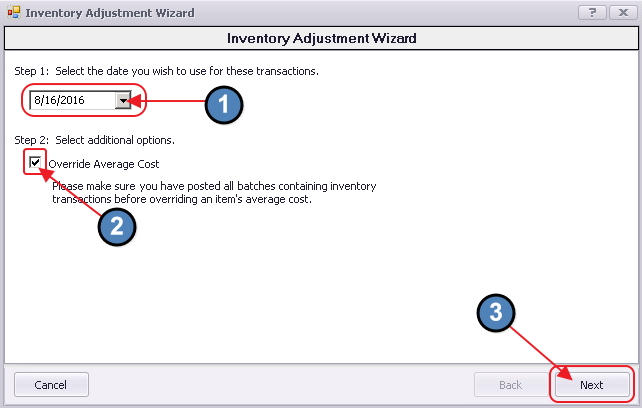
In addition to specifying the G/L date to use for the adjustment,
Ensure to check the Override Average Cost option.
Click Next.
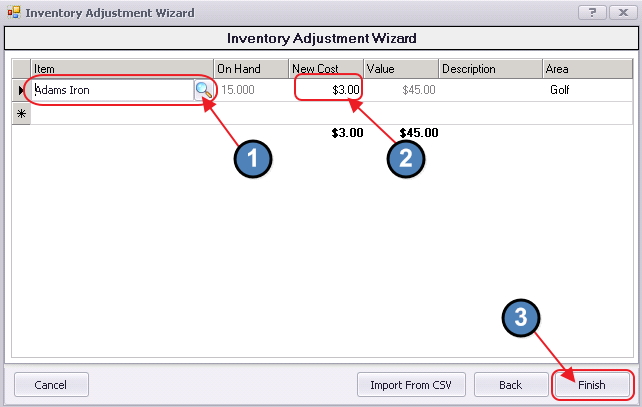
On the following screen:
Enter the Item(s). The On Hand quantity will display.
Enter the New Cost (the new Average Cost) for the item.
Click Finish.
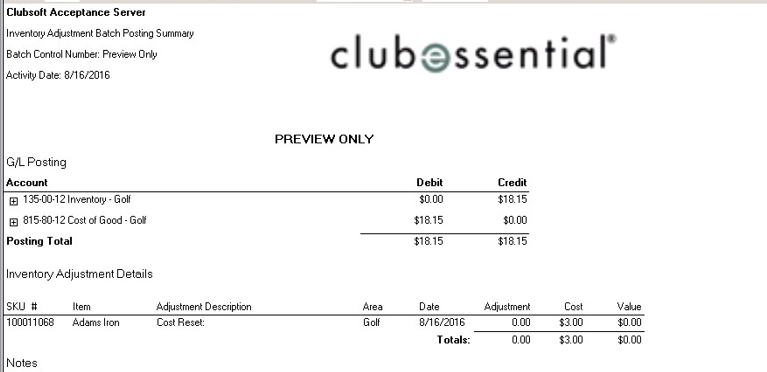
The Post Batch Preview will appear and will display the dollar adjustment that will be made to the G/L. Once reviewed, click Post Batch.
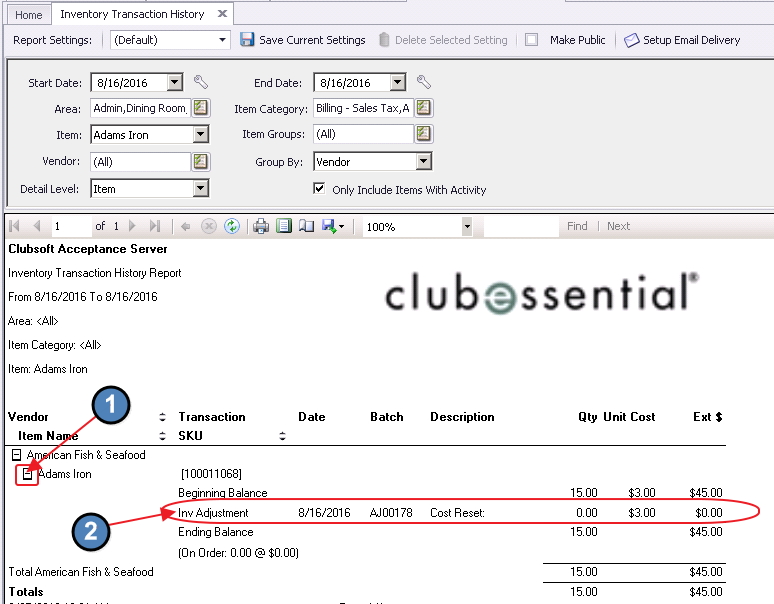
Again, the Inventory Transaction History Report will contain the posted batch, as well as the adjustment amount for future reference. Click to expand and view details.
Best Practices
Consult your Accounting Department prior to making any adjustments to ensure all batches have been posted.
Review Inventory Adjustment batch prior to posting to ensure desired results are obtained.
Use the Inventory Transaction History Report to help research/review adjustments impacting the Item’s cost or quantity.
Cost adjustments and overrides need to be made on items with positive quantity.
Making a cost adjustment on a 0 quantity or negative item will result in no change.
If you have a quantity of -1 and you want to shift that quantity to 0, you will need to input a +1 in the adjustment wizard.
The way the wizard works is that it adds the adjustment amount to the current quantity which gives you the final quantity amount.
We advise against back dating adjustment batches by several days. The adjustment batches may be backdated but the changes are not actually retroactive. This in turn can result in confusion as the adjustment applies to the day you created it and moving forward. This could throw count off between the grid and the Inventory transaction report. It could also cause issues with the item price based on retroactive expectations vs actual functionality.
We recommend you make price adjustments and quantity adjustments on different days due to how it can throw the grid out of balance with the reports as well.
Selling items with a negative qty will cause the average cost to go out of the norm. This cannot be avoided in some circumstances when doing a refund or return of an item. This can be easily corrected by following the steps to Override the Average Cost.
FAQs
Q. How do I know all batches have been posted?
A. To review for unposted batches, within Items, click on the Approve Inventory Adjustment Batch. Set Posted filter to Unchecked to return all unposted batches. Contact Accounting to Post batches.
Q. What if I can’t access Approve Inventory Adjustment Batch?
A. Contact your Club Administrator for access issues. Additionally, contact your Accounting department to ensure all appropriate batches have been posted prior to performing an Inventory adjustment.
Q. What’s the difference between using the Override Average Cost button and adjusting the Cost on screen 2 of the Inventory Wizard?
A. The Override Average Cost feature is to be used only when resetting the Item’s overall average cost, impacting all units of the Item. If an adjustment is being made to a subset of the total quantity of the Item (for instance 2 units when a total of 10 are on hand), the cost should be adjusted on screen 2 of the Inventory Wizard, and the Override Average Cost button should not be selected.
Q, How is the Average Cost Calculated?
A, The Average cost is a running average for the lifetime of the item. The system calculates the cost that the item is receipted in by as well as any adjustments to add or remove qty of an item. The Override will reset the average cost to the amount you choose but going forward, the calculation will be based on a running average for any new Item Receipts or Adjustments. The inventory system does not use a First in First out method, so the system will not say X number of items were receipted in with cost of Y and then X number of items were receipted in with a cost of Z. The system will do Y + Z / X + X = Average cost.
