Table of Contents
Overview
The Office system allows the user to enter non-member payments if applicable. This feature can only be utilized for Cash Receipt Payments (including checks); no other form of payment can be entered as a non- member payment.
Required Permissions
Membership
Member Payments Add/Edit/Delete
Accessing the Tool
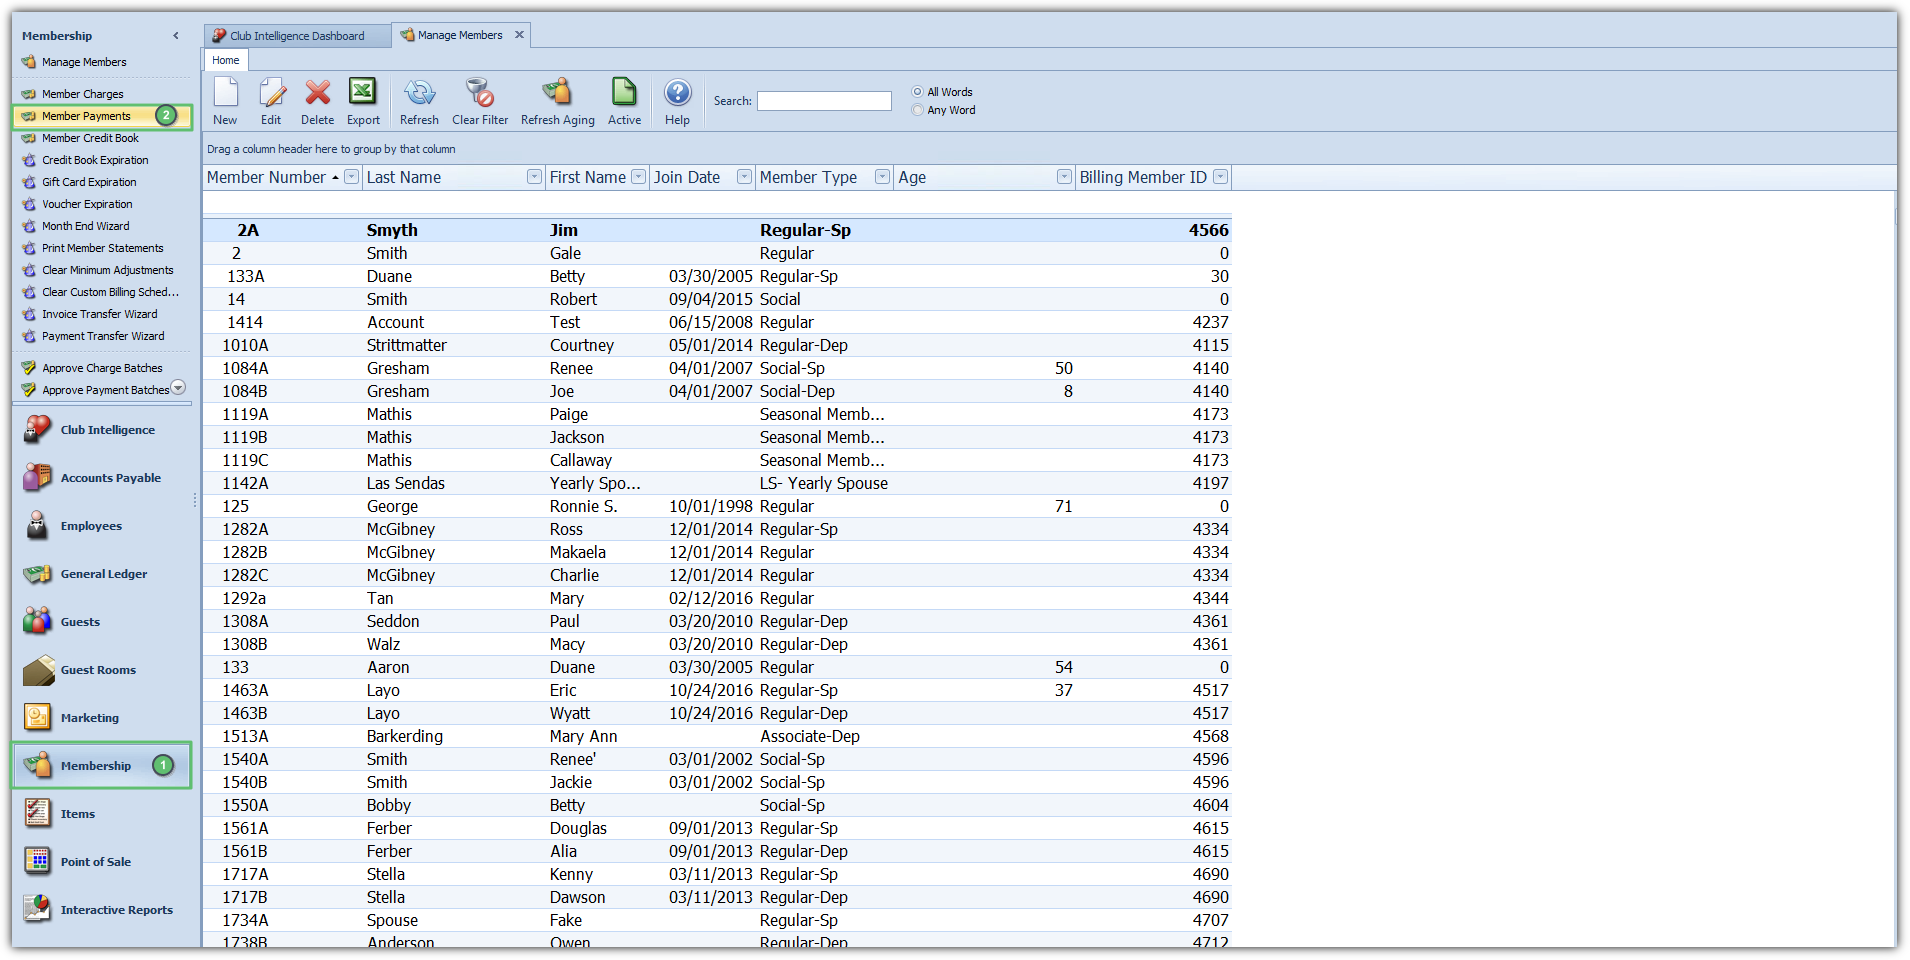
To enter a Non-Member Payment, log into CMA using your Credentials.
Select the Membership Module from the user menu, and then choose Member Payments.
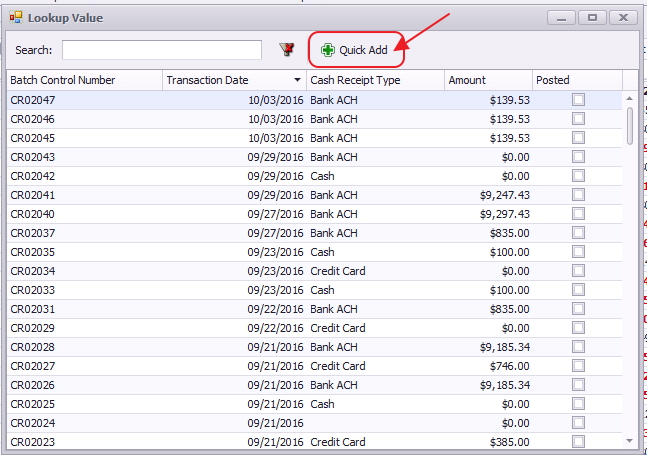
Select, Quick Add.
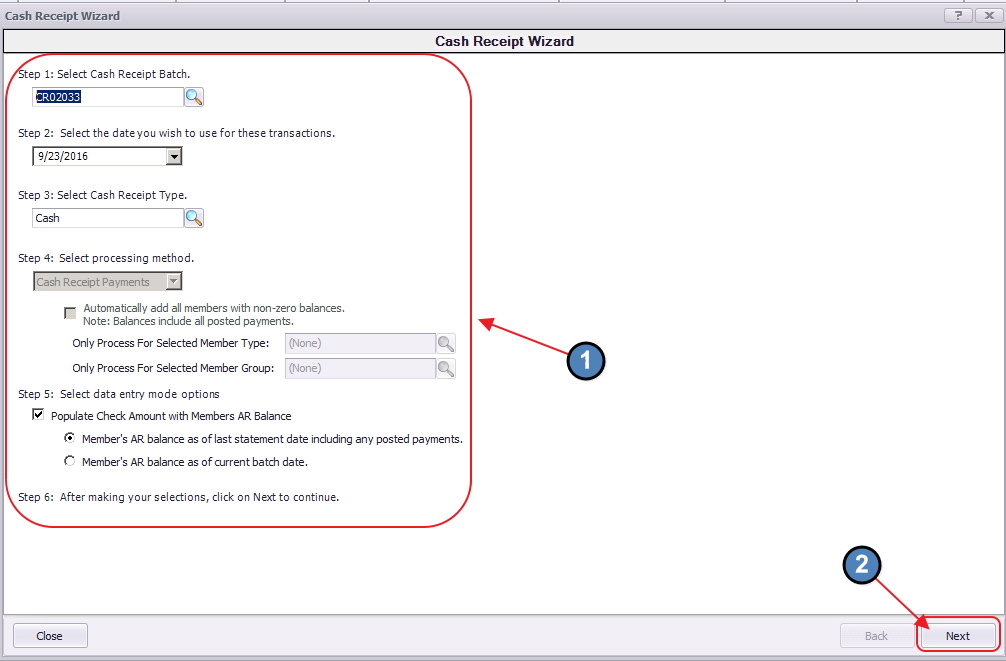
The Cash Receipt Wizard will launch.
Enter Non-Member Cash Receipt
Enter the appropriate information for a typical Cash Receipt Payment into each step of the Cash Receipt Wizard. For a refresher, refer to the Member Payments reference guide for more information.
Click, Next when complete.
Payment Entry Screen
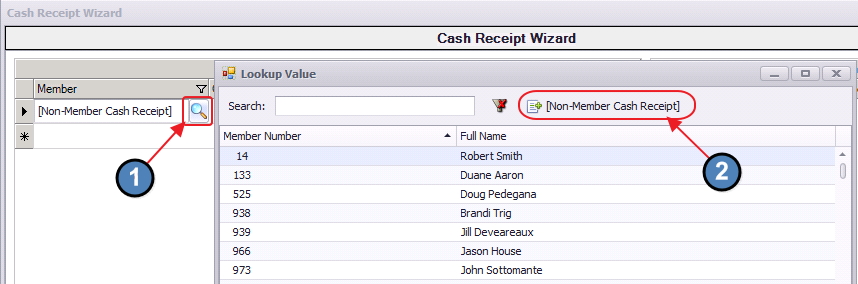
The payment entry for a Non-Member Payment is similar to entering a typical Cash Receipt Payment.
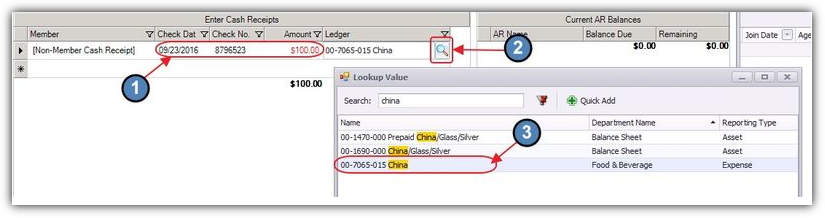
To enter a Non-Member payment, select the Lookup and choose Non-Member Cash Receipt.
Enter the Check Date, Check Number and Amount of the check.
Select the lookup and choose the appropriate Ledger.
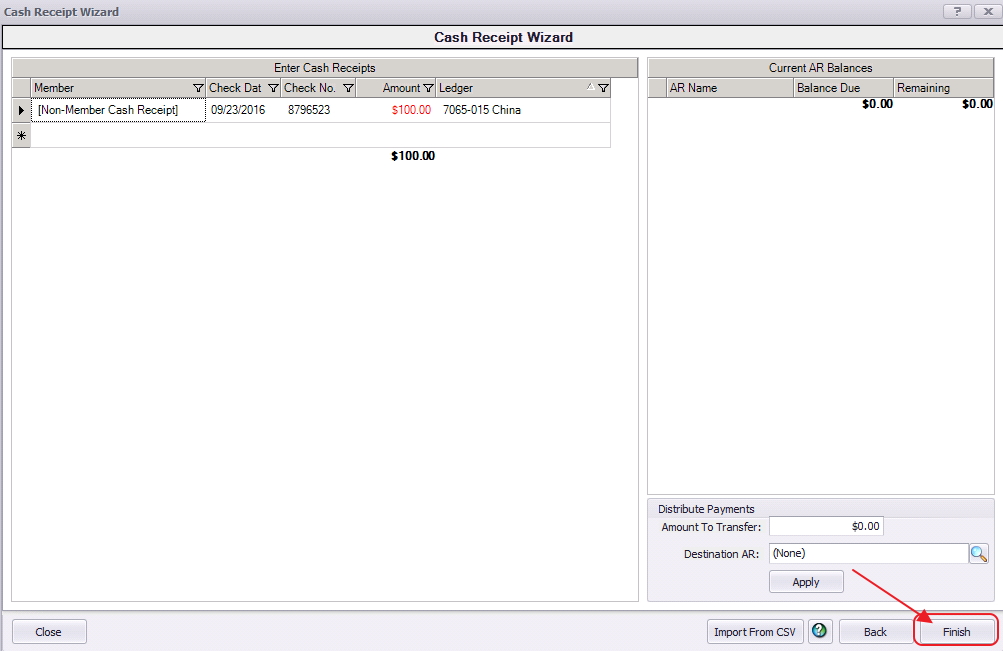
Repeat as necessary to enter all appropriate payments into batch.
When appropriate payments have been entered, click Finish.
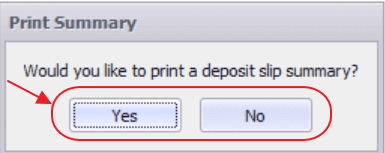
Once Finish has been selected, system prompt “Would you like to print a deposit slip?” will appear.
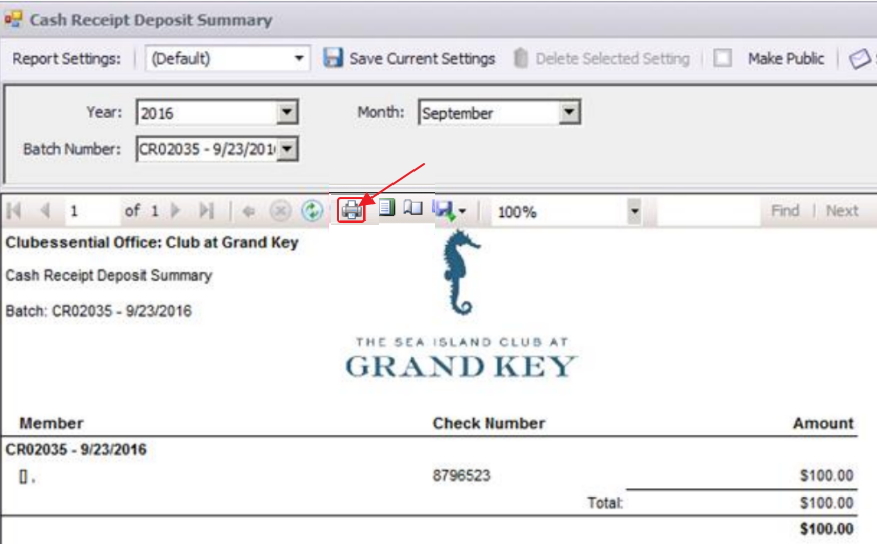
Click Yes to load the Cash Receipt Deposit Summary, and select printer icon to print the deposit slip. After the slip has printed, close the Cash Receipt Deposit Summary and the Payment Batch will generate.
Click No to proceed directly to generating the Payment Batch.
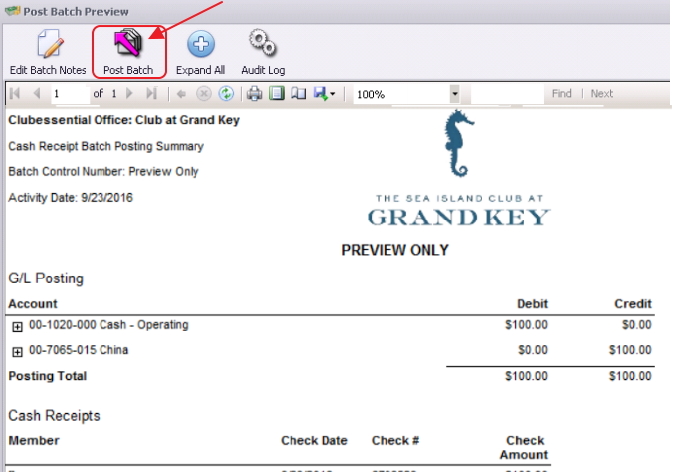
Verify the GL posting is correct and select Post Batch.
Payment(s) will post to G/L.
Editing Posted Payments
All Payment Batches can be un-posted unless they are flagged within a bank rec, in which case the system will not let the user un-post the batch. Follow same procedure for editing Member Payments as outlined in the Member Payments guide.
Best Practices
Enter Non-Member payments timely, and correct any errors in posting prior to marking amount as reconciled.
FAQs
Q. I accidentally entered the wrong amount for a Non-Member cash payment, how do I fix this?
A. Unpost the batch using the Approve Payment Batches function. Then, re-open batch (through the Wizard) to correct payment amount. Re-post when finished.
