Table of Contents
Overview
This guide is meant to assist in ensuring that your vendors are set up to receive their 1099s and includes the steps to generate them.
Required Permissions
Accounts Payable
Accounts Payables 1099s
Prior to Printing 1099s:
Check what Vendors are setup to receive a 1099 and the amount:
Go to Interactive Report.
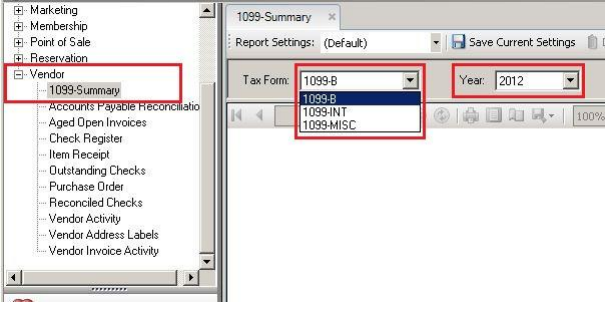
Click on the + sign next to Vendor > select 1099- Summary > Tax Form criteria will list the different tax form types: select a Form > select the Year > select View Report
Notes:
Run the report for each Tax Form Type
Only vendors who have been set up with a 1099 Form Type and a check mark on Use 1099 in vendor maintenance will be listed on the report.
Only vendors listed on the report will receive a 1099.
Make Corrections to the 1099 Amount or Form
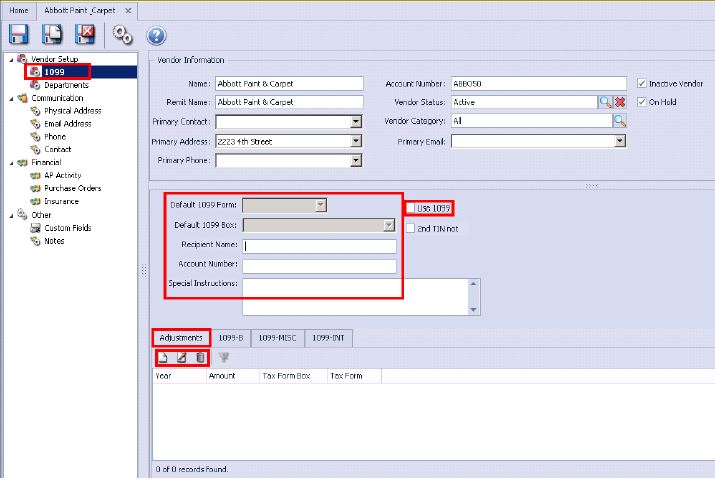
Go to Accounts Payable on left menu > select the Vendor you wish to edit > select the 1099 Tab on the left pane> On the Adjustment Tab click on the Add New icon
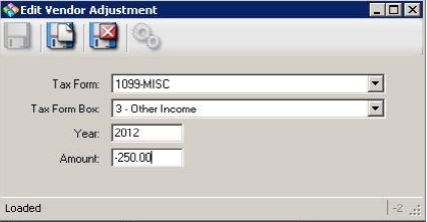
Enter the information and adjustment amount > Save and Exit the adjustment screen when done > Save and Exit the Vendor Maintenance screen.
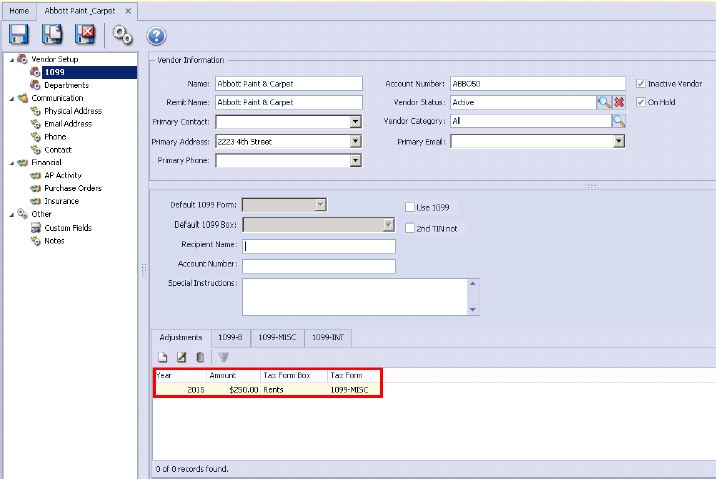
If there have been previous adjustments made they will be listed in Yellow; see below image.
You can edit the adjustment or delete by highlighting the line and choosing the Edit Icon or Delete icon .
If a Vendor is to receive different 1099 Forms for different services, make an adjustment entry and select the correct 1099 Form and Box for each amount.
Print 1099
The 1099 Wizard is used to print 1099 forms. It uses any standard form available at office supply stores It will only print 1099s for vendors who have met the payment threshold set by the government. Clubessential Office does not print the 1096, but the information needed to enter the information manually can be obtained using the 1099 Summary Report in Interactive Reports.
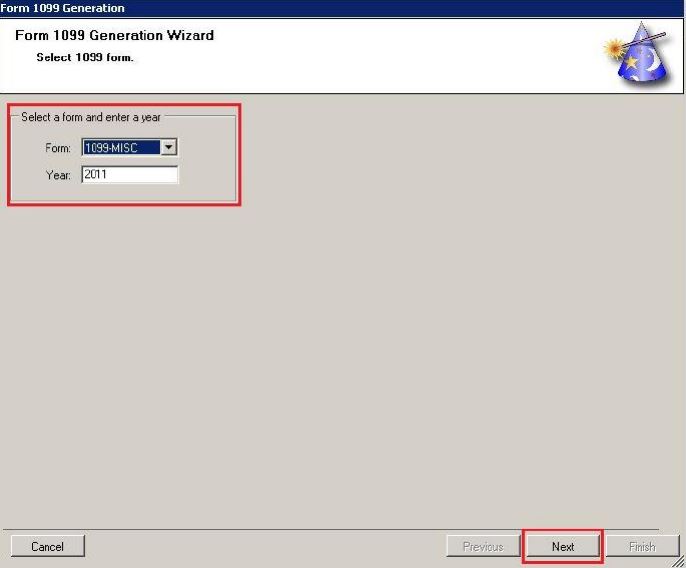
Select Accounts Payable on Left Menu > select 1099 Wizard > In the Form 1099 Generation Wizard select the form and year > select Next to move to step 2.
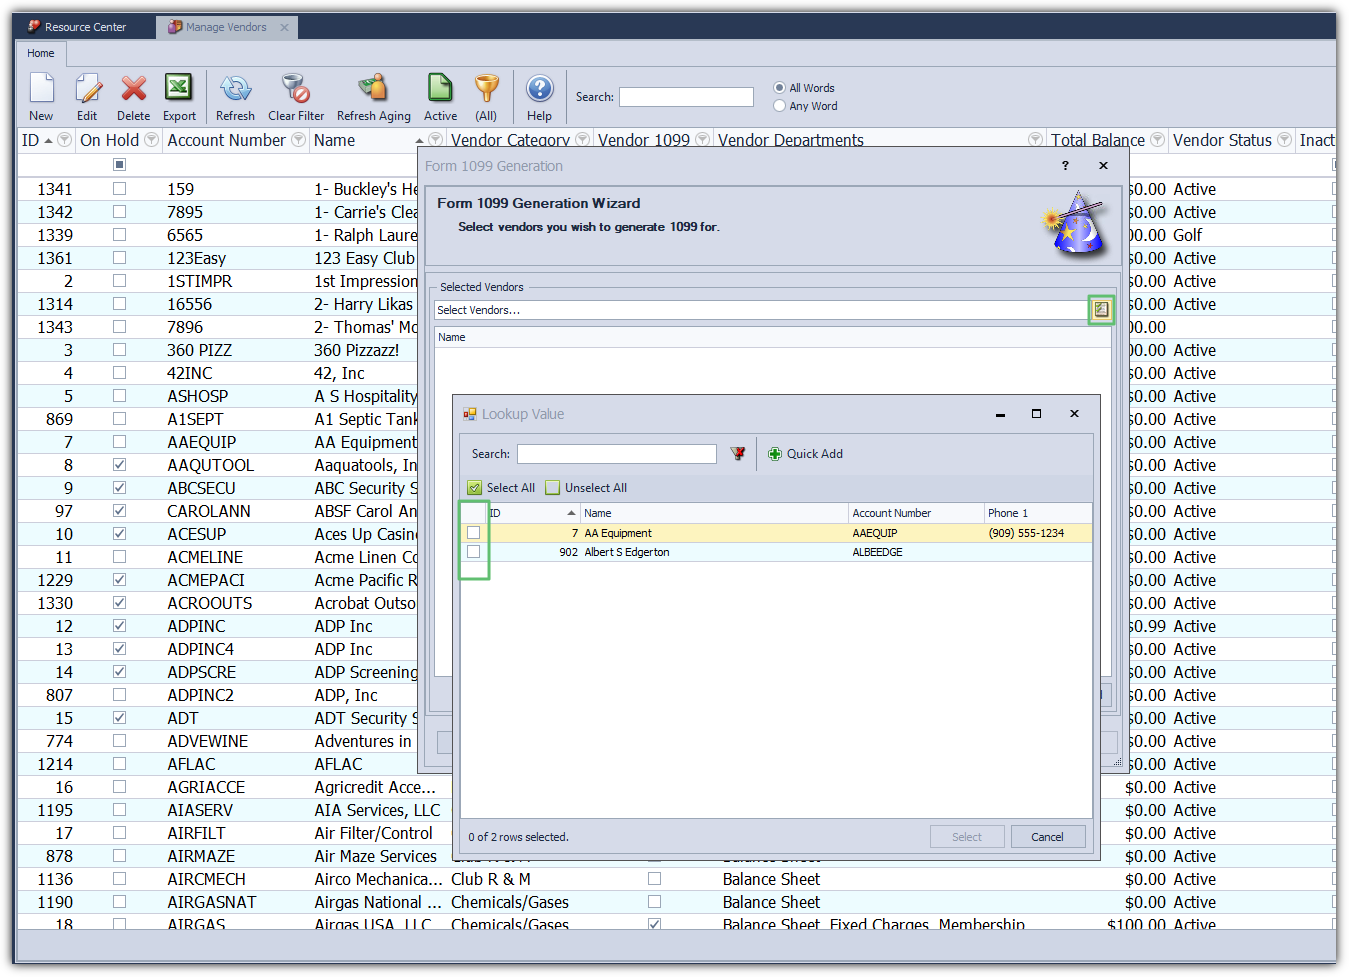
In the Available Vendor box will display only vendors setup to receive a 1099: highlight the vendor > using the arrows move the Vendor to Selected Vendor box > select Next to move to step 3.
Only Vendors in the Selected Vendor box will print a 1099
The double arrows will select all vendors, the single arrow will select only the vendor highlighted
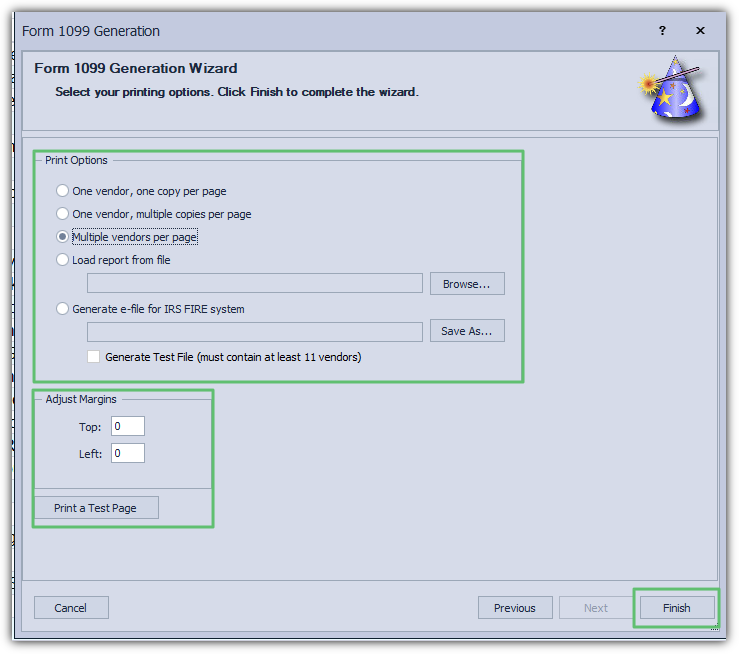
Select the Print Options > Adjust Margins if needed > Print a Test Page > Select Finish to move to step 4
Select the Print Option that matches the format being used
One Vendor, one copy per page
One vendor, multiple copies per page
Multiple vendors per page
Load report from file
Generate e-file for IRS FIRE system
Adjust Margins - Enter adjustment amounts in inches, .25 = ¼ inch.
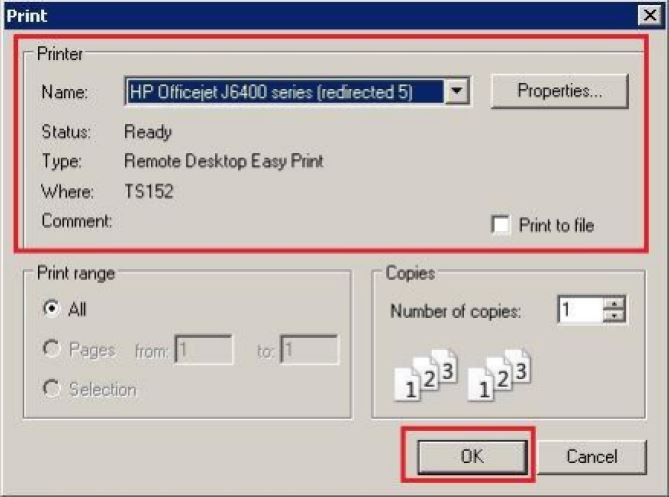
Select the Printer > number of Copies > select OK when ready to print
Select Close when printing is complete.
Best Practices
A recent update to the way businesses submit 1099s will cause most clubs to e-file the 1099s as the rule has to changed to any entity producing more than 10 1099s must now submit them electronically.
You must set up the 1099 File System Transmitter located in System>System Settings>Accounts Payable. The information required is provided to you by the IRS.
Once Set up, simply follow the Print 1099 steps, select the option to save the file to a name and location of your choice on your PC while in the 1099 Wizard.
This file is then uploaded to the IRS via your club’s IRS Portal.
FAQs
Does Clubessential sell 1099 Forms?
Clubessential does not sell 1099 Forms; they can be purchased at Staples, Office Depot or most office supply stores.
Can we print our 1096 through Clubessential?
Clubessential does not print the 1096, but the information needed to manually complete the 1096 form can be obtained from the 1099 Summary Report in Interactive Reports.
Do I have to enter the recipient name on the 1099 tab of vendor file or will it pick up the default vendor name?
You only need to enter the recipient name if the recipient name on the 1099 is different than the Vendor name.
In the 1099 generation wizard, do the available vendors include all vendors setup for 1099, or only ones that I’ve paid $600 or more this calendar year?
The 1099 Wizard will only include vendors that qualify for a 1099 form; vendors that were paid $600 or more.
