Office - Mobile POS - F&B Guide - As a Server - Member Check-in
Table of Contents
Overview
In this manual, we will discuss the various functionalities within our Mobile POS- F&B System.
Required Permissions
POS Terminal
Member Check In
The Check In tab is displayed when the user is signed into an Area where the Mobile POS device is configured for Member Check In.
Note: Please see Office - Manage Areas - POS F&B Areas for how to configure a Mobile POS device for Member Check In.
Members and Guests can be checked in by staff either by manual lookup or by scan/card swipe.
Member Check In by Manual Lookup
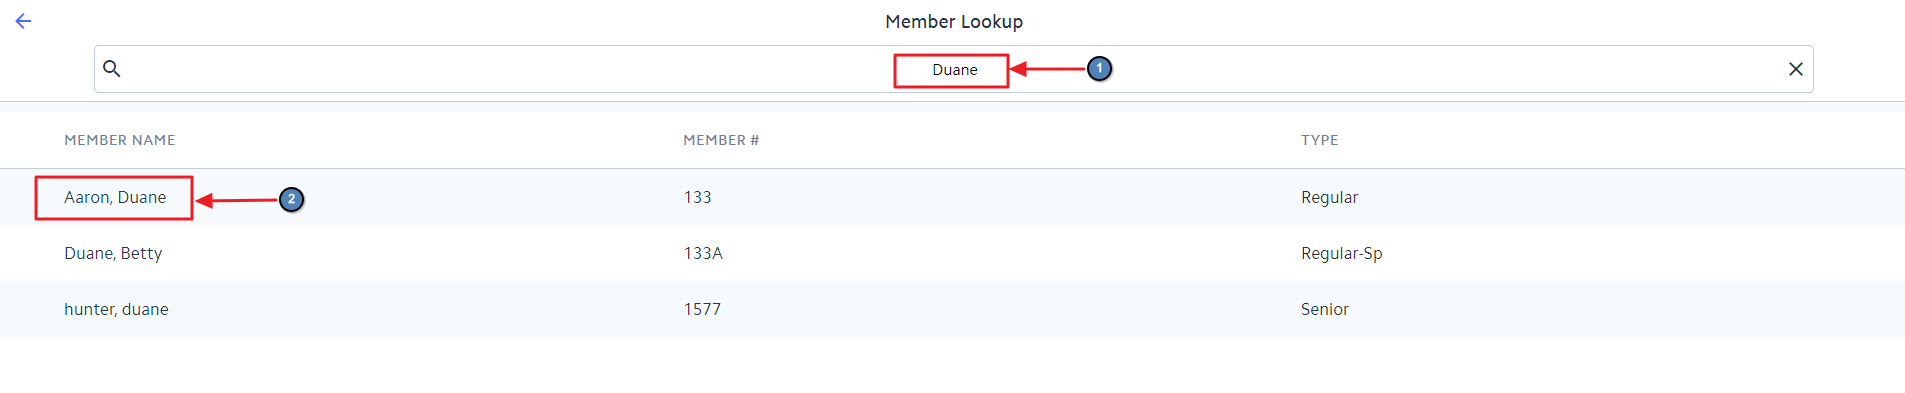
Click the Lookup button.
The Member Grid will populate. Search for and select the applicable Member.
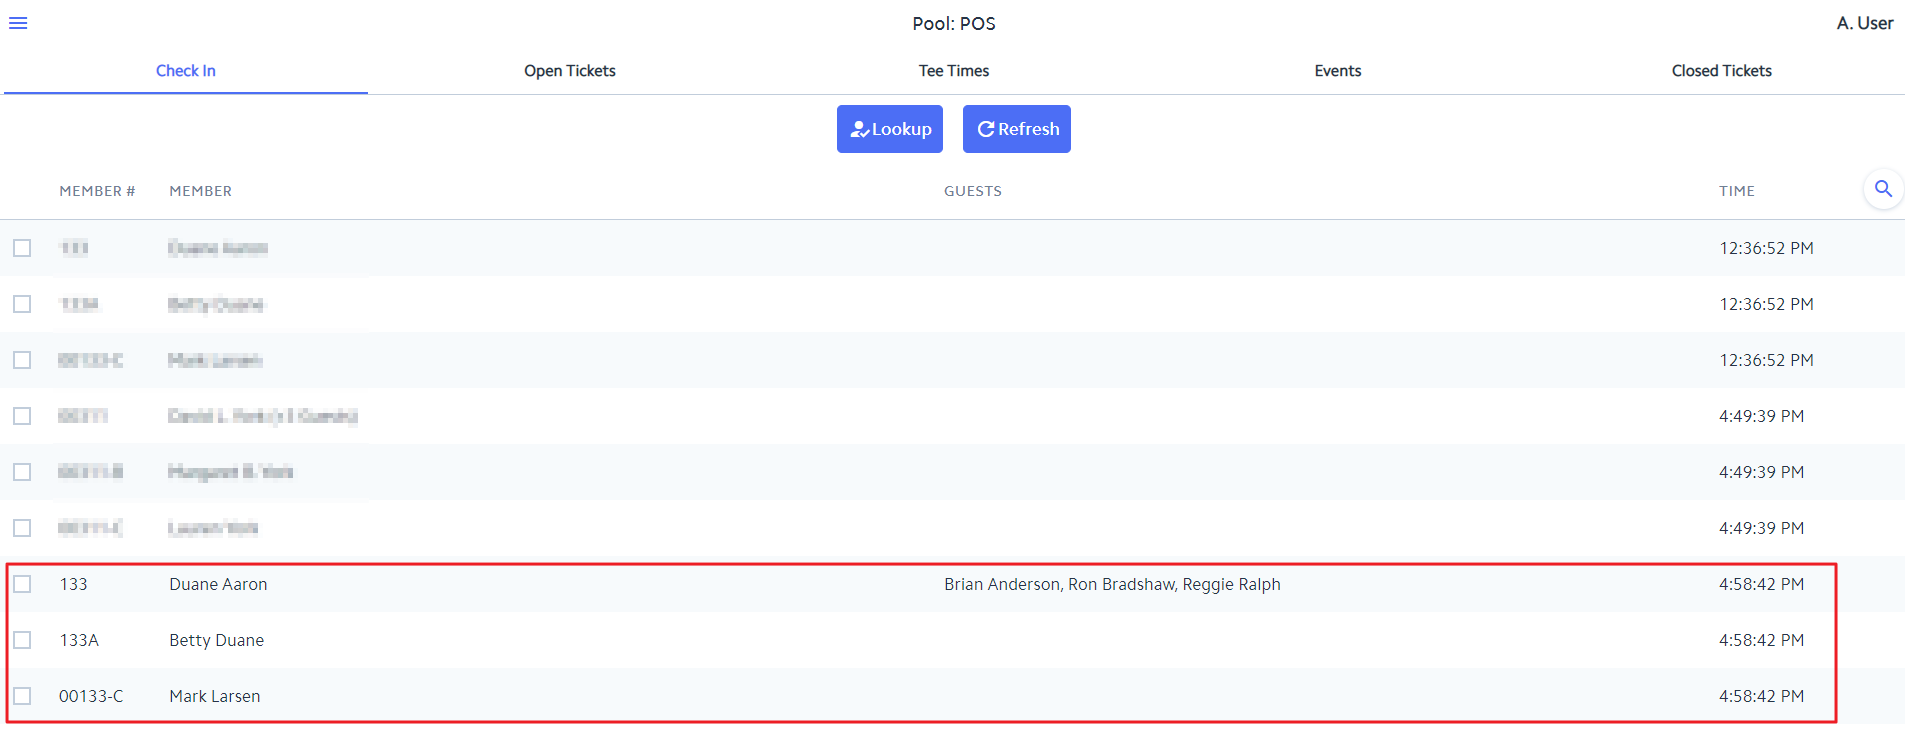
If the Area for the Mobile POS device is configured to Not Allow Family Check In upon Member Check In, then the Member will be checked in upon selecting them from the Member Grid. This screen shows how a Member appears after Check In.
Note: When the Area for the Mobile POS device is not configured to Allow Family Check In upon Member Check In, there is no way to check in a Member and their family at the same time. To check in Family Members, each Family Member needs to be found via the Member Lookup screen and selected from the Member Grid. In addition, Guests cannot be added to a Member Check In when not configured to Allow Family Check In.
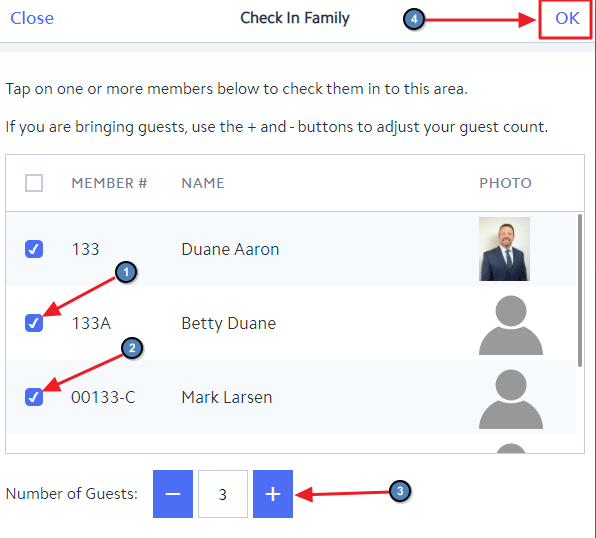
If the Area for the Mobile POS device is configured to Allow Family Check In upon Member Check In, both Family Members and Guests can be added to the Member's Check In at one time. When selecting the Member from the Member Grid, the Check In Family screen will appear allowing the the user to select Family Members, as well as indicate the number of Guests being checked in.
Click the check boxes of the Family Members to be included for Check In. Increase the guest count to indicate the Number of Guests to be included for Check In. Click OK.
When adding Guests to your Check In, users will experience one of two different behaviors depending on the configuration of the Item assigned to the Guest Check In Item POS Option for the Area.
Note: To find the Item assigned to the Guest Check In Item field for the Area, navigate in CMA to System, Areas, POS Options and find the Guest Check In Item specified in the Show POS Check In option. To then find the configuration of the Item, navigate in CMA to Items, Manage Items, Item Setup. The Ask for Guest option controls the behavior of adding Guests upon Check In. For more information, please Office - Manage Areas - POS F&B Areas for how to configure a Mobile POS device for Member Check In.
When the Item assigned to the Guest Check In is not configured to Ask for Guest, then the Member, Family Members and Guests will be checked in immediately after clicking OK. The user will not be required to enter the Guests' names or information. Instead, Guests will display as a Guest Count next to the Member Name on the Check In tab.
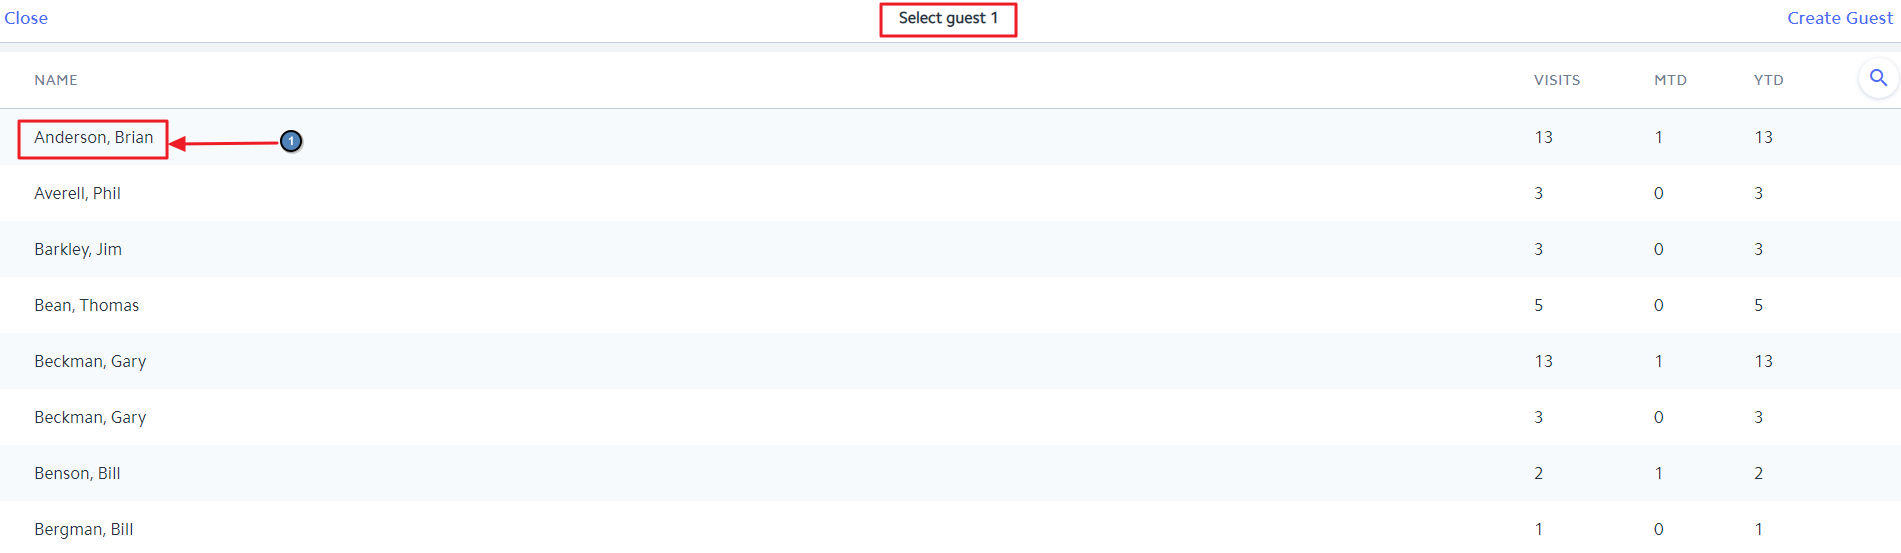
When the Item assigned to the Guest Check In is configured to Ask for Guest, the user will be prompted to select or create the Guests that are checking in. Since Guests are added one at a time, the user will be presented with a series of screens per the number of Guests indicated at Check In.
Guests that have already been added will appear in the Guest grid and can be selected.
Users can search for Guests by using the Search icon.
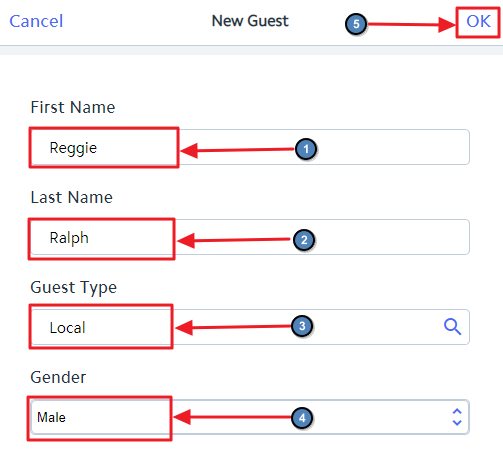
Users can add new Guests by clicking on Create Guest.
Add the required information for the new Guest and click OK.
After all Guests have been selected/created, the Member Check In will be complete. The Member, Family Members and Guests will be checked in and and will be displayed on the Check In tab.
Member Check In by Scan or Swipe
Member Check In by Scan or Swipe works the exact same way as Member Check In by Manual Lookup except that Members will be checked in immediately upon scanning/swiping a Member's Id if the Area for the Mobile POS device is not configured to Allow Family Check In. If the Area is configured to Allow Family Check In, the user will be taken to the Family Check In screen immediately after scanning/swiping a Member's Id. The steps to complete Check In from there are exactly the same as Member Check In by Manual Lookup.
Best Practices
If you find that you cannot perform certain tasks outlined in this guide, it may be due to a lack of permission. Please consult with your manager about access.
FAQs
Q: Can I sort various columns within the Mobile POS grid in ascending and descending order?
A: Yes, when navigating to any Mobile POS grid (Open Tickets, Dining, Events, Closed Tickets, Member Lookup, Item Lookup, Ticket Lookup, All Open Tickets, etc.), any column can be sorted in ascending or descending order by clicking on the column header. When a column is sorted, an arrow will appear indicating the sort order of the column. The up arrow indicates the column is sorted in ascending order. The down arrow indicates the column is sorted in descending order.
Q: When viewing the Closed Tickets grid in Mobile POS, can I see all closed tickets for any F&B Area?
A: When logged into a F&B Area, only closed F&B tickets for the Area(s) the user has the rights to view will be shown in the Closed Ticket grid.
