Office - Mobile POS - F&B Guide - As a Server - Open Tickets Tab
Table of Contents
- 1 Overview
- 2 Required Permissions
- 3 Open Tickets Tab
- 3.1 Unlock
- 3.2 Transfer
- 3.3 Member Charge
- 3.4 Delete
- 3.5 Multi-Edit
- 3.6 Quick Ticket
- 4 Best Practices
- 5 FAQs
Overview
In this manual, we will discuss the various functionalities within our Mobile POS- F&B System.
Required Permissions
POS Terminal
Open Tickets Tab
The Mobile POS will default to open on the Open Tickets Tab. Not only can users open a new ticket and an existing ticket from this Tab, they can also Unlock, Transfer, Member Charge, and Delete a Ticket from the Open Tickets Tab. Each option is explained below.
Unlock
If a Ticket is locked the text will be red. A Ticket becomes locked when another user is in the Ticket, but could also become locked when there is a disruption of service or other connectivity errors. If a user tries to open a locked ticket, a red warning will alert them that the ticket has been locked by another employee. Please follow instructions below to Unlock a Ticket.
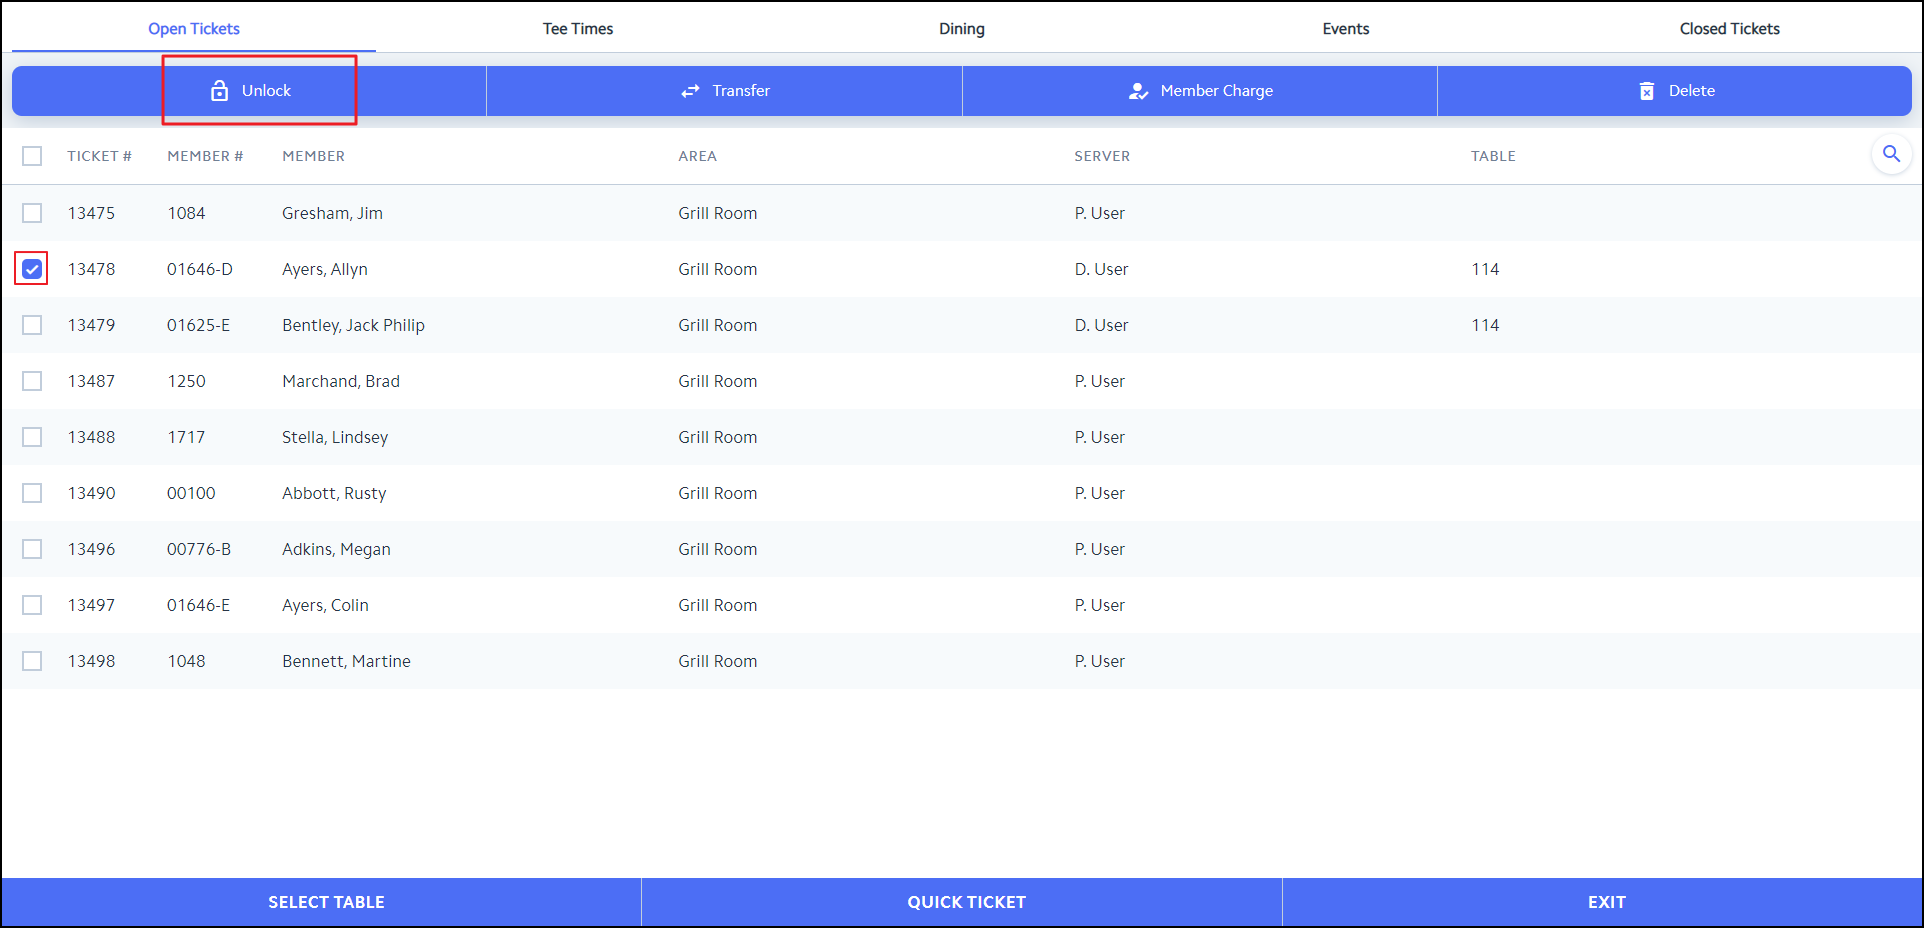
Select the checkbox to the left of the Ticket that needs Unlocked.
Additional options will populate. Select Unlock.
A prompt will then populate telling the user if they were successful or unsuccessful in Unlocking the Ticket. Select the X on the right of the prompt to close it.
Transfer
The Transfer option allows the user to transfer tickets between servers. This function is useful when servers have a shift change. Please follow instructions below to Transfer a Ticket.
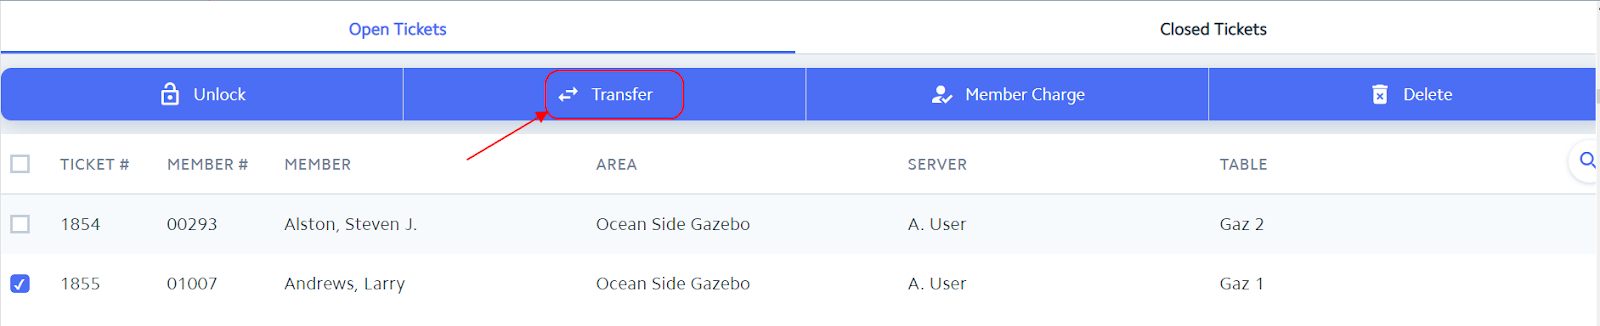
Select the checkbox to the left of the Ticket that needs Transferred.
Additional options will populate. Select Transfer.
Search for the applicable Employee and select their Name.
A prompt will then populate telling the user if they were successful or unsuccessful in Transferring the Ticket. Select the X on the right of the prompt to close it. If successful, the Ticket will then show on the Open Tickets Tab of the Employee selected in the previous step.
Member Charge
The Member Charge option gives users the ability to Member Charge a Ticket directly from the Open Tickets Tab. Please follow instructions below to Member Charge a Ticket from this Tab.
Select the checkbox to the left of the Ticket that needs Member Charged.
Additional options will populate. Select Member Charge.
A prompt will then populate telling the user if they were successful or unsuccessful in Transferring the Ticket. Select the X on the right of the prompt to close it. If successful, a Settle Receipt will then print for the Ticket selected in the previous step.
Delete
The Delete option gives users the ability to Delete a Ticket directly from the Open Tickets Tab. Please follow instructions below to Delete a Ticket from this Tab.
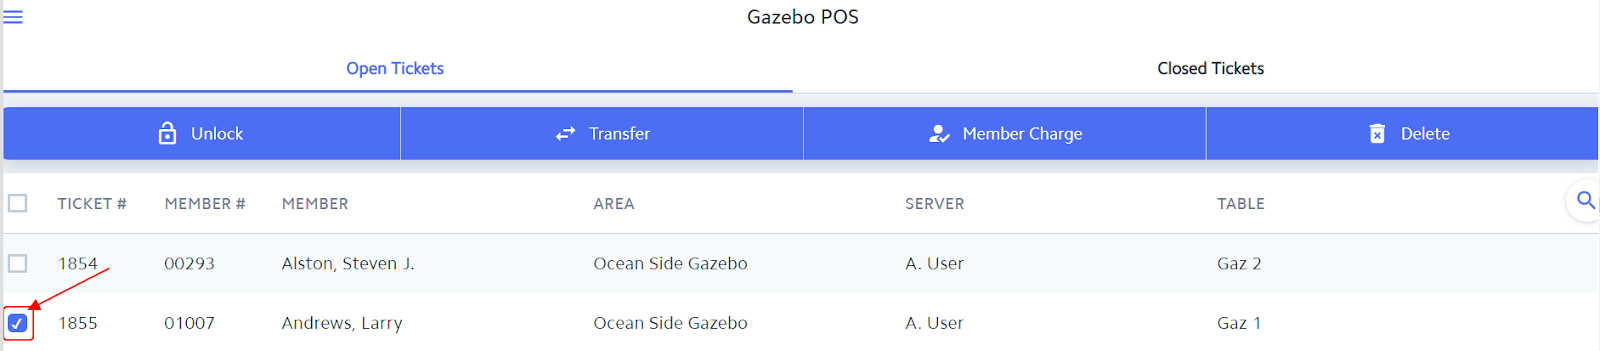
Select the checkbox to the left of the Ticket that needs Deleted.
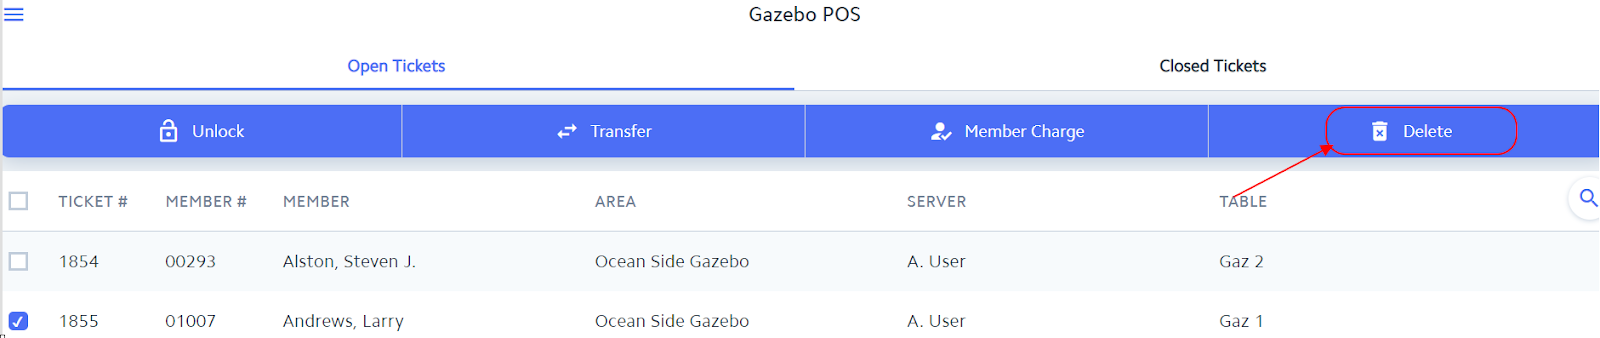
Additional options will populate. Select Delete.
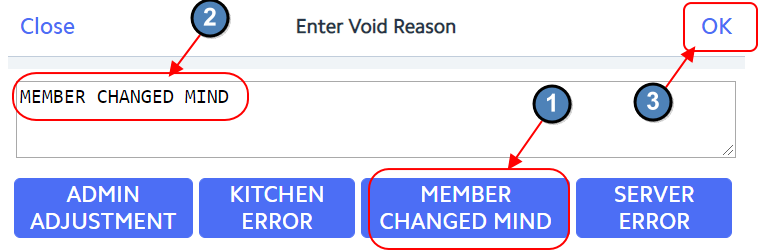
If the Ticket has already been sent to the Kitchen, the user will be prompted to Enter a Reason for Voiding the Ticket. A Void Ticket will then be sent to the Kitchen. Click OK when finished.
A prompt will then populate telling the user if they were successful or unsuccessful in Deleting the Ticket. Select the X on the right of the prompt to close it.
Multi-Edit
Please follow instructions below in the event a user needs to edit multiple Tickets at once (Eg. Transfer multiple Tickets to a new server).
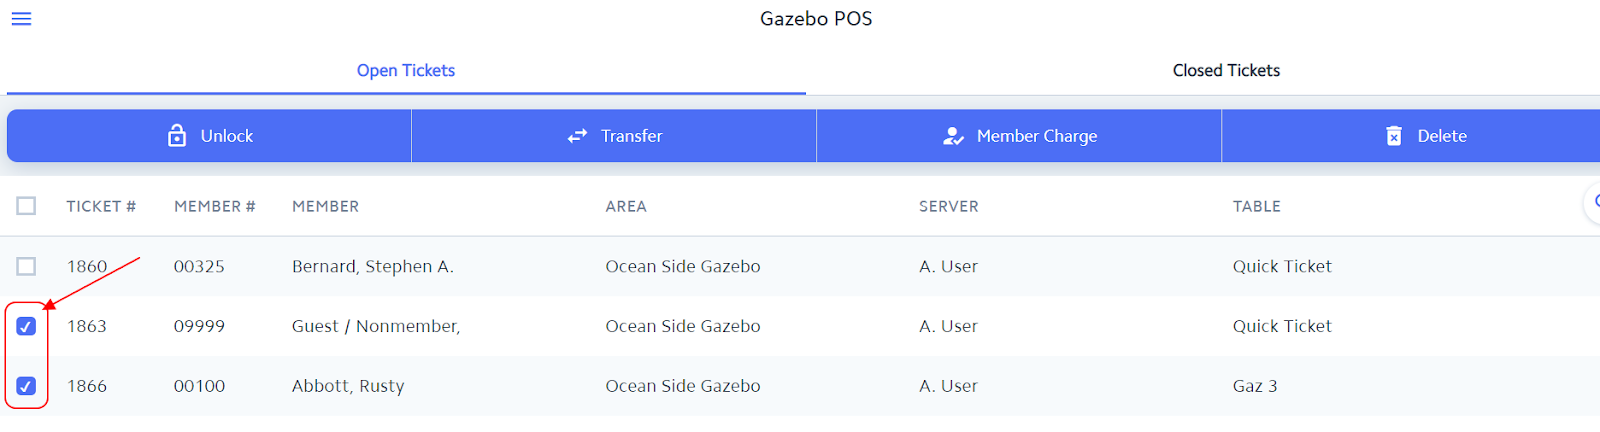
Select the checkbox to the left of the tickets that need to be edited.
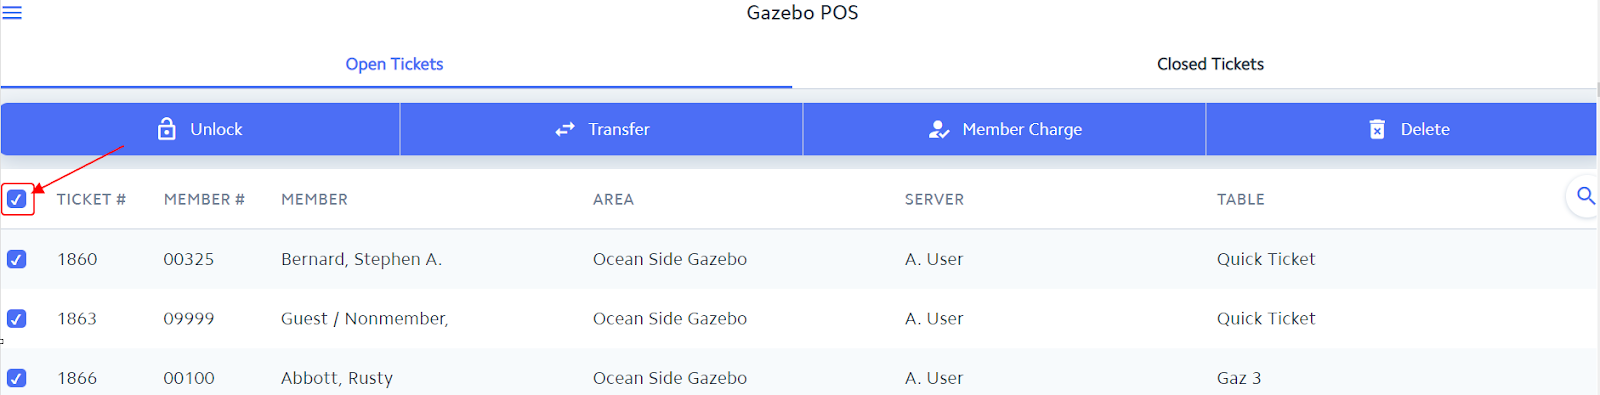
Note: To select ALL Tickets at once, select the check box to the left of Ticket #
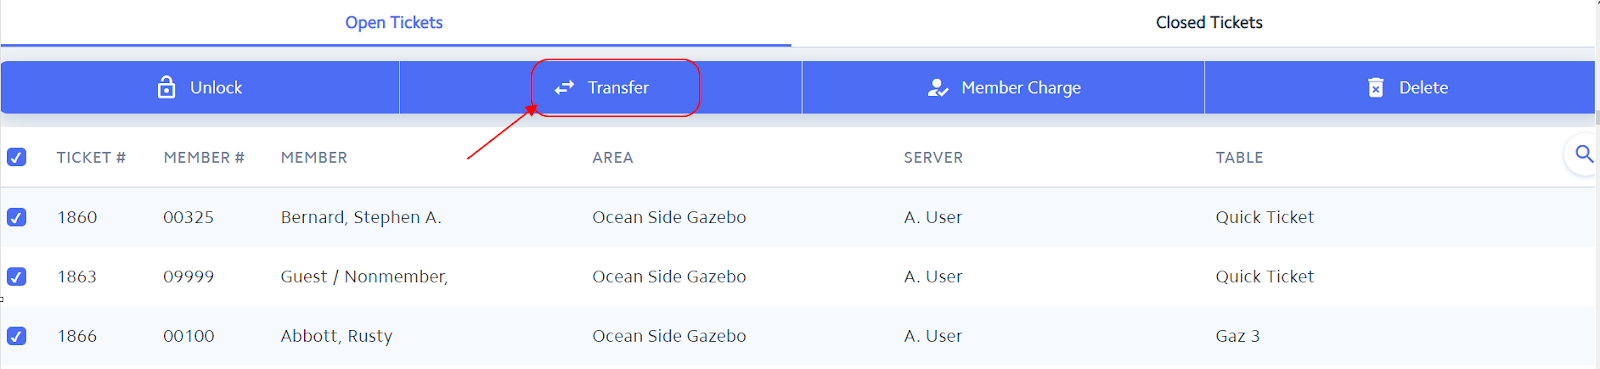
Additional options will populate. Select the applicable option and follow additional prompts.
A prompt will then populate telling the user if they were successful or unsuccessful in editing the Tickets. Select the X on the right of the prompt to close it.
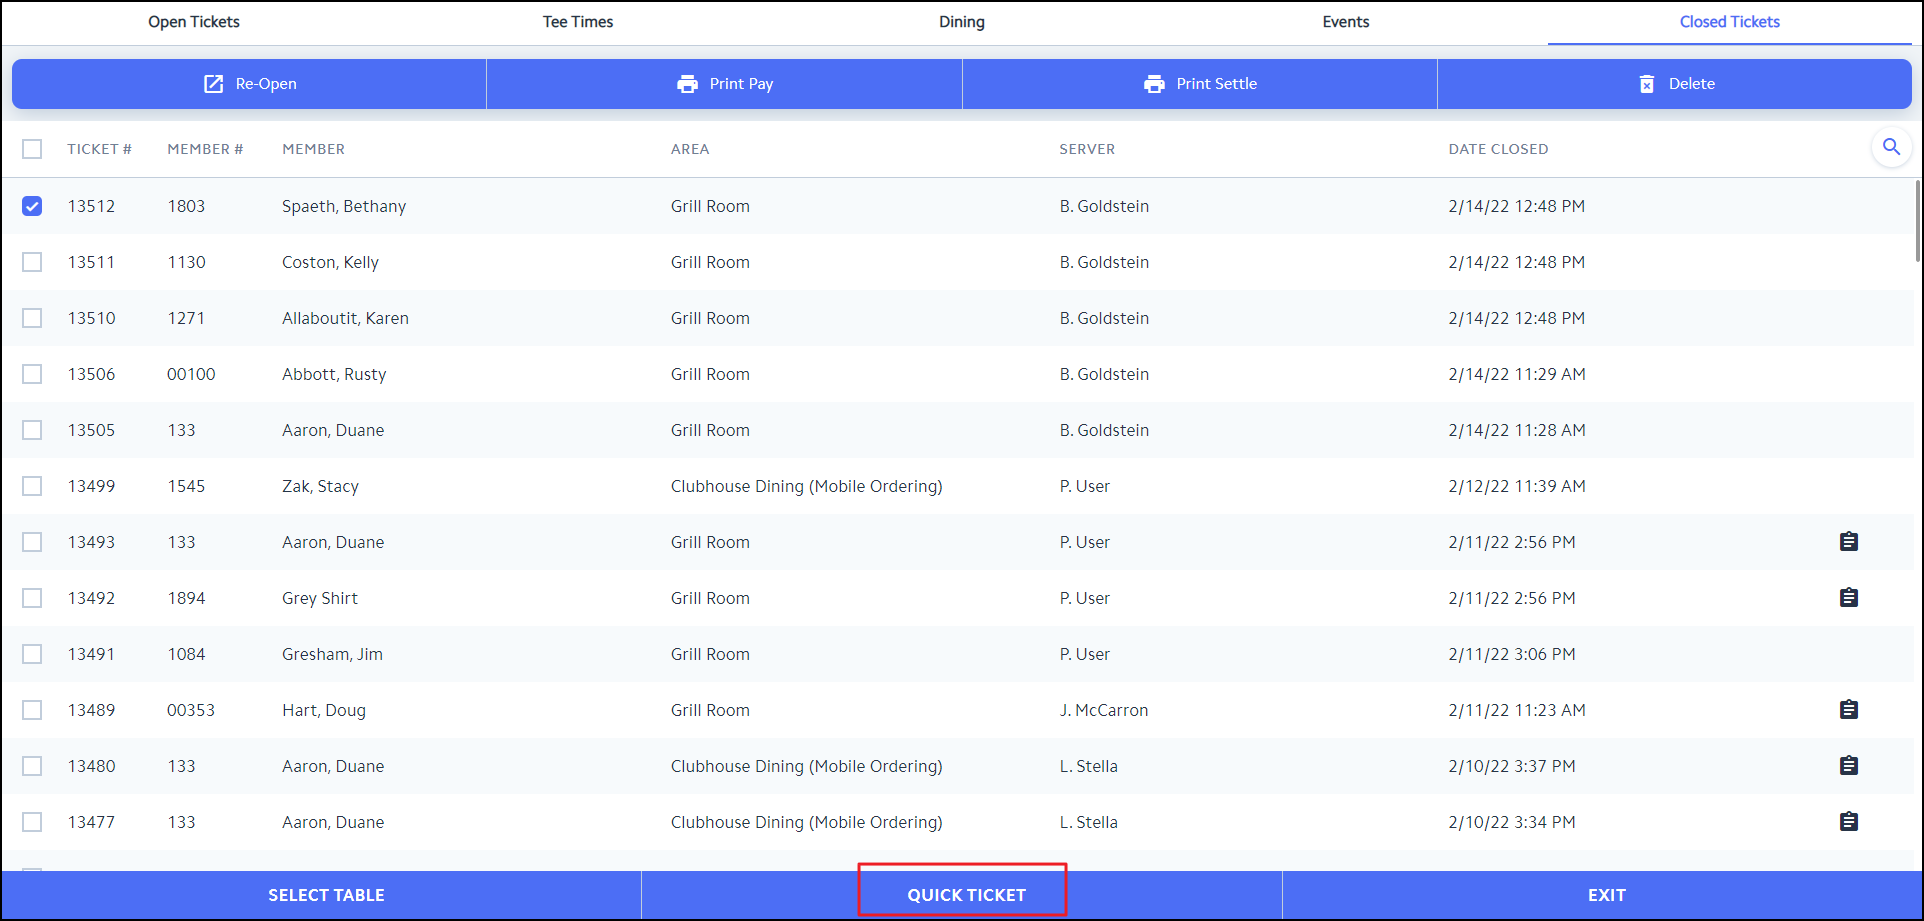
Quick Ticket
Quick Ticket allows the user to by-pass the Select a Table phase and move straight to selecting the Member. This is typically used in situations at the Bar or Snack Bar when a Member simply wants to order a quick drink or snack. Please follow instructions below.
Select Quick Ticket.
A Member Grid will then populate. Select the applicable Member or if this is not a Member, select Guest Member on the top right. Then proceed to enter the transaction as normal.
Best Practices
If you find that you cannot perform certain tasks outlined in this guide, it may be due to a lack of permission. Please consult with your manager about access.
FAQs
Q: Can I sort various columns within the Mobile POS grid in ascending and descending order?
A: Yes, when navigating to any Mobile POS grid (Open Tickets, Dining, Events, Closed Tickets, Member Lookup, Item Lookup, Ticket Lookup, All Open Tickets, etc.), any column can be sorted in ascending or descending order by clicking on the column header. When a column is sorted, an arrow will appear indicating the sort order of the column. The up arrow indicates the column is sorted in ascending order. The down arrow indicates the column is sorted in descending order.
Q: When viewing the Closed Tickets grid in Mobile POS, can I see all closed tickets for any F&B Area?
A: When logged into a F&B Area, only closed F&B tickets for the Area(s) the user has the rights to view will be shown in the Closed Ticket grid.
