Office - Paycloud - Admin Guide - Troubleshooting Member Access Issues
Table of Contents
Overview
This guide overviews Admin setups for PayCloud that will affect how the member will interact and engage with the payments system.
Required Permissions
Paycloud Admin
Membership Module
Troubleshooting Member Access Issues
When a member does not show up in Paycloud or when they try to sign on from the website they receive the error "This user is Restricted" The club has a few places to check in order to fix.
New Member not populating in PayCloud
Many times a club will build a new member type along with a new member. Whenever this happens the user will need to go into the PayCloud Endpoint Editor and add that new member type to sync over from Office into PayCloud.
Access the Editor
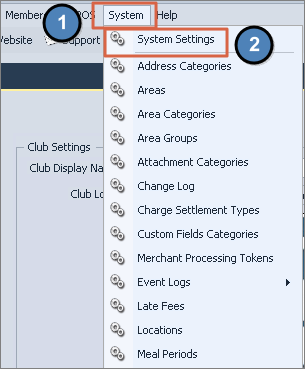
Go to
System along the top menu bar.
Click on System Settings within the drop down list.
Expand the Website Drop Down.
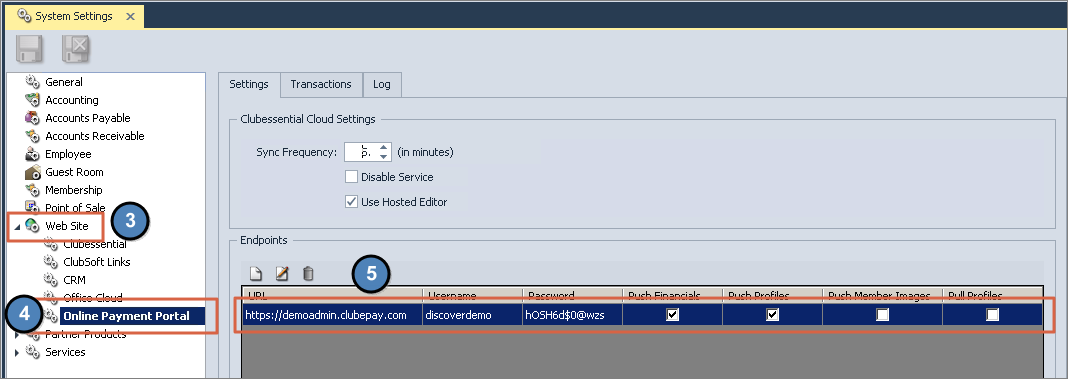
Select Online Payment Portal.
Double Click the Website URL.
Adding New Member Types to the Sync
In the Clubessential Cloud Endpoint Editor window, click on the Member Type Tab. Review the list of Member Types and check any that should sync to PayCloud. Click the Green Check Mark to accept the changes
Use to the checkbox to enable when a new member type is created automatically select it, and when you add a new member type in CMA it will be automatically added to the list of types to be synced to paycloud.4. Save the System Settings using the Save or Save and Close buttons.
Syncing Member Information
Once the User has saved the new Member Types in System Settings, the Members can now be manually pushed from Office to PayCloud using the Sync tab within the Endpoint Editor. The Sync tab is also useful for syncing changes made to various portions of the Member's A/R. Anytime a member informs the club of incorrect information on their statement it is a good Idea to come here and manually push the member changes.
Navigate back to the Clubessential Cloud Endpoint Editor:
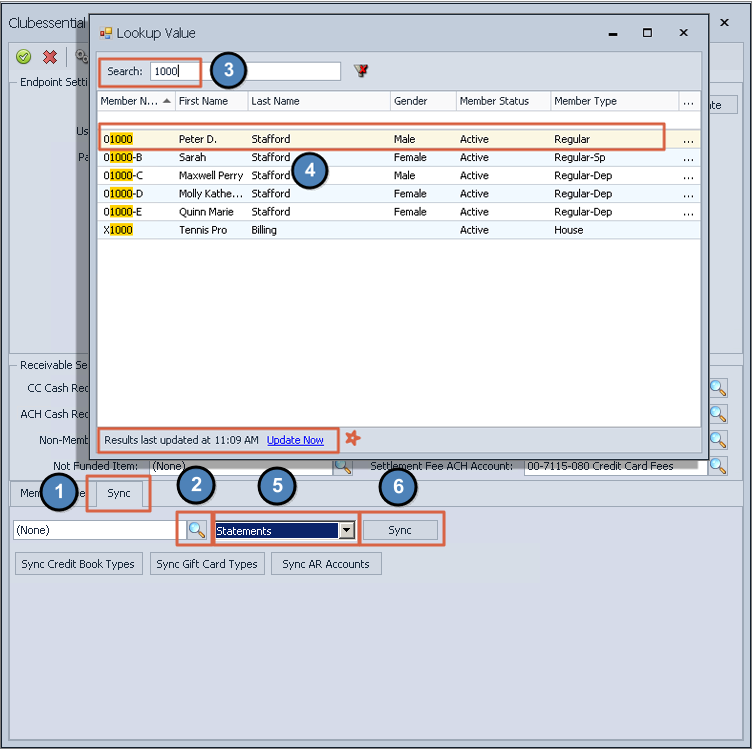
Click on the Sync Tab.
Use the Magnifying glass to open the Member Lookup Window.
Use the Search field to find the member.
Double Click the member in the Grid.
From the drop down, select which item to sync (Statements, Credit Books, Gift Cards, and Vouchers).
Click Sync.
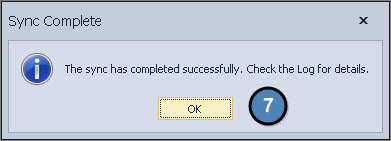
A confirmation window will appear, "The sync has completed successfully. Check the Log for details." Click OK to close and return to the editor.
Member Cannot Access PayCloud as They Are "Restricted"
There are three places in CMA that can cause a Restricted status in PayCloud. They are the Web Settings in the member's profile, the Rules tab under their Member type settings, and the Rules tab under their Member Status Definition settings.
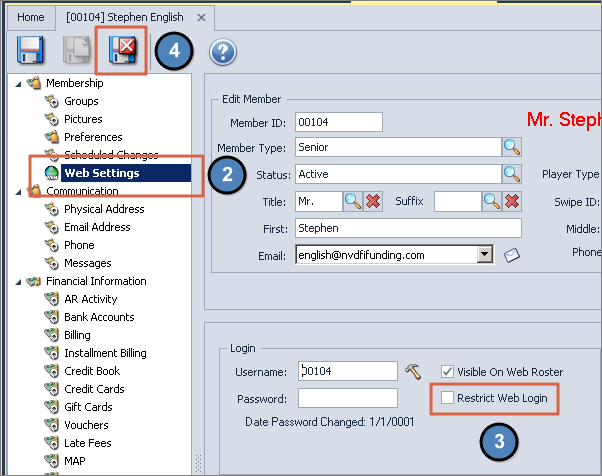
Web Settings in Member's Profile
Go to the Manage Member's Grid and edit the member in question. Expand Membership on the left hand side and click Web Settings. Review the Restrict Web Login checkbox to confirm this is unchecked. Click Save and Close.
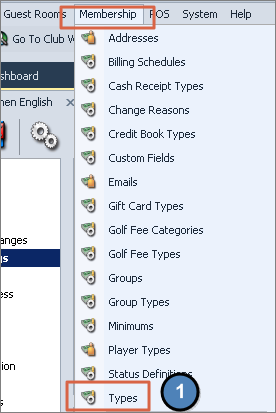
Member Type Rules
Navigate the Membership drop down from the top menu bar and click Types.
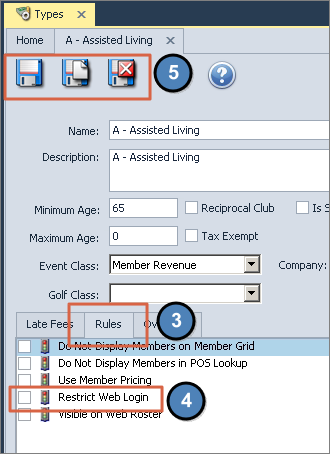
Open the Member Type connected to the Member in question.
Click on the Rules Tab.
Review the Restrict Web Login checkbox to confirm this is unchecked.
Click Save.
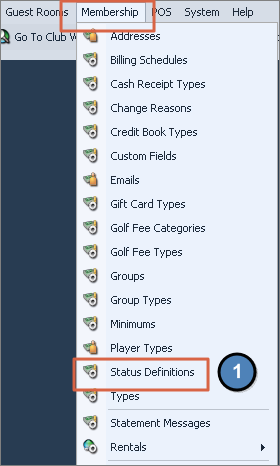
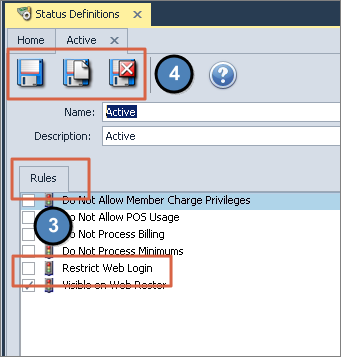
Member Status Definition Rules
Navigate to the Membership drop down from the top menu bar and click Status Definitions.
Open the Status connected to the Member in question.
Click on the Rules tab and review the Restrict Web Login checkbox to confirm this is unchecked.
Click Save.
Once these three area have been reviewed, go back to the Clubessential Cloud Endpoint Editor and manually sync the Member using the steps outlined above under Syncing Member Information.
Best Practices
When adding a new System User and creating the password, the password must be longer than six digits, needs one uppercase character, and one numerical character.
When adding a new System User, use the Staff Member’s email address when creating a Username. Typically, the email address is unique and will not be be duplicated by another user.
To obtain current information on ACH, or Credit Cards, you have the option to contact your payment processor and they export the information to a CSV file for an easy upload. This process tends to vary so if you have any questions please contact Clubessential for clarification.
Reconcile Processor data to Clubessential/Paycloud data timely, ensuring any rejections are manually adjusted in the Office batches.
FAQs
Q: What if our Club does not want to allow Members to schedule a payment on a certain day or days of the month (ie - month end)?
A: Use the blackout feature to prevent Members from making/scheduling payments on a certain day. Click here for more info.
Q: How do I change the landing page my Members see when they first log-in to Paycloud?
A: Go to System, Club Settings, Website Tab. Click here for more info.
Q: How do I batch my PayCloud payments and post them?
A: PayCloud automatically batches and sends payment batches to the Clubessential Office system. To post, go to Membership, Approve Payment Batches, select batch to post, and click post. For more info, click here.
